Table of Contents
Advertisement
Available languages
Available languages
Quick Links
Advertisement
Chapters
Table of Contents

Subscribe to Our Youtube Channel
Related Manuals for Domair SANTORIN


Summary of Contents for Domair SANTORIN
- Page 1 MANUEL D’UTILISATION MANUEL INSTRUCCIONES DE USO P17 USER MANUAL P33 D’UTILISATION BENUTZERHANDBUCH P49 GEBRUIKSAANWIJZING P65 CLIMATISEUR LOCAL MOBILE Ref: SANTORIN Mod: OL-BKY29-A011A2 Rev 1_10 12 19 Fabriqué en Chine Page 1...
-
Page 2: Table Of Contents
TRES IMPORTANT lire attentivement les instructions contenues dans cette notice, car elles fournissent des indications importantes sur la sécurité d’installation, d’emploi et d’entretien. CONSERVER SOIGNEUSEMENT CETTE NOTICE POUR TOUTE UTILISATION ULTERIEURE. Sommaire instructions de sécurité Panneau de commande lieux convenant à l’utilisation entretien Fonctionnalités Probleme... - Page 3 • Pour débrancher de l’alimenta- personne malade devant l’ap- tion électrique, prendre la prise pareil trop longtemps et sans et la retirer. ne Pas tiReR interruption. suR le CoRdon. • Assurez-vous que l’endroit où • Ne pas introduire des objets se trouve l’appareil est stable.
- Page 4 cuit de réfrigération, effectuera • Pour que le compresseur soit le travail de réparation. opérationnel, l’appareil doit être • NE BLOQUEZ PAS LA VEN- alimenté par une source d’au TILATION ! Veillez à ce que la moins 16 ampères. Afin d’éviter ventilation d’entrée et de sortie toute disjonction intempestive ne soit pas bloquée, et ce, en...
-
Page 5: Lieux Convenant À L'utilisation
• Ne réparez pas l’appareil vous- • Par mesure de sécurité vis-à-vis même. Contactez un technicien des enfants, ne laissez pas les qualifié et agréé. emballages (sac en plastique, • Ne pas percer ou brûler. ATTEN- carton, polystyrène) à leur por- TION : le gaz contenu dans tée (risque d’étouffement). -
Page 6: Fonctionnalités
FONCTIONNALITÉS Votre climatiseur a été conçu et fabriqué instantanément en cas de besoin. - Un cycle de déshumidification de en respectant les normes d’ingénierie moderne les plus rigoureuses. l’air filtré afin d’améliorer les condi- ses nombreuses fonctionnalités com- tions de respiration grâce à un puis- prennent une télécommande qui vous sant processus de déshumidifica- tion. -
Page 7: Description
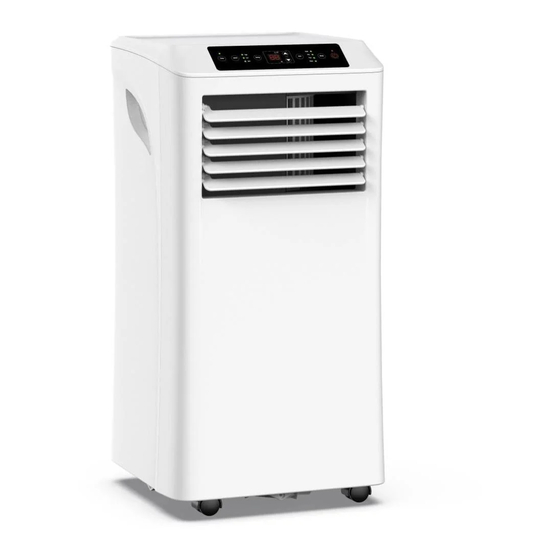
DESCRIPTION 1. Panneau de commande note : l’apparence réelle de votre 2. sortie d’air avec ailettes orientables appareil peut différer des dessins don- 3. entrée d’air / Filtre nés dans le présent manuel. 4. Câble d’alimentation 5. Poignée de transport 6. -
Page 8: Tuyau De Sortie
INSTALLATION DU TUYAU DE SORTIE 1. S’il n’est pas déjà assemblé, emboiter 5. Ajuster la longueur du tuyau de sor- le raccord (2) sur le tuyau de sortie tie : (1). 2. emboiter l’autre extrémité du tuyau dans l’adaptateur (3). 3. -
Page 9: Panneau De Commande
PANNEAU DE COMMANDE ET CONTROLE A DISTANCE DESCRIPTION DES FONCTIONS 1. Touche mise en marche / veille 2. TOUCHE MODE 2. Touche sélection mode Après mise en marche de l’appareil, 3. Voyant mode appuyez sur cette touche pour sélec- 4. Touche «diminuer» tionner successivement le mode refroi- 5. - Page 10 NOTA : Pour orienter le flux d’air, faites puis de 1°C supplémentaire après 2 pivoter manuellement les ailettes de heures. Puis elle est maintenue à ce sortie d’air. paramètre. le climatiseur s’arrêtera automatique- - tous les voyants s’éteignent progres- ment lorsque la température de la pièce sivement et le ventilateur passe auto- sera inférieure à...
- Page 11 2. Appuyez successivement plusieurs givrer. fois sur les touches « AUGMENTER A. En mode refroidissement ou déshu- » ou « DIMINIER », pour afficher le midification, si l’appareil détecte que temps souhaité. la température de l’évaporateur est ≤ 3. Sans action sur le bouton « TIMER -1°C, un dégivrage se fait automati- »...
-
Page 12: Entretien
tuyau d’évacuation sur l’orifice de drai- au milieu et en bas de la façade ar- nage permanent. rière de l’appareil. 2) Dévissez le capuchon de l’orifice de Drainage automatique drainage permanent et retirez le bou- en mode refroidissement et en mode chon. -
Page 13: Probleme
QUE FAIRE EN CAS DE PROBLEME IMPORTANT plage une sécurité arrête l’appareil. 1. la plage de température normale 2. Avant de contacter le service après- de fonctionnement est : 5°C ≤ Temp. vente, veuillez consulter le tableau Ambiante ≤ 35°C. En dehors de cette ci-dessous : Problème Cause possible... -
Page 14: Stockage
STOCKAGE EN CAS DE NON-UTILISATION PROLONGÉE - vider le bac de récupération de l’eau - retirer le tuyau d’évacuation d’air de condensation en retirant le bou- chaud (ainsi que le tuyau de drainage chon de drainage (prendre soin de dis- permanent si nécessaire) et le ranger poser un récipient pour la récupération convenablement,... - Page 15 Cet appareil est équipé d’un fusible de (CE) N 842/2006: type 5et ou sMt ; 3.15a ; 250Vac. ne R290 est un gaz à effet de serre fluo- jamais le remplacer par un fusible ayant rescent relevant du protocole de kyoto. des caractéristiques différentes.
-
Page 16: Bon De Garantie
BON DE GARANTIE CACHET DU REVENDEUR DATE : NOM DU CLIENT : GARANTIE Cet appareil est garanti 2 ans, pièces et main d’œuvre. La garantie ne couvre pas les dégâts occasionnés par : mauvaises utilisations, détérioration par choc, chute ou phénomène atmosphérique. En cas d’anomalie de fonctionnement, l’ensemble (emballage, produit, accessoires) doit être retourné... - Page 17 CliMatizadoR loCal PoRtÁtil Ref: santoRin Mod: ol-BkY29-a011a2 Rev 1_10 12 19 Fabriqué en Chine Page 17...
-
Page 18: Intrucciones De Seguridad
MUY IMPORTANTE lea atentamente las instrucciones contenidas en este manual, ya que proporcionan indicaciones importantes sobre la seguridad de ins- talación, de empleo y de mantenimiento. Para cualquier reparación, contacte con el servicio postventa autorizado. CONSERVE BIEN ESTE MANUAL PARA CUALQUIER USO POS- TERIOR. - Page 19 tación eléctrica, agarre el en- donde se encuentra el aparato chufe y retírelo. NO TIRE DEL es estable. CaBle. • Este aparato está destinado • No introduzca objetos de nin- únicamente al uso doméstico. gún tipo en las rejillas mientras Cualquier mantenimiento dis- que el aparato esté...
- Page 20 de reparación. cargado por una fuente de al • ¡NO BLOQUEE LA VENTILA- menos 16 amperios. Para evitar CiÓn! Procure que la ventila- cualquier desconexión intem- ción de entrada y salida no esté pestiva del panel de alimenta- bloqueada bajo ninguna cir- ción eléctrica, no utilice un alar- cunstancia.
-
Page 21: Lugares Convenientes
• No lo perfore ni lo queme. • Por medida de seguridad con ATENCIÓN: el gas contenido los niños, no deje los embalajes en este aparato no tiene olor. (bolsa de plástico, cartón, po- • Utilice únicamente los acceso- liestireno) a su alcance (riesgo rios originales. -
Page 22: Funciones
FUNCIONES Su climatizador ha sido diseñado y fa- tantáneamente en caso de necesi- dad. bricado respetando las normas de inge- niería moderna más rigurosas. - Un ciclo de deshumidificación del sus numerosas funciones incluyen aire filtrado para mejorar las condi- un mando a distancia que le permitirá... -
Page 23: Descripción
DESCRIPCIÓN 1. Panel de control 6. Orificio de evacuación de aire 2. salida de aire con aletas orientables caliente 3. entrada de aire / Filtro 7. Orificio de drenaje permanente 4. Cable de alimentación nota: el aspecto real de su aparato 5. - Page 24 INSTALACIÓN DEL TUBO DE SALIDA 1. Si no está ya ensamblado, encaje el 5. Ajuste la distancia del tubo de salida: empalme (2) en el tubo de salida (1). 2. Encaje el otro extremo del tubo en el adaptador (3). 3.
- Page 25 PANEL DE CONTROL Y MANDO A DISTANCIA DESCRIPCIÓN DE LAS FUNCIONES 1. Tecla de puesta en marcha/suspen- 2. TECLA MODE sión Después de la puesta en marcha del 2. tecla de selección de modo aparato, pulse esta tecla para seleccio- 3.
- Page 26 NOTA: Para orientar el flujo de aire, gire este parámetro. manualmente las aletas de salida de - todos los pilotos se apagan progresi- aire. vamente y el ventilador pasa automáti- El climatizador se detendrá automáti- camente de la velocidad alta a la velo- camente cuando la temperatura de la cidad baja habitación sea inferior a la temperatura...
- Page 27 2. Pulse sucesivamente varias veces ción es baja, el evaporador del aparato las teclas «AUMENTAR» o «DISMI- puede escarcharse. NUIR» para mostrar el tiempo desea- A. En modo refrigeración o deshu- midificación, si el aparato detecta 3. Si no hay actividad en el botón «TI- que la temperatura del evaporador MER»...
-
Page 28: Mantenimiento
Por el contrario, en modo deshumidifi- drenaje permanente que se encuen- cación, es obligatorio conectar un tubo tra en la mitad y en la parte inferior de de evacuación al orificio de drenaje per- la parte trasera del aparato. manente. 2) Desenrosque la tapa del orificio de drenaje permanente y retire el tapón. -
Page 29: Problema
QUÉ HACER EN CASO DE PROBLEMA IMPORTANTE sistema de seguridad detiene el aparato. 1. el rango de temperatura normal de 2. antes de contactar con el servicio pos- funcionamiento es: 5°C ≤ Temp. am- tventa, por favor, consulte la siguiente biente ≤... -
Page 30: Características
ALMACENAMIENTO EN CASO DE UN TIEMPO PROLONGADO SIN USO - vacíe el depósito de recogida del agua caliente (además del tubo de drenaje de condensación retirando el tapón de permanente si es necesario) y coló- drenaje (procure disponer de un reci- quelo adecuadamente, piente para recoger el agua), - asegúrese de que el lugar de almace-... - Page 31 este aparato está equipado con un fu- (CE) N 842/2006: sible de tipo 5et o sMt; 3.15a; 250Vac. R290 es un gas de efecto invernadero no lo sustituya nunca por un fusible que fluorescente del protocolo de Kioto. tenga características diferentes. Cual- su potencial de calentamiento global quier intervención debe ser efectuada (GWP) es 3,3.
-
Page 32: Certificado De Garantía
CERTIFICADO DE GARANTÍA SELLO DEL DISTRIBUIDOR FECHA: NOMBRE DEL CLIENTE: GARANTÍA Este aparato cuenta con una garantía de dos años para las piezas y la mano de obra. La garantía no cubre los daños ocasionados por: uso inadecuado, deterioro causado por golpes, caídas o fenómenos climatológicos. - Page 33 Manual manual PoRtaBle RooM aiR ConditioneR Ref: santoRin Mod: ol-BkY29-a011a2 Rev 1_10 12 19 Fabriqué en Chine Page 33...
-
Page 34: Safety Instructions
VERY IMPORTANT Read the instructions in this manual carefully as they provide impor- tant safety information regarding installation, use and maintenance. For repairs, contact the authorized service center. CAREFULLY RETAIN THIS MANUAL FOR FUTURE USE. Contents safety instructions Control panel Places suitable foruse Maintenance Functions... - Page 35 device is running, this Could by a qualified electrician. Cause seRious injuRY to • Do not use the device in the the PeRson. immediate vicinity of bathtubs, • When children are present, the washbasins, showers, swim- operation of any electrical de- ming pools, etc.
- Page 36 temperature range is 20°C ~ in order to avoid danger. 32°C. • Batteries must be removed from • Clean the air filter regularly so the remote control before it is that cooling is most effective. discarded and should be dis- •...
-
Page 37: Places Suitable Foruse
PLACES SUITABLE FOR USE (1) Place the device on a flat and dry (2) To avoid risk of injury or tampering surface. Ensure that the device is with the device and/or its perfor- not placed against objects which mance, do not place this device: could obstruct air supply, such as - near heat sources such as radiators, furniture or curtains, as this could... -
Page 38: Functions
FUNCTIONS Your air conditioner has been designed - A refrigeration system design to instantly cool air when needed. and manufactured to the highest stan- dards of modern engineering. - A dehumidification cycle for filtered its many features include a remote air to improve breathing conditions control which allows you to easily control thanks to a powerful dehumidifica-... -
Page 39: Description
DESCRIPTION 1. Control panel NOTE: The actual appearance of your 2. Air outlet with adjustable blades device may differ from the drawings 3. air inlet / Filter shown in this manual. 4. Power cable 5. Carrying handle 6. hot air evacuation outlet 7. -
Page 40: Outlet Pipe
INSTALLATION OF THE OUTLET PIPE 1. If it is not already assembled, fit the 5. Adjust the length of the outlet pipe: connector (2) onto the outlet pipe (1). 2. Fit the other end of the pipe into the adapter (3). 3. -
Page 41: Control Panel
CONTROL PANEL AND REMOTE CONTROL DESCRIPTION OF FUNCTIONS 1. Power on / standby key 2. MODE KEY 2. Mode selection key After switching on the device, press 3. Mode indicator this key to successively select cooling 4. «Decrease» key (COOL), dehumidification (DRY), or 5. - Page 42 The air conditioner will automatically ged. stop when the room temperature is be- low the selected temperature. 4. SPEED KEY - Press the SPEED key successively to 2.2 Dehumidification mode (DRY) select the (LOW) or (HIGH) fan speed: - connect a drainage hose (not sup- the corresponding LED lights up.
- Page 43 2. Repeatedly press the «INCREASE» DRAINAGE or «DECREASE» keys to display the This device is equipped with an auto- desired time. matic evaporation mechanism. This 3. If the «TIMER» key is not pressed for mechanism makes it possible to cool a few seconds, the time display will the condenser and therefore improve disappear and be replaced by the dis-...
-
Page 44: Maintenance
MAINTENANCE Please disConneCt the PoweR Cleaning the filters CoRd BeFoRe CleaninG Remove the air filter support block by Use a vacuum cleaner provided with a grasping it manually and pulling it ou- soft brush to remove dust particles. tward. For cleaning, use hot water (ap- Clean the body of the device with a soft proximately 40°C) with a small amount cloth slightly moistened and then dry it. -
Page 45: Problem
WHAT TO DO IN CASE OF A PROBLEM IMPORTANT stops the device. 1. The normal operating temperature 2. Please consult the table below before range is: 5°C ≤ Ambient Temp. ≤ 35 contacting the after-sales service: °C. Outside of this range a safety unit Issue Possible cause Solution... -
Page 46: Storage
STORAGE IN CASE OF PROLONGED NON-USE - empty the condensation drainage tray - remove the hot air exhaust pipe (as by removing the drainage plug (make well as the permanent drainage hose if sure you have a container handy to necessary) and store it properly, collect the water), - ensure that the storage room is clean... - Page 47 This device is equipped with a 5ET or R290 is a fluorescent greenhouse gas sMt type fuse; 3.15 a; 250 Vac. never under the Kyoto Protocol. replace it with a fuse with different cha- Its global warming potential (GWP) is racteristics.
-
Page 48: Warranty Card
WARRANTY CARD DEALER’S STAMP DATE: CLIENT’S NAME: GUARANTEE This appliance is guaranteed for 2 years, including parts and labour. The guarantee does not cover the damage caused by: incorrect usage, deterioration by shock, fall or atmospheric phenomenon. In case of malfunction, the product in its entirety (packaging, product, accessories) must be returned by the user (In postage paid if sent by mail. - Page 49 BenutzeRhandBuCh BenutzeRhandBuCh MoBiles RauMkliMaGeRÄt Ref: santoRin Mod: ol-BkY29-a011a2 Rev 1_10 12 19 Fabriqué en Chine Page 49...
-
Page 50: Sicherheitshinweise
WICHTIGER HINWEIS Lesen Sie die Anweisungen in diesem Handbuch sorgfältig durch, da sie wichtige Informationen zur Sicherheit bei Aufstellung, Gebrauch und Wartung enthalten. Wenden Sie sich zwecks Reparaturen bitte an den autorisierten kundendienst. HEBEN SIE DIESES HANDBUCH SORGFÄLTIG FÜR DEN ZUKÜNFTIGEN GEBRAUCH AUF. - Page 51 dern ohne Beaufsichtigung kranke Person nicht zu lange durchgeführt werden. Zeit ohne Unterbrechung dem • Um das Gerät vom Stromnetz zu Gerät aus. trennen, ziehen Sie den Stecker • Stellen Sie sicher, dass der heraus. ZIEHEN SIE NICHT AM standort des Geräts stabil ist. kaBel.
- Page 52 • Nur autorisiertes Personal, das Gerät) mit denen Ihres Haus- durch die zuständigen Behör- haltsnetzes übereinstimmen. den eine Zulassung zum Eingriff • Das Gerät muss fachgerecht in den Kältekreislauf hat, kann nach nationalen Vorschriften für den elektris- die Reparaturarbeiten ausfüh- ren.
-
Page 53: Geeignete Aufstellungsorte
professionellen Gebrauch bes- • Nicht gewaltsam öffnen oder verbrennen. VORSICHT: Das timmt. Nicht im Freien benut- zen. Schützen Sie es vor Hitze, Gas in diesem Gerät riecht direkter Sonneneinstrahlung, nicht. Feuchtigkeit (auf keinen Fall ins • Verwenden Sie nur Originalzu- Wasser tauchen) und vor schar- behör. -
Page 54: Produkteigenschaften
PRODUKTEIGENSCHAFTEN Ihr Klimagerät wurde nach den höchs- - Ein Zyklus zur Entfeuchtung der ge- filterten Luft zur Verbesserung der ten Standards der modernen Technik entwickelt und hergestellt. Atembedingungen dank eines leis- Zu seinen zahlreichen Eigenschaften tungsstarken Entfeuchtungsverfah- gehört eine Fernbedienung, mit der Sie rens. -
Page 55: Beschreibung
BESCHREIBUNG 1. Bedienfeld HINWEIS: Das tatsächliche Erschei- 2. luftaustritt mit verstellbaren lamel- nungsbild Ihres Geräts kann von den Abbildungen in diesem Handbuch 3. lufteinlass/Filter abweichen. 4. Netzkabel 5. tragegriff 6. Warmluftauslass-Öffnung 7. Öffnung Dauer-Entwässerung ZUBEHÖRTEILE 1. Auslassschlauch 4. Fernbedienung 2. Anschluss für den Auslassschlauch 3. -
Page 56: Auslassschlauchs
MONTAGE DES AUSLASSSCHLAUCHS 1. Wenn nicht bereits montiert, ist das 5. Richten Sie die Länge des Aus- Anschlussstück (2) auf dem Aus- lassschlauchs aus: lassschlauch zu befestigen. 2. Anderes Schlauchende in den Adap- ter (3) einrasten. 3. Anschlussstück (2) des Auslassschlauchs am warmluftluftauslass des klimagerätes an-... -
Page 57: Bedienfeld
BEDIENFELD UND FERNBEDIENUNG / FUNKTIONSBESCHREIBUNG 1. staRt-/standBY-taste 2. MODUS-TASTE 2. Moduswahltaste Drücken Sie nach dem Einschalten des 3. Modusanzeige Geräts diese Taste, um nacheinander 4. Taste «Verringern» den Modus Kühlen (COOL), Entfeuch- 5. Ventilatordrehzahlanzeige ten (DRY) oder Nur Lüften (FAN) 6. - Page 58 len: Die entsprechende Anzeige leuch- Stunden weiter um 1 ° C. Danach blei- tet auf. bt sie bei diesem wert. HINWEIS: Um den Luftstrom zu lenken, - Alle Anzeigen erlöschen allmählich und stellen sie die luftauslasslamellen ma- der Lüfter schaltet automatisch von ho- nuell ein.
- Page 59 2. Drücken Sie nacheinander wiederholt Entfeuchtungsmodus feststellt, dass die Tasten « UP » oder « DOWN », die Temperatur des Verdampfers ≤ -1 um die gewünschte Zeit anzuzeigen. ° C beträgt, setzt automatisch ein Ab- 3. §Wird die Taste « TIMER » einige tauen ein und die POWER-Anzeige Sekunden lang nicht gedrückt, erlöscht blinkt.
-
Page 60: Wartung
Automatische Entwässerung 2) Schrauben Sie den Verschluss von Im Kühl- und im Entfeuchtungsmodus ist der dauerentwässerung ab und ent- es möglich einen Abflussschlauch (nicht fernen sie den stopfen. mitgeliefert) zu installieren, damit das 3) Schließen Sie den Schlauch (nicht Wasser kontinuierlich abfließen kann. mitgeliefert) an den Anschluss an und verbinden sie das andere ende mit einem Ausfluss. -
Page 61: Störungsbeseitigung
STÖRUNGSBESEITIGUNG WICHTIG stoppt eine Sicherung das Gerät. 1. Der normale Betriebstemperaturbereich 2. Bevor Sie sich an den Kundendienst beträgt: 5°C ≤ bis 35 °C Umgebungs- wenden, sehen Sie bitte in der folgen- temperatur. Außerhalb dieses Bereichs den Tabelle nach: Problem Mögliche Ursache Lösung Gerät funktio-... -
Page 62: Lagerung
LAGERUNG BEI LÄNGERER NICHTBENUTZUNG - Leeren Sie den Kondensatbehälter, in- - E ntfernen Warmluftaus- dem Sie den Ablassstopfen entfernen. lassschlauch (sowie gegebenenfalls (Stellen Sie sicher, dass Sie einen den Schlauch der Dauerentwässe- Behälter zum Auffangen des Wasser rung) und lagern Sie ihn ordnungs- haben.) gemäß, - Betreiben Sie das Gerät ungefähr zwei... - Page 63 Dieses Gerät ist mit einer Sicherung tweicht. vom typ 5et oder sMt ausgestattet. (CE) N 842/2006: 3,15 A; 250 VAC. Ersetzen Sie sie nie- R290 ist ein fluoriertes Treibhausgas mals durch eine Sicherung mit anderen nach dem Kyoto-Protokoll. Eigenschaften. Alle Arbeiten müssen Sein Treibhauspotential (GWP) beträgt von einer Elektrofachkraft ausgeführt 3,3.
-
Page 64: Garantiekarte
GARANTIEKARTE HÄNDLERSTEMPEL DATUM: NAME DES KUNDEN: GARANTIE Dieses Gerät hat eine Garantie von 2 Jahren auf Teile und Arbeit. Die Garantie deckt keine Schäden ab, die durch: unsachgemäße Verwendung, Beschädigung durch Stoß, Sturz oder witterungsbedingte Ereignisse verursacht wurden. Im Falle einer Fehlfunktion muss alles (Verpackung, Produkt, Zubehör) vom Benutzer (Porto bezahlt, wenn per Post gesendet, nichtfrankierte Pakete werden nicht akzeptiert) zusammen mit einer Fotokopie... - Page 65 GeBRuiksaanwijzinG GeBRuiksaanwijzinG VeRPlaatsBaRe aiRConditioneR Ref: santoRin Mod: ol-BkY29-a011a2 Rev 1_10 12 19 Fabriqué en Chine Page 65...
- Page 66 ZEER BELANGRIJK Lees de instructies in deze handleiding aandachtig door, want deze bevatten belangrijke informatie over de veiligheid van de installatie, het gebruik en het onderhoud. Neem voor reparaties contact op met het erkende servicecentrum. DEZE HANDLEIDING ZORGVULDIG BEWAREN VOOR TOEKOMS- TIG GEBRUIK.
- Page 67 tRek niet aan het snoeR. doeld voor huishoudelijk ge- • Steek geen enkel voorwerp in bruik. Elk ander onderhoud dan de roosters terwijl het apparaat reiniging of routineonderhoud in werking is, dit zal eRns- door de gebruiker moet worden tiG PeRsoonlijk letsel uitgevoerd door een gekwali- VeRooRzaken.
- Page 68 worden geblokkeerd. dat het apparaat per ongeluk • Gebruik dit apparaat op een ho- wordt losgekoppeld van het sto- rizontaal oppervlak om water- pcontact. lekkage te voorkomen. • Dit apparaat wordt gebruikt voor • Alleen voor gebruik binnens- koeling, ventilatie en ontvochti- huis.
-
Page 69: Plaatsen Die Geschikt
raat heeft geen geur. ton, piepschuim) uit veiligheid- • Gebruik alleen originele acces- soverwegingen niet binnen soires. handbereik van kinderen (vers- • Laat de verpakking (plastic, kar- tikkingsgevaar). PLAATSEN DIE GESCHIKT ZIJN VOOR GEBRUIK (1) Het apparaat op een vlakke, droge (2) Om elk risico op letsel of schade ondergrond plaatsen. -
Page 70: Functies
FUNCTIES uw airconditioner is ontworpen en ver- nodig is. - Een ontvochtigingscyclus van gefil- vaardigd volgens de hoogste moderne technische normen. terde lucht om de ademhalingsoms- de vele functies omvatten een afstands- tandigheden te verbeteren dankzij bediening waarmee u alle functies ge- een krachtig ontvochtigingsproces. -
Page 71: Beschrijving
BESCHRIJVING 29. Bedieningspaneel OPMERKING: Het werkelijke uiterlijk 30. Luchtuitlaat met verstelbare ribben van uw apparaat kan verschillen van 31. Luchtinlaat/filter de tekeningen in deze handleiding. 32. stroomkabel 33. Draaghandgreep 34. Uitlaatopening voor warme lucht 35. Permanente afvoeropening ACCESSOIRES 1. uitlaatslang 4. - Page 72 INSTALLATIE VAN UITLAATSLANG 1. Monteer de fitting (2) op de uit- 25. de lengte van de uitlaatslang laatslang als deze nog niet is gemon- aanpassen: teerd. 22. Klik het andere uiteinde van de slang in de adapter (3). 23. Klik de aansluiting (2) van de uitlaatslang (1) op de uitlaatopening voor warme lucht van...
- Page 73 BEDIENINGSPANEEL EN AFSTANDSBEDIENING BESCHRIJVING VAN FUNCTIES 1. aan-/standbyknop 2. MODUSKNOP 2. Modusselectieknop Na het aanzetten van het apparaat drukt 3. Modusindicator u op deze knop om achtereenvolgens 4. Knop «verlagen» de koelmodus (COOL), ontvochtigings- 5. Ventilatiesnelheidindicator modus (DRY) of alleen ventilatiemodus 6.
- Page 74 ste ventilatorsnelheid aan te passen: deze instelling gehouden. de bijbehorende indicator licht op. - alle indicatoren gaan geleidelijk uit en OPMERKING: draai de luchtuitlaatrib- de ventilator schakelt automatisch van ben handmatig om de luchtstroom te hoge snelheid naar lage snelheid. richten.
- Page 75 den niet wordt ingedrukt, verdwijnt stopt de compressor ongeveer 10 mi- de tijdweergave en wordt vervangen nuten. zodra de temperatuur > +7°C door de weergave van de kamertem- is, schakelt het apparaat weer in. peratuur. de timer is dan geactiveerd. B.
-
Page 76: Onderhoud
(niet meegeleverd) aan te sluiten zodat 3) Sluit de slang (niet meegeleverd) aan water continu wordt afgevoerd. op de opening en sluit het andere uiteinde aan op een afvoer voor afva- lwater. zorg ervoor dat de slang een lichte neerwaartse helling heeft en niet wordt afgeknepen. - Page 77 WAT TE DOEN IN GEVAL VAN PROBLEMEN BELANGRIJK liging het apparaat stil. 1. Het normale bedrijfstemperatuurbe- 2. Raadpleeg de onderstaande tabel reik is: 5 °C ≤ kamertemperatuur ≤ voordat u contact opneemt met de 35°C. Buiten dit bereik zet een bevei- klantenservice: Probleem Mogelijke oorzaak...
-
Page 78: Specificaties
OPSLAG IN GEVAL VAN LANGDURIG NIET-GEBRUIK - leeg de condensopvangbak door de - verwijder de uitlaatslang voor warme dop van de afvoeropening te verwijde- lucht (en eventueel de permanente ren (zorg voor een opvangbak om het afvoerslang) en bewaar deze op een water te verzamelen), passende manier, - laat het apparaat ongeveer 2 uur in... - Page 79 Dit apparaat is uitgerust met een zeke- atmosfeer terechtkomt. ring van het type 5ET of SMT; 3.15A; (EG) Nr. 842/2006: 250Vac. Vervang deze nooit door een R290 is een fluorescerend broeikasgas zekering met andere kenmerken. Alle onder het Kyoto-protocol. werkzaamheden moeten worden uitge- Het aardopwarmingsvermogen (GWP) voerd door een gekwalificeerde elektri- is 3,3.
-
Page 80: Garantiebewijs
GARANTIEBEWIJS STEMPEL VAN DE WEDERVERKOPER DATUM: NAAM VAN DE KLANT : GARANTIE Dit apparaat heeft 2 jaar garantie op onderdelen en arbeid. De garantie dekt geen schade veroorzaakt door: slecht gebruik, verslechtering door schok, val of atmosferisch fenomeen. In geval van storing moet het geheel (verpakking, product, accessoires) door de gebruiker worden geretourneerd (met port betaald indien verzonden per post.
Need help?
Do you have a question about the SANTORIN and is the answer not in the manual?
Questions and answers