Table of Contents
Advertisement
Introduction----------------------------------------------------------------------1
Product Maintenance-----------------------------------------------------------3
Power/Record Button-----------------------------------------------------------5
Insert the microSD card--------------------------------------------------------7
Charging------------------------------------------------------------------------9
Rotatable lens-------------------------------------------------------------------10
Operating the Touch Screen-------------------------------------------------11
Swipe Right---------------------------------------------------------------------13
Swipe Up------------------------------------------------------------------------16
Swipe Down--------------------------------------------------------------------19
Controlling camera movement on the touch screen------------------21
Media library management--------------------------------------------------23
Downloading the Vmate App------------------------------------------------24
App Connection----------------------------------------------------------------25
App Interface Introductio---------------------------------------------------27
Updating Firmware-----------------------------------------------------------31
Maintenance Notes-----------------------------------------------------------34
Advertisement
Table of Contents

Summary of Contents for Snoppa Vmate S191
-
Page 1: Table Of Contents
Introduction----------------------------------------------------------------------1 Product Maintenance-----------------------------------------------------------3 Power/Record Button-----------------------------------------------------------5 Insert the microSD card--------------------------------------------------------7 Charging------------------------------------------------------------------------9 Rotatable lens-------------------------------------------------------------------10 Operating the Touch Screen-------------------------------------------------11 Swipe Right---------------------------------------------------------------------13 Swipe Up------------------------------------------------------------------------16 Swipe Down--------------------------------------------------------------------19 Controlling camera movement on the touch screen------------------21 Media library management--------------------------------------------------23 Downloading the Vmate App------------------------------------------------24 App Connection----------------------------------------------------------------25 App Interface Introductio---------------------------------------------------27 Updating Firmware-----------------------------------------------------------31 Maintenance Notes-----------------------------------------------------------34 Specifications--------------------------------------------------------------35... -
Page 2: Introduction
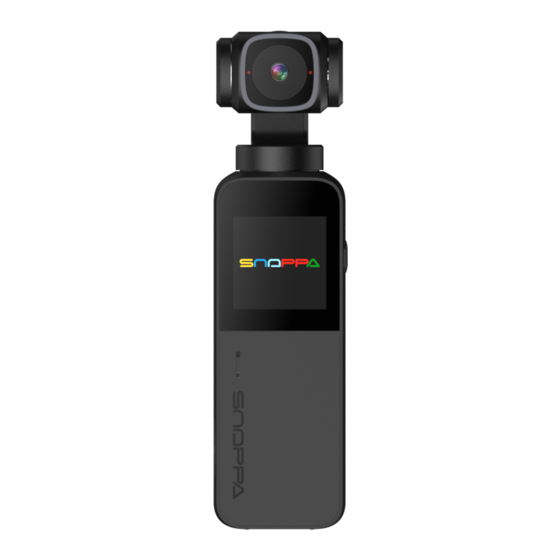
Introduction Snoppa Vmate is a palm-sized handheld 4k camera integrated with a micro 3-axis stabilizing system. It is remarkably compact, smart and easy to use—allowing you to capture any moment with a professional touch. Camera Tilt Motor Rotatable lens Roll Motor... - Page 3 Pan Motor/ Ventilation Area microSD Card Slot Lanyard Hole Type-C Port...
-
Page 4: Product Maintenance
Product Maintenance Storage Follow the below instructions to put multi-functional case on the Vmate; pay attention to the camera orientation to avoid damage. *Vmate camera will rotate to a certain direction for 15~20s which is easier to put upper cover on. - Page 5 The multi-functional case can be a phone holder while protecting Vmate, efficiently for one-handed operation.
-
Page 6: Power/Record Button
Power/Record Button 1.Power On/Off Power On: In the off state, press the Power/Record button for around 1 second. Power Off: In the power-on state, press and hold Power/Record button for about 2 seconds. *If your device isn’ t working or won’ t turn off/on, as usual, you can force to restart it. - Page 7 *There will be movement of Vmate three axes (roll, pitch, and yaw) for self-test during booting up; Do not touch the device during the period to avoid affecting the equipment performance . *Self-discharge in batteries will happen during storage; please charge the device before turning it on if the product cannot boot up normally.
-
Page 8: Insert The Microsd Card
Insert the microSD card Insert the microSD card (Self-purchase) into the microSD card slot as shown. It is recommended to use a microSD card with or over a UHS-1 Speed Class 3 (U3), the max capacity is 512 GB. Be sure to format the microSD card via the device at the first use before recording videos/pictures. - Page 9 Swipe up on the touch screen Tap Settings to enter gimbal Settings page Tap Available Tap Format SD *Due to the complexity of SD card parameters, below SD card brands and models are recommended: 1. SanDisk UHS-1 U3 - 64G and over 2.
-
Page 10: Charging
Charging When the battery level is low, the red light is always on if turned on the device. Charge the device in time in case it running power out and shut down. Using the Charger that Came with Your Device 1. -
Page 11: Rotatable Lens
Rotatable lens ·Hold the camera rotatable lens with hand and rotate the lens 90 degrees counterclockwise to switch to “landscape filming” . ·Hold the camera rotatable lens with hand and rotate the lens 90 degrees clockwise to switch to “vertical filming”... -
Page 12: Operating The Touch Screen
Operating the Touch Screen The touch screen displays the camera view after turned on Vmate, as well as the shooting parameters, battery level and album etc. Details as follows: Show current shooting mode and parameters. Media library, tap to view shot pictures/videos. - Page 13 Touch screen camera view:...
-
Page 14: Swipe Right
Swipe Right Swipe right on the touch screen to enter the shooting mode settings page and swipe up or down to select the desired shooting mode. The displayed shooting mode will automatically be the current shooting mode, then tap the screen or swipe left to back camera view. - Page 15 *Swipe up on the camera view page to set shooting parameters for current shooting mode. Video Supported to set the video resolution, frame rate, and video codec. ·Optional video resolution/frame rate: 1080 24/25/30/50/60; 1080+(1080p downsampled 4K) 24/25/30/50/60; 4K 24/25/30/50/60 ·Optional video codec: H.264; H.265 Photo Supported to set photo format and ratio.
- Page 16 ·Optional photo ratio: 3:2; 4:3; 16:9 *Must connect Vmate App for panorama shooting; the shot panorama picture will store in the phone's album automatically; please tap “Local” in the Vmate App album if you need to view it via Vmate App. Timelapse Supported to set shooting interval, duration, and resolution.
-
Page 17: Swipe
Swipe Up Swipe up on the touch screen to set parameters of current shooting mode or enter the gimbal settings page. Swipe up to enter settings page settings icon to enter the gimbal settings page, swipe left or right to select a setting. Calibration:... - Page 18 Space left: Tap the icon to view the remaining capacity of the microSD card and format the microSD card option. Preview: Tap the icon to switch between the full screen display and normal display. Landscape/Portrait screen shooting: Must set landscape/portrait mode through Vmate touch screen at the same time when rotated rotatable lens to landscape/vertical filming with the desired need.
- Page 19 Language: Tap the icon the switch device language. Factory reset: Tap the icon to reset to default settings. Regulatory: Tap the icon to view basic device information: product name/model/manufactur- er etc. (swipe left and right to show above information).
-
Page 20: Swipe Down
Swipe Down Swipe down on the touch screen to enter gimbal follow mode settings page, tap to select the desired follow mode, swipe left and right to view the all follow modes. Swipe up on the follow mode settings page to back the camera view page after selecting the desired follow mode. - Page 21 FPV: Pan, tilt and roll axes all follow the movement of the handle. Full Follow: Pan and tilt axes follow the movement of the handle. Fast full follow: Speed up the full follow mode for shooting a fast-moving subject. Lock: Three axes are locked, the camera view will unchanged in this mode.
-
Page 22: Controlling Camera Movement On The Touch Screen
Controlling camera movement on the touch screen Tap and hold the right of the touch screen to manipulate camera up and down movement; tap and hold the bottom of the touch screen to control the camera left and right movement. Move the camera horizontally Move the camera in the pitch direction... - Page 23 Re-center Swipe from the right edge of the touch screen to the left to re-center the camera. Swipe from right to left, re-centered Flip Swipe from the right of the edge of the touch screen to the screen middle and immediately slide to the right to switch the gimbal facing forward or backward.
-
Page 24: Media Library Management
Media library management Tap media library icon on the top right corner of the touch screen to enter the media library, swipe left, and right to view shot pictures or videos. Swipe up on the media library page, and tap delete the current picture or video, or swipe down continuing view the picture/video. -
Page 25: Downloading The Vmate App
(The name of Vmate App on IOS is "Vmate" and on Android is "Snoppa Play) *The IOS version of Snoppa Vmate is compatible with IOS V11.0 and later; the Android version of Snoppa Vmate is compatible with Android V8.0 and later. -
Page 26: App Connection
App Connection Launch Vmate App after confirming that Bluetooth and Wi-fi settings of the phone are turned on, then tap “Connect the device” to enter the device searching page, select device name currently in use (device name start with vmate) and tap “Join” to connect with the device. - Page 27 Please follow the instruction (P1) to tap the "confirm" icon (P2) on the touch screen of the device to complete the connection after successful authorization. Reminder: The touch screen of the device will automati- cally dim to save power; please operate shooting directly via the Vmate app;...
-
Page 28: App Interface Introductio
App Interface Introduction Home Page Vmate: Tap to enter camera view. Tutorial: Tap to view Vmate manual. Tutorial My Creation: Tap to view pictures and videos which downloaded on the phone. My Creation VN Editor: Tap to quick import videos to the VN app. Help &... - Page 29 Camera View 1.Album: Tab Album to view shot photos and videos. 2.Battery Level: The upper icon displays the current battery level of Vmate; the icon below displays the current battery level of the phone. 3.SD Card Information: Sufficient SD card storage No SD card Insufficient SD card space 4.Shutter Button:...
- Page 30 5.Shooting Parameters Settings: Tap to set parameters of current shooting mode. 6.Virtual Joystick: Pull the virtual joystick left and right to control pan axis movements, and pull the virtual joystick up and down to control tilt axis movements; double-tap the middle of the joystick to re-center the camera;...
- Page 31 9.LIVE: Tap Live icon to follow the instruction to enter RTMP URL and stream code to go live; tap the top right corner ? to learn how to obtain RTMP URL and stream code. 10.Home: Tap to back to Home page. 11.Settings:...
-
Page 32: Updating Firmware
Updating Firmware Vmate supports updating firmware online or via microSD card, it is recommended to upgrade online. Upgrade online When Vmate app-connected, an on-screen alert will be received if new firmware is available. Follow the on-screen instructions to update the firmware. Or tap on App camera view page to enter gimbal settings page, slide down to view the current... - Page 33 Upgrade via microSD card 1.Insert SD card into Vmate SD card slot, enter settings page on the touch screen to format SD card.
- Page 34 2.Visit https://www.snoppa.com/updatefailed.html and follow the instructions to download the firmware pack and unzip it, then move the decompressed package to the SD card. (do not rename the folder). 3.Reinsert SD card with firmware pack into Vmate SD card slot when Vmate is in shutdown status, long-press the Power/Shutter button till the green light blink.
-
Page 35: Maintenance Notes
Maintenance Notes ·Vmate gimbal camera is a hign-precise control device. Please do not drop it or have it hit by external force. And please ensure that the gimbal doesn’ t be blocked by outside forces when it is moving. Otherwise, the machine might be damaged and be led to abnormal operations. -
Page 36: Specifications
Specifications General Name Vmate Model S191 Dimensions 122 X37.6 x32.3 mm Weight 125g ( Vmate only) Case Weight Gimbal Controllable Range Pan: -270˚ ~ +90˚ Tilt: -98˚ ~ 50˚ Roll:±45˚ Max Controllable Speed 120°/s Angular Vibration Range ±0.005° Operating Temperature 0°C~40°C... - Page 37 Battery Type LiPo Capacity 2100mAh Voltage 3.7V Operating Temperature 0°C~40℃ Operating Time 210 mins (1080p/30fps, video shooting by device only) 150 mins (4k/30fps, video shooting by device only) 100 mins (4k/30fps, video shotting by app-connected) Charging Time When using a USB adapter of 10W (5V/2A) Camera 1/2.3 ‘...
- Page 38 Lens FOV:81˚, F2.0 equivalent focul length:26mm Photo:ISO 100-3200 Video:ISO 100-3200 Max Image Size 4000x3000 Photo formats JPEG, DNG Video Resolution 4K Ultra HD: 3840x2160@ 24/25/30/50/60fps FHD: 1920x1080@ 24/25/30/48/50/60/120/192 fps Video/Slow motion/Timelapse/ Video Recording Modes Hyper timelapse/Trace Timelapse 200 Mbps(H264); Max Video Birate 100 Mbps(H265) Supported File Format FAT32...
- Page 39 Supported SD Cards Type Micro SD (U3) Max512GB Audio Output 48 KHz; AAC Wireless Bluetooth Bluetooth 4.1 Wi-Fi 802.11ac ( 5G) Wi-Fi USB Port Type USB3.1 Gen1 Type-C Video Codec MPEG-4 VC/H.264/H265 Compatible Phones for Vmate Case Thickness ≤10mm Width 61-84 mm...
Need help?
Do you have a question about the Vmate S191 and is the answer not in the manual?
Questions and answers