Table of Contents
Advertisement
Advertisement
Table of Contents

Summary of Contents for EMME Core
- Page 1 User Guide Emme System...
- Page 2 ©Copyright Emme 2013...
- Page 3 User Guide Emme Systems...
-
Page 5: Table Of Contents
Connecting Emme Systems to Your WiFi Network Status Icons: Emme ......9 (Automatic DHCP) ......21 Status Icons: Home and Away . - Page 6 Canceling Away ......40 Emme Core +Zone......57 HVAC Settings .
- Page 7 Control Unit.......66 Emme +Energy ......67 Before You Begin .
-
Page 8: Getting Started
Getting Started Congratulations! And thank you for purchasing an Emme System, the foundation of the world’s fi rst Energy and Environmental Management System designed specifi cally for homes and light commercial buildings. Emme Systems come with a smart thermostat application that’s redefi ning the way you control heating and cooling. -
Page 9: Emme Components
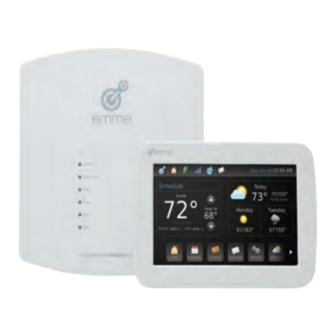
(furnace). Display and Control Unit Parts Touch screen 2. USB terminal: connect Emme to a USB fl ash drive to upload software and confi guration fi les. BOTTOM Figure 3.1... -
Page 10: Equipment Interface Panel Parts
Equipment Interface Panel Parts (Core + Zones) FRONT Status LEDs: indicates current equipment conditions. RJ-45 terminals: device terminals used for adding supplemental Emme equipment. 3. DC in terminal: input for power adapter allowing Emme to be powered without HVAC equipment present. -
Page 11: Using The Touch Screen
Do not spray liquid cleaners directly onto the screen. Touch Screen Controls The Emme interface makes use of various controls that let you change setting and access and enter information. The following is a brief summary of the most common types of controls. -
Page 12: Types Of Touch Screen Controls
Types of Touch Screen Controls Scrolling Lists When there is list of items that has an arrow next to them, it indicates there are more options then can fi t on the screen. Drag your fi nger across the list in the direction opposite of the arrow to move the list in that direction. - Page 13 Types of Touch Screen Controls Multi-select A multi-select allows you to cycle between diff erent options. Press the arrows to either side to view the options. The selections may wrap when cycled through the complete set. Check Box Check boxes allow you to turn a function on or off . Touch the check box to change the state.
- Page 14 Types of Touch Screen Controls Dial To use the dial, either slide your fi nger from the top to the bottom or from the bottom to the top, depending on the direction you want the dial to go. You can also press above or below the selected value to move the dial.
-
Page 15: The Emme Main Screen
The Emme Main Screen The Main Screen is where you’ll fi nd all of the top level menu items. The Menu Bar and the Smart Thermostat Panel provide all of your controls. Six selections are displayed at a time on the Menu Bar. You can browse through additional... -
Page 16: Status Bar
Status Bar Status Icons: System Status No activity (Ideal) The Status Bar provides an at-a-glance view of the current conditions of your Emme System. In addition, pressing the Status Bar will return you to the Main Screen. Heating Status Icons: Emme... - Page 17 Status Icons: System Status Status Icons: System Status Cooling A small clock by the upper left of the status icon indicates the system is heating, cooling, or circulating because of SmartRecovery. 2nd Stage Cooling The system is waiting for the compressor cycle timer to expire SmartCirculation One or more zones are calling for heat at the...
-
Page 18: Status Icons: Network Connectivity
Status Icons: Network Connectivity Status Icons: Messages There is no WiFi connection There is a new message There is a WiFi connection, but the system There is a new alert message (yellow triangle) cannot connect to the server There is a WiFi connection and the system is There is a new alarm message (red triangle) connected to the server There is a WiFi connection, the system... -
Page 19: Smart Thermostat Panel
Smart Thermostat Panel can toggle between heat to cool to by pressing the override type. The Smart Thermostat Panel provides HVAC control and status. It displays the inside temperature and humidity. It also allows you to temporarily override the current schedule, put the system in Away mode, change the mode (off , heat, cool, and auto), and change the fan setting (auto and on). -
Page 20: System Modes
Override Down Arrow: Temporarily decreases the System Modes temperature setpoint. The system is off , there will be no heating or Fan Mode: Displays the current fan mode which can cooling, although circulation may still run or auto. System Mode: Displays the current system mode;... -
Page 21: Changing The System Mode
Changing the System Mode Fan Modes Press MODE: auto The system will automatically mange the fan based on heating and cooling conditions and your settings The fan will always run, even when it is not heating and cooling Select the Desired Changing the Fan Mode Mode of Operation... - Page 22 Select the Desired Mode of Fan Operation In this example it is changing from auto. Verify the System is using the Correct Fan Mode Smart Thermostat Panel...
-
Page 23: Weather Panel
Weather Panel The Weather Panel provides the current weather conditions as well as a two-day forecast. High temperatures are in yellow while low temperatures are in white. Icons indicate current conditions. The Weather Panel will be blank if the system is not connected to the Internet. -
Page 24: Menu Bar
Menu Bar Menu Bar Buttons Most functions of Emme can be accessed through the Messages: Menu Bar on the Main Screen. You simply press the button Allows you to access your messages. to access the pages below. The available space may not be large enough to show all of the buttons. - Page 25 HVAC: Setup: Allows you to confi gure equipment Allows you to confi gure Emme for reminders, SmartCirculation, multistage operation. With the exception of WiFi control and SmartRecovery. confi guration, it is strongly...
-
Page 26: Cleaning The Touch Screen
Disable Screen for Cleaning If you need to clean the touch screen, Emme provides an easy way to temporarily disable it. This will allow you to clean any dirt or fi ngerprints off the t ouch screen without making any unwanted changes to programming or settings. -
Page 27: Using Emme Systems
Clear/No Security: with SSID being broadcast • WEP: 40/64 and 104/128, but only key 0 You can operate Emme from the display or you can use the • WPA: Pre-shared keys; TKIP secure Emme web portal. The web portal allows you to do •... -
Page 28: Incompatible Wifi Encryption Protocols
WPA: “Enterprise” - all EAP/PEAP types, RADIUS, Wireless Network Certifi cate-based, etc. • WPA2 “Enterprise” - all EAP/PEAP types, RADIUS, Certifi cate-based, etc. Connecting Emme to Your WiFi Network (Automatic DHCP) Select the Network Press the Select the network to... -
Page 29: Connecting Emme To Your Wifi Network (Manual)
Connecting Emme System to Your Enter the WiFi Network (Manual) Password When fi nished, press Press the setup Button The setup screen should appear. You may need to scroll to the right to see the setup option. Verify Emme is... - Page 30 Use the multi-selector to Repeat Step 5 and 6 with change the Addressing the Remaining Options. from Automatic (DHCP) Manual Press Edit across Double Check from IP Address Your Settings When you’re fi nished press Ok. Emme Internet Setup and Connectivity...
-
Page 31: Connecting To Emme From The Emme Web Portal
Press the connect Button connect screen Before you can access Emme from the Internet two should appear. requirements must be met: Emme must be connected to your WiFi network. Your email and password must be confi gured on the connect screen. - Page 32 NOTE: The password is case sensitive; ensure the password is entered correctly, using any letters, numbers or symbols that are required. Press Change Password Enter Your Password When you are fi nished, press ok. Connecting to Emme From the Emme Web Portal...
-
Page 33: Logging In To The Emme Web Portal
(Firefox, Internet Explorer, Safari, etc.). In the address bar, type in www.myemme.com. Then do the following: Explore Emme Online Using Emme online is just like using it from your Enter Your Email and Password home or business. When fi nished click Out. -
Page 34: System Setup
This section of the manual describes how to set up and Emme Cores installed in the building) • confi gure Emme using the display touch screen. These Entering your dealer contact information are the two steps to programming Emme: These steps should be completed by the HVAC professional who installed your Emme system. -
Page 35: Setting The Clock
Press the clock Button clock screen should By default, Emme uses an automatic clock that updates appear. using the WiFi/Internet connection. If network access is not available the clock can be set manually. Confi guring the Automatic Clock Select the Correct... -
Page 36: Confi Guring The Manual Clock
Confi guring the Manual Clock Select the Correct Time Zone When disconnected from the Internet, Emme may lose or This is done to ensure gain one to two seconds per month depending upon the time will be conditions. Do not confi gure the manual clock if you have correct if the system already confi gured the automatic clock. -
Page 37: Screen Settings
Screen Settings Set the Correct Time Use the dial to set the Screen options allows you to set Normal Brightness, correct time. A grey Inactive Brightness and Dim Screen After to your background with white preferences. Drag your fi nger along the slider to change text indicates a selected settings. -
Page 38: Scheduling
Brightness and Inactive Brightness Changing Simple Settings Scheduling program Press the Emme Systems are designed to give you the ability to Button schedule the temperatures you want, when you want programs screen them; real schedules for real people! will appear. -
Page 39: Creating A Custom Schedule
Creating Schedules (Room by Room & Zones) To help you learn how to setup a schedule we will create a Select Simple weekday schedule using the following information: Settings and press Edit (Core Only) Example Schedule Wake at 7:00AM heat to 74° cool to 80°... - Page 40 Press either the Standard,Away Press Edit, this program or press the screen appears. Add button to create Press add a new schedule. button. Then press edit. You will now see all of the (valve/ Press days wanted for dampers) configured transition.
- Page 41 Example of a 2 The new program will transition screen appear in the programs screen. done Press the button when you are fi nished. Your schedule is complete To create a named When you are fi nished schedule by zone. Press press Done.
-
Page 42: Temperature Overrides
In some cases, you may want to temporarily override a The overriden sensor current temperature schedule. This is easy to do with temperature will now be a Emme. In addition, Emme provides multiple options for green color. You must setting how long an override lasts. override each (valve/... -
Page 43: Setting An Indefi Nite Override
If you press the up and down arrow on the main display. A clock will appear next to the override indicator if you are using the display as a zone sensor. Press the clock and you will get the options shown. -
Page 44: Canceling A Temperature Override
Temperatures While in Auto Mode While Emme is running in auto mode it will automatically switch between air conditioning and heating depending on your set points, yet on the Main Screen there is only one set point displayed. To switch between the... -
Page 45: Home And Away Modes
This allows you to save energy by conditioning the building less. When Emme is in Home mode, the status bar will show the home icon. When Emme is in Away mode, the away icon will appear in the status bar and the schedule name in the Smart Thermostat Panel will change to Away. -
Page 46: Setting Away Mode
Setting Away Mode Scheduling an Away Return Time Press the Press the Clock Away Button Icon Set the Date You Are Now and Time In Away Mode Away mode is indicated Use the selector to set by the schedule type your return time. -
Page 47: Changing Away Set Points
Changing Away Set Points Select Sun Press the thru Sat Press program button on edit. the bottom tool bar of the main screen Apply desired settings for heat and Select the Away cool then press done Program. System default will have all zones linked together Link the zones together you want to... -
Page 48: Hvac Settings
HVAC Settings Schedule the Filter Reminder Set parameters for equipment reminders, SmartCirculation, multistage control, and SmartRecovery settings from the hvac button on the Main Screen. Equipment Reminders Schedule Press the hvac Humidifi er Button Reminder If you do not have a humidifi er, you will not see this option. -
Page 49: Circulation Control
SmartCirculation intelligently balances the temperature in your home without using heating and cooling. Using optional Emme sensors, it detects uneven temperatures and then uses the high speed fan to mix the air. SmartCirculation is a great way to increase the comfort of your home without using heating and cooling. -
Page 50: Multistage Control
Multistage Control Second stage heat will start if: Many heating and cooling systems have one speed; The temperature is 1° they are running at 100% capacity or they are off . This is The previous stage has lower than the set point been heating for 20 minutes called single-stage equipment. -
Page 51: Smartrecovery
To reach the correct temperature by the next transition, Emme must start conditioning before that transition occurs. Start too early and energy is wasted; start too late and the home or building is uncomfortable. SmartRecovery... -
Page 52: Password Protecting The Display Touch Screen
Display Touch Screen Recovery Time In this instance, Emme will not begin setback Emme gives you the ability to lock the display touch recovery unless it is screen by using a password. Do the following to lock the Hours... -
Page 53: Disabling Password Protection
The system will remain unlocked until the screen dims, after Enter Your which it will need to be unlocked with the password to gain Password access. Press when you are fi nished. Disabling Password Protection Press the password Button You may need to scroll right to fi nd it. -
Page 54: Wireless Sensors
Smart Senors are small, wireless, family room as the reference temperature in the evening. temperature sensors that can be linked to Emme , they have no override capability. Smart Controllers perform a Wireless Sensor Icons similar function as Smart Sensors but you can override the current schedule from a Smart Controller. -
Page 55: Selecting A Sensor To Use As The Primary Temperature
Press Make Selecting a Sensor to Use as the Primary Primary Temperature (EMME CORE ONLY) Press the Make Primary button. Press the sensors Button Verify the Selection Primary Sensor: should now display the sensor Select the Sensor name (in this case Press the sensor Downstairs). -
Page 56: Making The Display And Control Unit The Primary Temperature
Making the Display and Control Unit Press Make the Primary Temperature (EMME CORE) Primary Press the make Make Press the sensors Primary button. Button Verify the Selection Above the temperature Press Emme it should display inside. Display in the list When you are fi nished press Done. -
Page 57: Renaming A Sensor
You can use any SmartSensor or Smart Controller in your home or building as the reference temperature for your schedule transitions. In this example, we’ll use the family room SmartSensor as the reference temperature on weekends between 7:00AM and 11:00PM. (CORE ONLY) Wireless Sensors... - Page 58 Emme Core Only Press the Select the Sensor schedule Button Press Done when you are fi nished. Select the Verify the Correct Schedule Selection Press Edit. The transition should now display the sensor name. Press Done when you are fi nished.
-
Page 59: Overriding The Temperature From A Smart Controller
Overriding the Temperature Increase Temperature Set the Smart from a Smart Controller Controller Change the setting with If a Smart Controller is set as the Primary Sensor you can the up and down arrow use it to override the current temperature schedule. To set buttons. -
Page 60: Canceling An Override
Canceling an Override Setting SAVER Mode from a Smart Controller The override can be canceled from the Smart Controller. To cancel an override do the following: If a Smart Controller is set to Primary you can use it to enable SAVER mode. You cannot turn the system OFF from a Smart Controller, you can only enable SAVER which uses Press the button with a circle Press the... -
Page 61: Canceling Saver Mode From A Smart Controller
Canceling SAVER Mode from a Smart Controller Press the Press the circle button Circle Button When the Smart Controller is in SAVER mode and set as PRIMARY, press the circle button to disable SAVER mode. In SAVER mode SAVER Mode Disabled The Smart Controller will now display ON indicating SAVER mode... -
Page 62: Replacing The Smart Controller Battery
Replacing the Smart Install Batteries Install two new AAA alkaline Controller Battery batteries as shown at right. For effi ciency, avoid mixing battery types or using batteries from Remove the Smart diff erent manufacturers. Controller Lift the Smart Controller off its mounting bracket to remove the Smart Controller from the wall. -
Page 63: Replacing The Smartsensor Battery
Replacing the Attach the Cover When the back plate is SmartSensor Battery mounted carefully attach the sensor cover to the Remove the back plate; attach the top of Back Plate sensor fi rst and gently push Pry the sensor apart slowly the bottom until it locks into from the bottom. -
Page 64: Emme Core +Zone
Emme Core +Zone User Guide Addendum Emme Core +Zone... -
Page 65: Before You Begin
Before You Begin Emme Core +Zone Basics This addendum is specifi cally for Emme Core +Zone. If A traditional heating and cooling system heats and cools you have general questions about Emme Core, the entire building whenever the thermostat detects a consult preceding sections of the Emme User Guide. -
Page 66: Temperature Sensors
The Smart Sensor is a small, wireless sensor that only broadcasts the temperature and Emme Core +Zone requires Emme temperature sensors to has no override capabilities, although you can still override operate properly. Each zone requires a temperature sensor the temperature in a zone by using the Display and Control as reference to use against the settings in your schedule. -
Page 67: Getting To The Zones Screen
Getting to the Zones Screen To see the zones screen press the zones button from the home screen. Press the zones Button zones screen should appear. You may need to scroll to the left to see the zones option. Zones Screen Components The Zones Screen Zone Name Sensor associated (linked) with the zone... -
Page 68: Activity Indicators On The Zone Screen
Activity Indicators It’s important to note that even though the system may on the Zone Screen display an activity on the Status Bar not every zone may be taking part in that activity. Unlike a conventional heating and cooling system a zone Overriding a Zone system can heat and cool each zone independently. -
Page 69: Using The Display And Control Unit To Override The Current Schedule
Using the Display and Control Unit to Use the up Override the Current Schedule and down arrows to set Select the the override Zone temperature From the zones screen select the zone Press you want to apply the override to. when you are fi nished Press the... -
Page 70: Canceling An Override Using The Display And Control Unit
Canceling an Override Using the Display Using the Smart Controller to Override and Control Unit the Current Schedule You can cancel an override initiated from the Display and Control Unit or Smart Controller in the same manner. The Press the Smart Controller will continue to fl ash between SET and up or down your new setpoints after it is canceled from the display. -
Page 71: Canceling An Override Set Using A Smart Controller
Canceling an Override SAVER Mode Set Using a Smart Controller SAVER mode saves energy by reducing heating and cooling. Press the You can put a zone in SAVER mode if the zone is linked to a Smart Controller. When you put a zone in SAVER it uses large circle your AWAY settings instead of the current schedule. -
Page 72: Canceling Saver Mode Using A Smart Controller
Putting a Zone in SAVER Mode Canceling SAVER Using a Smart Controller Mode Using a Smart Controller Press the circle button Press the Smart Controller is ON Press the Circle Button Circle Button When the Smart When the Smart Controller is in SAVER Controller in ON and mode press the circle not in an override,... -
Page 73: Canceling An Saver Mode Using The Display And
Canceling an SAVER mode Using the Press Cancel Display and Control Unit The override You can cancel SAVER mode initiated from a Smart button should now Controller from the Display and Control Unit. To cancel read cancel, press SAVER mode from the Display and Control Unit do the Cancel. -
Page 74: Emme +Energy
Emme Core +Energy User Guide Addendum Emme Core +Energy... -
Page 75: Before You Begin
Before You Begin Getting to the Energy Screen This addendum is specifi cally for Emme +Energy. If you have general questions about Emme , consult To see the energy screen press the energy button from the preceding sections of the Emme User Guide. -
Page 76: The Energy Screen
The Energy Screen Current Energy Use: Displays your current energy use. The background color indicates whether your use is low, average, or high. Green indicates low energy use, The energy screen provides information about your blue is average, and red is high energy use. buildings electricity use. -
Page 77: The Real-Time Graph
The Real-Time Graph consumption history plotted over time. Time Plot: Displays the last 5 minutes of energy data. From the energy screen you can view a real-time energy Back Button: Pressing this button returns you to the graph by pressing the Realtime Graph button. -
Page 78: Technical Support
Technical Support If assistance is required, our Technical Support team is available to answer your questions: Technical Support: 1-877-509-1200 Email Support: support@getEmme.com Technical Support... -
Page 79: Notes
Notes ______________________________________________________________________________________________________ ______________________________________________________________________________________________________ ______________________________________________________________________________________________________ ______________________________________________________________________________________________________ ______________________________________________________________________________________________________ ______________________________________________________________________________________________________ ______________________________________________________________________________________________________ ______________________________________________________________________________________________________ ______________________________________________________________________________________________________ ______________________________________________________________________________________________________ ______________________________________________________________________________________________________ ______________________________________________________________________________________________________ ______________________________________________________________________________________________________ ______________________________________________________________________________________________________ ______________________________________________________________________________________________________ ______________________________________________________________________________________________________ ______________________________________________________________________________________________________ ______________________________________________________________________________________________________ ______________________________________________________________________________________________________ ______________________________________________________________________________________________________ ______________________________________________________________________________________________________ Notes... -
Page 80: Notes
Notes ______________________________________________________________________________________________________ ______________________________________________________________________________________________________ ______________________________________________________________________________________________________ ______________________________________________________________________________________________________ ______________________________________________________________________________________________________ ______________________________________________________________________________________________________ ______________________________________________________________________________________________________ ______________________________________________________________________________________________________ ______________________________________________________________________________________________________ ______________________________________________________________________________________________________ ______________________________________________________________________________________________________ ______________________________________________________________________________________________________ ______________________________________________________________________________________________________ ______________________________________________________________________________________________________ ______________________________________________________________________________________________________ ______________________________________________________________________________________________________ ______________________________________________________________________________________________________ ______________________________________________________________________________________________________ ______________________________________________________________________________________________________ ______________________________________________________________________________________________________ ______________________________________________________________________________________________________ Notes... - Page 82 100.0065 VER1.4 OCT2013 Emme User Guide...
Need help?
Do you have a question about the Core and is the answer not in the manual?
Questions and answers