
Summary of Contents for Duplo EX-2000
- Page 1 Duplo Express Sealer EX-2000 Service Manual Provided By http://www.MyBinding.com http://www.MyBindingBlog.com...
-
Page 3: Introduction
Introduction Symbols and Notations in this manual Safety precautions Various symbols and pictures are used in this manual and on the stickers affixed to the machine. These symbols and pictures provide warnings and instructions to prevent danger to you or other personnel, and to prevent damage to office property. - Page 4 ...
- Page 5 ...
-
Page 6: Table Of Contents
Contents ・・・・・・・・・・・・・・・・・・・・・・・・・・・・・・・・・・・・・・・・・・・・・・・・・・・・・・・・・・・・・・・・・・・・・・・・ Introduction ・・・・・・・・・・・・・・・・・・・・・・・・・・・・・・・・・・・・・・・・・・・・・・・・・・・・・・・・・・・・・・・・・・・・・ 1. Specifications ・・・・・・・・・・・・・・・・・・・・・・・・・・・・・・・・・・・・・・・・・・・・・・・・・・ 2. Parts names and their functions ・・・・・・・・・・・・・・・・・・・・・・・・・・・・・・・・・・・・・・・・・・・・・・・・ 3. Paper flow and operating principle ・・・・・・・・・・・・・・・・・・・・・・・・・・・・・・・・・・・・・・・・・・・・・・・・・・・・・・・・・・・・・・・ 4. Operating sequence ・・・・・・・・・・・・・・・・・・・・・・・・・・・・・・・・・・・・・・・・・・・・・・・・・・・・・・・ 5. Circuits and their operation ・・・・・・・・・・・・・・・・・・・・・・・・・・・・・・・・・・・・・・・・・・・・・・・・・・・・ 6. Maintenance and adjustments ・・・・・・・・・・・・・・・・・・・・・・・・・・・・・・・・・・・・・・・・・・・・・・・・・・・・・・・・・・・・・・・・・・・・・・・・ 7. HELP mode ・・・・・・・・・・・・・・・・・・・・・・・・・・・・・・・・・・・・・・・・・・・・・・・・・・・・・・・・・・・ 8. -
Page 7: Specifications
1. Specifications Item Specification Remarks 1 Type Desktop 2 Model name EX-2000 Length:279.4mm (11”) - 355.6mm (14”) 3 Paper size Width :210mm - 215.9mm (8.5”) Length: 93.1mm - 148.5mm 4 Finished size Width : 210mm - 215.9mm (8.5”) 24lb(90g/㎡)... -
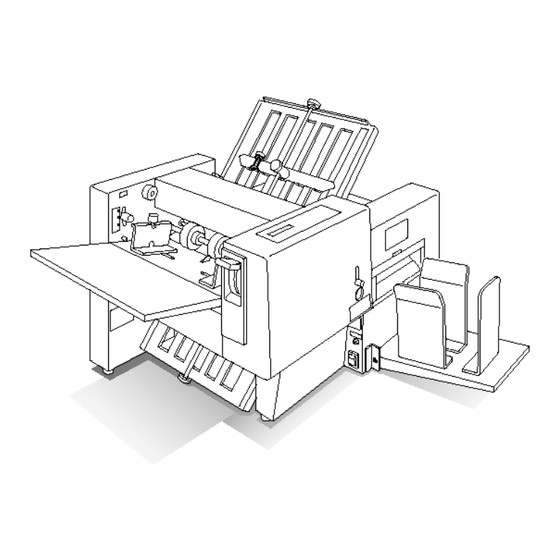
Page 8: Parts Names And Their Functions
2. Parts names and their functions 9 Name Function Feed pressure Adjusts feed pressure according to paper thickness. Normally set to adjuster lever “Standard”. -
Page 9: Paper Flow And Operating Principle
3. Paper flow and operating principle 3-1 Folding section Parts name PPS sensor 1 (light receiving) Folding roller 1 Double feed Paper feed ring... - Page 10 4. The paper fed to the folding tray 2 sags by bumping the stopper as well as the flow in the folding tray 1, Folding roller 2 Folding and is fed to the path between the folding rollers 3 roller 3 and 4, and then is fed to the sealer section by the ejection roller.
-
Page 11: Operating Sequence
4. Operating sequence * Both motors stop 1 second after the PPS3 sensor detects photopassing (ejecting paper). 5. Circuits and their operation Paper empty SW circuit A sensor is installed on the feed tray and detects paper empty. - Page 12 PPS3 circuit PPS3 is installed at the back of the feed roller, and detects that the paper is properly fed. ...
-
Page 13: Maintenance And Adjustments
6. Maintenance and adjustments ●Exterior Side cover L Sealer cover 2 Sealer cover 1 Side cover R (lower) Side cover R assy * Remove the folding plate, support tray, stacker guides, and the stacker stopper before starting maintenance. - Page 14 [Sealer cover 1] Remove the 3 screws (3mm taptight) indicated in the right photograph and remove the cover toward you. [Sealer cover 2] Remove the 3 screws in the circles in the right photographes, Disconnect the connectors (yellow, yellow, white, white) of the interlock switch connecting to the machine, and then remove the sealer cover 2 with lifting up.
- Page 15 Replacing the main PCB Screw Connector Remove the 10 connectors and the 4 screws、 and then remove the main PCB. Main PCB Replacing the main motor Remove the 4 screws indicated in the right photograph, and remove the rear cover. Rear cover Remove the 4 nuts indicated in the photograph 1, and remove the main...
- Page 16 Replacing the flat belt Remove the 3 screws indicated in the photograph (left side), and then remove the bracket. Bracket Take out the paper feed clutch from the Paper feed bush in the photograph (right side). clutch Loosen the 2 screws indicated in the right photograph to move the tension roller, and then remove the belt.
- Page 17 5. Remove the encoder sensor and PPS3 cable, and then take out the cabinet 2 by lifting it up as shown in the right photograph. Cabinet 2 Cabinet 1 6. Inside of the cabinet 1 is as shown Circuit protector in the right photograph.
- Page 18 Replacing scraper Remove the 4 screws indicated in the right photograph, and then remove the both bracket Rs. (Both the upper bracket R and the lower one are the same.) Remove the screws indicated in the right photograph, and then replace the scraper. After replacing it, install the scraper so that it appears by 7mm from the edge of the bracket.
- Page 19 [Adjustments] Adjusting double feed detection unit Parts names Photo sensor Hole Folding roller 1 Detection roller (upper) Lever Eccentric pin Fulcrum Folding roller 2 Detection roller (lower) Paper 1. Turn the eccentric pin until the gap between the upper and lower detection rollers is at the maximum setting.
- Page 20 Adjusting folding roller Bearing holder 1. Loosen the 2 screws holding the bearing holder of each roller. Slide the folding rollers 1 and 3 along the elongate hole taking the roller 2 as reference so that these rollers are pressed up the roller 2.
-
Page 21: Help Mode
7.HELP Mode <HELP Mode List> HELP Mode No. Description Remarks H-00 Rom version display H-01 Motor check H-02 Sensor & switch check H-03 Motor & clutch check H-04 Not used H-05 Error & jam counter H-06 RAM initialization H-07 Setting double feed detecting timing... - Page 22 Accessing HELP mode 1. Turn the power switch ON while pressing the JOG key and MODE key. 2. A buzzer sounds and the HELP mode is displayed. 3. Select HELP mode no. by pressing the JOG key or MODE key. 4.
- Page 23 5. H-04: Not used. 6. H-05: Error & jam counter: Checking number of error occurrences Access the HELP mode H-05, and the press the START key. Press the JOG key to check the item. Press the MODE key for 2 seconds to clear the counter. (Each error can be counted up to 9,999.) FEED MISS ****...
- Page 24 12. H-11: Not used. 13. H-12: Selecting language for display Access the HELP mode H-12, and the press the START key. A:0 B:0 C:0 D:0 (HELP6 RAM initialization: 0001) 0000 English, 0001 Japanese 14. H-13: Not used. 15. H-14: Not used. ...
-
Page 25: Error Message Displays
8. Error Massage Displays 1. COVER OPEN (without warning beep) COVER OPEN Status: The safety cover is open. - Page 26 6. MOTOR LOCK (with warning beep) F.MOTOR LOCK RESET BREAKER Status: The encoder sensor keeps detecting photointerrupting or photopassing for a certain period of time, and the folding motor does not run. Solution A: 1. Remove jammed paper. 2. Press the STOP/C key. Solution B: Press the breaker in the back of the folding tray 2.
- Page 27 11. REMOVE PAPER REMOVE PAPER Status: The START, TEST or JOG key was pressed when any of PPS detects photo interrupting. (This message appears after folding test only when folding test is executed.) Solution A: 1. Remove jammed paper. 2.
-
Page 28: Electrical Parts
9. Electrical parts Connector layout ... - Page 29 Circuit diagram...
- Page 30 2005.02 ...
Need help?
Do you have a question about the EX-2000 and is the answer not in the manual?
Questions and answers