
Subscribe to Our Youtube Channel
Related Manuals for GARO Nova GTC

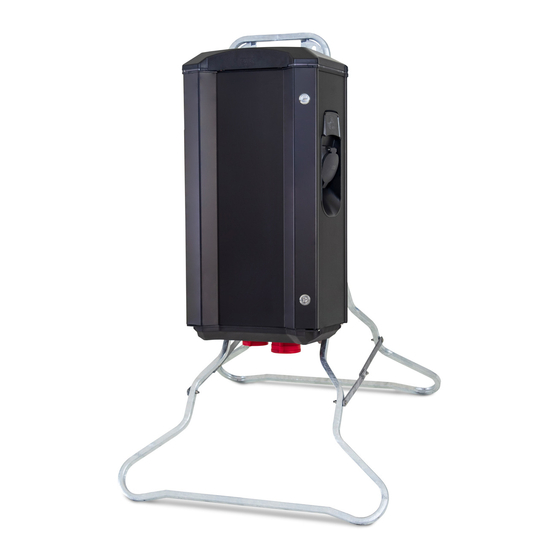
Summary of Contents for GARO Nova GTC
- Page 1 GARO Nova GTC Assembly instructions / End User Instruction (EN) GARO AB Box 203, SE–335 25 Gnosjö Phone: +46 (0) 370 33 28 00 info@garo.se garo.se...
-
Page 2: Table Of Contents
TABLE OF CONTENT About this manual INFORMATION Warnings Cautions Notes INSTALLATION OF STANDALONE GTC NOVA RFID reader installation RFID settings for stand alone GTC Nova Dimensional sketch USER MANUAL Normal use / Charging Resetting/Conditioning of RCCB Electrical diagram Connecting to GTC Nova Wifi access point (AP) Web interface Main menu Energy information... -
Page 3: About This Manual
This document contains general descriptions which are verified to be accurate at the time of printing. However, because continuous improvement is a goal at GARO, we reserve the right to make Dielectric Voltage Withstand Test is not allowed on GTC product and software modifications at any time. -
Page 4: Cautions
Appropriate protection is charging cable, and the end of the charging cable should be periodically wiped with a clean, dry cloth to remove available in GARO’s range. accumulation of dirt and dust. Be careful not to damage the circuit boards or components during installation. -
Page 5: Installation Of Standalone Gtc Nova
INSTALLATION OF STANDALONE GTC NOVA INSTALLATION OF STANDALONE GTC NOVA The installation must be performed by a professional electrician. The installed mains cable need to handle up to 32A during long term period. Calculate the required cable length and select the appropriate cable-area to minimize the risk of voltage-drop. - Page 6 INSTALLATION OF STANDALONE GTC NOVA 3. You can by setting Dip switch SW2 on both CC1 and CC2 (picture 2 and 3) reduce the charging current for left or right hand ON OFF side if needed. Normally, this is normally not necessary. Available 3=OFF range is 6-32A (table 1 and picture 4).
- Page 7 INSTALLATION OF STANDALONE GTC NOVA 5. Turn on the electrical power to the GTC Nova. 6. For GTCDCW… models: Connect a mobile device (PC/ Tablet/Mobile) to the GTC Nova Wifi network. You find SSID and password on the label inside the front door. Type in 172.24.1.1 in your web browser and check that the GTC web interface is visible.
-
Page 8: Rfid Reader Installation
INSTALLATION OF STANDALONE GTC NOVA RFID reader installation DIP switch 1. Turn off the electrical power to the GTC Nova 2. Assembly the RFID readers according picture 7-9. (picture 10) Note: Both DIP switches should set to ON on both RFID readers, see picture 10. -
Page 9: Rfid Settings For Stand Alone Gtc Nova
INSTALLATION OF STANDALONE GTC NOVA RFID settings for stand alone GTC Nova Set SW1 (Dip5) CC2 to ON that makes the unit as “Master”, see picture 11. (picture 11) For RFID setting, see section web interface. -
Page 10: Dimensional Sketch
INSTALLATION OF STANDALONE GTC NOVA Dimensional sketch... -
Page 11: User Manual
USER MANUAL USER MANUAL Normal use / Charging Connect the charging cable to the EV. Charging will start immediately if the EV is ready for charging. See your EV charging manual. When finishing charging, follow the car’s instructions. After charging: Release first the charging cable from your EV and place the charging cable at designated place. -
Page 12: Resetting/Conditioning Of Rccb
USER MANUAL Resetting/Conditioning of RCCB In the event of overload/earth fault, the built in RCCB/RCBO can trip, see picture 12. These components also need to be conditioned by pressing the test button every 6 month. Procedure to reset/condition: 1. Disconnect the EV from the Nova 2. -
Page 13: Electrical Diagram
USER MANUAL Electrical diagram P1 = Energymeter Left Outlet P2 = Energymeter Right Outlet -KF1 FB1 = RCCB Left Outlet -RFID1 -RFID2 FB2 = RCCB Right Outlet -CC1 -CC2 FC1 = Fuse Left Outlet FC2 = Fuse Right Outlet -XD2 -XD1 QA1 = Contactor Left Outlet QA2 = Contactor Right Outlet... - Page 14 USER MANUAL -XD2 -XN1 -XPE1 1 2 3 -FC1 -FB1 16/32A 8 9 10 11 12 4 5 6 1 2 3 -FC2 -FB2 A- B+ 16/32A 8 9 10 11 12 4 5 6 A- B+...
- Page 15 USER MANUAL -KF1 Fuse Fuse Connector for Connector for Led light Topcard the RFID reader Connector for Fuse/RccB FB Fuse/RccB FB the RFID reader Contactor FB Contactor FB Contactor control Contactor control Line (L) Line (L) Neutral (N) Neutral (N) Protective earth (PE) Protective earth (PE) E-Meter...
-
Page 16: Connecting To Gtc Nova Wifi Access Point (Ap)
USER MANUAL Connecting to GTC Nova Wifi access point (AP) (Only for GTC with wifi module installed) 1. Make sure that the GTC Nova is turned on. 2. Check the Serial no./SSID and password on the label which can be found inside the front door. Make a note of the serial number/SSID and password in the box below for future reference. -
Page 17: Web Interface
Warning! GARO recommend that settings should be done by a person that have enough knowledge and good experience of a GTC Nova. If wrong setting is done for example DLM functions, it can result in overload for the installation and it can cause operational failure. - Page 18 USER MANUAL Example of information for left and right hand side...
-
Page 19: Energy Information
USER MANUAL Energy information Information for consumed energy for each side of the GTC... -
Page 20: Rfid Settings In The Web Interface
USER MANUAL RFID settings in the web interface Schedule After activate the RFID check, you can add and remove RFID tags Settings menu for scheduled activation of GTC Nova. manually or read in RFID tags via the RFID reader (Read tag from wallbox). -
Page 21: Connect Gtc Nova To A Local Network Via Wi-Fi
Launch the browser on your device and go to url: chargebox. 4. Press “Save” garo.se and follow the instructions. Launch the browser on your device and go to url: chargebox. Note: your device needs to be connected to same network as the garo.se and follow the instructions. -
Page 22: Connect Gtc Nova To A Local Network Via Ethernet Using Static Ip-Adress
GTC Master. Launch the browser on your device and go to url: chargebox. garo.se and follow the instructions. Note: your device needs to be connected to same network as the GTC Nova Factor y reset of Network settings By pressing the SW3 on CC2 for >3s, you will reset the network... -
Page 23: Uppdatering För Gtc Laddbox Som Ej Är Ansluten Till Internet Via Wifi Eller Lan (Kräver Installerad Wifimodul)
USER MANUAL Uppdatering för GTC laddbox som ej är ansluten till internet via wifi eller LAN (kräver installerad wifimodul) Updating the firmware on a GTC Nova not connected to internet (installed wifi module is required). • Via computer, android mobile/tablet: Open https://www.webel-online/wifi and download the file. -
Page 24: Troubleshooting
USER MANUAL Troubleshooting Basic indications Solid green Twinbox ready, waiting for EV to connect Flashing green EV connected, waiting to start charging or charging complete Fast flashing green RFID reader ready, waiting to read tag Shifting blue intensity Charging in progress Solid blue RFID tag accepted, charging starts within 2 min... -
Page 25: Technical Specifications
USER MANUAL Error type Action Error indications One white flash every two DLM error Auto-reset when Twinbox minutes communication with energy meter is up and running Flashing red/blue Firmware update in progress Wait for the update process to complete GLB/Twin - ljud signaler Up beat tone RFID tag is accepted, authorization ok Down beat tone... - Page 26 GARO AB Box 203, SE–335 25 Gnosjö Phone: +46 (0) 370 33 28 00 info@garo.se garo.se...
Need help?
Do you have a question about the Nova GTC and is the answer not in the manual?
Questions and answers