
Related Manuals for Miravac SWERVE

Summary of Contents for Miravac SWERVE
- Page 1 SWERVE Robo t ic Va c uu m Cl e an e r wit h D o c k ing Station O P ERATIO N M ANUAL...
-
Page 3: Table Of Contents
Installing and Removing Remote Control Battery Battery Installation and Removal Recharging Battery Testing the Docking Station Preparation of Room Containment GENERAL OPERATION Getting Started with SWERVE Room Containment Sensor Control Panel Remote Control Docking Station Control Panel Basic Operation Select Working Time and Function... -
Page 4: Important Safety Instructions
Certain objects and materials are hazardous to SWERVE and can cause accidents and/or serious bodily injury. SWERVE vacuum cleaner should not be used to clean up the following objects and materials: •... -
Page 5: General Safety Instructions
11. If damage or malfunction occurs, discontinue using SWERVE and call your local dealer for assistance. 12. In the event SWERVE will not be in use for a long period of time, we recommend that you remove the battery from the unit and store it separately. - Page 6 IMPORTANT SAFETY INSTRUCTIONS vacuum. There should not be any objects blocking its pathway. Also, make sure that hazardous objects are removed from the environment, especially those that can be turned over by the robot, such as: candles, wires connected to electronics/appliances, fragile stands, etc. BATTERY &...
-
Page 7: Battery And Recharging Safety Instructions
6. Charging adapter is for indoors only. 7. SWERVE is only to be used with the power supply and adapters provided with the unit. Do not use or replace with any other substitute. -
Page 8: Swerve Overview
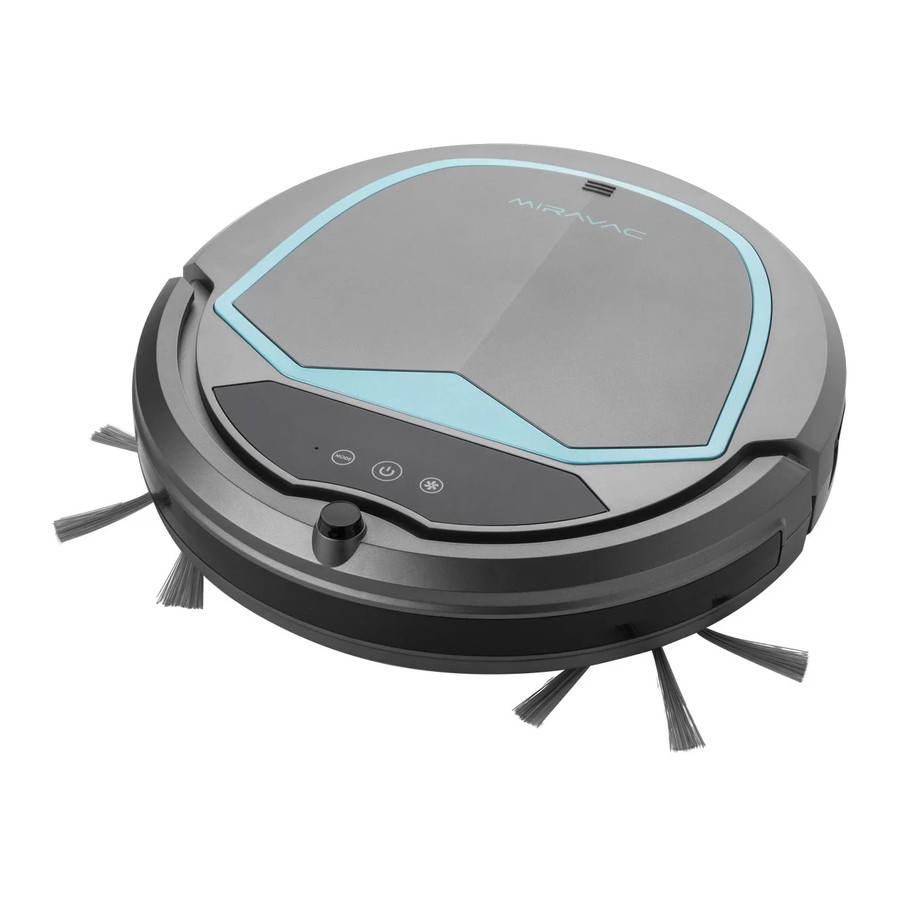
SWERVE OVERVIEW Congratulations on your new purchase of the SWERVE Robotic Vacuum Cleaner with Docking Station. This revolutionary vacuum cleaner is equipped with functions suitable for cleaning floors in homes and offices whether the surface is wood, tile, or linoleum. -
Page 9: Working Patterns
SWERVE is designed to analyze real-time surroundings to create and navigate the best working patterns to reach every angle and corner of your home. *Only available in Auto mode or can be selected using the Mode button on the SWERVE. Major Components and Attachments... - Page 10 SWERVE OVERVIEW IR Receiver (for Remote Control and Docking Station) Top Cover Control Panel Control Panel (Dust Bin inside) and LED Display Bumper Contact Plates for Power Switch Automatic Charging D.C. Jack...
- Page 11 SWERVE OVERVIEW Front Small Wheel Anti-Cliff Sensor Side Brush Side Brush Intake Valve Wheel Cover Left and Right Wheels Heat Vent Battery Cover...
-
Page 12: Installation Guide
INSTALLATION GUIDE INSTALLATION GUIDE INSTALLATION GUIDE Installing and Removing Side Brushes To install: Insert the brush directly into the holder as shown in Fig. 1 and press down until you hear a click. To remove: Hold two opposite sides of the brush, as shown in Fig. 2, then pull upward to remove the brush. -
Page 13: Installing And Removing Remote Control Battery
INSTALLATION GUIDE Installing and Removing Remote Control Battery Remove insulation sheet before use. 1. On the backside of the remote control, press position A (shown below) and pull out position B of the battery slot at the same time. 2. Place the battery with the (+) positive side facing up. 3. -
Page 14: Battery Installation And Removal
INSTALLATION GUIDE Battery Installation and Removal When installing or removing the battery, the power switch must be off. Removing the battery: Open the battery cover by pressing the two points “A” (marked in the below diagram) and slide the battery cover in the direction of arrow “B”. -
Page 15: Recharging Battery
The power switch must be turned on to charge. 2. There are two ways to charge the battery: A. One way is to connect the charging adapter directly to SWERVE. Insert the adapter’s plug into the D.C. jack on the side of the unit, then connect the A.C. -
Page 16: Testing The Docking Station
Testing the Docking Station Testing by Remote Control To test the docking station, turn on the power switch on SWERVE. Use the ( button to select “ “ (refer with page 23, table A) on control panel. The unit will go back to the docking station to recharge the battery. -
Page 17: Preparation Of Room Containment
INSTALLATION GUIDE Preparation of Room Containment Testing by Remote Control 1. Turn off the power switch on the room containment sensor. 2. On the back side of the sensor, slide open the cover (from point A to B) as shown in the diagram below. 3. -
Page 18: General Operation
SWERVE’s room containment sensor will act as an invisible wall and prevent SWERVE from crossing the designated containment area. To contain SWERVE within a designated cleaning area (A - shaded area) and to keep it from crossing to area B, put the Room Containment device in the position as shown in Fig. -
Page 19: Control Panel
GENERAL OPERATION To operate SWERVE without connecting to the docking station: 1. Place SWERVE on the floor and turn on the power switch, then press the Power/Time Selection Button (shown below) to operate, press again to stop. 2. When the battery is low, the unit is programmed to find the docking station automatically for recharging. -
Page 20: Remote Control
“ ” button for the unit to start cleaning. 4. While SWERVE is in operation, press any key on the remote control to change its settings or action immediately. 5. Function of buttons: See table on the next page. - Page 21 Turn right. Pressing and holding the right button makes it RIGHT turn right continuously. Stop/Start SWERVE immediately. STOP/START Move backward. NOTE: The unit does not have any anti-cliff BACKWARD sensor in the rear to prevent it from falling down stairs.
-
Page 22: Docking Station Control Panel
Full Go Button Indication on the Panel State Signal Function SWERVE is programmed to start cleaning as soon as the FULL GO Activated FULL GO with red light on unit is fully charged when button is pressed (red light on). -
Page 23: Basic Operation
GENERAL OPERATION Basic Operation Manual Work When LED Indicator light turns on. Check: Dust bin is full. Intake Valve is stuck with dirt. Wipe out the insider and outside of Intake Valve area. 1. Press ( ) power key to start. 2. - Page 24 2. The unit will stop when the wheels are jammed for more than 6~10 seconds. Other Function If SWERVE is not visible nearby: Clap loudly 3 times and SWERVE will Beep 3 times in response. If no beep response, please walk around and clap again until the beep sound response is heard.
-
Page 25: Select Working Time And Function
GENERAL OPERATION Select Working Time and Function Table A: “ “ Power/Time Selection Button Sequence of LED Display Function Presented Button Pressed Maximum working time with 1st Press “ “ LED is on “ “ LED is on docking function ON. (Note 2). 30 minutes working time with 2nd Press “... - Page 26 GENERAL OPERATION Table B: “ “ Mode Selection Button Sequence of Button LED Display Clean Mode Pressed 1st Press Spiral 2nd Press Along the Wall 3rd Press “Z” Type 4th Press Random 5th Press Auto Table C: “ “ Strength Selection Button Sequence of Button Fan Strength LED Display...
- Page 27 The bumper is stuck. obstacles. The unit will detect the error and fix automatically. The unit was lifted up Put SWERVE back on the floor. from the floor. Remove the cleaner from dark The unit is stuck. floor surfaces, cliffs, or stairs.
- Page 28 GENERAL OPERATION Table F: Buzz Buzz Represent Beep 1 Time Normal Beep 2 Times Invalid Beep 3 Times Error...
-
Page 29: Cleaning And Maintenance
CLEANING AND MAINTENANCE Maintaining SWERVE The operation and maintenance of the SWERVE is very simple. After each use, clean any dirt left behind in the dust bin and filter. It is not necessary to clean the intake after every use. - Page 30 CLEANING AND MAINTENANCE 3. Open the upper cover of the dust bin. Side Buckle 4. Lift up and take out the filter. 5. Throw away the dust and dirt from the dust bin.
- Page 31 CLEANING AND MAINTENANCE 6. Rinse the dust bin with tap water. It is not necessary to wash every time. Do not put it into the dishwasher. 7. Periodically clean the filter with a soft bristle brush. 8. Once dry, reinstall the filter and the dust bin lid. Side Buckle 9.
-
Page 32: Intake
CLEANING AND MAINTENANCE Intake Valve After repeated use, dirt and dust can accumulate around the intake of SWERVE and the work efficiency can be reduced. To ensure the best efficiency and constant airflow, the intake should be cleaned periodically. Intake Valve Side Brushes 1. -
Page 33: Roll Brush
Roll Brush After repeated use, dirt and dust can accumulate around the intake and Roll Brush of SWERVE and the working efficiency can be reduced. To ensure the best efficiency and constant airflow, the intake should be cleaned periodically. 1. After being used for a period of time, the Roll Brush need to be replaced for maximum efficiency. -
Page 34: Main Wheels
CLEANING AND MAINTENANCE Main Wheels Follow instructions below if wheels are jammed or if cleaning is needed. UNSCREW AND OPEN WHEEL COVER PRESS WHEEL DOWN, PULL COVER UP PULL WHEEL UP CLEAN WHEEL & COMPARTMENT SECURE GRAPPLING HOOK RETURN WHEEL TO COMPARTMENT Grappling Hook PRESS WHEEL DOWN, CLOSE COVER... -
Page 35: Troubleshooting
2. Avoid direct exposure to Remote control does control are exposed to sunlight. not work. sunlight or strong light. 3. Move SWERVE at least 3. Remote control will not 2 meters away from function if SWERVE is docking station. nearby docking station. - Page 36 Please refer to table D shows error. and Beep 2 times or 3 on page 25 to solve this times. problems. *** If the solutions shown here do not resolve your issue, please contact Miravac at service@miravac.com or (833) 647-2822 for service. ***...
Need help?
Do you have a question about the SWERVE and is the answer not in the manual?
Questions and answers