Table of Contents
Advertisement
Advertisement
Table of Contents

Related Manuals for Exodus Render 4G


Summary of Contents for Exodus Render 4G
- Page 2 THANKS! First and foremost… If you’re reading this, you bought the Render 4G, which means that you’ve supported us in our mission to build a better hunting industry company! We want to give you an extremely gracious and humble “thank you” for your business! In this manual, we’re going to go over everything you need to know to get the most out of your camera for many years to come.
- Page 3 706-407-4527 during normal business hours (Mon.- Fri. 10AM - 5PM EST). You can also reach out via email to support@scoutek.com. For more in-depth support, please reference our YouTube Channel, Exodus Trail Cameras and look for the Exodus Render Playlist. FCC ID -2APP9-RENDER4G Model # -4GV10018...
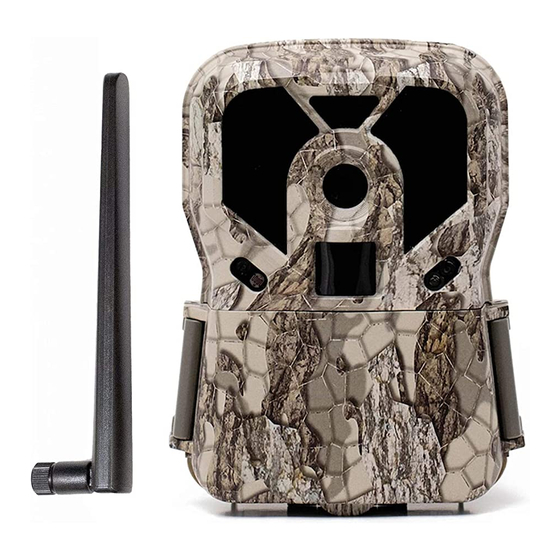
- Page 4 Wireless Antenna Antenna Threading LED IR Flash Unit Camera Lens PIR Sensor Indicator LEDs Menu Screen Menu Button Sim Card Slot Directional Keys Enter Button Battery Eject On/Off/Setup Button Toggle Switch...
- Page 5 Antenna Rubber Washer Door Lock 1/4 x 20 Mounting Adaptor Battery Housing External Power Port DC 12v 1a...
-
Page 6: Directional Keys
BUTTON FUNCTIONALITY/ NAVIGATION ON/OFF/SETUP SLIDER SWITCH: On sets the camera into the startup countdown. Off shuts the camera down. Setup turns the camera into preview/setup mode MENU KEY: Preview Mode: Opens the camera’s user menu of setting options (Setup Mode) Setup Mode: Cancel/Enter setting options and/or exit ... - Page 7 “click” into place. For additional battery life and extended field use of the device we recomomend adding our external power source product the Exodus SP18. 2. Insert SD card until you hear a slight click as it locks into place. Refer to the card symbol above the card slot for orientation.
- Page 8 “WIRELESS NETWORK” to “ON”. 6. Using the Scoutek mobile application or website activate the camera. For more details on this please read the Activating The Exodus Render portion of the user guide. 7. Pick a location and mount the camera via the included strap or a 3rd party mounting system.
- Page 9 8. When you are happy with the setup, slide the camera to the “ON” position. The camera will start a 30 second count down, upon completion a red and blue indicator light will blink on right side of the camera when armed. 9.
- Page 10 ACTIVATING THE EXODUS RENDER: Note: A Scoutek account is required to activate the device, receive photos/videos, and have OTA controls of the device. Cellular service/signal is required by the device if you want to have photos/videos delievered to your Scoutek account via mobile device or webportal.
- Page 11 REGISTER A CAMERA: Click the link to Register Camera. On your Render camera, make sure the batteries, SD card, SIM card and antenna are all installed properly and switch camera to Setup position. Press the Menu button and change the camera setting ...
- Page 12 ACTIVATE YOUR CAMERA: In Scoutek open the side menu on the left and select My Account. If this is the first time you have activated a camera be sure to select a Share Plan. Select a reasonable amount of data you expect your camera(s) to need.
-
Page 13: Mobile App
MOBILE APP CREATE A SCOUTEK ACCOUNT: Go to the Google Play Store or Apple App Store, search for “Scoutek” and install the app. Launch Scoutek and click Sign Up to create an account, or for an existing account enter your credentials and click Sign In. - Page 14 On the Register Camera screen in Scoutek, select either Automatic Registration or Manual Registration. For Automatic Registration, use your mobile device’s camera to capture the information displayed on your Render camera’s screen. Once the values have been captured and input into their corresponding fields, enter a camera name and click the Register Camera button.
- Page 15 Look in the Inactive Cameras section and select ACTIVATE for each camera you wish to activate. Once all cameras to be activated have been selected, click the Checkout button and follow each step of the checkout process. After the payment has been made it may take from 5 ...
-
Page 16: Menu Overview
The icons from left to right indicate MODE, IMAGE SIZE, CELLULAR SIGNAL STRENGTH, UPLOADING/DOWNLOADING STATUS, PHOTOS TAKEN/ CAPACITY (SD card). To cycle through the Render 4G’s menu options use keys. To change menu options press enter to select menu ... -
Page 17: Menu Settings Overview
MENU SETTINGS OVERVIEW: WIRLESS NETWORK CAMERA INFO IMEI Model SimID Reg Code UPLOAD INTERVAL Real Time 12hr 24hr MODE Photo Video Time Lapse Hybrid SET CLOCK TIME DATE NATIVE IMAGE SIZE 12MP BURST COUNT 1-9 Photos VIDEO SIZE 1280x720 1920x1080 640x360 30 FPS 30 FPS... - Page 18 VIDEO LENGTH 5s-90s Dynamic TIME FORMAT 12 Hour 24 Hour TRIGGER DELAY 15 sec - 59min 59 sec TRIGGER SENSITIVITY High IR FLASH RANGE High TIME LAPSE PIR TIME LAPSE Hour OPERATING HOURS TIME STAMP...
- Page 19 TEMPERATURE Fahrenheit Celsius FREQUENCY 50 Hz 60 Hz CAMERA NAME 1 - 13 Characters PASSWORD ENABLE 5 Numbers COORDINATES Latitude ° ‘ “ Longitude ° ‘ “ FORMAT DEFAULT SET FIRMWARE Version Update...
-
Page 20: Wireless Network
WIRELESS NETWORK: Allows users to enable the cellular capabilities of the camera. Selecting the “ON” option allows the camera to be active over cellular networks and must be in this position to activate. The “OFF” option essentially allows you to use the device without the celluar capabilities. -
Page 21: Set Clock
In time lapse mode the camera will take a series of photos at a programmed specified interval throughout the day. As in all Exodus Trail Cameras, you also have the ability to leave the PIR sensor on to capture images inbetween specified time lapse intervals. -
Page 22: Burst Count
BURST COUNT: This is the photo burst selection. You can set the camera to take between 1 and 9 photos per trigger event while in photo mode. VIDEO SIZE: When the Wireless Network setting is turned ON, the camera will only record in 640x360 at 30 fps. When the Wireless Network setting is turned off, there are two options, 1280x 720 30FPS or 1920x1080 30FPS. -
Page 23: Trigger Sensitivity
TRIGGER SENSITIVITY: This option allows you to adjust the distance/sensitivity of the detection circuit. NOTE: This setting should remain on high except for specific use cases that require less PIR trigger events. IR FLASH RANGE: This option allows you to adjust the Flash distance/intensity. NOTE: This should remain on high for optimal night time photos/videos. -
Page 24: Camera Name
TIME STAMP: This is the info strip at the bottom of each photo/video. In this section you can either turn the strip on or off. TEMPERATURE: This menu option gives you the ability to change from Celsius to Fahrenheit. This data is shown on the info strip at the bottom of each photo/video. - Page 25 SD card. Manual FW updates are not recommended for this camera. Any damage or malfuction associated with manual FW updates will not be covered under warranty, any maintenance/repairs performed by Exodus will be subject to a service fee. Updates should be done with OTA commands when applicable.
-
Page 26: Removing The Sd Card
RETRIEVING DATA AND VIEWING IMAGES REMOVING THE SD CARD: Remove the SD card from the camera. IT IS IMPORTANT TO NOTE THAT YOU MUST TURN THE CAMERA OFF BEFORE REMOVING THE CARD. Once you remove the card you can insert it into an SD card slot on a laptop, tablet, or pc and download the pictures. -
Page 27: Registering Your Warranty
THE EXODUS WARRANTY REGISTERING YOUR WARRANTY: Inside the packaging of your camera, you received a warranty registration card with detailed instructions. Your camera must be registered within the first 30 days of purchase for the warranty to be valid. We can not offer exceptions to this policy. -
Page 28: Warranty Exclusions
However, most of this is covered by our 5-yr theft / accidental damage policy. You can read the entire Exodus warranty policy and theft/accidental damage replacement policy at www.exodusoutdoorgear.com/warranty-policy... - Page 29 FOR EXTERNAL BATTERIES: The Render 4G is designed for use with our external power product the SP18. For additional information on the SP18 please visit our website.
-
Page 30: Sim Card Requirements
SD CARD REQUIREMENTS: The Render 4G will work with all major American SD card brands. The maximum size is 64GB and we recommend a class 4 or higher card for higher resolution photos and video. - Page 31 LEARN MORE ABOUT www.exodusoutdoorgear.com @ExodusOutdoorGear @ExodusTrailCameras @ExodusTrailCameras TRAIL CAM RADIO...
- Page 32 FCC STATEMENTS: Note: Changes and modifications not expressly approved by the party responsible could void the user’s authority to operate this device. This device complies with Part 15 of the FCC Rules. Operation is subject to the following two conditions: (1) This device may not cause harmful interference, and (2) this device must accept any interference received, including interference that may cause undesired operation.
Need help?
Do you have a question about the Render 4G and is the answer not in the manual?
Questions and answers