Table of Contents
Advertisement
Quick Links
Advertisement
Table of Contents

Subscribe to Our Youtube Channel
Related Manuals for Blaupunkt AP-5DA45450AU


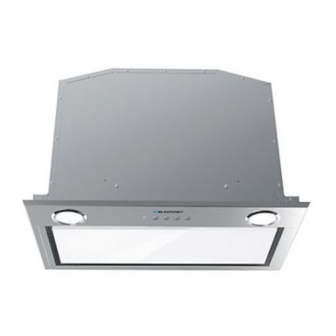
Summary of Contents for Blaupunkt AP-5DA45450AU
- Page 1 Instructions Manual...
- Page 2 INDEX RECOMMENDATIONS AND SUGGESTIONS ........................CHARACTERISTICS ................................INSTALLATION..................................USE ...................................... MAINTENANCE ...................................
-
Page 3: Recommendations And Suggestions
RECOMMENDATIONS AND SUGGESTIONS The Instructions for Use apply to several versions of this appliance. Accordingly, you may find descriptions of individual features that do not apply to your specific appliance. INSTALLATION • The manufacturer will not be held liable for any damages resulting from incorrect or improper installation. - Page 4 • If the instructions for installation for the gas hob specify a greater distance specified above, this has to be taken into account. Regulations concerning the discharge of air have to be fulfilled. • Use only screws and small parts in support of the hood. Warning: Failure to install the screws or fixing device in accordance with these instructions may result in electrical hazards.
-
Page 5: Maintenance
• “CAUTION: Accessible parts may become hot when used with cooking appliances.” MAINTENANCE • Switch off or unplug the appliance from the mains supply before carrying out any maintenance work. • Clean and/or replace the Filters after the specified time period (Fire hazard). •... - Page 6 CHARACTERISTICS Dimensions Components Ref. Q.ty Product Components Hood Body, complete with :Controls, Light, Blower, Filters Frame Directioned grid Reducer Flange ø 150-120 mm Damper ø 150 mm Ref. Q.ty Installation Components Screws Screws 2,9 x 9,5 Screws 2,9 x 6,5 Q.ty Documentation Instruction Manual...
- Page 7 INSTALLATION Fitting the Hood canopy BEFORE FITTING THE HOOD TO THE WALL UNIT, PROCEED AS FOLLOWS: • Disconnect the wires to the Commands at the connectors. • Disconnect the wires to the Light at the con- nectors. • The Hood can be installed directly on the underside of the wall unit (Minimum 650 mm from the Cooker Hob).
-
Page 8: Recirculation Version Air Outlet
Connections DUCTED VERSION AIR EXHAUST SYSTEM When installing the ducted version, connect the hood to the chimney using either a flexible or rigid pipe ø 150 or 120 mm, the choice of which is left to the installer. • To install a ø 120 mm air exhaust connection, insert the reducer flange 9 on the hood body outlet. - Page 9 Control panel BUTTON FUNCTIONS T1 Speed Turns the Motor on at Speed one. Turns the Motor off. T2 Speed Turns the Motor on at Speed two. T3 Speed Fixed When pressed briefly, turns the Motor on at Speed three. Flashing Pressed for 2 Seconds.
-
Page 10: Remote Control (Optional)
MAINTENANCE REMOTE CONTROL (OPTIONAL) The appliance can be controlled using a remote control powered by a 1.5 V carbon-zinc alkaline batteries of the standard LR03- AAA type (not included). • Do not place the remote control near to heat sources. •... - Page 11 Activated Charcoal Filter (Recirculation Version) This cannot be washed or regenerated, and must be changed when led S1 starts to flash, or at least once every 4 months. The Alarm signal, if it has been activated, only appears when the Suction motor is turned on.
- Page 12 Service 1800 252 878 658 www.blaupunkt-einbaugeraete.com Australia CustomerCare@blaupunktAU.com...
Need help?
Do you have a question about the AP-5DA45450AU and is the answer not in the manual?
Questions and answers