Table of Contents
Advertisement
Available languages
Available languages
Quick Links
™
Cequent
Performance Products, Inc.
Website: www.cequentgroup.com
Technical Assistance: 800-632-3290
TechnicalSupport@cequentgroup.com
To prevent SERIOUS INJURY, DEATH or PROPERTY DAMAGE:
•
ALWAYS read, understand and follow warnings and instructions
for your hitch BEFORE installation. Keep for future reference.
•
DO NOT cut, weld or modify this receiver.
•
CHECK all fasteners are tight and your hitch is securely mounted
to your vehicle periodically.
•
ALWAYS read, understand and follow all warnings and
instructions for your vehicle and for other accessories you will use
with your hitch BEFORE use.
•
LOAD the trailer heavier in front.
•
DO NOT exceed lower of towing vehicle manufacturer's rating or:
Hitch Type
Max Gross Trailer
Weight Carrying
3500 lb. (1589 kg)
Weight Distributing
•
ALWAYS wear your seatbelt.
•
SLOW DOWN when towing, NEVER exceed any posted speed limit.
•
If EXCESS SWAY occurs, take your foot off the gas pedal and hold
the steering wheel as steady as possible. DO NOT apply your
brakes and DO NOT speed up.
©2016 Cequent™ Performance Products, Inc. - Printed in Mexico
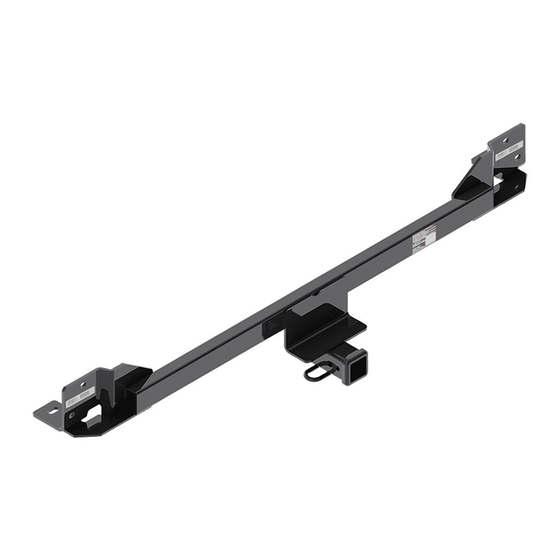
Installation Instructions
PART NUMBERS: 76025, 84025
Max Tongue
Weight
Weight
525 lb. (238 kg)
N/A
N/A
LIMITED LIFETIME WARRANTY
Limited Lifetime Warranty ("Warranty"). Cequent Performance Products, Inc. ("We",
1.
"Us" or "Our") warrants to the original consumer purchaser only ("You" or "Your") that the
product will be free from material defects in both material and workmanship, ordinary wear
and tear excepted. The Warranty is valid only if (a) the products are returned to Us for
inspection and testing; (b) Our inspection discloses to Our satisfaction that any alleged
nonconformance are material and have not been caused by misuse, neglect, wear and tear,
improper installation, unsuitable storage, improper repair, alteration, or accident; and (c) the
products were installed, maintained and used in accordance with Our instructions. THE
WARRANTY IS MADE IN LIEU OF ALL OTHER WARRANTIES, EXPRESS OR
IMPLIED (OTHER THAN THE WARRANTY OF TITLE AS PROVIDED BY THE
UNIFORM COMMERCIAL CODE IN EFFECT IN MICHIGAN), INCLUDING
WITHOUT LIMITATION, ANY WARRANTIES OF MERCHANTABILITY OR FITNESS
FOR A PARTICULAR PURPOSE, SAID WARRANTIES BEING EXPRESSLY
DISCLAIMED.
2.
Obligations of Purchaser. To make a Warranty claim, contact Us at our principal address of
47912 Halyard Drive, Suite 100, Plymouth, MI 48170, 1-800-632-3290, identify the product
by model number, and follow the claim instructions that will be provided. Any returned
product that is replaced by Us becomes our property. You may be responsible for return
shipping costs. Please retain your purchase receipt to verify date of purchase and that You
are the original consumer purchaser. The product and the purchase receipt must be provided
to Us in order to process Your Warranty claim.
3.
Exclusive Remedy. Product replacement is Your sole and exclusive remedy under this
Warranty. We shall not be liable for service or labor charges incurred in removing or
replacing a product. IN NO EVENT WILL WE BE RESPONSIBLE FOR ANY INDIRECT,
SPECIAL, CONSEQUENTIAL OR PUNITIVE DAMAGES.
4.
Assumption of Risk. You acknowledge and agree that any use of the product for any
purpose other than the specified use(s) stated in the product instructions is at Your own risk.
5.
Governing Law. This Warranty gives You specific legal rights, and You also may have
other rights which vary from state to state. This Warranty is governed by the laws of the
State of Michigan, without regard to rules pertaining to conflicts of law. The state courts
located in Oakland County, Michigan shall have exclusive jurisdiction for any disputes
relating to this Warranty.
Rev 9/2014
Sheet 1 of 18
Scan for safe
towing tip, or visit
http://www.ceque
ntgroup.com/qr-
product.aspx
76025NP
03-31-17
Rev. C
Advertisement
Table of Contents

Subscribe to Our Youtube Channel
Related Manuals for Cequent Performance Products 76025


Summary of Contents for Cequent Performance Products 76025
- Page 1 TechnicalSupport@cequentgroup.com LIMITED LIFETIME WARRANTY Limited Lifetime Warranty (“Warranty”). Cequent Performance Products, Inc. ("We", “Us” or “Our”) warrants to the original consumer purchaser only ("You" or “Your”) that the To prevent SERIOUS INJURY, DEATH or PROPERTY DAMAGE: product will be free from material defects in both material and workmanship, ordinary wear •...
-
Page 2: Installation Instructions
™ Cequent Performance Products, Inc. Installation Instructions Website: www.cequentgroup.com PART NUMBERS: 76025, 84025 Technical Assistance: 800-632-3290 TechnicalSupport@cequentgroup.com Applications: Installation Time: 80 min Years Make Models The time listed above is the average time for professional installers. If you do not... - Page 3 Fastener Kit: 76025F Always wear SAFETY GLASSES Installation Instructions when installing hitch ① Qty. (4) Flat Washer PART NUMBERS: 76025, 84025 1/2‘’ ② Qty. (2) Spacer Block .375 x 1.50 x 3.00 ③ Qty. (2) Bolt M12 1.25 x 45, CL8.8 ②...
- Page 4 Installation Instructions when installing hitch PART NUMBERS: 76025, 84025 1. Appearance bottom panel and mud flap removal - use phillips screwdriver, panel removal tool, and 10 mm socket to remove (3) rivets, and (2) bolts from bottom panel on driver side. Remove the mud flap each side if present. Keep the bottom panel and mud flaps for reinstallation.
- Page 5 1.Appearance bottom panel and mud flap removal - use phillips screwdriver, panel removal tool, and 10 mm socket to remove (3) rivets, and (2) bolts from bottom panel on driver side. Remove the mud flap each side if present. Keep the bottom panel and mud flaps for reinstallation.
- Page 6 3. Bumper beam removal - use 14 mm socket to remove (4) factory bolts from bumper beam and return them to customer. Carefully set the bumper beam aside for reinstallation. 4. Hitch installation – tape (4) flat washers ① on the end panel where the holes locate, see Figure 1.
-
Page 7: Instructions D'installation
GARANTIE À VIE LIMITÉE Garantie à vie limitée (« Garantie »). Cequent Performance Products, Inc. (« Nous », « Notre ») garantit à l’acheteur initial seulement (« Vous », « Votre ») que le produit sera Pour prévenir les blessures SÉVÈRES, FATALES ou les DOMMAGES exempt de vices de matières et de fabrication, exception faite de l’usure normale. - Page 8 ™ Cequent Performance Products, Inc. Instructions d’installation Site Internet: www.cequentgroup.com NUMÉROS DE PIÈCES : 76025, 84025 Assistance technique: 800-632-3290 TechnicalSupport@cequentgroup.com Applications : Durée de l'installation : 80min Années Marque Modèles La valeur indiquée ci-dessus est la durée moyenne des installeurs professionnels.
- Page 9 Visserie: 76025F Toujours porter des LUNETTES DE PROTECTION Instructions d’installation lors de l'installation de l'attelage. ① Qté (4) Rondelle plate NUMÉROS DE PIÈCE : 76025, 84025 1/2‘’ ② Qté (2) Bloc espaceur .375 x 1.50 x 3.00 ③ Qté (2) Boulon M12 ②...
- Page 10 Instructions d’installation lors de l'installation de l'attelage. NUMÉROS DE PIÈCE : 76025, 84025 1. Enlèvement du panneau décoratif inférieur et du garde-boue - Utiliser un tournevis à tête étoilée, un écarteur de panneau et une douille 10 mm pour retirer trois (3) rivets et deux (2) boulons du panneau inférieur côté...
- Page 11 1. Enlèvement du panneau décoratif inférieur et du garde-boue - Utiliser un tournevis à tête étoilée, un écarteur de panneau et une douille 10 mm pour retirer trois (3) rivets et deux (2) boulons du panneau inférieur côté conducteur. Enlever le garde-boue de chaque côté s'il est présent. Conserver le panneau inférieur et les garde-boue pour réinstallation. 2.
- Page 12 3. Enlèvement de la poutre de pare-chocs - Utiliser une douille 14 mm pour retirer quatre (4) boulons d'usine de la poutre de pare-chocs et remettez-les au client. Mettre avec précaution la poutre de pare-chocs de côté pour réinstallation. 4. Installation de l'attelage – Fixer avec du ruban quatre (4) rondelles plates ① sur le panneau d'extrémité...
-
Page 13: Instrucciones De Instalación
Cequent Performance Products, Inc. Instrucciones de instalación de remolque seguro, o visite Sitio web: www.cequentgroup.com http://www.cequentgr NÚMEROS DE PARTES: 76025, 84025 Assistance técnica: 800-632-3290 oup.com/qr- TechnicalSupport@cequentgroup.com product.aspx GARANTÍA LIMITADA DE POR VIDA Garantía limitada de por vida ("Garantía") Cequent Performance Products, Inc. -
Page 14: Equipo Necesario
™ Cequent Performance Products, Inc. Instrucciones de instalación Sitio web: www.cequentgroup.com NÚMEROS DE PARTES: 76025, 84025 Assistance técnica: 800-632-3290 TechnicalSupport@cequentgroup.com Aplicaciones: Tiempo de instalación: 80 min Años Marca Modelos El tiempo indicado anteriormente es el tiempo promedio para instaladores 2016-2016*... - Page 15 Siempre usar GAFAS DE SEGURIDAD Instrucciones de instalación Kit de fijadores: 76025F al instalar el enganche ① Cant. (4) Arandela plana NÚMEROS DE PARTE: 76025, 84025 1/2" ② Cant. (2) Bloque espaciador .375 x 1.50” x 3.00 ② ③ Cant. (2) Perno M12 1.25 x 45, CL8.8...
- Page 16 Instrucciones de instalación SEGURIDAD al instalar el enganche NÚMEROS DE PARTE: 76025, 84025 1. Eliminación del panel inferior de apariencia y de las solapas de barro: Usar un destornillador de estrella, herramienta de eliminación de paneles y una llave de 10 mm para retirar (3) remaches y (2) pernos del panel inferior en el lado del conductor.
- Page 17 1. Eliminación del panel inferior de apariencia y de las solapas de barro: Usar un destornillador de estrella, herramienta de eliminación de paneles y una llave de 10 mm para retirar (3) remaches y (2) pernos del panel inferior en el lado del conductor. Retirar la solapa de barro en cada lado si está...
- Page 18 3. Eliminación del travesaño del parachoques: Usar la llave de 14 mm para retirar (4) pernos de fábrica del travesaño del parachoques y devolverlos al cliente. Con cuidado, colocar el travesaño del parachoques a un lado para reinstalación. 4. Instalación del enganche: Pegar (4) arandelas planas ① en el panel lateral, donde se encuentran los orificios, ver la Figura 1.
Need help?
Do you have a question about the 76025 and is the answer not in the manual?
Questions and answers