Advertisement
WATER CHILLERS
®
INSTRUCTION MANUAL
1/2
1/4
HP
1/10
HP
HP
Thank you for purchasing an EcoPlus
Water Chiller!
®
To get the most out of your chiller and enjoy safe, reliable operation, please thoroughly read
and understand this Instruction Manual before operating. Please keep it for future reference.
IMPORTANT: After unpacking (or accidental tipover)
allow chiller to stand upright for 20 minutes before starting.
Contents
Safety Information................................................................ 1
Features ................................................................................. 2
Installation..........................................................................4-5
Operation ............................................................................... 6
Cleaning & Storage.............................................................. 7
Troubleshooting .................................................................... 8
Parts List & Wiring Diagram.............................................. 9
Limited Warranty................................................................ 10
Advertisement
Table of Contents

Related Manuals for Ecoplus 1/10 HP

Summary of Contents for Ecoplus 1/10 HP
-
Page 1: Table Of Contents
WATER CHILLERS ® INSTRUCTION MANUAL 1/10 Thank you for purchasing an EcoPlus Water Chiller! ® To get the most out of your chiller and enjoy safe, reliable operation, please thoroughly read and understand this Instruction Manual before operating. Please keep it for future reference. -
Page 2: Safety Information
Safety Information To prevent injury to user, others and/or property damage, the following safety instructions must be followed. Ignoring these instructions may cause harm or damage due to faulty operation. Seriousness is indicated by the following symbols: CAUTION WARNING! Possible death or serious injury. Possible injury or property damage. -
Page 3: Features
2. Performance tests were done with an ambient room temperature of 86˚F (30˚C), water temperature (before refrigeration) of 82˚F (28˚C), and a total water volume of 42 gallons (160L) with 1/10 HP model; 80 gallons (300L) with 1/4 HP model;... - Page 4 PERFORMANCE CURVES Models: 1/10 HP & 1/4 HP Ambient Temperature: 86˚F (30˚C) Water Temperature (before refrigeration): 82˚F (28˚C) Total Water Volume: 1/10 HP – 42 Gal. (160L), 1/4 HP – 80 Gal. (300L) ˚F / ˚C 86.0 / 30 84.2 / 29 82.4 / 28...
-
Page 5: Installation
Installation UNPACKING THE CHILLER Please DO NOT dispose of any packaging until you have checked that all parts are included and the chiller is operational. In the unlikely event of missing parts or damage, contact the retailer where you purchased the unit immediately. Do not leave children unattended with the chiller or packaging. - Page 6 Max. Reservoir Volume Rate of Circulation – Pump Size Model Gallons (Liters) Gallons Per Hour (Liters Per Hour) 1/10 HP 42 (160) 66 - 317 GPH (250 - 1200 LPH) 1/4 HP 80 (300) 264 - 660 GPH (1000 - 2500 LPH)
-
Page 7: Operation
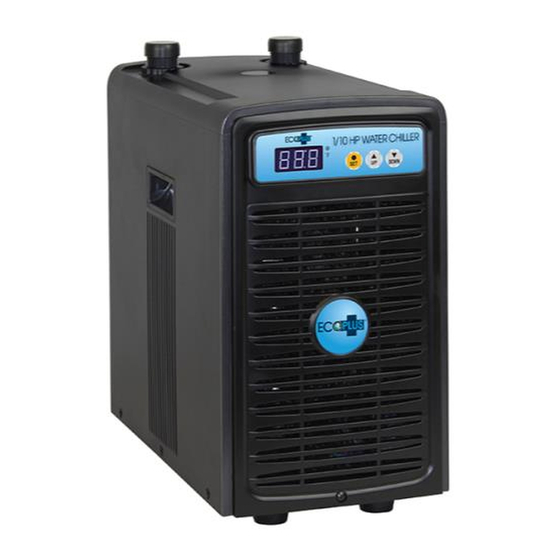
Operation USING THE DIGITAL CONTROL PANEL “Cooling” Indicator Light DOWN 3-Digit Temperature Display Temperature Adjustment Buttons Setting Water Temperature: To enter a temperature setting, press the SET button and hold for more than 3 seconds. The previously set temperature will appear on the display. Press the UP or DOWN key to enter a new temperature setting from 37-90˚F (3-32˚C). -
Page 8: Cleaning & Storage
Cleaning & Storage CLEANING THE CHILLER Always make sure unit is unplugged before performing any cleaning! For safe, efficient operation and long service life, it is essential to regularly clean the chiller and all hoses, connections and other components in the system in which it is installed. Thorough cleaning is recommended every 1-2 months, including: •... -
Page 9: Troubleshooting
Troubleshooting Before calling service, check the troubleshooting chart below for solutions to the most common problems. SOLUTION Chiller doesn’t run Not plugged all the way in Display is blank Fuse has blown Change fuse Connected to wrong voltage and frequency Chiller keeps turning itself Protection device... -
Page 10: Parts List & Wiring Diagram
6. Housing 7. Handle 8. Condenser 9. Fan 10. Compressor 11. Base 12. Power Switch 13. Power Input 14. Fuse 15. Water Temp. Sensor 16. Water Tank 17. Intake Air Filter 18. Front Cover 1/10 HP Model Shown WIRING DIAGRAM... -
Page 11: Limited Warranty
Limited Warranty Sunlight Supply, Inc. One-Year Limited Warranty: The EcoPlus Chiller covered in this manual is ® ® warranted under normal use for one year after purchase date. Any part determined defective in material or workmanship can be returned to an authorized service location designated by Sunlight Supply, shipping prepaid, and will be repaired or replaced at the option of Sunlight Supply. - Page 12 PLEASE BE RESPONSIBLE DO NOT dispose of this product in the trash, on the landscape or into any unsorted waste stream! It may contain hazardous substances that can leach into groundwater and find their way into the food chain. This unit contains VALUABLE RESOURCES that are easy to recycle and re-use.
Need help?
Do you have a question about the 1/10 HP and is the answer not in the manual?
Questions and answers
how do I replace the water temp sensor ? what is the part number for temp sensor 1/4 hp model?
@Shaun T Davis the machine works fine but after storing for a while it just reads 104 on the screen. continuously cooling