
Related Manuals for SmartAV Tango Series

Summary of Contents for SmartAV Tango Series
- Page 1 Install Guide For Tango Series Smart Consoles (Logic Pro 8) Revision 1.1 Date 4th Aug 2008...
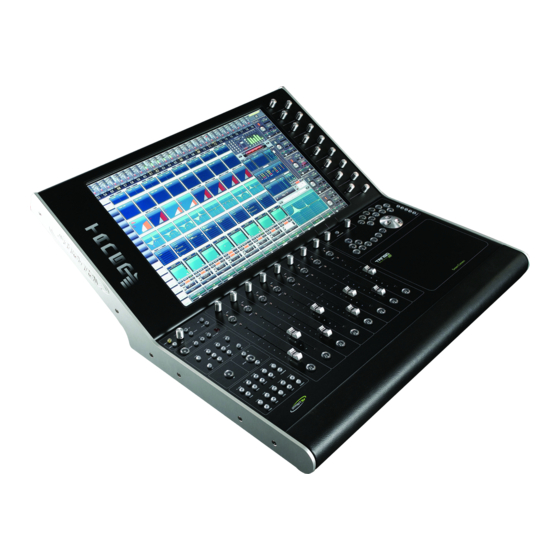
- Page 2 INTRODUCTION Welcome to Tango! Tango is a unique console – a mix of tradition and new ideas. A console intended not just for mixing but also for every aspect of audio production. The chapters below will guide you through the process of setting up your Tango console, connecting it to your DAW and configuring your DAW to provide the most seamless integration with your console.
-
Page 3: Table Of Contents
TABLE OF CONTENTS POWER CONNECTION ................... 4 SWITCHING POWER ON/OFF ................ 5 NETWORK CONNECTIONS................6 DOWNLOAD SOFTWARE................8 UPGRADING TANGO SOFTWARE .............. 10 DAW SETUP – LOGIC ................... 12 VIRTUAL KEYBOARD SETUP..............17 Install Guide – Tango Smart Console (Logic) Page 3... -
Page 4: Power Connection
POWER CONNECTION IMPORTANT: To ensure the correct operation of the touch sensitive controls of Tango the mains supply connection MUST include an earth connection. Tango is connected to the mains via an external power supply (PSU) which is included with the console. This power supply is suitable for use with mains voltages of 100 –... -
Page 5: Switching Power On/Off
SWITCHING POWER ON/OFF Tango is switched on via the power on button and switched off via the “Shutdown” menu command on the touchscreen. Power down should always be done via the “Shutdown” menu to ensure the software is safely closed before power down. To switch the power on press the “Power On”... -
Page 6: Network Connections
NETWORK CONNECTIONS Tango connects to your DAW computer via Ethernet. This connection can be either direct or via an existing network. Some simple network setup will be required to initiate communications between the 2 devices. If connecting Tango directly to your DAW computer, you will need to use a CAT5 cross-over cable (a CAT5 cross-over cable is supplied with Tango). - Page 7 • Use the Active Button below the display to disable DHCP. (Select “Enable” if you wish to use DHCP to assign the consoles IP address.) • Adjust the IP address using the encoders down the RHS of the display. The digit of the IP address to be adjusted by each encoder is labelled on the display.
-
Page 8: Download Software
receive a “timeout” message, you have a network problem. You need to rectify this problem before proceeding. REPLY FROM TANGO IMPORTANT: On a Mac: Please ensure that the firewall on your DAW computer does not have “Stealth Mode” enabled as it interferes with the connection of Tango and your DAW audio application. - Page 9 TANGO SOFTWARE VERSION To download the console software from the Smart AV website, proceed as follows:- • Go to the website www.smartav.net • Select “Downloads” and then “Software” from the menus • Locate the directory for the latest release of software •...
-
Page 10: Upgrading Tango Software
o SmartAVLogicSetupXXX-YYY o VirtKeySetup XXX YYY where XXX is the software version and YYY is the release date. • Copy all the downloaded software onto a USB memory stick. IMPORTANT: The various software applications running on Tango and your DAW operate as a set. - Page 11 FILES AVAILABLE FOR IMPORT IMPORT CONFIRM • Use the active knob below the screen to select the version of software you want to install (the one you just imported). • Once selected press the “Install” button. • Press “Proceed” to initiate the software upgrade. This will take a few seconds. SELECT FILE PROCEED INSTALL...
-
Page 12: Daw Setup - Logic
SELECT LOGIC RESTART DAW SETUP – LOGIC In order for Tango to communicate with Logic, you need to install a number of modules into Logic. This section takes you through the steps necessary to either install the modules for the first time or install a newer version of the modules. The latest revision of these modules was downloaded from the Smart AV website and placed on a memory stick in the section above. - Page 13 SELECT ANY EXISTING CONTROLLERS APPEARING HERE • Click “OK” to confirm the delete. • Exit Logic Pro. • Copy the file named SmartAVLogicSetupxxxxx.dmg onto your desktop. The xxx represents the release version and date. • Double click on the .dmg file. The Mac will now open this file and show an icon called “SmartAVLogicInstaller.mpkg”.
- Page 14 SMART CONSOLE PLUG-INS CLICK ADD • Click “Add”. Large numbers of channels will take longer to install so this step may take several minutes to complete. • Once complete ensure the Smart Console Module is displayed in the Setup window (as shown below). NEW MODULE ADDED IMPORTANT: For optimum performance, Smart AV recommends that no other...
- Page 15 • Change the “Out Port” and “Input” in the setup window to be “SAV Logic”. To do this click on the Up/Down arrow and select “SAV Logic” from the list that appears. OUT PORT & INPUT • From the menu select Logic Pro -> Preferences -> Control Surfaces -> Preferences.
- Page 16 SET TO 1 UNCHECK To point Tango to the IP address of your DAW, proceed as follows:- • Select the “System” menu tab on the LHS of the Tango display. • Select “Configure” from the system menu and then select “Engine”. •...
-
Page 17: Virtual Keyboard Setup
• Select “Save” to save the setting. Tango should now be connected to Logic. VIRTUAL KEYBOARD SETUP Tango contains a virtual keyboard that allows you to name tracks and perform other text entry functions from your console without the need for a separate keyboard. In order to setup this function you must install the Smart AV Virtual Keyboard application on you DAW. - Page 18 TANGO IP ADDRESS CONNECT STATUS BAR Install Guide – Tango Smart Console (Logic) Page 18...
Need help?
Do you have a question about the Tango Series and is the answer not in the manual?
Questions and answers