Table of Contents
Advertisement
Advertisement
Table of Contents

Summary of Contents for AhnLab TrusGuard
-
Page 2: Preface
Manufacturer/Country: AhnLab, Inc./Korea Limited Warranty AhnLab, Inc. warrants that for a period of 12 months from the original purchase of the Product, the Hardware Device will be free from defects in materials and workmanship under normal and authorized use, and the Software will substantially conform to its published specifications). -
Page 3: Table Of Contents
Checklist ..................................8 Safety Precautions ..............................9 Installation Environment ............................. 11 Security Checklist ..............................13 Chapter2 AhnLab TrusGuard Overview................15 Introduction ................................16 TrusGuard System Specifications ........................21 Compatibility ................................40 Chapter3 Installation......................41 Overview ................................... 42 Before Installation ..............................44 System Settings ..............................46 Initial Login ................................ - Page 4 TrusGuard SSL VPN Client ..........................106 Installation and Login ..........................106 Manage Certificate ............................111 SSL VPN Client Status Icon ........................113 Remove TrusGuard SSL VPN Client ......................114 TrusGuard Auth ..............................115 Chapter5 Remove Device ....................119 Remove Device ..............................120 4 AhnLab TrusGuard Installation Guide...
-
Page 5: Chapter1 Before You Start
Chapter1 Before You Start Technical Support /6 About This Guide /7 Checklist /8 Safety Precautions /9 Installation Environment /11 Security Checklist /13... -
Page 6: Technical Support
AhnLab provides consulting services on the method to use products and various questions you might have, such as program errors. These are provided by the AhnLab Technical Support Center and its website. Please check the following prior to requesting consulting service to ensure fast and accurate troubleshooting. -
Page 7: About This Guide
About This Guide Purpose Thank you for using AhnLab TrusGuard. This guide is to provide you with useful information to successfully install, configure, and administer AhnLab TrusGuard. Audience This guide is mainly for administrators and engineers who understand TCP/IP and network protocol. It also includes instructions on some basic features for the general user. -
Page 8: Checklist
Authenticity Check Check that the product is authentic. Check that AhnLab Software License is in a sealed package. If you purchase multiple products from one site, you may be provided with one AhnLab Software License only. Check that the CD is in a sealed package, and the security sticker is not damaged or missing ... -
Page 9: Safety Precautions
Safety Precautions Power This safety guide applies to all products connected to a power outlet. The following safety precautions should always be strictly practiced to reduce the risk of fire, electric shock and injury. Only use use voltage in the range of 100 to 220 volts. 220V is recommended. The power must be ground-fixable. - Page 10 Precautions Do not use the device near any heat source. Only use parts that have been provided by AhnLab. Keep the work environment clean. Make sure that the device does not get wet. Do not expose the device to rain or moisture as it may damage the device and also cause electric shock.
-
Page 11: Installation Environment
Installation Environment Before installing the device, ensure your installation site meets all the following requirements. Temperature A wide change in temperature will shorten the lifespan of the device. The optimal temperature range is 5 to 35 degrees Celcius. Ensure there is adequate air flow to get hot air out. - Page 12 It is highly recommended to use a UPS (Uninterruptible Power Supply) with your device for continuously operation. If there are two power input ports in your device, plug the power cables into two different power outlets. 12 AhnLab TrusGuard Installation Guide...
-
Page 13: Security Checklist
Keep the device secure by meeting the following security policies. Unique Connection Point If TrusGuard is installed and used on a network, the network must be divided into external and internal ones. All communications between the two networks must be conducted via TrusGuard only. - Page 14 An administrator must have no malicious intent and be properly trained, and perform his/her duty in accordance with the administrator guideline. Trusted Timestamp The device must have a trusted time stamp (provided by the NTP server) that conforms to RFC 1305. 14 AhnLab TrusGuard Installation Guide...
-
Page 15: Chapter2 Ahnlab Trusguard Overview
Chapter2 AhnLab TrusGuard Overview Introduction /16 TrusGuard System Specifications /21 Compatibility /40... -
Page 16: Introduction
AhnLab TrusGuard is Korea’s first integrated network security solution. It was first launched in 2007 and now has more than 5,000 users. It is built on an advanced platform known as the AhnLab Technology for Enhanced Algorithm for Multi-core (A-TEAM). A-TEAM is a unique, next-generation architecture that combines software-accelerated processing with an optimal multi-core distribution processing technology. - Page 17 Flexible & Secure VPN Network AhnLab TrusGuard supports both IPSec VPN and SSL VPN, and interoperates with IPS to prevent malware propagation via VPN tunnel. Chapter2 AhnLab TrusGuard Overview 17...
- Page 18 Proactive & Comprehensive Defense AhnLab TrusGuard provides strong ACCESS based integrated security. ACCESS proactively protects systems from zero-day attacks and unknown attacks in real-time. 18 AhnLab TrusGuard Installation Guide...
- Page 19 Intrusion Prevention System AhnLab TrusGuard has the more than 6,000 signatures that are up-to-date and accurate. ASEC (AhnLab Security Emergency-response Center) analyzes/monitors the signatures 24/7/365, and updates them two to three times a day. Bot Prevention AhnLab TrusGuard prevents bots and malware from entering the network and running. By controlling access to bot/malware distributing sites and communication with the C&C server based on ACCESS, it...
- Page 20 Product and Services Integrated to Provide Robust Defense AhnLab TrusGuard is integrated with AhnLab's services to provide accurate and prompt response against unknown security threats. ASEC (AhnLab Security E-response Center) monitors security threats all over the world 24/7/365 to prevent new security threats and minimize damages caused by these threats.
-
Page 21: Trusguard System Specifications
TrusGuard 50A TrusGuard 70A For Small Business TrusGuard 100A For Medium Enterprise TrusGuard 400A TrusGuard 500A For Large Enterprise TrusGuard 1000P TrusGuard 5000 TrusGuard 10000P TrusGuard 22000 Chapter2 AhnLab TrusGuard Overview 21... - Page 22 Interface: 1Gbe Copper 6 Ports Size: 300x44x260(WxHxD, mm), 1U Environment • Operating/Storage temperature: 5~35C / -40~70C Electric Energy Consumption • Power: 100W Single 12V AC Adapter • Heat: Max. 116.6 BTU/h 22 AhnLab TrusGuard Installation Guide...
- Page 23 UTP Cables (CAT 5e Straight-Through, 2m) x 6 Console Cable (DB9/RJ-45, 2m) x 1 Power Code (250V/7A, 2m) x 1 Mount Bracket (L Type) x 1 pair Rubber Feet x 4 Manual CD x 1 Chapter2 AhnLab TrusGuard Overview 23...
- Page 24 UTP Cables (CAT 5e Straight-Through, 2m) x 6 Console Cable (RJ-45, 2m) x 1 Power Code (250V/7A, 2m) x 1 Mount Bracket (L Type) x 2 Rubber Feet x 4 Manual CD x 1 24 AhnLab TrusGuard Installation Guide...
- Page 25 UTP Cables (CAT 5e Straight-Through, 2m) x 6 Console Cable (RJ-45, 2m) x 1 Power Code (250V/7A, 2m) x 1 Mount Bracket (L Type) x 2 Rubber Feet x 4 Manual CD x 1 Chapter2 AhnLab TrusGuard Overview 25...
- Page 26 Operating/Storage temperature: 0~40C/ -10~70C Electric Energy Consumption • Power: 250W Single • Input: 100-240V, 100V:3.5A, 240V:1.5A @50-60Hz • Output (DC): 3.3V:13A, 5V:14A, 12V V1:18A, 12V V2:18A, -12V:0.3A, +3.3V:10A, +5Vsb:2A • Heat: Max. 699.46 BTU/h 26 AhnLab TrusGuard Installation Guide...
- Page 27 UTP Cables (CAT 5e Straight-Through, 2m) x 6 Console Cable (DB9-RS232, 2m) x 1 Power Code (250V/7A, 2m) x 1 Mount Bracket (L Type) x 1 pair Rubber Feet x 4 Manual CD x 1 Chapter2 AhnLab TrusGuard Overview 27...
- Page 28 1GbE Fiber(on-board) x 4 • Network Interface Slotx1 ▪ 1GbE Fiber(on-demand) x 2 • Others ▪ Console (RJ-45) x 1 ▪ USB (disabled) x 2 Size: 437 x 88 x 503.6(W x H x D, mm), 2U 28 AhnLab TrusGuard Installation Guide...
- Page 29 SFP Modules (850nm, Multi-Mode, 3.3V, 550m) x 4 Console Cable (RJ-45, 2m) x 1 Power Code (250V/7A, 2m) x 2 Mount Rail x 2 Rubber Feet x 4 Manual CD x 1 Chapter2 AhnLab TrusGuard Overview 29...
- Page 30 Network Interface Slot x 1 ▪ 1GbE Fiber(on-board) x 2 • Others ▪ Console (RJ-45) x 1 ▪ USB (disabled) x 2 Size: 437 x 88 x 503.6(W x H x D, mm), 2U 30 AhnLab TrusGuard Installation Guide...
- Page 31 SFP Modules (850nm, Multi-Mode, 3.3V, 550m) x 6 Console Cable (RJ-45, 2m) x 1 Power Code (250V/7A, 2m) x 2 Mount Rail x 2 Rubber Feet x 4 Manual CD x 1 Chapter2 AhnLab TrusGuard Overview 31...
- Page 32 Size: 450x88x580(WxHxD, mm), 2U Environment • Operating/Storage temperature: 5-35C/ 0-70C Electric Energy Consumption • Power: 500W Redundant • Input: 90-264V, 115V:10A, 230V:5A @47-63Hz • Output (DC): 5V:24A, 12V:36A, -12V:0.8A, +3.3V:24A, +5Vsb:3.5A • Heat: Max. 1330.68 BTU/h 32 AhnLab TrusGuard Installation Guide...
- Page 33 Console Cable (DB9/RJ-45, 2m) x 1 Power Code (250V/7A, 2m) x 2 Mount Bracket (L Type) x 2 pair Mount Rail x 1 pair Rubber Feet x 5 Manual CD x 1 Chapter2 AhnLab TrusGuard Overview 33...
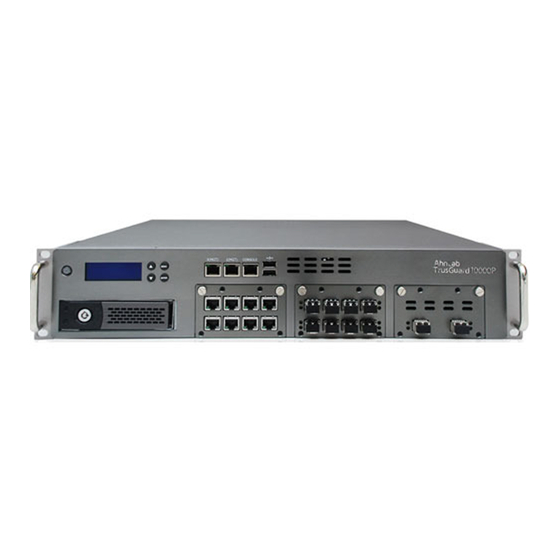
- Page 34 1GbE Fiber(on-board, disabled) x 1 • Network Interface Slot x 3 ▪ 1GbE Copper (on-board) x 8 1GbE Fiber (on-board) x 4 10GbE Fiber (on-board) x 2 1GbE Copper (on-demand, Replacement of the existing card) x 8 34 AhnLab TrusGuard Installation Guide...
- Page 35 Console Cable (DB9/RJ-45, 2m) x 1 Power Code (250V/7A, 2m) x 2 Mount Bracket (L Type) x 2 pair Mount Rail x 2 pair Rubber Feet x 5 Manual CD x 1 Chapter2 AhnLab TrusGuard Overview 35...
- Page 36 • 1Gbe Copper 14 Ports • 1Gbe Fiber 8 Ports • 10Gbe Fiber 2 Ports Size: 450x88x580(WxHxD, mm), 2U Environment • Operating/Storage temperature: 5-35C/ 0-70C Electric Energy Consumption • Power: 500W Redundant 36 AhnLab TrusGuard Installation Guide...
- Page 37 Console Cable (DB9/RJ-45, 2m) x 1 Power Code (250V/7A, 2m) x 2 Mount Bracket (L Type) x 2 pair Mount Rail x 2 pair Rubber Feet x 5 Manual CD x 1 Chapter2 AhnLab TrusGuard Overview 37...
- Page 38 1GbE Copper (on-board, disabled) x 1 • Network Interface Slot x 3 ▪ 1GbE Copper (on-board) x 8 ▪ 1GbE Fiber (on-board) x 4 ▪ 10GbE Fiber (on-board) x 2 ▪ 1GbE Fiber (on-demand) x 2 38 AhnLab TrusGuard Installation Guide...
- Page 39 Console Cable (DB9/RJ-45, 2m) x 1 Power Code (250V/7A, 2m) x 2 Mount Bracket (L Type) x 2 pair Mount Rail x 2 pair Rubber Feet x 5 Manual CD x 1 Chapter2 AhnLab TrusGuard Overview 39...
-
Page 40: Compatibility
Compatibility Some AhnLab TrusGuard features can be operated with other AhnLab products. Before connecting any product to AhnLab TrusGuard, check the version first. The compatible models are as below: TrusAnalyzer 1.0 Patch3 or higher TrusGuard Manager 1.5 Patch7 or higher ... -
Page 41: Chapter3 Installation
Chapter3 Installation Overview /42 Before Installation /44 System Settings /46 Initial Login /47 License /49 Update /51 Network Interface /54 Routing Setting /76 Security Settings /78 Connect to Log Server /81 Other Settings /90 Network Connection /98 After Installation /102 Installation Completed /103... -
Page 42: Overview
AhnLab TrusGuard can only be installed by engineers approved by AhnLab. During the installation process, you must enter the license in the form of encoded character strings. You can only use AhnLab TrusGuard after inspecting the state and operation of the device. - Page 43 Using TrusGuard Manager for Remote Management If you use TrusGuard Manager to set and control TrusGuard, all the policies and system settings applied to TrusGuard will get initialized. You are adviced to perform the following settings only. Enter product license ...
-
Page 44: Before Installation
TrusGuard’s network interface and operation mode are set according to the network structure and traffic. Check the following: Location TrusGuard can be used in router mode or bridge mode according to where it is installed. Check whether it will be installed at the network boundary or within a single network. ... - Page 45 Traffic Size and Type Set the traffic processing capacity according to the traffic size, and select an appropriate TrusGuard device. Identify Protection Target Check the network bandwidth and hosts and application services to protect or exclude from protection. Sub-network This information is used to define the IP address of network interface and the IP address profile of sub- network to be used by TrusGuard.
-
Page 46: System Settings
System Settings Specify the settings to connect the network to the sysetm. Default Settings TrusGuard’s default system settings are as below: Admin ID: (Please ask AhnLab) Password: (Please ask AhnLab) Administrative IP Address: 10.0.0.0/16 (IP address allowed to access the device) ... -
Page 47: Initial Login
Change the IP address to allow the PC to communicate with the system. Use the UTP cable to connect the PC to an Internet switch. • Insert the UTP cable’s RJ-45 connector into TrusGuard’s temporary network port (e.g.: eth0). • Insert the other UTP cable’s RJ-45 connector into the PC’s network port. - Page 48 Step 3: Connect to Network Temporarily for System Settings While setting the system, you need to update the signatures and V3 engine. Connect TrusGuard to the Internet temporarily to perform this update. Check the network information for TrusGuard to use.
-
Page 49: License
After setting up the system, register the TrusGuard license. Step: System > License > License Step 1: Prepare License Check the TrusGuard license to register. You can only use the IPv4 firewall and proxy if you do not register the license. The licenses available are as below. ... - Page 50 Click Logout to log out, and log in again. Note You need the Device ID and Serial Number to change the license. Only authorized engineers can register/change the license. To change the license, you need to contact AhnLab or your vendor. 50 AhnLab TrusGuard Installation Guide...
-
Page 51: Update
Update Update the information used by the system. You can update the signatures and behaviors via the Internet. Step 1: Check Network Connection Check the network is connected. Enter diagnostic mode from the terminal. Used the commands below to check the network connection. •... - Page 52 Anti-Virus Engine: V3 engine for anti-virus feature • Content Rating DB: Content rating DB used by website filter • Anti-MalSite: DB on malicious sites used by Anti-MalSite If you changed the update cycle, click OK and then Apply. 52 AhnLab TrusGuard Installation Guide...
- Page 53 Click Run Now to start update now. Wait until a message that the update is completed will appear. Note If you try to update a feature you do not have a license for, a message that update is not available for the feature will appear.
-
Page 54: Network Interface
IPSec VPN. Port Labelling In TrusGuard 2.1 Patch1, you can label the network port: IN, OUT, DMZ. Before setting the interface, label the network port first. If the network port is labeled, the nework port will be displayed on the management screen, or the label will be displayed when showing the IP address profile that refers to the network port. - Page 55 You need to set NAT to connect to the Internet from the sub-network. Bridge Mode When the cable model on the top provides DHCP service, TrusGuard can be used in bridge mode. Set bridge mode, using an interface to connect the top and sub-network.
-
Page 56: Static Ip Address Port
Select Static for Type. • Enter the IPv4 or IPv6 address. • Select the response protocol in Control. ▪ PING: To respond to ICMP ping requests ▪ HTTPS: To allow access to administrative web page 56 AhnLab TrusGuard Installation Guide... - Page 57 ▪ SSH: To allow connection to SSH terminal • MTU (100 to 1,500 bytes, Default: 1,500) ▪ 100 to 1,360 bytes, when using IPSec VPN ▪ PPPoE: 100 to 1,492 bytes (Default: 1,492) ▪ IPv6 Network: 1,280 to 1,500 bytes •...
-
Page 58: Pppoe Port - For Ipv4
PPPoE Port – For IPv4 This is used when PPPoE-based ISP line is used. This is the most appropriate method to connect TrusGuard to the Internet in small-scale network with no static IP address. Set PPPoE Port Set the PPPoE settings as below. Use the default settings for any fields that have been left out. - Page 59 Note If you set the PPPoE interface and connect to the network, TrusGuard will automatically get the gateway information, so you do not need to set the routing. Uncheck HTTPS and SSH in Control if possible. PPPoE interface is usually used to connect to an external network like the Internet.
- Page 60 NAT is needed to set the network to communicate with the Internet. An IP address can be automatically allotted to the host connected to the sub-network, using TrusGuard as the DHCP server. Advanced Settings You can use commands that control PPPoE connection in a Terminal. Regularly check the connection with the PPP server using Link Control Protocol (LNK) when PPPoE client daemon is running on the system.
-
Page 61: Dhcp/Dhcpv6 Port
DHCP/DHCPv6 Port Get the IP address managed by DHCP or DHCPv6 server. You can also use DHCP in ISP connection. DHCPv6 is a protocol that manages IPv6 addresses. Set DHCP or DHCPv6 Port Set the network interface as below. Use the default settings for any fields that have been left out. Use the DHCP to get an IP address. -
Page 62: Aggregation
Click OK. Click Apply. Note If you set the DHCP port and connect to the network, TrusGuard will automatically get the gateway information, so you do not need to set the routing. Uncheck HTTPS and SSH in Control if possible. - Page 63 Set Aggregation Interface Set the aggregation interface as below. Use the default settings for any fields that have been left out. In the profile/policy modification tool, click Add Network Interface will appear. Specify the settings as below. • Specify the aggregation interface Name (e.g.: agg0). •...
- Page 64 ▪ NDP: To allow the operation in the link layer of the Internet model, and address autoconfiguraiton. Click OK. Click Apply. Note To use 802.3ad, the switch must support 802.3ad. 64 AhnLab TrusGuard Installation Guide...
-
Page 65: Bridge
Bridge Use bridge interface when you cannot change the network setting. When you install TrusGuard at the bottom of the router, and the router and the bottom network must use the same network address When the cable modem operates as DHCP and the bottom network host must use DHCP Bridge and aggregation are similar, but its use is different. - Page 66 This feature is often used with routing, and is only available if the network port driver supports LLCF. list_llcf: Displays LLCF port group list. 66 AhnLab TrusGuard Installation Guide...
- Page 67 OSPF or RIP must be used in the upper/lower router. When setting OSPF or RIP in TrusGuard, use the upper router’s IP address and bottom L3 switch’s IP address. The bottom switch must support L3. ...
-
Page 68: Vlan
Add Network Interface will appear. Specify the settings as below. • Specify the VLAN interface Name (e.g.: vlan0). • Select VLAN for Type • Enter the VLAN ID (0 to 4,095). • Select the Network Interface. • Enter the IPv4 address. 68 AhnLab TrusGuard Installation Guide... -
Page 69: Secondary Port
Click Apply. Secondary Port Secondary port is used in HA mode, when setting services that use TrusGuard’s IP address. Set Secondary Port Set the secondary port as below. Use the default settings for any fields that have been left out. - Page 70 The devices using HA mode must be able to communicate with all routers/switches, and use the same IP address as the IP address profile. Next-hop router/switch uses ARP communication to connect devices using HA mode and NAT session. 70 AhnLab TrusGuard Installation Guide...
-
Page 71: Ha Mode
There are two HA modes: Active-Standby and Active-Active. In Active-Standby mode, one TrusGuard device (master) is working while the other (slave) is in standby mode. • The slave device waits in standby mode starts working when there is a problem in the master device. - Page 72 All routing goes through the master's virtual IP address: VIP1 and VIP3. If a problem occurs in the master, the slave informs the upper/lower device that it has brought over VIP1 and VIP3 through ARP. 72 AhnLab TrusGuard Installation Guide...
- Page 73 Active-Standby Bridge Mode You can set this mode regardless of the type of upper/lower switch (L2, L3). The upper/lower switch must be in the same sub-network. STP must be used in upper/lower router/switch. The sub-network host uses the upper router/switch’s IP address as the gateway. ...
- Page 74 The sub-network is used as a gateway, so it uses SIP1. The HA peers uses OSPF routing for each upper router’s IP address and bottom SIP2. Do not set the HA interface as it operates using routing protocol. 74 AhnLab TrusGuard Installation Guide...
- Page 75 Information Not Synchronized in HA Mode The information below is not shared between HA peers. Network interface settings Host name DHCP Routing information (dynamic, static, multicast) License IPSec VPN profile/SA SSL VPN The network interface type and setting must be the same, but properties lie the interface’s IP address does not get shared.
-
Page 76: Routing Setting
This document focuses on static routing. Gateway Register the gateway for TrusGuard to use. Note If you set the network port with DHCP or PPPoE, you do not need to set the gateway. It will be automatically set. -
Page 77: Multi-Path Routing
Click OK. Click Apply. Multi-Path Routing When using multiple network interfaces in the same bandwidth, more than two routing paths with the same priority can be used. When a problem occurs in a specific service in equal-cost multi-path environment, the problem can be sovled by changing the Load Balancing. From the menu, go to Network >... -
Page 78: Security Settings
Security Settings Specify the settings to allow access of TrusGuard’s administrative web interface and SSH terminal from a designated IP address only. Change the default administrator’s account as well. Well-known Default Account Prohibited Well-known default accounts like Windows’ Administrator are often used by attackers to intrude into the system. -
Page 79: Register Administrative Ip Address
Register Administrative IP Address Restrict the IP addresses that can access TrusGuard’s administrator web page. If not, it will be open to attack. Step 1: Check Administrative Network Interface Step: Network > Interface > Interface Before registering the administrative IP address, select the interface for the administrator to use to access TrusGuard. - Page 80 Terminal and run setadminhost to redesignate the administrative IP address and administrator’s network interface. To remove the administrative IP address used in the initial system settings stage, connect to the network, and then log in with the newly registered administrative IP address and remove it. 80 AhnLab TrusGuard Installation Guide...
-
Page 81: Connect To Log Server
Connect to Log Server Select logs recorded by the system and register/set the server to manage logs. Log Level The log level is specified by the administrator. Based on syslog’s level, there are five different levels, from lowest to highest: Debug, Information, Warning, Error and Critical. - Page 82 Note When connection is allowed, TrusGuard checks whether the session has timed out when a certain time has passed after the first login, this is called Connection Log. This log can only be controlled with the get_conn_alive_log and set_conn_alive_log commands..
- Page 83 System > Log and change the settings of local cerver. TrusGuard only records logs selected from the local server. Note Logs not recorded by the local server cannot be sent to other log servers.
-
Page 84: Local Server Settings
The local server only creates and sends the selected logs, so it affects the settings of log servers that are newly added. • Even if you select the logs not selected from the local server in a newly added log server, the logs will not be created. Click OK. 84 AhnLab TrusGuard Installation Guide... -
Page 85: Set Local Trusanalyzer
The hard disk has been formatted to recognize TrusAnalyzer. If you change the hard disk, it will get formatted whilte booting, and take a long time. Step 3: Log in to TrusAnalyzer There are two ways to log in to TrusAnalyzer. Single Sign-On from TrusGuard Click TrusAnalyzer in TrusGuard. Chapter3 Installation 85... -
Page 86: Connect To Remote Log Server
More so, if you want to use HA mode. Step 1: SNMP Settings System > SNMP To register TrusAnalyzer in TrusGuard, use the SNMP information provided by the system, or enter the system information in TrusAnalyzer yourself. The method to register TrusAnalyzer using SNMP information is as below. - Page 87 To communicate with SNMPv3 server, set the SNMPv3 User. (TrusAnalyzer does not support SNMPv3.) • SNMPv3: ID to use for SNMP communication (Korean, English, Numbers) • Hash Algorithm: Algorithm to use for user authentication (MD5, SHA) • Auth PW: Password to use with the hash algorithm •...
- Page 88 Step 2: Register TrusAnalyzer in TrusGuard Step: System > Log Set the remote log server connection as below. Click Specify the settings in Add Log Server. • Items not selected in the local server cannot be used even if selected in a newly added server.
- Page 89 Step 3: Register TrusGuard in TrusAnalyzer Connect the device to the network first. Log in to TrusAnalyzer and use the SNMP community name, TrusGuard’s IP address and SNMP listening port number 161 to register the device. Chapter3 Installation 89...
-
Page 90: Other Settings
To keep the changed settings, click Apply. Host Name Host Name is the name used to identify the device in TrusAnalyzer and TrusGuard Manager. To change the host name, enter the New Host Name (1 to 15 alphanumeric characters). - Page 91 System Time The logs recorded by the system, remote backup and firewall policies are all based on time. You must set the time accurately. The Time Zone is (GMT +09:00) Seoul, Tokyo. For the Time Setting Method, select Synchronize with Time or Direct Input. ...
-
Page 92: Change Session Settings
The TCP MSS values that are usually used are 1,500, 1,340, 980 and 660 bytes. It is recommended to use 1,340 bytes in xDSL or VPN environment. Change TCP Validation Test Settings in Asymmetric Routing Environment Change the TCP validation test settings in Active-Active HA environment. Select 3-Way Handshake Enforcement. 92 AhnLab TrusGuard Installation Guide... -
Page 93: Policy Settings
Use IPS to block traffic that attacks TCP/IP or application vulnerabilities, and traffic caused by malware. Packet Processing When a packet enters the interface, TrusGuard checks whether it is valid. If not, it gets thrown out. The packets that come through IPSec/SSL VPN tunnel: •... - Page 94 Convert both source and detination IP addres: Apply firewall policy based on the source IP address before applying NAT and destination IP address after applying NAT. Note Connection passing NAT is recorded as snat (source address converted) and dnat (destination address converted) in the firewall log. 94 AhnLab TrusGuard Installation Guide...
- Page 95 Destination Address: Profile defining the remote subnet Note In TrusGuard 2.1 p1, the firewall policy gets created automatically if you use the Add IPSec VPN Policy while setting the IPSec VPN Network. Policy Setting Step 1: Register IP Address to Protect/Block In Profile >...
- Page 96 Create local CA server certificate: VPN > Certificate > CA Certificate If you use TrusGuard as the CA server, the user certificate signed as the local CA certificate while registering the user account will be automatically generated. Define the information needed to create the certificate in the certificate profile in advance.
- Page 97 Caution Behavior rules have a regular threshold. There could be false-positives in threshold-based detection, so adjust it according to the traffic characteristics of sites. Do not just use the default value as is. Step 7: Set Firewall Policy Use the registered IP address, service, user, authentication server, schedule, QoS and IPS profile to set the firewall based on the site environment.
-
Page 98: Network Connection
This model also comes with guide rails. Space Make sure there is enough space to install TrusGuard on the rack/cage. 1 Unit (1U) or 1 Rack Unit (1RU) is the standard unit of space needed by the device. ... -
Page 99: Connect Power And Start System
Connect Power and Start System Connect to Power Source and Turn on Device Pull up the power cable guard (if there is one). Connect the power cable (provided) to the power connector on the back of the device. Push down the power cable guard (if there is one) to fix the power cable (if available). Plug the cable into a power outlet. - Page 100 The network interfaces could use more than one network ports. Check all the network ports. Modify any wrong settings and click Apply. Step 2: Network Settings Change the settings to allow routing between the connected network and TrusGuard. Check the upper/lower router/switch network settings. ...
- Page 101 Step 3: Connect TrusGuard to Network Connect TrusGuard to upper/lower router/switch. Select the cable that fits the upper/lower router/switch interface specification. Check the TrusGuard’s UTP port status. • The green LED on the left of the port will turn on if properly connected. If not, the light will not turn on.
-
Page 102: After Installation
To optimize the behavior rules in IPS Policy, two to three weeks of observation is needed. After the observation period, seach for the following logs in TrusAnalyzer that is connected to TrusGuard, and change the threshold and action. ... -
Page 103: Installation Completed
Installation Completed After completing the installation and checking whether the policies work for your environment, the system will be handed over to your network administrator. Check System Operation The newtwork administrator must make sure the system runs properly in the network. Receipt Check whether the firmware version is the same as in the receipt. - Page 104 104 AhnLab TrusGuard Installation Guide...
-
Page 105: Chapter4 Client Program
Chapter4 Client Program TrusGuard SSL VPN Client /106 TrusGuard Auth /115... -
Page 106: Trusguard Ssl Vpn Client
Firewall Policy: Any firewall policy running in the computer may block the connection to the SSL VPN. Turn off the firewall policy or register TrusGuard SSL VPN Client to the allowed policy in the firewall policy. Then connect the SSL VPN again. - Page 107 If an installation message for the SSL VPN driver appears, click Continue. Note The SSL VPN driver used by TrusGuard SSL VPN Client has passed the Windows Hardware Quality Labs (WHQL) test, but does not reflect on the installation program. The message above will not appear if the driver distributed is code-signed by Microsoft.
- Page 108 Enter the Group ID and Password. Required when authenticated by separate authentication server. Ignore when using authentication account managed by TrusGuard. Select the Save Group Account checkbox ( ) to save the Group ID and Password. Login with Certificate To log in with a certificate, you need: ...
- Page 109 ). This option will get disabled when you restart TrusGuard SSL VPN Client. Step 3: Check Program Status If you log in successfully, the TrusGuard SSL VPN Client icon will appear in the Windows notification area. Chapter4 Client Program 109...
- Page 110 First Login After your first login, you must change your password. Once logged in to SSL VPN, a window for specifying the TrusGuard SSL VPN Client settings appears. Specify settings and click OK. VPN Start Page The SSL VPN Client home page shows notices and a list of networks the user can use.
-
Page 111: Manage Certificate
▪ If you cannot connect using the domain, please ask the administrator. ▪ If the SSL VPN gateway does not forward the DNS address information to TrusGuard SSL VPN Client, you cannot use the domain. • Service Type: The type of service set to the SSL VPN network. - Page 112 Private key will be converted into KEY file and get saved in the designated path. Change Password of Local Certificate When <TrusGuard SSL VPN Client> appears, select the certificate to change a password and click Change Password. Change the password and click OK.
-
Page 113: Ssl Vpn Client Status Icon
Internet cache: When a user logs out of the SSL VPN, temporary files stored in the web browser will be removed. Program: When a user logs out of the SSL VPN, the TrusGuard SSL VPN Client will be removed. Auto Login: Select the checkbox to remember the login information and automatically log in. -
Page 114: Remove Trusguard Ssl Vpn Client
To log out from the program, click Exit. If you specified the settings to remove the program upon log out, TrusGuard SSL VPN Client will be removed. Note If you specified the settings to disconnect SSL VPN when you close your web browser, the TrusGuard SSL VPN Client will be terminated when you close your web browser. About To check the program version, click About.. -
Page 115: Trusguard Auth
Click OK. Your account will be locked out and TrusGuard Auth will be terminated if you enter the incorrect ID or password for the number of times you specified. To unlock it, please ask your administrator. - Page 116 Login with OTP The authentication window will appear when TrusGuard Auth starts. Enter the ID, and click OK. The Password window will appear. Enter the Password and click When the hash value appears in the Response field, click OK. Login with OTP after Logout The session will time out after 30 minutes of inactivity.
- Page 117 Click Exitfrom the popup menu. Remove TrusGuard Auth TrusGuard Auth is not “installed”, so the set value is not recorded in the registry, and there is no separate ini file. To remove TrusGuard Auth, just remove the TrusGuard Auth file from the computer.
- Page 118 118 AhnLab TrusGuard Installation Guide...
-
Page 119: Chapter5 Remove Device
Chapter5 Remove Device Remove Device /120... -
Page 120: Remove Device
If a problem occurs in the system, it will not be able to shutdown. When this happens, press the ON/OFF switch to force shutdown. Remove Device from Network After shutting down the system, remove all cables. Store the device in a secure place where it will not get damages. 120 AhnLab TrusGuard Installation Guide...
Need help?
Do you have a question about the TrusGuard and is the answer not in the manual?
Questions and answers