Advertisement
Advertisement
Table of Contents

Related Manuals for Farberware FMO22ABTBKA


Summary of Contents for Farberware FMO22ABTBKA
- Page 1 MICROWAVE OVEN INSTRUCTION MANUAL Model: FMO22ABTBKA Read these instructions carefully before using your microwave oven, and maintain its upkeep. If you follow the instructions, your oven will provide you with many years of good service. KEEP THESE INSTRUCTIONS IN A SAFE PLACE...
- Page 2 Farberware is a registered trademark of Farberware Licensing Company, LLC Manufactured and sold pursuant to a license from Farberware Licensing Company, LLC © 2018 Farberware Licensing Company, LLC. All rights reserved.
-
Page 3: Table Of Contents
Tables of Contents PRECAUTIONS ���������������������������������������������������������������������������������������������������������������������������������� 4 SPECIFICATIONS ����������������������������������������������������������������������������� ������������������������������������������������� 4 SAFETY ��������������������������������������������������������������������������������������������������������������������������������������������� 5 GROUNDING ������������������������������������������������������������������������������������������������������������������������������������ 6 UTENSILS ����������������������������������������������������������������������������������������������������������������������������������������� 8 SETTING UP YOUR OVEN ��������������������������������������������������������������������������������������������������������������� 10 CONTROL PANEL ���������������������������������������������������������������������������������������������������������������������������� 12 OPERATION ������������������������������������������������������������������������������������������������������������������������������������ 13 MAINTENANCE ������������������������������������������������������������������������������������������������������������������������������ 20 WARRANTY INFORMATION ����������������������������������������������������������������������������������������������������������� 21... -
Page 4: Precautions
(3) DOOR SEALS AND SEALING SURFACES (Do not use if the door seal or sealing surfaces are damaged.) (d) The oven should not be adjusted or repaired by anyone except properly qualified service personnel. SPECIFICATIONS Model: FMO22ABTBKA Rated Voltage: 120V~60Hz Rated Input Power (Microwave): 1700W... - Page 5 IMPORTANT SAFETY INSTRUCTIONS When using electrical appliances basic safety precautions should be followed, including the following: WARNING - To reduce the risk of burns, electric shock, fire, injury to persons or exposure to excessive microwave energy: 1. Read all instructions before using the appliance. 2.
-
Page 6: Grounding
To reduce the risk of injury to persons: 1. Do not overheat the liquid. 2. Stir the liquid both before and halfway through heating it. 3. Do not use straight-sided containers with narrow necks. 4. After heating, allow the container to stand in the microwave oven for a short time before removing the container. -
Page 7: Safety
RADIO INTERFERENCE 1. Operation of the microwave oven may cause interference to your radio, TV or similar equipment. 2. When there is interference, it may be reduced or eliminated by taking the following measures: 3. Clean door and sealing surface of the oven. a. -
Page 8: Utensils
UTENSILS – Personal Injury Hazard CAUTION Tightly-closed utensils could explode. Closed containers should be opened and plastic pouches should be pierced before cooking. See the instructions on "Materials you can use in microwave oven or to be avoided in microwave oven." There may be certain non-metallic utensils that are not safe to use for microwaving. - Page 9 MATERIALS YOU CAN USE IN MICROWAVE OVEN Utensils Remarks Browning dish Follow manufacturer* instructions. The bottom of browning dish must be at least 3/16 inch (5mm) above the turntable. Incorrect usage may cause the turntable to break. Dinnerware Microwave-safe only. Follow manufacturer’s instructions. Do not use cracked or chipped dishes.
-
Page 10: Setting Up Your Oven
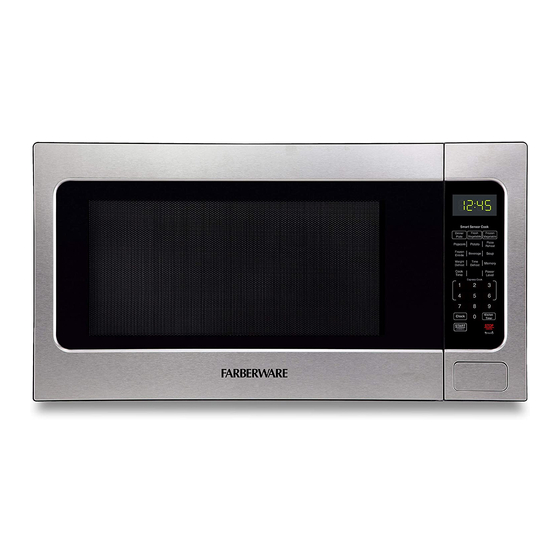
SETTING UP OUR OVEN Names of Oven Parts and Accessories Remove the oven and all materials from the carton and oven cavity. Your oven comes with the following accessories. Glass tray (turntable) Turntable ring assembly Instruction manual A) Control panel E) Observation window B) Turntable shaft F) Door assembly... - Page 11 Countertop Installation Remove all packing material and accessories. Examine the oven for any damage such as dents or broken door. Do not install if oven is damaged. Cabinet: Remove any protective film found on the microwave oven cabinet surface. Do not remove the light brown Mica cover that is attached to the oven cavity to protect the magnetron. 12 inch(30cm) 3.0 inch(7.5cm) OPEN...
-
Page 12: Control Panel
CONTROL PANEL 1. Smart Sensor Cook (Sensor Reheat, Frozen Pizza,Frozen Entrée, Potato, Rice, Vegetable ) 2. Auto Menu (Auto Cook, Soften/Melt, Popcorn) 3. Automatically defrosts one pound items 4. Auto Defrost (Defrost time calculated by entered weight and category of item) 5. -
Page 13: Operation
OPERATION 1. CLOCK SETTING When the microwave oven is plugged into an outlet, "00:00" will display. (1) Press "Clock", "00:00" will appear in teh display. The first figure will flash ":" and another "0" will be lit. (2) Press the number pads and enter the current time. For example, time is 10:12 now, please press "1, 0, 1, 2"... - Page 14 3. MICROWAVE COOK (1) Press "Cook Time" once, the screen will display "00:00" and "Cook". (2) Press number pads to input the cooking time; the maximum cooking time is 99 minutes and 99 seconds. (3) Press "Power Level" once, the screen will display "PL10". The default power is 100% power. Press "Power Level"...
- Page 15 6. AUTO DEFROST FUNCTION (1) Press "Auto Defrost", the screen will display "dEF1" and "DEF". Press repeatedly and "dEF2", "dEF3", "dEF1", will display in order. DISPLAY dEF1 dEF2 dEF3 FOOD Meat Poultry Fish (2) Press numerical buttons to input weight to be defrosted. "Lbs" will light. Input the weight range between 0.1- 6.0 lbs.
- Page 16 EXAMPLE: SENSOR REHEAT: (1) After placing food in the oven, press "Sensor Reheat" pad once, "SC-1" will appear in the display. (2) Press "START/+30SEC" to start cooking. Oven will beep 5 times when cooking is finished. NOTE: 1) Food to be avoided in sensor reheating. a.
- Page 17 10. AUTO COOK (1) Press "Auto Cook" once,the screen will display "CC-1". (2) Press "Auto Cook" four more times, "CC-2", "CC-3", "CC-4", "CC-5" will display in order. (3) After selecting Auto Cook setting, press the number pad to enter the weight of the food item. (4) Press "START/+30SEC"...
- Page 18 12. MEMORY FUNCTION (1) Press "Memory" to choose up to 3 cooking programs. 1, 2, or 3 will display. (2) If the program has been set, press "START/+30SEC" to use it. If not, continue to set the program. A maximum of two microwave stages can be set for each procedure. (3) After finishing the setting, press "Memory"...
- Page 19 15. ENERGY SAVER MODE In standby mode, press the " S TOP/Cancel" once (less than 3 seconds to avoid starting the child lock function to enter the Energy Saver mode. In child-locked mode, press the " S TOP/Cancel" once (less than 3 seconds) and release to enter the Energy Saver Mode .
-
Page 20: Maintenance
MAINTENANCE Troubleshooting Check your problem by using the chart below and try the solutions for each problem. If the microwave oven still does not work properly, call the customer service number 877-648-5973. Trouble Possible Cause Possible Remedy a. Electrical cord for oven is not plugged in. a. - Page 21 ONE YEAR LIMITED WARRANTY This warranty applies to products purchased and used in the U.S. and Canada. This is the only expressed warranty for this product and is in lieu of any other warranty or condition. This product is warranted to be free from defects in material and workmanship for a period of one (1) year from the date of original purchase.
Need help?
Do you have a question about the FMO22ABTBKA and is the answer not in the manual?
Questions and answers