Advertisement
Table of Contents
- 1 1.0 Introduction
- 2 Preparation (Attaching the Punch Handle)
- 3 General Machine Movements
- 4 Holding and Gauging of Keys
- 5 Cutting the Key
- 6 Changing the Punch
- 7 Removal of the Punch
- 8 Depth Adjustment
- 9 Space Adjustment
- 10 Recalibration of Space
- 11 Preventive Maintenance
- 12 Exploded View and Parts List
- Download this manual
Advertisement
Table of Contents

Related Manuals for HPC Punch Machine 1200PCH

Summary of Contents for HPC Punch Machine 1200PCH
- Page 1 Punch Machine ™ No. 1200PCH © 2013 HPC, Inc. • Schiller Park, IL • 60176 • USA • www.hpcworld.com 040413 36PCH_100_00...
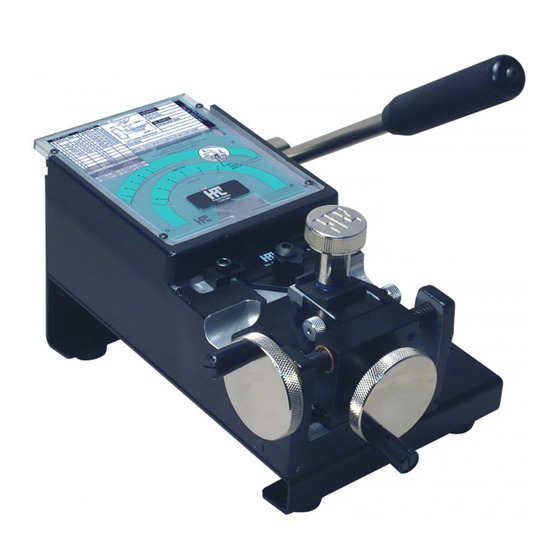
- Page 3 1.0 Introduction The Punch Machine (1200PCH), works on the same principle as the popular ™ 1200CMB Code Machine (a known and proven system), but is more portable and works without electricity. All that is needed to handle almost any code cutting situation is included, and all the power you need is in the palm of your hand! The ease with which changes can be made from one manufacturer’s specifications to another is unparalleled!
- Page 4 The Punch Machine Manual Contents ™ 1.0 Introduction..............1 1.1 Preparation (Attaching the Punch Handle)....5 2.0 General Machine Movements........7 3.0 Holding & Gauging of Keys........15 4.0 Cutting the Key............27 5.0 Changing the Punch...........43 6.0 Depth Adjustment............53 7.0 Space Adjustment............63 8.0 Preventive Maintenance..........71 Exploded View and Parts List........73 PUNCH MACHINE ™...
- Page 5 1200PCH Packaging Contents Punches Nos. PCH-1011, PCH-14, (installed) and PCH-47 Punch Machine ™ © 2009 HPC, Inc. Schiller • Park, IL • 60176 • USA • www.hpcworld.com Depth Adjustment Code Cards Manual 3/8 “Allen Wrench 1/8”Allen Wrench Punch/Die Wrench Wrenches No.
- Page 6 Code Cutting Key Machines by HPC Original Blitz ™ No. 1200CMB Tiger SHARK ™ No. 123SHARK Switch Blitz ™ CodeMax ® No. 1233CMSB No. 1200MAX www.hpcworld.com PUNCH MACHINE ™ No. 1200PCH...
- Page 7 Preparation Attach Punch Handle to The Punch Machine ™ 1. Insert handle into open hole of handle axle, flush to opposite side. 2. Turn handle to straight up position. 3. Using a 1/8"Allen Wrench, insert the provided 1/4"- 20 x 3/8" Dog Point Allen Screw into hole located below the handle and tighten.
- Page 8 visit us online at: www.hpcworld.com PUNCH MACHINE ™ ™ No. 1200PCH...
- Page 9 General Machine Movements PUNCH MACHINE ™ ™ No. 1200PCH...
- Page 10 Fig. 2.1 Turn the Spacing Crank clockwise to move the Key Carriage to the left. PUNCH MACHINE ™ ™ No. 1200PCH...
- Page 11 Fig. 2.2 Turn the Spacing Crank counterclockwise to move the Key Carriage to the right. PUNCH MACHINE ™ ™ No. 1200PCH...
- Page 12 Fig. 2.3 Turn the Depth Crank clockwise to move the Key Carriage IN. PUNCH MACHINE ™ No. 1200PCH...
- Page 13 Fig. 2.4 Turn the Depth Crank counterclockwise to move the Key Carriage outward. PUNCH MACHINE ™ No. 1200PCH...
- Page 14 NOTE: Never force the Key Carriage or the Spacing Crank past full right position. (Full right equals the centerline of the punch with the extreme left side of the jaw). Fig. 2.5 NOTE: Never force the Key Carriage or the Spacing Crank past full left position.
- Page 15 1.200" (3 cm) Fig. 2.7 The total spacing range of the machine is from the extreme right to the left side of the jaws and equals 1.200" (3 cm) maximum. PUNCH MACHINE ™ No. 1200PCH...
- Page 16 RANGE: .700" (1.75 cm) MAX. Fig. 2.8 The total depth range of the machine is from the face of the punch to the back of the bottom jaw and equals .700" (1.75 cm) maximum. PUNCH MACHINE ™ ™ No. 1200PCH...
- Page 17 Holding And Gauging Of Keys PUNCH MACHINE ™ ™ No. 1200PCH...
- Page 18 Fig. 3.1 Position the key at the back of the bottom jaw to satisfy most single-sided key holding situations. PUNCH MACHINE ™ No. 1200PCH...
- Page 19 Fig. 3.2 Optional Method: Position the key at the front of the bottom jaw for double-sided symmetrical keys. PUNCH MACHINE ™ ™ No. 1200PCH...
- Page 20 Fig. 3.3 NOTE: For single-sided keys the blank must be flush with the back of the Bottom Jaw. PUNCH MACHINE ™ No. 1200PCH...
- Page 21 CORRECT INCORRECT INCORRECT The bow is not The tip is not flush with the flush with the back of the jaw back of the jaw Fig. 3.4 PUNCH MACHINE ™ ™ No. 1200PCH...
- Page 22 Fig. 3.5 Typical shoulder gauging. PUNCH MACHINE ™ No. 1200PCH...
- Page 23 FLIP GAUGE Fig. 3.6 Typical tip gauging. PUNCH MACHINE ™ ™ No. 1200PCH...
- Page 24 Fig. 3.7 Fig. 3.7 Special Best tip gauging. PUNCH MACHINE ™ No. 1200PCH...
- Page 25 Alternate holding of keys for double-sided cutting: Insert the key using the Tip Stop. Fig. 3.8 Gauge the center ward of the key against the front of the Bottom Jaw. Fig. 3.9 PUNCH MACHINE ™ ™ No. 1200PCH...
- Page 26 Fig. 3.10 Move the key in and punch all of the cuts on one side, then move out. PUNCH MACHINE ™ No. 1200PCH...
- Page 27 Take the key directly out, while maintaining position. Fig. 3.11 Flip the key 180° so that the uncut side is now facing upward or toward the Punch. Fig. 3.12 Reclamp the key and punch all of the cuts on the other side. Fig.
- Page 28 Due to the profile of some key blanks they may not fit under the punch. Follow these steps to adjust for this: 1. Load the particular key blank (that does not fit under the punch). 2. Loosen the 2 set screws on the Depth Crank and remove the Depth Crank (Fig.
- Page 29 Cutting The Key PUNCH MACHINE ™ ™ No. 1200PCH...
- Page 30 Fig. 4.1 Select the proper card and key blank to be used. PUNCH MACHINE ™ ™ No. 1200PCH...
- Page 31 PUNCH MACHINE ™ ™ No. 1200PCH...
- Page 32 Fig. 4.3 Select the proper gauging and insertion direction for clamping of the key to be cut. Tighten wing nut to hold the key blank securely between the jaws. PUNCH MACHINE ™ ™ No. 1200PCH...
- Page 33 Fig. 4.4 Insert the card beneath the lens. Be careful to place card under the needles. PUNCH MACHINE ™ ™ No. 1200PCH...
- Page 34 Flip Gauges Fig. 4.5 Move the Flip Gauges out of the way. PUNCH MACHINE ™ ™ No. 1200PCH...
- Page 35 Fig. 4.6 Note: Depth and Space Windows. PUNCH MACHINE ™ ™ No. 1200PCH...
- Page 36 Fig. 4.7 Turn the Spacing Crank to move the Key Carriage to the first position. PUNCH MACHINE ™ ™ No. 1200PCH...
- Page 37 Fig. 4.8 Turn the Depth Crank to move the Key Carriage to the first desired depth position. PUNCH MACHINE ™ ™ No. 1200PCH...
- Page 38 Fig. 4.9 PUNCH! PUNCH MACHINE ™ ™ No. 1200PCH...
- Page 39 1. ENGAGE 2. PUSH THROUGH Fig. 4.10 A smooth, even movement ensures the best results. PUNCH MACHINE ™ ™ No. 1200PCH...
- Page 40 Fig. 4.11 After the first cut is made, move to the next space position. PUNCH MACHINE ™ ™ No. 1200PCH...
- Page 41 DEPTH WINDOW WITH INDICATOR AT No. 4 DEPTH Fig. 4.12 Again, move to the next depth position. PUNCH MACHINE ™ ™ No. 1200PCH...
- Page 42 Fig. 4.13 PUNCH! Repeat these steps until all of the cuts are made. PUNCH MACHINE ™ ™ No. 1200PCH...
- Page 43 Fig. 4.14 After all of the cuts have been made, remove the key. There should be no need to deburr the key for it to work in the lock. PUNCH MACHINE ™ ™ No. 1200PCH...
- Page 44 visit us online at: www.hpcworld.com PUNCH MACHINE ™ ™ No. 1200PCH...
- Page 45 Changing the Punch PUNCH MACHINE ™ ™ No. 1200PCH...
- Page 46 Removal of the Punch Fig. 5.1.1 Loosen both of the Toe Clamps and move clamps out of the way. Loosen Punch Screw and remove it. PUNCH MACHINE ™ ™ No. 1200PCH...
- Page 47 Fig. 5.1.2 Remove the entire Punch and Die unit from the machine. PUNCH MACHINE ™ ™ No. 1200PCH...
- Page 48 Fig. 5.1.3 NOTE: If the unit does not come out easily, push down on the handle. This will cause the unit to free itself for easy removal. PUNCH MACHINE ™ ™ No. 1200PCH...
- Page 49 Replacing the Punch Fig. 5.2.1 These are critical areas to mate upon insertion of a new punch. Note: Clean any brass chips from all of the critical areas. PUNCH MACHINE ™ ™ No. 1200PCH...
- Page 50 Key Seat Punch Key Fig. 5.2.2 Note: Punch Key should line up with Key Seat. PUNCH MACHINE ™ ™ No. 1200PCH...
- Page 51 Fig. 5.2.3 Insert the Punch and Die unit into position. You can insert the triangular die unit first and then the Punch unit (making sure the Punch key lines up into key seat), or both pieces as one unit (as shown above). PUNCH MACHINE ™...
- Page 52 Fig. 5.2.4 Thumb-tighten the Punch Screw and depress the Punch Arm to line up the Punch and Die unit before the final tightening. PUNCH MACHINE ™ ™ No. 1200PCH...
- Page 53 Fig. 5.2.5 Tighten the Punch Screw with the wrench. Do not overtighten! Move the Toe Clamps into position and tighten. PUNCH MACHINE ™ ™ No. 1200PCH...
- Page 54 visit us online at: www.hpcworld.com PUNCH MACHINE ™ ™ No. 1200PCH...
- Page 55 Depth Adjustment PUNCH MACHINE ™ ™ No. 1200PCH...
- Page 56 Card No. MIAR Fig. 6.1 1. Insert Micrometer Card No. MIAR 2. Gauge and locate a single-sided key blank. 3. Move the depth needle to 0.260 4. Punch a cut into the key. PUNCH MACHINE ™ No. 1200PCH...
- Page 57 Fig. 6.2 Remove the key from the Carriage. PUNCH MACHINE ™ No. 1200PCH ™...
- Page 58 0.260 Fig. 6.3 Measure the key for the actual punch cut dimension. Note whether the key is equal to proper cut dimension or greater than. Example: proper cut dimension = .260 actual cut dimension = .265 + .005 The cut is greater than the proper cut dimension. PUNCH MACHINE ™...
- Page 59 Fig. 6.4 The key may also be cut less than the proper cut dimension. Example: proper cut dimension = .260 actual cut dimension = .255 – .005 The cut is less than the proper cut dimension. PUNCH MACHINE ™ ™ No.
- Page 60 Fig. 6.5 Move the Carriage back to allow room for adjustment. PUNCH MACHINE ™ No. 1200PCH...
- Page 61 Fig. 6.6 Note Depth Plunger to be adjusted and Adjustment Wrenches to be used. PUNCH MACHINE ™ ™ No. 1200PCH...
- Page 62 Fig. 6.7 Place the Wrenches on the Locknut and Plunger. Note: Do not loosen or turn unless you are certain of which movements are necessary! PUNCH MACHINE ™ No. 1200PCH...
- Page 63 Fig. 6.8 Step 1: Loosen the Lock Nut while holding the Depth Plunger still. Step 2: For a shallower cut, turn the Depth Plunger counterclockwise. For a deeper cut, turn the Depth Plunger clockwise. Step 3: Hold the Depth Plunger still and tighten the Lock Nut.
- Page 64 45 = .004" (0.10mm) 45 = .004"(0.10mm) 90 = .008" (0.20mm) 180 = .016" (0.40mm) 360 = .032" (0.80mm) Fig. 6.9 Determine amount of movement necessary to make the appropriate adjustment. PUNCH MACHINE ™ No. 1200PCH...
- Page 65 Space Adjustment PUNCH MACHINE ™ ™ No. 1200PCH...
- Page 66 Fig. 7.1 Insert the Micrometer Card. PUNCH MACHINE ™ No. 1200PCH...
- Page 67 Fig. 7.2 Insert a key of known dimension (manufacturer original cut key) using the proper clamping procedure. PUNCH MACHINE ™ ™ No. 1200PCH...
- Page 68 If not, proceed to Recalibration Of Space. As with any HPC product, if your machine is no longer functioning properly, please dial our toll-free number (1-800-323-3295) before attempting any adjustments to avoid further damage.
- Page 69 Recalibration Of Space Fig. 7.2.1 Loosen the Space Adjustment Screw one-half turn (using the supplied wrench) as shown, but do not remove. PUNCH MACHINE ™ No. 1200PCH...
- Page 70 1. Insert supplied wrench into the Space Adjustment Hole. Fig. 7.2.2 2. Move the wrench as indicated to set the needle at known space dimension. Turning the shaft counterclockwise moves the Spacing Needle to the right. Turning the shaft clockwise moves the Spacing Needle to the left. Do not force beyond full left or or right positions! (see page 14).
- Page 71 Fig. 7.2.3 Note maximum range of possible adjustment. Any further adjustment MUST be done by authorized factory personnel. Fig. 7.2.4 After the recalibration of the needle is done, retighten the Adjustment Screw. PUNCH MACHINE ™ No. 1200PCH...
- Page 72 visit us online at: www.hpcworld.com PUNCH MACHINE ™ No. 1200PCH...
- Page 73 Preventive Maintenance PUNCH MACHINE ™ ™ No. 1200PCH...
- Page 74 Mail the Warranty Card and a copy of your invoice immediately to validate your warranty. Should your machine require factory repairs, please contact the HPC Service Department. During the one year warranty period, you will be billed for handling and shipping only.
- Page 75 Your machine should be equipped with an HPC cutter when it is sent in for repairs. If you are sending in a Blitz ™...
- Page 76 Exploded View and Parts List PUNCH MACHINE ™ ™ No. 1200PCH...
- Page 77 1200PCH Parts List Description Stock # Card Lens PCH-2001A Screws-Lens PCH 2002 Punch Handle PCH-ARM ASSY CM-50185 Punch Handle Mounting Screw PCH-2011 Screw-Punch 6.& 7. Punch & Die Set Sold Separately Screws-Clamp PCH-2013 PCH-2014 Clamp-Die Plate Spring-Clamp PCH-2015 Easy Grip Wing Nut EGN-1 Ball Bearing Washer BBW-2...
- Page 78 Exploded Parts View PUNCH MACHINE ™ ™ No. 1200PCH...
Need help?
Do you have a question about the Punch Machine 1200PCH and is the answer not in the manual?
Questions and answers