Advertisement
Advertisement
Chapters

Related Manuals for ROBBE SCHLUTER Moskito Sport II


Summary of Contents for ROBBE SCHLUTER Moskito Sport II
- Page 1 S 2884...
-
Page 2: Table Of Contents
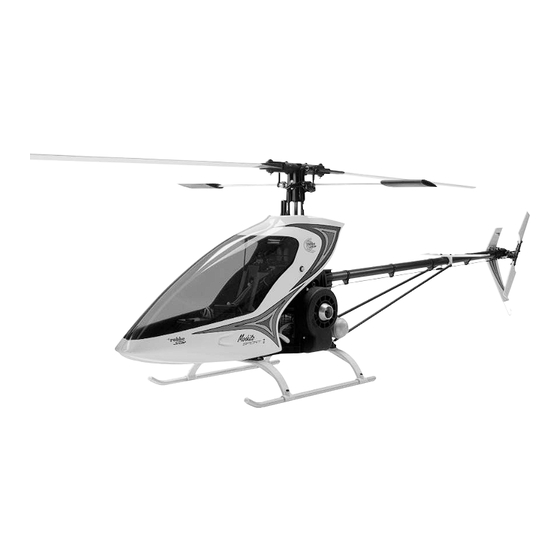
Inhaltsverzeichnis Contents Table Technische Daten: Specification: Caractéristiques techniques: Rotordurchmesser: ca. 1280 mm Rotor diameter: approx. 1280 mm Diamètre du rotor: approx. 1280 mm Heckrotordurchmesser: ca. 275 mm Tail rotor diameter: approx. 275 mm Diamètre du rotor ar. approx. 275 mm Länge: ca. -
Page 3: Vorwort
Vorwort Foreword Préface Das von Ihnen erworbene Modell The MOSKITO-Sport II which you Le modèle MOSKITO-Sport II que MOSKITO-Sport II stammt aus der have purchased is a member of the vous venez d‘acquérir est un membre Robbe-Schlüter Hubschrauber- renowned Robbe-Schlueter family of de la famille des hélicoptères robbe- Produktfamilie. -
Page 4: Foreword
Vorwort Foreword Préface Grundsätzliches zum Aufbau Basic information on assembling Généralités concernant la Sie können dieses Modell rechts- oder the model construction linksdrehend aufbauen. You can build the model in left-hand or vous pouvez construire ce modèle Unter rechts- bzw. linksdrehend right-hand rotation form. -
Page 5: Hinweise
Hinweise Notes À noter Ersatzteil einmal nicht bei Ihrem Notes on construction: Pour toute réclamation ou recours en Händler vorrätig sein, so haben Sie You will see three different symbols garantie, indiquer le numéro de die Möglichkeit alle Ersatzteile schnell used in these instructions: contrôle de qualité... -
Page 6: Notes
Hinweise Notes À noter Die Funktionsweise eines How a model helicopter works: Mode de fonctionnement d‘un Modellhubschraubers: hélicoptère A powered aircraft with fixed wing and Ein Motorflugzeug mit Tragflächen tail requires the forward thrust of the Un appareil volant à moteur a besoin und Leitwerk benötigt den Vortrieb der propeller to take off and fly. - Page 7 Hinweise Notes À noter Die Steuerung eines Controlling a model helicopter Commande d‘un hélicoptère Modellhubschraubers modèle réduit The crucial difference between a Das wichtigste fixed-wing aircraft and a helicopter is La distinction la plus sensible entre un Unterscheidungsmerkmal zum that the latter‘s power element - the avion à...
- Page 8 Baustufe / Stage / Stade: 1 S1393...
-
Page 9: Montage Kupplung
Baustufe: 1 Stage: 1 Stade: 1 1.0 Montage Kupplungseinheit 1.0 Fitting the clutch assembly 1.0 Montage de l‘embrayage 1.1 Fitting the motor mounts 1.1 Montage du support moteur S0031 M 3 x 16 Note: À noter: If you are using a motor intended for Pour la mise en place d‘un moteur, il S4059 fixed-wing use, the propeller driver... - Page 10 Baustufe / Stage / Stade: 1...
- Page 11 Baustufe: 1 Stage: 1 Stade: 1 1.2 Montage Getriebewelle: 1.2 Fitting the gearbox shaft: 1.2 Montage de l‘arbre d‘engrenage S0030 M 3 x 8 S0007 3.2 x 9 x 0.8 1.3 Montage Trägerplatte 1.3 Fitting the bearer plate 1.3 Montage de la plaque-support Hinweis: Note: À...
- Page 12 Baustufe / Stage / Stade: 1...
- Page 13 Baustufe: 1 Stage: 1 Stade: 1 1.4 Montage Motorbock 1.4 Fitting the motor brackets 1.4 Montage du support-moteur Hinweis: Note: À noter: Bei Montage der Motoreinheit auf der When attaching the motor assembly to Au montage de l‘unité de motorisation Trägerplatte, zuerst die hinteren (mit the bearer plate tighten the rear sur la plaque-support, serrer d‘abord...
- Page 14 Baustufe / Stage / Stade: 2...
-
Page 15: Montage Autorotationsfreilauf
Baustufe: 2 Stage: 2 Stade: 2 2.0 Montage Autorotationsfreilauf: 2.0 Fitting the auto-rotation 2.0 Montage de la roue libre freewheel: d‘autorotation Nach der Montage des Freilaufes; DREHRICHTUNGSKONTROLLE ! After you have fitted the freewheel: Après le montage de la roue libre, Das Tellerrad S4220 festhalten. - Page 16 Baustufe / Stage / Stade: 3...
-
Page 17: Tankzusammenbau
Baustufe: 3 Stage: 3 Stade: 3 3.0 Tankzusammenbau 3.0 Assembling the fueltank 3 Assemblage du réservoir Hinweis: Note: À noter: Den dünnen Silikonschlauch zur Use the thin silicone tubing for the Utiliser le flexible de silicone fin pour Tankpendelmontage benutzen. clunk pick-up, and the thick silicone la mise en place du plongeur du Den dicken Silikonschlauch zur... - Page 18 Baustufe / Stage / Stade: 4...
-
Page 19: Zusammenbau Oberteil
Baustufe: 4 Stage: 4 Stade: 4 4.0 Zusammenbau Oberteil, 4.0 Assembling the top and bottom 4.0 Assemblage de la partie Unterteil, Tank und Schalldämpfer chassis sections, fueltank, silencer supérieure, de la partie inférieure, bzw. Krümmer and/or exhaust manifold du réservoir et du silencieux et du coude-collecteur Hinweis: Note:... - Page 20 Baustufe / Stage / Stade: 4, 5...
-
Page 21: Montage Pitchbrücke
Baustufe: 4, 5 Stage: 4, 5 Stade: 4, 5 4.1 Montage Getriebeabdeckung 4.1 Fitting the gearbox cover and 4.1 Montage du carter d‘engrenage und Gebläsegehäuse fan housing et du carter de turbine Hinweis: Note: À noter: Bei der Montage der When fitting the fan housing be sure to Au montage du carter de la turbine, Gebläseabdeckung unbedingt darauf... - Page 22 Baustufe / Stage / Stade: 6...
-
Page 23: Montage Taumelscheibe22/23
Baustufe: 6 Stage: 6 Stade: 6 6.0 Montage Taumelscheibe 6.0 Fitting the swashplate 6.0 Montage du plateau cyclique Tip: Tip: Un conseil: Sollte nach Aufklipsen der If you connect the ball-links S4057 to Si, après engagement des biellettes Kugelgelenke S4057 auf die the plastic balls and find that they are S4057 sur les pivots sphériques de Kunststoffkugeln sich diese sich nur... - Page 24 Baustufe / Stage / Stade : 6 6.2 Montage Heckrohr 6.2 Assembling the tail boom 6.2 Montage du tube arrière...
- Page 25 Baustufe / Baustufe / Baustufe: 6 6.3 Einbau Heckrohr 6.3 Installing the tail boom 6.3 Installation du tube arrière S0088 M 3 x 18 S0012 M 3 STOP...
- Page 26 Baustufe / Stage / Stade: 7...
-
Page 27: Heckrotorblatthalter
Baustufe: 7 Stage: 7 Stade: 7 7.1 Montage Heckrotorblatthalter 7.1 Assembling the tail rotor blade 7.1 Installation des porte-pales du holders rotor arrière S4293 M 2,5 x 4 S4354 M 2.5 x 6 S4366 2.7 x 6.5 x 0.5 S0077 M 4 x 5 S0029 M 2 x 8... - Page 28 Baustufe / Stage / Stade: 7, 8...
-
Page 29: Montage
Baustufe: 7, 8 Stage: 7, 8 Stade: 7, 8 7.4 Verschraubung 7.4 Mounting the tail rotor gearbox 7.4 Vissage du mécanisme du rotor Heckrotorgetriebe arrière S0029 M 2 x 8 S0090 M 2 STOP 7.5 Securing the tail rotor gearbox 7.5 Sicherung Heckrotorgetriebe 7.5 Fixation du mécanisme du rotor arrière... - Page 30 Baustufe / Stage / Stade : 8, 9...
-
Page 31: Montage Kufenlandegestell
Baustufe: 8, 9 Stage 8, 9 Stade 8, 9 8.2 Montage Höhenleitwerk und 8.2 Fitting the horizontal stabiliser 8.2 Montage du stabilisateur Abstützungen and the struts horizontal et les renforts de tubes de queue Hinweis: Note: Höhenleitwerk waagrecht ausrichten. The horizontal stabiliser must be set À... - Page 32 Baustufe / Stage / Stade: 10...
-
Page 33: Montage Gestänge
Baustufe: 10 Stage: 10 Stade: 10 10.0 Montage Gestänge 10.0 Fitting the swashplate linkages 10.0 Montage des tringles Taumelscheibenanlenkung d‘asservissement du plateau cyclique S0020 M 2 x 10 S0000 2.2 x 5 x 0.3 S0010 10.1 Montage Gasanlenkung 10.1 Fitting the throttle linkage 10.1 Montage de l‘asservissement des gaz Hinweis:... - Page 34 Baustufe / Stage / Stade: 10...
- Page 35 Baustufe: 10 Stage: 10 Stade: 10 10.2 Montage Heckgestänge 10.2 Fitting the tail rotor pushrod 10.2 Montage des guide-tringle guides du rotor arrière Das Gestänge S0375 wie auf Seite 46 Bend the pushrod S0375 to the shape Couder la tringle S0375 comme gezeigt biegen.
- Page 36 Baustufe / Stage / Stade: 11,12...
-
Page 37: Montage Rotorkopf
Baustufe: 11,12 Stage: 11,12 Stade: 11,12 11.0 Montage Rotorkopf 11.0 Fitting the rotor head 11.0 Montage de la tête du rotor Hinweis: Note: À noter: Unbedingt auf die korrekte Be sure to orientate the thrust Veiller absolument à monter Montagerichtung des Axiallagers bearings S3509 correctly parfaitement le roulement de butée S3509 achten. - Page 38 Baustufe / Stage / Stade: 12 S4536...
- Page 39 Baustufe: 12 Stage: 12 Stade: 12 12.1 Montage Paddelstange 12.1 Fitting the flybar 12.1 Montage de la barre stabilisatrice Hinweis: Note: Paddelstange bei der Montage exakt When fitting the flybar be sure to set it À noter: mittig ausrichten. (Ausmessen) exactly central (measure both sides).
- Page 40 Baustufe / Stage / Stade: 12...
-
Page 41: Pitch Compensator
Baustufe: 12 Stage: 12 Stade: 12 12.2 Rotorkopf "R" 12.2 Rotor head „R“ 12.2 Tête du rotor „R“ Bei Aufbau eines Modells mit If you prefer to build your model with a Si vous montez à rotor à rotation vers linksdrehendem Rotorkopf, können sie left-hand rotation rotor head, skip to la gauche, passez à... - Page 42 Baustufe / Stage / Stade: 12...
- Page 43 Baustufe: 12 Stage: 12 Stade: 12 12.2 Rotorkopf "L" 12.2 Rotor head „L“ 12.3 Tête du rotor „L“ Die Gestängelänge “PB“ wird auf Set the length of the pushrod „PB“ to La tringle „PB“ est réglée sur 7 mm. 7 mm eingestellt. 7 mm.
- Page 44 Baustufe / Stage / Stade: 13 5 mm 13.0 10 mm 13.1 Ø 7,5 mm S4199 S3078 S2883...
-
Page 45: Kabinenhaube
Baustufe: 13 Stage: 13 Stade: 13 13 Kabinenhaube 13 Cabin 13 Verrière de cabine Kontur der Kabinenhälften hinten und Cut out the cabin shells along the Découper le contour des demi-cabines unten nach Markierung ausschneiden. marked line at the rear and bottom. à... - Page 46 Baustufe / Stage / Stade: 14 14.0 S3879 11 mm...
-
Page 47: Fertigstellen Der Hauptrotorblätter
Baustufe: 14 Stage: 14 Stade: 14 14.0 Fertigstellen der 14.0 Completing the main rotor 14.0 Préparation des pales du rotor Hauptrotorblätter: blades: principal: Die Hauptrotorblätter mit 600.er Rub down the main rotor blades lightly Poncer légèrement les pales du rotor Schleifpapier leicht überschleifen und with 600-grit abrasive paper and paint principal avec du papier de verre fin... - Page 48 Baustufe / Stage / Stade: 14...
- Page 49 Baustufe: 14 Stage: 14 Stade: 14 14.1 Schwerpunkt ermitteln: 14.1 Finding the Centre of Gravity 14.1 Définition du centre de gravité Sollten Sie keine Rotorblattwaage (CG): Si vous ne disposez pas d‘une (robbe No. S 1367) besitzen, so If you do not possess a rotor blade balance à...
- Page 50 Baustufe / Stage / Stade: 15...
-
Page 51: Einbau Der
Baustufe: 15 Stage: 15 Stade: 15 15 Einbau der 15 Installing the receiving system 15 Mise en place des éléments de components l‘ensemble de réception Fernsteuerungskomponenten À noter: Les emplacements indiqués Note: Hinweis: pour les composants de l‘ensemble de The location of the RC components Die gezeigte Platzierung der RC- réception, l‘alimentation, le récepteur, battery, receiver, switch and gyro... - Page 52 Baustufe / Stage / Stade: 15 15.1 PA = 63mm 'P A' PC = 8,5 mm Pmax GD = 10 - 14 mm 'GD' 'PC' Gmax...
- Page 53 Baustufe: 15 Stage: 15 Stade: 15 Vorgehensweise: Procedure: Séquence de réglage: - Sender einschalten - Switch on the transmitter - mettre l‘émetteur en marche - Freien Modellspeicher wählen - Select a vacant model memory - sélectionner une mémoire de - Modellspeicher programmieren auf - Program the model memory to the modèle non occupée Mixtyp Heli...
- Page 54 Baustufe / Stage / Stade: 15 15.2 'Re' 'RA' 'Li' 0° RA = 17 mm 'Rü' NA = 14 mm 'Vo'...
- Page 55 Baustufe: 15 Stage: 15 Stade: 15 Hinweis: Note: À noter: Die Servos dürfen auf keinen Fall an The servos must not be obstructed Les servos les doivent en aucun cas einen mechanischen Anschlag laufen. mechanically at any point. If connaître de butée mécanique. Si Gegebenfalls die Gestänge am necessary re-connect the pushrod to a nécessaire déplacer les tringles plus...
- Page 56 Baustufe / Stage / Stade: 15 15.3 HA = 11 mm HB = 20 mm 'Re' 'Li'...
- Page 57 Baustufe: 15 Stage: 15 Stade: 15 15.3 Servoeinstellung für 15.3 Servo set-up for the tail rotor 15.3 Réglage du servo du rotor Heckrotorservo servo arrière - Servoscheibe bzw. Hebel für - Select an output disc or lever for the -Sélectionner le palonnier du servo de Heckrotor nach Skizze so tail rotor servo as shown in the rotor arrière de telle manière qu‘il soit...
- Page 58 Baustufe / Stage / Stade: 16 16.0...
-
Page 59: Endkontrolle
Baustufe: 16 Stage: 16 Stade: 16 16 Endkontrolle: 16 Final checks: 16 Contrôle final Bei Neutralstellung aller Servos muß When all servos are at neutral the Lorsque tous les servos se trouvent der Pitchhebel waagerecht und die collective pitch lever should be au neutre, il faut que le palonnier du Umlenkhebel zur Taumelscheibe 90°... - Page 60 Tips Tips Conseil 17 Allgemeines zur 17 General information on 17 Généralités concernant la Programmierung der programming the radio control programmation de l‘ensemble de Fernsteuerung: system: radiocommande Wie bereits in Baustufe15 As already explained in Stage 15: Comme mentionné au chapitre 15 sur Servoeinstellung erläutert, stellt die Servo set-up, if a model helicopter is les réglages mécaniques, il faut au...
-
Page 61: Tips Zur Program
Tips Tips Conseil Nun wird nun der Pitchwert The next step is to adjust the Régler ensuite le „maximum“ du pas. “Maximum“ eingestellt. collective pitch „maximum“ setting. Il faut s‘assurer que le régime du moteur reste constant sur l‘ensemble Erreicht werden soll, daß über den The ideal situation is that rotor speed de la fourchette du pas. - Page 62 Tips Tips Conseil Ausgehend vom Schwebeflug wird Starting from a stable hover, abruptly En partant de la position du manche zügig Pitch gegeben. increase the collective pitch setting. en vol stationnaire, donner rapidement du pas. Dreht das Modell gegen die If the model turns around the vertical Drehrichtung des Rotors um die axis (yaws) in the opposite direction to...
- Page 63 Tips Tips Conseil Im Folgenden gehen wir noch kurz auf The following section covers a number Dans les paragraphes qui suivent einige weitere Programmierfunktionen of extra programming functions briefly. nous détaillons encore un certain ein, die Sie anhand des We recommend that you study your nombre de fonction de programmation Fernsteuerungshandbuches RC system operating manual before...
- Page 64 Irrtum und technische Änderungen vorbehalten Copyright robbe-Modellsport 2002 Kopie und Nachdruck, auch auszugsweise, nur mit schriftlicher Genehmigung der robbe-Modellsport GmbH & Co.KG Errors and omissions excepted. Modifications reserved. Copyright robbe-Modellsport 2002 Copying and re-printing, in whole or in part, only with prior written approval of robbe-Modellsport GmbH &...
- Page 65 Z u b e h ö r I t e m s Zubehör Accessories Folgendes Zubehör wird zur Fertigstellung des Modells benötigt und ist nicht in diesem Montagekasten enthalten: The following accessory items are required to complete the model, and are not included in this kit: Die Empfehlungen beziehen sich auf Zubehör aus dem robbe Programm.
- Page 66 A c c e s s o i r e s Accessoires Les accessoires énumérés ci-dessous sont indispensables à la réalisation du modèle et ne sont pas contenus dans cette boîte de con- struction. Pour les modèles d’hélicoptères, nous recommandons un ensemble de radiocommande d’au moins cinq voies. Par exemple: robbe Futaba FX 18 FM 35 MHz 4/7/3 réf.
Need help?
Do you have a question about the Moskito Sport II and is the answer not in the manual?
Questions and answers