
Summary of Contents for TINY Hawk II Freestyle
- Page 1 Freestyle Thanks for purchasing the Tinyhawk II . Designed in California, assembled in China.
-
Page 2: Disclaimer
Tinyhawk II Freestyle Disclaimer Please read the disclaimer carefully before using this product. By using this product, you hereby agree to this disclaimer and signify that you have read them carefully and completely. This product is not suitable for people under the age of 18. Adult supervision is highly recommended for kids under the age of 18. -
Page 3: Table Of Contents
Tinyhawk II Freestyle Table of Contents Disclaimer........................1 Precautions........................1 Support........................... 1 Product specification...................... 4 Tinyhawk II Freestyle..................4 Parameter......................4 Radio......................4 Goggle......................5 Product list......................5 Tinyhawk II Freestyle Structure................6 Radio and Goggle Diagram..................7 Radio..........................7 Battery and Charging..................... 7 Operation........................8 Power......................8 Binding...................... - Page 4 Tinyhawk II Freestyle First Person View (FPV) Flying..............21 emax-usa.com...
-
Page 5: Product Specification
Product specification Tinyhawk II Freestyle Parameter Diagonal wheelbase (without paddles) 115mm Maximum size of the aircraft (without 143×137×23(mm) antenna, cable tie) Aircraft weight (without battery) TH1103-7000KV Motor Avan Rush 2.5 inch Propeller Propeller F4(MATEKF411RX firmware) 4 in one 5A ESC Main Flight Controller SPI RX receiver(Compatible with Frsky remote control D8 mode)... -
Page 6: Goggle
Goggle Maximum appearance size 140×153×90(mm) weight (without battery) 398g Resolution 480×272 battery 1 cell 18650 lipo battery Product list Freestyle 1. Tinyhawk II × 1 2. Radio × 1 3. Goggle × 1 4. Goggle battery box (including 1 cell 18650 battery) × 1 5. -
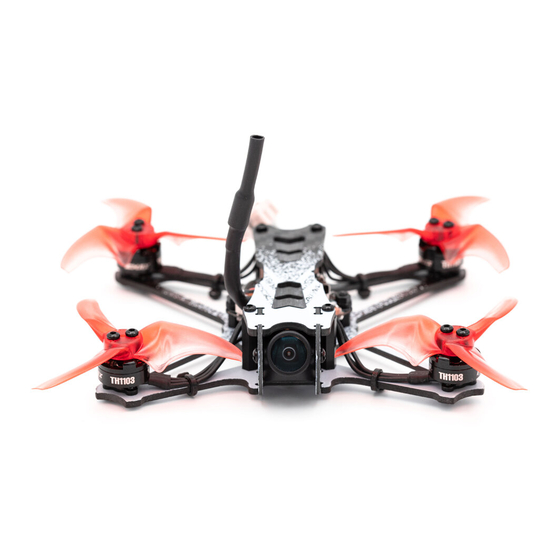
Page 7: Tinyhawk Ii Freestyle Structure
Tinyhawk II Freestyle Structure emax-usa.com... -
Page 8: Radio And Goggle Diagram
Radio and Goggle Diagram Radio Battery and Charging This is a 6 channel 2.4 GHz radio, The radio is powered with an 18650 battery. The radio comes with the battery installed; however if a reinstall is needed make sure the negative side is on the side touching the spring of the radio. -
Page 9: Operation
Operation Power Power on and off by holding the power button for 2 seconds. The center light will turn green when on. Binding Freestyle The radio comes already bound to tinyhawk II in the ready to fly kit. If binding is necessary follow these steps: Freestyle 1. -
Page 10: Goggles
6. Press and hold both throttle trim buttons and both pitch trim buttons for 2 seconds to exit calibration mode. Goggles Battery and Charging The battery cartridge comes preinstalled with a 18650 battery. If a battery reinstall is required please use caution making sure to install with the correct polarity. The battery can be charged in the cartridge with a micro USB cable. -
Page 11: Operation
4. Please remove antennas and power lead when traveling/storing the goggles. Operation Power Power on the goggles by plugging in the power lead from the battery cartridge. Power off by unplugging the power lead from the battery cartridge. Video Channel Selection There are 2 buttons (CH and FR) that can manually select the correct channel and frequency band. -
Page 12: Tinyhawk Ii Freestyle
to increment and “CH” to decrement. The menu will close automatically after 3 seconds if no input was detected. Tinyhawk II Freestyle Propeller Direction and Mounting There are 2 spinning directions for Tinyhawk II Freestyle propellers, Clockwise (CW) and Counter-Clockwise (CCW). When Buying a set of propellers, 2 CW and 2 CCW will be given. -
Page 13: Tinyhawk Ii Freestyle Vtx Settings
Tinyhawk II Freestyle VTX Settings Changing VTX setting via Betaflight OSD Freestyle Tinyhawk II is equipped with SmartAudio and is already configured with stock settings. The SmartAudio line is operated on UART 2 TX. Freestyle 1. Power on Tinyhawk II , goggles, and Controller. -
Page 14: Vtx Channel Settings With The Button
VTX Channel Settings with the Button NOTE: You must “disable” VTX Smart AUDIO on UART 2 in order for push button VTX adjustment to work as described below. Vtx Schematic and Button Diagram 1. Normal display When powered on, the parameters of frequency group band, frequency point and power are displayed twice by LED cycle, then the LED is extinguished. - Page 15 (2)Press the button and hold for 5s again to save parameters and exit the menu. After saving and exiting the menu, all LED goes out. 3.Enter/Exit Band / Channel / Power option (1) After entering menu, short click button to switch frequency group band / frequency point / power, and the LED of the corresponding menu is lit.
-
Page 16: Emax On-Board Receiver
User Unlocked Configuration (Adjustable Output) FCC: Ham radio license required for use in North America. E band Channels 4, 7, and 8 limited to prevent transmitting outside of designated amateur radio frequencies. Adjustable video output power only available on select models. EU/CE: Do not use Use Unlocked Configuration. -
Page 17: Emax Tinyhawk Ii Freestyle Flight Controller (Fc)
Binding Procedure Binding is the process of uniquely associating a receiver to a transmitter module. A transmitter module can be bound to multiple receivers (not to be used simultaneously). A receiver can only be bound to one transmitter module. 1.Hold the bind button for 2 seconds while the flight controller is already on. When the RED LED is flashing, it means the receiver is in BIND MODE 2.Turn on the transmitter, make sure it is set to D8 mode, and then set it into bind mode. -
Page 18: Adjusting Software Settings (Betaflight Configurator)
PID profile 1 is tuned and optimized for Tinyhawk II Freestyle with the provided 2x Emax 1s HV 450 mAh battery for ultimate control in outdoor flight. Please do not change these values. Rate Profiles: Profile 1 is designed for optimal outdoor flight for people who like to fly "thumber" style. -
Page 19: Restoring The Tinyhawk Ii Freestyle Default Settings
Tinyhawk II Freestyle Restoring the default settings 1. Download the latest CLI Dump File from https://emax-usa.com/service 2. Connect Tinyhawk II Freestyle to Betaflight configurator and select the CLI 3. Open the CLI Dump File in a text editor and copy all the text. 4. -
Page 20: Flight
Flight Always use caution when flying and operate in an open and controllable area. Please learn the flight controls first before powering on the aircraft to fly. Radio Stick Controls Freestyle The left stick controls throttle and yaw direction of Tinyhawk II . -
Page 21: Arming
Freestyle battery. Land Tinyhawk II when the battery reaches 3.2v; flying any longer can severely damage your battery and is not recommended. Arming Freestyle Arming refers to setting Tinyhawk II to a fly ready state. When Tinyhawk II Freestyle is powered on first it will not spin up the propellers until it is armed. Arm the aircraft by first moving throttle to the bottom position. -
Page 22: Line Of Sight Flying
Intermediate Mode: This mode has a higher angle limit for higher speed flying with the same attitude control. The only difference is at the end of the gimbal for pitch and roll, it will cause the aircraft to flip in that direction. Advance Mode: This mode gives you full control of the aircraft.
Need help?
Do you have a question about the Hawk II Freestyle and is the answer not in the manual?
Questions and answers