Table of Contents
Advertisement
We strive to ensure that our products are of the highest quality
and free of manufacturing defects or missing parts. However, if
you have any problems with your new product,
FAX: 1-866-873-3531
gameroom@escaladesports.com
Please
have your model number when inquiring about parts.
When contacting Escalade Sports please provide your model number, date
code (if applicable) and part number if requesting a replacement part. These
numbers are located on the product, packaging, and this owners manual.
Your Model Number ____________________
2 - AL1005W-
Date Code ___________________________
Purchase Date ________________________
PLEASE RETAIN THIS INSTRUCTION MANUAL FOR FUTURE REFERENCE
All Rights Reserved.
© 202 0 Escalad e Sports
DO NOT RETURN IT TO THE STORE
please contact us toll free @:
1-888-996-2729
Customer Service Department
Evansville IN 47706
AL1005W/F
Or write to:
Escalade Sports
P.O. Box 889
- SY
1
,
Fo r Custome r Servic e Cal l 1-888-996-2729
Advertisement
Table of Contents

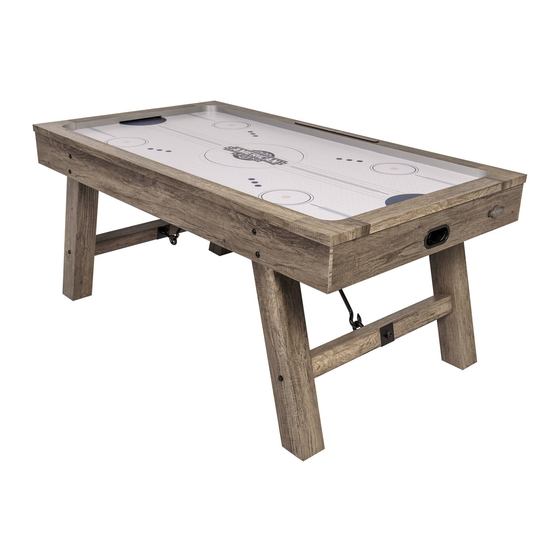
Summary of Contents for American Legend 72’’ BROOKDALE AIR HOCKEY TABLE AL1005W/F
- Page 1 We strive to ensure that our products are of the highest quality and free of manufacturing defects or missing parts. However, if you have any problems with your new product, DO NOT RETURN IT TO THE STORE please contact us toll free @: 1-888-996-2729 FAX: 1-866-873-3531 gameroom@escaladesports.com...
- Page 2 IMPORTANT! READ EACH STEP IN THIS MANUAL BEFORE YOU BEGIN THE ASSEMBLY. TWO ADULTS ARE REQUIRED TO ASSEMBLE THIS 72’’ BROOKDALE AIR HOCKEY TABLE Tools Required: Socket Head Wrench (Included) Furnitur e Polish and Cloth 24mm Open End Wrench or Crescent Wrench Small Phillips Screw Driver to Install Batteries Assembly Tips Make sure you understand the following tips before you begin to assemble your hockey table.
- Page 3 HARDWARE IDENTIFIER (To Scale) H1 - 8mm x 130mm Hex Head Bolt (4 pcs) H2 - 8mm x 40mm H3 - M8 Flat Washer H4 - M8 Lock Washer Hex Head Bolt (16 pcs) (16 pcs) (12 pcs) (Not to Scale) H6- M18 Flat Washer H5 - M16 Hex Nut T1 - Socket Head Wrench...
- Page 4 P4 - Leg Cross Support P5 - Turnbuckle Support P6 - Leg Leveler (2 pcs) (2 pcs) (4 pcs) P7 - Metal Bracket P8 - Leg Cross Support Hook P9 - Cabinet Support Brace Hook (2 pcs) (2 pcs) (2 pcs) Note: Will install onto P4 Leg Cross Supports ACCESSORIES IDENTIFIER...
- Page 5 PARTS REQUIRED 1pc - P1 Main Cabinet 4pcs - H5 M16 Hex Nut 2pcs - P9 Cabinet Support Brace Hook 4pcs - H6 M18 Flat Washer STEP 1 Attach the P9 Cabinet Support Brace Hook onto the P1 Main Cabinet using the H5 Hex Nut and H6 M18 Flat Washer as shown in FIGURE 1.
- Page 6 PARTS REQUIRED 2pcs - P4 Leg Cross Support 4pcs - H5 M16 Hex Nut 2pc - P7 Metal Bracket 4pcs - H6 M18 Flat Washer 2pc - P8 Leg Cross Support Hook STEP 3 Align the hole on the P7 Leg Bracket with the predrilled hole on the P4 Leg Cross Support. Attach the P8 Leg Cross Support Hook onto the P4 Leg Cross Support with the H5 Hex Nut and H6 Flat Washer as shown in FIGURE 3.
- Page 7 PARTS REQUIRED 2pcs - P5 Turnbuckle Support 4pcs - P6 Leg Leveler STEP 5 Attach the P5 Turnbuckle Support onto the P8 Leg Cross Support Hook and P9 Cabinet Support Brace Hook. Thread P6 Leg levelers to legs as shown in FIGURE 5. NOTE: It will be necessary to screw out both ends of the turnbuckle in order to attach them to the hooks.
- Page 8 ELECTRONIC CONNECTIONS C1. Sensor with Short Wire C6. Blower with A/C Cord C2.Sensor with Long Wire C3. Control Box C5. Scorer IMPORTANT: Plug into wall outlet. Do not allow cord to be a trip hazard. NOTE: ON/OFF switch is attached to the air fan motor cord.
- Page 9 LED SCORING OPERATING All Rights Reserved. © 202 0 Escalad e Sports Fo r Custome r Servic e Cal l 1-888-996-2729...
- Page 10 Congra tula tion s! Y ou ha v e now a ssembled your table . Plea s e no t e the Car e and Use instructions below to insure many years of trouble free use of your game t a b l e. CA R E AND U SE OF YO UR T A B L E 1 .
- Page 11 First Time Battery Installation: Locate battery compartment for this product . Use alkaline batteries for maximum performance . Using a small Phillips head screwdriver – loosen and remove the battery compartment cover screw(s). Remove battery compartment cover . Install new batteries only after reading the “ Battery Information NOTICE“ ! Replace compartment cover and secure cover with the cover screw .
- Page 12 90 DAY LIMITED WARRANTY This customer warranty extends to the original owner, on the purchase of any ESCALADE SPORTS Product (hereinafter referred as the "Product"). WARRANTY DURATION: This Product is warranted to the original owner, for a period of 90 days from the original purchase.


Need help?
Do you have a question about the 72’’ BROOKDALE AIR HOCKEY TABLE AL1005W/F and is the answer not in the manual?
Questions and answers