Table of Contents
Advertisement
Available languages
Available languages
Quick Links
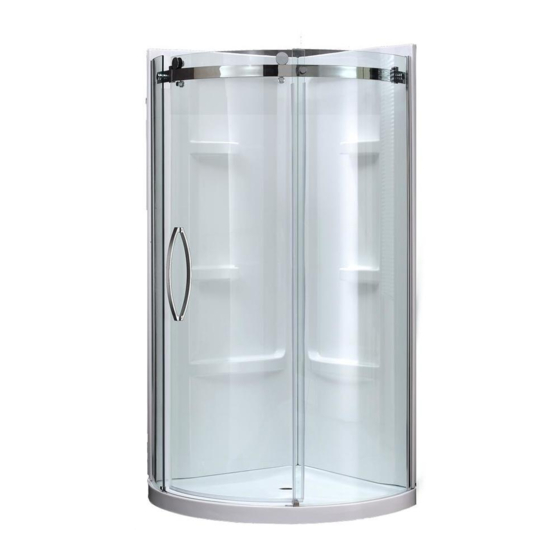
CAICOS
Purchase date: _________________________
Product Tracking Reference: ________________________
Questions, problems, missing parts?
Before returning to your retailer, call our customer service department at
1-866-839-2888, 9 a.m. - 5 p.m., EST, Monday - Friday
2800 Etienne Lenoir, Laval
OVE 2014-05-05
1
Québec H7R 0A3 Canada
Advertisement
Chapters
Table of Contents

Related Manuals for OVE CAICOS


Summary of Contents for OVE CAICOS
- Page 1 CAICOS Purchase date: _________________________ Product Tracking Reference: ________________________ Questions, problems, missing parts? Before returning to your retailer, call our customer service department at 1-866-839-2888, 9 a.m. - 5 p.m., EST, Monday - Friday 2800 Etienne Lenoir, Laval OVE 2014-05-05 Québec H7R 0A3 Canada...
-
Page 2: Table Of Contents
TABLE OF CONTENT PACKAGE CONTENT............................4 HARDWARE CONTENT............................5 TOOLS REQUIRED............................. 5 SAFETY INFORMATION............................. 6 PREPARATION..............................6 THIS SHOWER IS NOTREVERSIBILITY......................7 BASE AND ACRYLIC WALL INSTALLATION (OPTIONAL)................8 WALL TRACKS INSTALLATION.........................9 FIXED PANELS INSTALLATION........................10 SUPPORT BAR INSTALLATION........................12 DOOR PANEL INSTALLATION......................... -
Page 3: Package Content
PACKAGE CONTENT... - Page 4 PACKAGE CONTENT PART# DESCRIPTION CODE Wall tracks for fixed panel 99STR0026-WM Fixed glass panel (Small) 99SG10019-WM Roller stoppers 99SDS0006-WM Acrylic walls 29SAP-081340-001WM Support bar 99SGS0016-WM Fixed panel’s brackets 99SGC3107-WM Door rollers 99SWE3103-WM Anti-jump pegs 99SWE3107-WM Door panel 99SGD0022-WM Fixed glass panel (Large) 99SG10020-WM Fixed panel’s bottom seal strip (Long) 99SRU0078-WM...
-
Page 5: Hardware Content
HARDWARE CONTENT Screw Screw Screw Screw Bolt ST4x12mm ST4x15mm ST4x20mm ST4x25mm M6x20mm 6+2 extra 10+2 extra 2+1 extra 8+2 extra 5+1 extra Fitting Clip 14+2 extra 14+2 extra 5+1 extra TOOLS REQUIRED Drill with ceramic tile bits Pencil Screwdriver Level ø3mm (1/8”) Allen key Measuring Tape... -
Page 6: Safety Information
SAFETY INFORMATION Please read and understand this entire manual before attempting to assemble, operate or install the product. • Handle the tempered glass with caution! Improperly handling the glass can cause it to break suddenly in small pieces (never in pointed fragments). •... -
Page 7: This Shower Is Notreversibility
THIS SHOWER IS NOT REVERSIBLE • This instruction is drawn up for an opening from left to right. • Note that this shower is not reversible. BASE AND ACRYLIC WALL INSTALLATION (OPTIONAL) 1. Using silicone, install the 2 acrylic walls (E) together. Secure the 2 walls with bolt (EE) and nut (FF). 2. - Page 8 BASE AND ACRYLIC WALL INSTALLATION (OPTIONAL) 1-3. Place the acrylic wall and the base on the wall and level it. 4-5. Measure the position of the tap handle and the shower head, make the hole using a box saw. Drywall Studs Acrylic or tile wall...
-
Page 9: Wall Tracks Installation
WALL TRACKS INSTALLATION 1-2. Ensure the base and wall are leveled. Place 2 metal tracks (B) approximately 25mm (1") from the edge of the acrylic wall to the center of the holes of the metal track. 3-4. Mark the holes clearly on the wall. 5. -
Page 10: Fixed Panels Installation
FIXED PANELS INSTALLATION 1-2. Insert the fixed panel’s bottom seal strips (N and L) at the base of the fixed glass panels (C and K). Cut the surplus part with a cutter. 3. Insert the fixed glass panels (C and K) into the metal tracks (B). Do not fully tighten it as further adjustments may be required. - Page 11 FIXED PANELS INSTALLATION 1-3. Completely remove the support bar (F) and the fixed glass panels (C and K). 4. Remove the plastic gaskets from the support bracket (R) and the guide (Q). Drill pilot holes with a ø3mm drill bit. 5-6.
-
Page 12: Support Bar Installation
SUPPORT BAR INSTALLATION 1-3. Fix the fixed panels (C and K) onto the support bar (F) using the brackets (G). Use a ratchet to strongly tighten the bolts. 4. Drill the 2 wall metal tracks (B) on 3 positions (top, middle and bottom) with a ø3mm drill bit. Level the panels (C and K). -
Page 13: Door Panel Installation
DOOR PANEL INSTALLATION 1. Insert the door panel’s bottom seal strip (O) at the base of door panel (J) and cut the surplus with a cutter. 2-3. Install the 2 top rollers (H) on the door glass panel (J). Use a ratchet to strongly tighten the bolts. 4. -
Page 14: Handle Installation & Sealing
HANDLE INSTALLATION & SEALING 1. Install the door handle (M) using an Allen key. 2. Ensure that the door closes tightly and opens smoothly, and that there is a tight connection between the fixed glass panels and the frame as well as the support bar. Apply a clear silicone water sealant around the outside perimeter of any fixed shower components (horizontally between bottom of fixed glass panel and base, as well as vertically between the wall, glass frames, and any fixed glass panel). -
Page 15: Care And Maintenance
CARE AND MAINTENANCE For the daily maintenance, use a wet cloth and a soft liquid cleaner. Never use abrasive cleaners containing some acetone, chlorine or strong bleach, scrapers, metallic brushes, nor other objects or the products which can graze or tarnish surfaces. Use a ratchet to strongly tighten any bolts used to support the fixed glass panels or doors panel (support bolts can withstand up to 250 lbf*in of torque). - Page 16 CAICOS Date de l’achat: _______________________ Numéro de référence du produit: ______________________ Questions, problèmes ou pièces manquantes? Avant de retourner le produit à votre détaillant, contactez notre service à la clientèle au 1-866-839-2888, du lundi au vendredi de 9h00 à 17h00 HNE.
- Page 17 TABLE DES MATIÈRES CONTENU DE L’EMBALLAGE........................... 4 QUINCAILLERIE..............................5 OUTILS REQUIS..............................5 INFORMATION SUR LA SÉCURITÉ........................6 PRÉPARATION..............................6 CETTE N’EST PAS DOUCHE EST RÉVERSIBLE....................7 INSTALLATION DE LA BASE ET DES MURS D’ACRYLIQUE (OPTIONNEL)..........8 INSTALLATION DES RAILS MURAUX........................9 INSTALLATION DES PANNEAUX FIXES......................
-
Page 18: Contenu De L'emballage
CONTENU DE L’EMBALLAGE... - Page 19 CONTENU DE L’EMBALLAGE PART# DESCRIPTION CODE Rail mural pour panneau fixe 99STR0026-WM Panneau fixe (Petit) 99SG10019-WM Buttées pour roues 99SDS0006-WM Murs d’acrylique 29SAP-081340-001WM Barre de support 99SGS0016-WM Raccords pour panneau fixe 99SGC3107-WM Roues de la porte 99SWE3103-WM Buttées anti-sauts 99SWE3107-WM Panneau de la porte 99SGD0022-WM Panneau fixe (Grand)
-
Page 20: Quincaillerie
QUINCAILLERIE Boulon ST4x12mm ST4x15mm ST4x20mm ST4x25mm M6x20mm 6+2 extra 10+2 extra 2+1 extra 8+2 extra 5+1 extra Écrou Raccords Capuchon Capuchon Clip 14+2 extra 14+2 extra 5+1 extra OUTILS REQUIS Perceuse avec forets à céramique Crayon Tournevis Niveau ø3mm (1/8”) Clé... -
Page 21: Information Sur La Sécurité
INFORMATION SUR LA SÉCURITÉ S.v.p. lire et comprendre complètement le manuel avant de tenter d’assembler, d’installer et d’utiliser le produit. • Manipulez le verre trempé avec précaution sinon il pourrait se briser en petits morceaux (jamais en fragments pointus). • 2 personnes sont requises pour installer le produit correctement et sécuritairement. AVERTISSEMENT •... -
Page 22: Cette N'est Pas Douche Est Réversible
CETTE DOUCHE N’EST PAS RÉVERSIBLE • Utilisez ces instructions pour une ouverture de la porte de gauche à droite. • Notez que cette douche n’est pas réversible. INSTALLATION DE LA BASE ET DES MURS D’ACRYLIQUE (OPTIONNEL) 1. Appliquez une ligne de silicone entre les 2 panneaux d’acrylique (E). Fixer les 2 panneaux avec les boulons (EE) et écrous (FF). - Page 23 INSTALLATION DE LA BASE ET DES MURS D’ACRYLIQUE (OPTIONNEL) 1-3. Placez les murs d’acrylique et la base sur le mur et mettre le tout à niveau. 4-5. Mesurez la position désirée de la poignée et de la tête de douche, puis percez les trous adéquat avec une scie sauteuse.
-
Page 24: Installation Des Rails Muraux
INSTALLATION DES RAILS MURAUX 1-2. S’assurer que la base et les murs soient à niveau. Placez les 2 rails muraux (B) environ à 25mm (1”) du bord du mur d’acrylique jusqu’au centre des trous sur le rail. 3-4. Marquez les trous sur le mur. 5. -
Page 25: Installation Des Panneaux Fixes
INSTALLATION DES PANNEAUX FIXES 1-2. Insérez les joints d’étanchéité du bas des panneaux fixes (N & L) à la base de leurs panneaux respectifs (C & K). Coupez le surplus avec un exacto. 3. Insérez les panneaux fixes (C & K) dans les rails muraux (B). Ne pas serrer fixer pour l’instant. 4. - Page 26 INSTALLATION DES PANNEAUX FIXES 1-3. Retirer complètement la barre de support (F) et les panneaux fixes (C&K). 4. Retirez les joints de plastique dans le support (R) et le guide (Q). Percez les trous guides avec un foret ø3mm. 5-6. Fixez le raccord (R) et le guide (Q) avec les vis (CC), puis replacez les joints de plastique. Installez la clip (JJ) sur la vis du guide (Q).
-
Page 27: Installation De La Barre De Support
INSTALLATION DE LA BARRE DE SUPPORT 1-3. Fixez les panneaux (C & K) sur la barre de support (F) en utilisant les raccords (G). Utilisez une clé à rochet afin de fortement serrer les boulons. 4. Percez les 2 rails muraux (B) en 3 positions (haut, milieu et bas) avec un foret ø3mm. Mettre à niveau les panneaux. -
Page 28: Installation De La Porte
INSTALLATION DE LA PORTE 1. Insérez le joint d’étanchéité du bas de la porte (O) à la base de la porte (J) et coupez le surplus avec un exacto. 2-3. Installez les 2 roues (H) sur la porte (J). Utilisez une clé à rochet afin de fortement serrez les boulons. 4. -
Page 29: Installation De La Poignée Et Scellage
INSTALLATION DE LA POIGNÉE ET SCELLAGE 1. Installez la poignée de porte (M) avec une clé Allen. 2. Assurez-vous que la porte se ferme hermétiquement et s’ouvre doucement, et que le châssis et la barre de support sont étroitement fixés aux panneaux de verre. Appliquez un scellant étanche à... -
Page 30: Traitement Et Entretien
TRAITEMENT ET ENTRETIEN Utilisez un chiffon mouillé et un nettoyant liquide doux pour l’entretien quotidien. N’utilisez jamais de nettoyants abrasifs contenant de l’acétone, du chlore ou du javellisant puissant, et évitez les grattoirs, les brosses métalliques et tout autre objet ou produit pouvant érafler ou ternir les surfaces. Utilisez la clé...
Need help?
Do you have a question about the CAICOS and is the answer not in the manual?
Questions and answers