Advertisement
Quick Links
Advertisement

Subscribe to Our Youtube Channel
Summary of Contents for Aputure NOVA P300c
- Page 1 NOVA P300c Product Manual English...
-
Page 2: Important Safety Instructions
Foreword Thank you for purchasing Aputure® NOVA P300c. The Aputure NOVA P300c is a color panel lamp with wide color gamut. IMPORTANT SAFETY INSTRUCTIONS Bsica safety precautions should always be followed while using the unit, as bellowing: 1. Please read and understand these instructions before using 2. - Page 3 fixture in water or any other liquid. 10. To reduce the risk of electric shock, don’t disassemble this fixture. Contact Aputure Customer Service or take it to qualified service personnel when service or repair work is required. Incorrect reassembly may cause electric shock when the lighting fixture is in use.
-
Page 4: Fcc Compliance Statement
19. The instructions and information in this manual are based on thorough, controlled company testing procedures. Further notice will not be given if the design or specifications change. SAVE THESE INSTRUCTIONS FCC Compliance Statement This device complies with Part 15 of the FCC Rules. Operation is subject to the following two conditions: (1) This device may not cause harmful interference. -
Page 5: Components List
If not, please contact with your sellers immediately. Paracord Strap(1 pc) Control Box (1 pc) Nova P300c Lamp Head (1 pc) Lightning Clamp Nova P300c Custom Hard Shell (1 pc) (Available in Kit/Sold Separately) (1pc) Cable Tie Cable Tie Cable Tie Neutrik® powerCON AC 5-Pin Male-to-Female... -
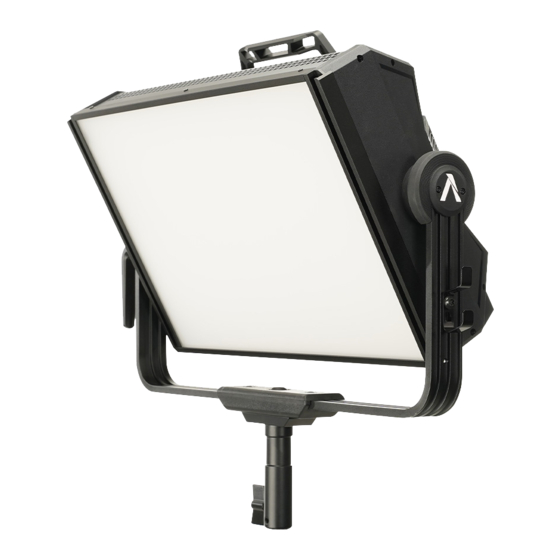
Page 6: Product Details
Product Details 1. Light Quick-Release Accessory Fixed Diffusion "Lightning Clamp" Carrying Handle Slot Panel Receiver /Floor Stand Cable Relief Hook T-Handle Storage Hole Dual Junior/Baby Pin Yoke Small text underneath: (1-1/18in. / 28mm | 5/8in / 16mm) Neutrik® powerCON Control Box Input Disk Brake AC Power Input T-Handle... -
Page 7: Installations
5-Pin Female XLR Control Box Input DMX IN Port DMX OUT Port Installations 1. Setting Up Your Light Baby Pin (5/8in. / 16mm) Mount the lamp head onto a light stand, then fix it in place by tightening the T-Handle on the mounting column. - Page 8 * The lamp controller interface schematic is shown in the pictures below: Power-Ground Signal Pin-B Signal Pin-A Ground 3. Instructions for the Lightning Clamp 1) Clamp the Lightning Clamp onto a light stand. 2) To attach the control box, rotate the release lever to unlock the quick-release baseplate, then mount the control box onto the Lightning Clamp (the release lever will automatically spring back).
- Page 9 You can also power this light via DC 24V-48V Power from a 3-pin XLR. This can be done via our an Aputure Battery Power Station that supports 48V output, or other power stations or block batteries that are capable of outputting the same voltage.
- Page 10 Operation Instructions 1. Turning on the Light After connecting the lamp head to an appropriate power source, connect the lamp head and control box with one of the included 5-Pin Male-to-Female XLR Head Cables. Press the power button on the side of the control box to turn the light on and off.
- Page 11 Rotate the CCT / HUE Control Knob to adjust the CCT or HUE Output of the light fixture. Rotate the Green-Magenta / Saturation (G/M / SAT) Control Knob to adjust the the Green-Magenta Shift or Saturation output of the light fixture. * The speed at which you rotate the knob will result in different rates of change.
- Page 12 2.2. Light Mode Interface Press the Light Mode button to enter the system. 2.2.1 Press the INT button to select CCT mode to adjust the color emperature of the light from 2000K-10000K. 2.2.2 Press the INT button to select HSI mode to adjust the change of the HUE from 1°~360°.
- Page 13 2.2.3 Press the INT button to select FX mode, then rotate the INT control knob to toggle between Club Lights, Paparazzi, Lightning, TV, Candle, Fire, Strobe, Explosion, Fault Bulb, Pulsing, Welding, Cop Car, Color Chase, Party Lights, Fireworks. a. Club Lights b.
- Page 14 g. Strobe h. Explosion i. Fault Bulb j. Pulsing i. Welding j. Cop Car l. Party Lights k. Color Chase m. Fireworks -13-...
- Page 15 Under anyone FX mode, press the INT control knob to circulate the light effect and press the INT control knob again to pause the light effect. But under Lightning and Explosion, press the INT control knob, it will become trigger. 2.2.4 Press the INT button to select RGB mode to adjust the brightness via change the scale of each of R/G/B.
- Page 16 2.2.7 Press the INT button to select GEL mode, then rotate the INT control knob to adjust the brightness, rotate the INT control knob to choose 3200K/5600K and press G/M control knob to enter the interface of GEL. 2.3 Press the MENU button to enter the system of menu interface, as shown below.
- Page 17 2.3.2 Dimming curve mode Press the MENU button to enter the system menu, rotate the INT control knob to select Dimming Curve, and press the INT knob again to enter the dimming curve. rotate the INT control knob to choose from exponential (Exp), logarithmic (Log), S-Curve, or linear dimming curves, and press the INT control knob to make your choice.
- Page 18 2.3.5 Fixture Serial No. Press the MENU button to enter the system menu, rotate the INT control knob to select "Fixture Serial No." and you can see that device has a unique serial number. 2.3.6 Update Firmware Press the MENU button to enter the system menu, rotate the INT control knob to select Update Firmware.
- Page 19 2.3.7 Language Press the MENU button to enter the system menu, rotate the INT control knob to select Language, and press the INT control knob again to enter the Language interface. rotate the INT control knob to select from the available languages.
- Page 20 3. Connecting to DMX 1) Connect a standard DMX controller OUTPUT DMX512 Connecting DMX to only one NOVA P300c OUTPUT DMX512 Daisy chaining multiple lights using DMX * The DMX interface schematic is shown in the pictures below: Data 1-...
- Page 21 * The default DMX channel is "001". ** The range of DMX channels is 1 to 512. 4. Controlling Device Via DMX 1) Connect the DMX controller's OUTPUT to the Nova P300c controller's DMX INPUT as shown in the figure below. OUTPUT...
- Page 22 2) DMX Chart Model Channel Function INT: 0-100% Profile1: Color Temp: 2000-10000K G/M:-1.0~+1.0 INT: 0-100% INT: 0-100% Color Temp: 2000-10000K HUE: 1°-360° Profile2: CCT&HSI VG/M: -1.0~+1.0 SAT: 0-100% CCT->HSI HSI->CCT INT: 0-100% R INT: 0-100% Color Temp: 2000-10000K G INT: 0-100% Profile3: G/M:-1.0~+1.0 B INT: 0-100%...
- Page 23 INT: 0-100% Profile8: X-coordinate:0.0000-0.8000 Y-coordinate:0.0000-0.8000 FX Selection: Club Lights, Paparazzi, Lightning, TV, Candle, Fire, Strobe, Explosion, Fault Bulb, Pulsing, Welding, Cop Car, Color Chase, Party Lights, Fireworks INT: 0-100% Colors: 3、6、9、12、15、18、24、36 Club Lights SPD: 1-10 Stop/Loop CCT: 2000-10000K G/M:-1.0~+1.0 Paparazzi FRQ: 1-10 Stop/Loop CCT: 2000-10000K...
- Page 24 X, Y SOURCE CCT: CCT: Source X-coordinate: HUE: 1°-360° 2000-10000K 3200K/5600K matching 0.0000-0.8000 GEL Selection: Y-coordinate: G/M: SAT: 0-100% SPD: 1-10-R 0.0000-0.8000 -1.0~+1.0 GEL Selection: Strobe SPD: 1-10-R SPD: 1-10-R SPD: 1-10-R Stop/Loop series GEL Selection: Stop/Loop Stop/Loop Stop/Loop Model SPD: 1-10-R Stop/Loop X, Y...
- Page 25 X, Y SOURCE CCT: CCT: Source X-coordinate: HUE: 1°-360° 2000-10000K 3200K/5600K matching 0.0000-0.8000 GEL Selection: Y-coordinate: G/M: SAT: 0-100% SPD: 1-10-R 0.0000-0.8000 -1.0~+1.0 GEL Selection: FRQ: 1-10-R FRQ: 1-10-R FRQ: 1-10-R FRQ: 1-10-R series Pulsing GEL Selection: SPD: 1-10-R SPD: 1-10-R SPD: 1-10-R Stop/Loop Model...
- Page 26 CCT+HUE: CCT/HUE/CCT+HUE Fireworks FRQ: 1-10-R Stop/Loop * You can get more detail information about DMX by visiting http://aputure.com/wp-content/uploads /2020/03/dmx_chart_of_aputure_nova_p300c.pdf 5. Using the Sidus Link APP You can download the Sidus Link app from the iOS App Store or Google Play Store for enhancing the functionality of the light. Please visit sidus.link/app/help for more details regarding how to use the app to...
- Page 27 Specifications Operating Temperature -10~45℃ Power Supply AC 100~240V 50/60Hz Operating Current Power Input ≤360W Power Output ≤360W 2500K (Warm White) & 7500K (Cool White): 572 LEDs LED Quantity Breakdown RGB: 546 LEDs ≥95 TLCI ≥95 2000K-10000K SST(D55) SST(Tungsten) App Control Type Bluetooth 5.0 Mesh Battery Operating Voltage Range 24V-48V...
- Page 28 Photometrics 2700K 7450 lux 890 lux 350 lux 3200K 8200 lux 960 lux 370 lux 4300K 8600 lux 1000 lux 395 lux 5500K 9000 lux 1100 lux 430 lux 6500K 8550 lux 1020 lux 400 lux * This data is based on average brightness measurements, there will be slight variations between lights. -27-...
- Page 30 NOVA P300c 使 用 者 指 南 中 文...
- Page 31 前 言 感谢您购买爱图仕系列LED摄影灯—NOVA P300c。它是一款广色域的 彩色面板灯。 重要的安全说明 使用此摄影灯时,应始终遵循基本的安全预防措施,包括: 1. 使用前阅读并理解所有说明。 2. 当儿童靠近设备或使用设备时,必须进行密切监督。在使用设备时, 请勿将设备置于无人看管状态。 3. 必须小心接触高温部件防止被烫伤。 4. 请勿操作电源线损坏的设备以及掉落或损坏的设备,直到合格的维修 人员检查过。 5. 请归置好电源线,防止被电源线绊倒或拉扯电源线导致设备断电,且 电源线不可接触灼热表面。 6. 如果需要延长线,应使用额定电流至少等于设备额定电流的延长线。 额定电流小于设备的电线可能过热。 7. 在清洁和维修之前以及不使用时,务必从电源插座上拔下电器插头。 切勿拉扯电线从插座拔出插头,应抓住插头并拉动来拔出。 8. 在存放前让设备完全冷却。存放时,请将电源线从设备上拔出,待冷 却后归置在安全箱中对应位置。 9. 为降低电击风险,请勿将本产品浸入水中或其他液体中。 您可以在本公司网站 www.aputure.com/cn 中找到本设备的详细使用者指南。...
- Page 32 10. 为降低电击风险,请勿拆卸本产品,在需要维修时将其交给合格的维修 人员。不正确的重装可能会在随后使用设备时引起电击。 11. 使用非制造商推荐的配件可能会引起火灾、电击或人身伤害。 12. 请将本产品连接到接地插座。 13. 请勿将本产品置于液体或其他易燃、易挥发溶剂附近,避免损坏产品。 14. 请用软布、干布清洁本设备。 15. 请勿在潮湿的环境下使用本设备,否则有短路或电击的危险。 16. 需要维修时请联系授权的维修人员。本设备内有精密电子线路。未经许 可擅自拆卸导致故障不在本司保修范围内,但用户可以付费维修。 17. 建议使用爱图仕原厂线缆。由于使用非爱图仕原厂附件导致本产品的任 何损坏,不在本司保修范围内,但用户可以付费维修。 18. 本产品已通过RoHS, CE, KC, PSE和FCC认证,请参考相关国家标准使用 和操作。因使用操作不当而造成机器损坏,不在保修范围内,但用户可以付 费维修。 19. 此使用者指南依据本公司严格测试制定。设计和规格如有变更,恕不另 行通知。 保存这些说明...
- Page 33 F C C 符 合 声 明 : 此设备符合 FCC 规则第 15 部分中的规范。操作设备须符合以下两个条件: (1) 此设备不会导致有害干扰; (2) 此设备可承受任何外来干扰,包括可能导致非预期操作的干扰。 【警告】如果用户未经爱图仕明确许可而进行改动或改装,可能会丧失继续 操作该设备的权利。 【注】此设备经测试确定符合 B 类数码设备(依照 FCC 规则第 15 部分规 范 )的限制。这些限制的设计旨在为居住场所安装条件下的有害干扰提供合 理 的保护。此设备生成、使用并可以发射射频能量。如果未按照指示安装和 使 用,可能对无线电通信造成有害干扰。但是,在特定安装条件下,不保证 这 类干扰不会发生。如果此设备确实对无线电或电视机接收信号造成有害干 扰 ,而这点可以通过关闭和打开设备来确定,那么建议用户尝试使用以下一 种 或多种措施来消除干扰: 扩大设备与接收器之间的距离。 将设备连接到其他电路的插座中,而不是接收器所连接电路的插座。 咨询经销商或有经验的无线电/电视机技术人员以获得帮助。...
- Page 34 物 品 清 单 使用本产品前,请检查包装内是否包含所有以下物品。如有缺失,请与经销商联系。 挂绳 (1 pc) 控制盒 (1 pc) 灯体 (1 pc) 快装件 防爆箱 (1 pc) (1 pc) (仅套装版本) Cable Tie Cable Tie Cable Tie 连接线 连接线 电源线 (1 pc) (1 pc) (1 pc)
- Page 35 产 品 视 图 1. 灯体 附件槽 扩散片 挂线柱 快装板 手提把手 T型手柄存放孔 U型支架 灯体支撑柱 AC电源插座 接口公座 碟刹手柄 紧固手柄 电池接口 2. 控制盒 挂绳板 显示窗 电源开关 亮度调节旋钮 G/M调节旋钮 光效模式按键 快装板 菜单键 预设键 USB插口 色温调节旋钮...
- Page 36 接口母座 DMX输入插座 DMX输出插座 安 装 1. 固定灯体 调节灯体到合适角度,旋转紧固手柄安装灯体在三脚架上,再旋转把手 固定灯体。 2. 连接灯体和控制盒 用连接线连接灯体和控制。 锁口槽 弹簧锁口 弹簧锁口 锁口槽 * 您可将绑有连接线的集线绑带系到挂线柱上 ** 拆卸连接线时,请压住灯体和控制盒上的弹簧锁口再拆卸,切勿硬拔。...
- Page 37 *与灯体连接口(控制盒上)定义如图所示: 电源地 通信脚B 通信脚A 大地 3. 快装件使用说明 1)将快装件装到灯架或支架上; 2)打开快装件旋柄,将控制盒装进快装件(旋钮自动弹回); 3)打开快装件(必须抓住控制盒,不然会摔落),取下控制盒; 4) 灯体上的快装板固定控制盒的方式和快装件固定控制盒的方式一样。...
- Page 38 快装件规格 重量 670g / 1.48lbs 尺寸(长X宽X高) 10.35x8.74x12.5cm / 4.07x3.44x4.92in * 快装件能夹直径2-5cm / 0.79-1.97in的圆管或方管。 4. 供电 1) 交流电供电 弹簧锁口 AC 100V-240V 锁口槽 * 拆卸电源线时,请下拉电源线上的弹簧锁口按钮再拆卸,切勿硬拔。 2) 供电箱供电 您也可以通过外接卡侬口24V-48V的电源为该灯供电。这可以通过我们的 一个支持48V输出的蓄电池输出站,或其他能够输出相同电压的发电站或 蓄电池组来实现。 PUSH 供电箱...
- Page 39 操 作 1. 开机 将灯体连接到适当的电源后,用自带的5针卡侬插头将灯头和控制盒连接 起来。按控制盒侧面的电源按钮可实现打开和关闭灯。 2. 控制盒手动控制。 2.1 旋转INT调节旋钮来调节亮度,顺时针变强,逆时针变弱。...
- Page 40 旋转CCT/HUE调节旋钮来调节色温、HUE值,顺时针变强,逆时针变弱。 旋转亮度调节旋钮来调节G/M、饱和度,顺时针变强,逆时针变弱。 * 旋转旋钮的速度会导致不同的变化程度。 -10-...
- Page 41 2.2 按压Light Mode键进入主界面 2.2.1 短按INT选择CCT模式来调节色温(2000K~10000K)。 2.2.2 短按INT选择HSI模式后来调节色调(1°~360°,每一度代表一种 颜色)及饱和度(0%~100%)。 -11-...
- Page 42 2.2.3短按INT选择光效模式后,旋转亮度旋钮可进行酒吧灯光/狗仔队 /闪电/电视/烛光/火光/闪光灯/爆炸/故障灯泡/脉搏/焊接/警车/颜色捕 捉/聚会灯光/烟花等15种光效切换。 a. 酒吧灯光模式 b. 狗仔队模式 c. 闪电模式 d. 电视模式 e. 烛光模式 f. 火光模式 -12-...
- Page 43 g. 闪光灯模式 h. 爆炸模式 i. 故障灯泡模式 j. 脉搏模式 k. 焊接模式 l. 警车模式 m. 颜色捕捉模式 n. 聚会灯光模式 o. 烟花模式 -13-...
- Page 44 在任 一光效模式下,短按亮度键来循环光效,再次短按将暂停;但是 闪电和爆炸模式下短按亮度键,它将变成触发。 2.2.4 短按INT选择RGB模式后,通过改变每种光源的比例来达到想要 的光效。 2.2.5 短按INT选择X,Y色坐标模式,短按或旋转HUE/SAT旋钮来分别 切换X轴/Y轴的数值。 2.2.6 短按INT选择SOURCE模式,旋转亮度旋钮来选择需要的source 。 -14-...
- Page 45 2.2.7 短按INT选择GEL模式,旋转亮度旋钮来调节亮度,旋转色温旋 钮选择3200K/5600K,短按G/M旋钮进入GEL选择界面。 2.3 按压MENU按键进入菜单界面,显示如下图。 2.3.1 风扇模式 按MENU键进入菜单模式,旋转亮度键选择风扇模式,短按亮度键进 入风扇模式, 旋转亮度键选择FORCE或AUTO模式,再短按亮度键键 确认选择。 -15-...
- Page 46 2.3.2 调光曲线调节 按MENU键进入菜单模式,旋转亮度键选择调光曲线,短按亮度键进 入调光曲线模式, 旋转亮度键选择指数型、对数型、线型、“S”型 调光曲线,再短按亮度键确认选择。 2.3.3 频率选择 按MENU键进入菜单模式,旋转亮度键选择频率选择,短按亮度键进 入频率选择界面, 旋转亮度键选择频率从1~10,再短按MENU键返回 上一菜单。 2.3.4 蓝牙复位 按MENU键进入菜单模式,旋转亮度键选择蓝牙复位,短按亮度键进 入蓝牙复位界面,再旋转亮度键选“是”,短按亮度键进行蓝牙复位 ;选择“NO”,则返回上一级菜单。 -16-...
- Page 47 2.3.5 设备序列号 按MENU键进入菜单模式,旋转亮度键选择设备序列号,短按亮度键 进入设备序列号界面,可以看到每一台机器都有唯一的序列号。 2.3.6 固件更新 按MENU键进入菜单模式,旋转亮度键选择固件升级,短按亮度键进 入固件升级界面。旋转亮度键选“是”,OLED显示屏出现升级进度 条,随着升级情况显示相应进度。旋转亮度键选择 “否”,再短按亮 度键则返回主界面。 -17-...
- Page 48 2.3.7 语言选择 按MENU键进入菜单模式,旋转亮度键选择语言菜单,短按亮度键进 入语言界面, 旋转亮度键选择English或中文,再短按亮度键确认。 2.3.8 固件版本 按MENU键进入菜单模式,旋转亮度键选择固件版本,短按亮度键进入 固件版本界面,然后可以看到灯体和控制盒的版本号。 2.4 预设功能 控制盒的下面有4个预设按键。将灯光设置为所需输出后,长按四个 按键(1、2、3或4)中的任意一个以启动保存预设过程。使用INT控 制轮选择“是”或“否”。 然后,您可以在任何模式下使用这些预设按键来激活之前保存到该预 设的模式及内容。 使用Sidus Link移动应用程序,您可以保存几乎无限数量的预设。 -18-...
- Page 49 3. DMX控制台控制 1) 连接DMX标准控制台与灯体 OUTPUT DMX512 连接一台 OUTPUT DMX512 连接多台 *DMX接口定义如图所示: 数据负(-) 数据负(-) 地 地 数据正(+) 数据正(+) 备用数据负(-) 备用数据负(-) 备用数据正(+) 备用数据正(+) -19-...
- Page 50 2) 频道选择 DMX控制台通道数与控制盒DMX通道数保持一致时,可使用控制台进行亮度调节操作。 适用于单台或多台连接方式。 *在DMX模式下,控制通道号出厂默认值为1。 *在DMX模式下,NOVA P300c可设置通道范围为1-512。 4. DMX控制操作 1) DMX控制台与控制盒连接,见下图所示 OUTPUT DMX512 -20-...
- Page 51 2) DMX 实用表 模式 信道 功能 INT: 0-100% 模型1: 色温: 2000-10000K G/M:-1.0~+1.0 INT: 0-100% INT: 0-100% 色温: 2000-10000K HUE: 1°-360° 模型2: CCT&HSI VG/M: -1.0~+1.0 SAT: 0-100% CCT->HSI HSI->CCT INT: 0-100% R INT: 0-100% 色温: 2000-10000K G INT: 0-100% 模型3: CCT&RGB G/M:-1.0~+1.0 B INT: 0-100% CCT->RGB...
- Page 52 INT: 0-100% 模型8: X坐标:0.0000-0.8000 Y坐标:0.0000-0.8000 FX 选择:酒吧灯光/狗仔队/闪电/电视/烛光/火光/闪光灯/爆炸/ 故障灯泡/脉搏/焊接/警车/颜色捕捉/聚会灯光/烟花 INT: 0-100% Colors: 3、6、9、12、15、18、24、36 酒吧灯光 SPD: 1-10 停止/循环 色温: 2000-10000K G/M:-1.0~+1.0 狗仔队 FRQ: 1-10 停止/循环 色温: 2000-10000K G/M: -1.0~+1.0 闪电 FRQ: 1-10-R 模型9: SPD: 1-10-R 停止/循环 色温: Warmer/Natural/Cooler 电视 SPD: 1-10-R 停止/循环 色温: Warmer/Natural/Cooler 烛光...
- Page 53 X, Y SOURCE 色温: 色温: Source X坐标: HUE: 1°-360° 2000-10000K 3200K/5600K matching 0.0000-0.8000 GEL 选择: Y坐标: G/M: SAT: 0-100% SPD: 1-10-R 0.0000-0.8000 -1.0~+1.0 GEL 选择: 闪光灯 SPD: 1-10-R SPD: 1-10-R SPD: 1-10-R 停止/循环 系列 GEL 选择: 停止/循环 停止/循环 停止/循环 型号 SPD: 1-10-R 停止/循环...
- Page 54 X, Y SOURCE 色温: 色温: Source X坐标: HUE: 1°-360° 2000-10000K 3200K/5600K matching 0.0000-0.8000 GEL 选择: Y坐标: G/M: SAT: 0-100% SPD: 1-10-R 0.0000-0.8000 -1.0~+1.0 GEL 选择: 频率: 1-10-R 频率: 1-10-R 频率: 1-10-R 频率: 1-10-R 系列 脉搏 GEL 选择: SPD: 1-10-R SPD: 1-10-R SPD: 1-10-R 停止/循环...
- Page 55 SAT: 0-100% 聚会灯光 SPD: 1-10 模型9: 停止/循环 CCT+HUE: CCT/HUE/CCT+HUE 烟花 频率: 1-10-R 停止/循环 * 您可以通过访问二维码来获取更多的DMX信息。 关注微信公众号,发送:Nova P300c DMX 5. Sidus Link APP 的使用 您可以在App store和安卓市场搜索sidus link下载专业控制软件来控制 爱图仕灯具,更多详细使用方法请访问:sidus.link/app/help 获取 Sidus Link™ App Sidus.link/app/help -25-...
- Page 56 规 格 工作温度 -10~45℃ 工作电压 100V~240V 工作电流 输入功率 ≤360W 输出功率 ≤360W 2500K(暖白)和10000K(冷白)各572 LEDs LED数量 RGB 546 LEDs ≥95 TLCI ≥95 色温 2000K-10000K SST(D55) SST(Tungsten) App 控制类型 Bluetooth 5.0 Mesh 锂电池工作电压范围 24V-48V 散热方式 主动散热 产品重量 16.9kg 产品重量(安全箱版) 24.4kg 灯体 尺寸 56.19*45.7*17.2cm / 22.1*18.0*6.77in (长X宽X高)...
- Page 57 亮 度 测 试 数 据 2700K 7450 lux 890 lux 350 lux 3200K 8200 lux 960 lux 370 lux 4300K 8600 lux 1000 lux 395 lux 5500K 9000 lux 1100 lux 430 lux 6500K 8550 lux 1020 lux 400 lux * 亮度为平均数据,不同灯的亮度会有微小差异。...
Need help?
Do you have a question about the NOVA P300c and is the answer not in the manual?
Questions and answers