
Summary of Contents for Net2Edge Liberator 44 Series
- Page 1 MANUAL Installation Guide Liberator™ 44xx LIB-4400 Carrier Ethernet NID LIB-4424 Aggregation Switch...
- Page 2 No part of this work may be reproduced or used in any form or by any means (graphic, electronic or mechanical) without written permission from Net2Edge Limited. The information contained herein is confidential property of Net2Edge Limited. The use, copying, transfer or disclosure of such information is prohibited except by express written agreement from Net2Edge Limited.
- Page 3 LIB-4400/4424 Installation Guide Cautions and Warnings Definitions Cautions indicate that there is the possibility of poor equipment performance or potential damage to the equipment. Warnings indicate that there is the possibility of injury to a person. Cautions and Warnings appear here and may appear throughout this manual where appropriate. Failure to read and understand the information identified by this symbol could result in poor equipment performance, damage to the equipment, or injury to persons.
- Page 4 LIB-4400/4424 Installation Guide Caution: Do not bend any part of an optical fiber/cable to a diameter that is smaller than the minimum permitted according to the manufacturer’s specification (usually about 65 mm or 2.5 in)! Warnings Warning: Use of controls, adjustments or the performance of procedures other than those specified herein may result in hazardous radiation exposure.
-
Page 5: Table Of Contents
LIB-4400/4424 Installation Guide IEEE Standards Optical Module Standards 9 Models Physical Specifications Features List 11 Feature Descriptions Synchronous Ethernet (Sync-E) 15 IEEE 1588 PTP Loopback Features 15 Packet Generator and Checker Ethernet SAT (Service Activation Testing) Loopback 16 2. Installation 18 Safety 18 Unpacking Ship Kit Contents... - Page 6 LIB-4400/4424 Installation Guide Register at My TN Access 39 TN Customer Satisfaction Survey 39 3. Web Interface and CLI 40 Web Interface Menu System Command Line Interface (CLI) 4. Messages and Troubleshooting LIB-4xxx Troubleshooting 44 LIB-4xxx Error Recovery For More Error Message Information LIB-4400 and LIB-4424 PCB Configuration J28 (Hardware / Software Jumper) PCB Configuration 47...
- Page 7 LIB-4400/4424 Installation Guide Figure 6: Tabletop Installation Figure 7a: LIB-4400 SFP Installation Figure 7b: /LIB-4424 SFP Installation Figure 8: Back Panel Figure 9: CES-PSU-DC Power Supply Figure 10: CES-PSU-AC Power Supply 27 Figure 11: DC Power Connection 27 Figure 12: AC Power Connection 28 Figure 13: Default (Startup) Web GUI Screen Figure 14: CLI Screen (HyperTerminal) 42 Figure 15: CLI Screen (Telnet)
- Page 8 1. Introduction Net2Edge Ltd.’s LIB-4400 and LIB-4424 products are designed to support a wide range of MEF- based Carrier Ethernet services for Mobile Backhaul, Business Ethernet, Cloud Assurance and Carrier Exchange E-Access Services. Net2Edge’s Carrier Ethernet portfolio meets the demand for highly scalable, on-demand, dynamic...
-
Page 9: Ieee Standards
LIB-4400/4424 Installation Guide Standards IEEE Standards IEEE 802.3 ™ , IEEE 802.3u IEEE 802.3z, IEEE 802.3x IEEE 802.3ad, IEEE 802.1D IEEE 802.1w, IEEE802.1s IEEE 802.1Q, IEEE 802.1p IEEE 802.1ad, IEEE 80.1AB IEEE 802.3ah, IEEE 802.1ag IEEE 1588-2008 (v2) Precision Time Protocol (PTP) ITU G.8261 Synchronous Ethernet, ITU Y.1731 PM ITU G.8031, ITU G.8032 Optical Module Standards... -
Page 10: Physical Specifications
LIB-4400/4424 Installation Guide Physical Specifications The LIB-4xxx platforms meet the following operating specifications: Table 3a: LIB-4xxx Operating Specifications Specification Description Fully non-blocking wire-speed switching performance for all frame sizes. Switch Specifications Maximum frame size = 10,056 bytes Maximum MAC addresses = 32768 Shared buffer memory = 32Mbit IEEE 1588 Input = 1 PPS, 8 KHz, 64 KHz, 1.544 MHz, 2.048 MHz, 10 MHz, 19.44 MHz, and 25 MHz. -
Page 11: Features List
LIB-4400/4424 Installation Guide Safety Compliance UL listed, CE mark Power Consumption 60W max Power Source See Table 2. Size (Dimensions) 1.75” h x 17.375” w x 10” d Weight 3.0 Kg ○ ○ C to +50 Operating Temperature ○ ○ C to +70 Storage Temperature Altitude... - Page 12 LIB-4400/4424 Installation Guide Multiple spanning tree (MSTP, RSTP, STP) Loop guard IEEE 802.30ad link aggregation, static and LACP BPDU guard and restricted role IGMPv2 and IGMPv3 snooping MLDv1 and MLDv2 snooping IPMC throttling, filtering, and leave proxy Voice VLAN DHCP client, DHCP snooping DNS client, proxy Port mirroring Protection: 1+1 port protection, 1:1 port protection, 1:N port protection, port protection with...
- Page 13 LIB-4400/4424 Installation Guide RFC 2544 Traffic Generation/Reporting (Throughput Test, Latency Test, Frame Loss Test, and Back- to-back Frames Test) In-Service Throughput Testing 3rd Party Performance Monitoring Portal Vendor support Power Savings ActiPHY PerfectReach Adaptive fan control Management HTTP server CLI – console port and Telnet Management access filtering HTTPS SSHv2...
-
Page 14: Feature Descriptions
LIB-4400/4424 Installation Guide Feature Descriptions Key LIB-4xxx features include: Up to 4096 Service Classification entries; and up to 4096 service-specific egress tagging and QoS entries. Layer 2 Switching features (802.1Q VLAN switch with 32k MACs and 4k VLANs, Push/pop/translate up to two VLAN tags on ingress and/or egress; Policing with leaky bucket storm control and protection from broadcast, flooding, and multicast. -
Page 15: Synchronous Ethernet (Sync-E)
LIB-4400/4424 Installation Guide Synchronous Ethernet (Sync-E) Recommendation ITU-T G.8262/Y.1362 outlines requirements for timing devices used in synchronizing network equipment using synchronous Ethernet. This Recommendation defines the requirements for clocks (e.g., bandwidth, frequency accuracy, pull-in, hold-in, and pull-out ranges, noise generation, noise tolerance, noise transfer, transient response, holdover performance, etc.). Synchronous Ethernet (Sync-E) as defined by ITU-T G.8261 allows for the transfer of high-quality network timing from a traceable reference, to all network elements. -
Page 16: Packet Generator And Checker
LIB-4400/4424 Installation Guide Packet Generator and Checker The RFC2544 Packet Generator / Checker provides Throughput, Latency, Back-to-Back and Frame loss tests. RFC 2544 is the de facto methodology that outlines the tests required to measure and to prove performance criteria for carrier Ethernet networks. It provides an out-of-service benchmarking methodology to evaluate the performance of network devices using throughput, back-to-back, frame loss and latency tests. -
Page 17: Figure 2: Lib-4400 Deployment
LIB-4400/4424 Installation Guide Typical Applications The LIB-4xxx can be used to implement the access and first-level aggregation functions between CPE (Customer Premise Equipment) and PE (Provider Edge) boxes. Environments can include: • Metro Ethernet transport (MSPP/MSTP) • Carrier Ethernet switch/router (CESR) •... -
Page 18: Installation
Installation This section describes how to install the LIB-4xxx hardware and software, and the procedures to access and initially set up the LIB-4xxx through either a local serial interface or a remote Ethernet connection (Telnet session or Web interface). 2.1 Safety Before installing the LIB-4xxx, read the “Safety Cautions and Warnings”... -
Page 19: Ship Kit Contents
LIB-4400/4424 Installation Guide Ship Kit Contents The LIB-4xxx is shipped with several standard components. Make sure you have received the following: • One LIB-4400 NID or one /LIB-4424 switch • One CONSOLE Cable, DB9 Fem-to-RJ45 Male, 6Ft. (TN PN 27232) (CISCO 72-3383-01) •... -
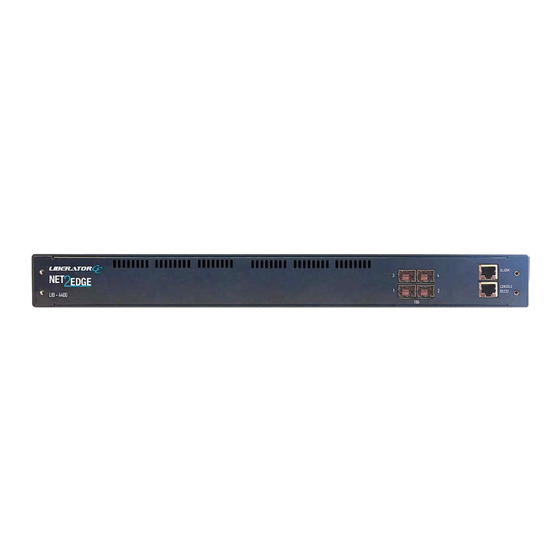
Page 20: Front Panel Connectors And Leds
LIB-4400/4424 Installation Guide If the install was successful, continue with the related Web User Guide or CLI Reference manual. If the install was unsuccessful, refer to the Troubleshooting section in the online Web User Guide. Front Panel Connectors and LEDs The LIB-4400 front panel connectors and LEDs are shown and described below: Figure 4a: LIB-4400 Front Panel Connectors and LEDs Front Panel... - Page 21 LIB-4400/4424 Installation Guide 8. S1 LED (System Status LED) and S2 LED - Power Source LED. S1 - System Status LED. During normal boot up this LED will be amber. Once the device is fully booted it will turn green. During firmware upgrade this LED will flash green.
-
Page 22: Figure 4B: Front Panel
LIB-4400/4424 Installation Guide 16. IEEE 1588 PTP LED: Off = Input Disabled; Flashing Amber = No signal detected; Yellow = Signal detected, but incorrect frequency or unstable. Flashing Green -- N/A; Green = Valid signal detected. 17. SYNC-E LED: Off = Disabled; Flashing Amber = No signal detected;... -
Page 23: Figure 4C: Lib-4424 Front Panel
LIB-4400/4424 Installation Guide The LIB-4424 front panel connectors and LEDs are shown and described below: Figure 4c: LIB-4424 Front Panel LIB-4424: P1-P24 LEDs Two LEDs for each port, one Green and one Yellow: Green LED = ON when linked, OFF when not linked, BLINK when activity. Yellow LED = Indicates speed when linked, ON=1GE, OFF=100FX. -
Page 24: Installing Lib-4Xxx Hardware
Installation” on page 26). SFP / XFP / GBIC Optical Transceivers Net2Edge SFPs and XFPs are Small Form-Factor Pluggable (SFP) hot-pluggable transceivers that allow a single network device to be connected to a multitude of interfaces, protocols, and transmission media via the SFP/XFP port. Our SFPs offer a cost effective, flexible way to accommodate network modifications and growth, while still using existing network devices. -
Page 25: Installing Sfps
LIB-4400/4424 Installation Guide Net2Edge SFPs and XFPs are compliant with the Multi-Sourcing Agreement (MSA) ensuring interoperability with all other MSA compliant networking devices. Note: DMI option support requires an SFP that supports DMI. Installing SFPs The LIB-4xxx lets you install one to four SFP devices of your choice in order to make a fiber connection. -
Page 26: Back Panel
LIB-4400/4424 Installation Guide Note: Do not remove and replace the SFP modules more often than necessary; excessive SFP removing/replacing can shorten the SFPs useful life. Back Panel The LIB-4400 back panel is shown and described below. Figure 8: Back Panel Connections The LIB-4400 back panel connectors are described in the table below: Table 4: LIB-4xxx... -
Page 27: Installing The Dc Power Supply
LIB-4400/4424 Installation Guide Figure 9: CES-PSU-DC Power Supply Figure 10: CES-PSU-AC Power Supply Installing the DC Power Supply After the LIB-4xxx has been unpacked, install the DC Power Supply. Warning: Risk of electrical shock. For multiple power sources: Energy hazard if both power modules are not disconnected. -
Page 28: Installing The Ac Power Supply
LIB-4400/4424 Installation Guide Warning: Shock hazard exists if power supply is ejected while powered on. Unplug LIB-4xxx POWER, CONSOLE, and PORT connections if desired. Remove the blank faceplate or use the one open power supply slot. Insert the DC Power Supply into the open LIB-4xxx slot. Fasten the DC Power Supply with the slotted retaining screw. -
Page 29: Grounding The Lib-4Xxx (Rack Mount)
LIB-4400/4424 Installation Guide Fasten the AC Power Supply with the slotted retaining screw. Insert the AC Power plug into the AC Power Block receptacle (power inlet). Refer to the “Grounding the LIB-4xxx” section below. Grounding the LIB-4xxx (Rack Mount) C. GND (Chassis Ground) Note: a device bonded to metallic shelf that houses LIB-4xxx jacks should be bonded directly by either 1) and independent conductor to the central office ground via rack ground bar, or 2) connection to the rack itself, or 3) other metal-to-metal bond to ground. - Page 30 LIB-4400/4424 Installation Guide TB Connector In Indy Switch Terminal Block Mounting Screw Qty (2) Connect Power Wires to the Terminal Block Strip the wires to the proper length. Insert the positive and negative power wires into V+ and V- contacts respectively of the terminal block (note polarity on the chassis of the switch).
-
Page 31: Connecting To The Ac Power Supply
LIB-4400/4424 Installation Guide Connecting to the AC Power Supply Use the procedure below to connect the LIB-4xxx to the provided AC power supply (see Figure 13 above). Warning: Risk of electrical shock. Insert the installed Power Supply plug into the LIB-4xxx front panel. Plug the AC power plug into a live AC outlet. -
Page 32: Software Install Process
LIB-4400/4424 Installation Guide Software Install Process The next sections cover the LIB-4xxx software installation process, which includes: • Configure and login in to the LIB-4xxx via Telnet (page 26), PuTTY (page 27) or HT (page 29). • Log in to the LIB-4xxx via the Web Interface (page 31). •... -
Page 33: Log In To The Lib-4Xxx Via Putty
LIB-4400/4424 Installation Guide Continue to enter LIB-4xxx CLI commands. See the LIB-4xxx CLI Reference manual for more information. Log In to the LIB-4xxx via PuTTY Start PuTTY. If the PuTTY “Open File - Security Warning: dialog displays, click the Run button. At the PuTTY Configuration dialog box, in the “Host Name [or IP Address]”... - Page 34 LIB-4400/4424 Installation Guide Save and Load the saved session as desired. Click the Open button. The LIB-4xxx PuTTY login screen displays. Enter the LIB-4xxx Username (the default is admin in lowercase letters) and press the Enter key. Enter the LIB-4xxx password (no default - just press the Enter key). | MANUAL Page 34 of 65...
- Page 35 LIB-4400/4424 Installation Guide At the PuTTY command prompt, enter a command and press the Enter key. For example, type Help or ? a space, and press Enter to display the LIB-4xxx Help screen: 9. Continue to enter LIB-4xxx CLI commands. See the related CLI Reference manual for more information.
-
Page 36: Log In To The Lib-4Xxx Via Hyperterminal (Ht)
LIB-4400/4424 Installation Guide Log In to the LIB-4xxx via HyperTerminal (HT) Open the HyperTerminal (HT) program. Create a new connection by selecting File > New Connection. Enter a name for the session, choose an icon, and click the OK button. At the Connect To dropdown select “COM7”... - Page 37 LIB-4400/4424 Installation Guide At the HT command prompt, enter a command and press the Enter key. For example, type Help (or ?) and press Enter to display the LIB-4xxx Help screen: Continue to enter LIB-4xxx CLI commands. See the related CLI Reference manual for more information.
-
Page 38: Log In To The Lib-4Xxx Via The Web Interface
LIB-4400/4424 Installation Guide Log In to the LIB-4xxx via the Web Interface This procedure assumes that the previous steps are successfully completed. Open a supported web browser. Type in the default URL (e.g., 192.251.144.129) and press the Enter key. The ‘Connect to’ screen displays in IE (or the ‘Authentication Required’... -
Page 39: Log Out Of The Lib-4Xxx Web Interface
LIB-4400/4424 Installation Guide When you access the web interface, by default, the DHCP client is enabled and the static IP address is 192.168.0.1. If a DHCP server is available on the network, the following steps are recommended: Setup the system name using the "system name" command, e.g. "system name my-switch". Delete the static IP address using the "ip setup 0.0.0.0"... -
Page 40: Web Interface And Cli
3. Web Interface and CLI When the previous steps are successfully completed, you can continue with the LIB-4xxx web interface menu system and/or the CLI (Command Line Interface. Refer to the related manual below for additional information: LIB-4xxx Web Interface User Guide LIB-4xxx Command Line Interface (CLI) Reference Web Interface Menu System The LIB-4xxx web interface is available from a PC connected to a network port or management port. - Page 41 LIB-4400/4424 Installation Guide The LIB-4xxx Web interface menu system is shown below in terms of its sub-menus and functions. Configuration Monitor Diagnostics Maintenance Main Menu sub-menu sub-menu sub-menu sub-menu The four Main Menu selections are: Configuration - lets you define system operating parameters for the available LIB-4xxx features. Monitor - lets you view and track the LIB-4xxx operating functions.
-
Page 42: Command Line Interface (Cli)
LIB-4400/4424 Installation Guide Command Line Interface (CLI) This LIB-4xxx CLI is for experienced network administrators who are responsible for configuring and maintaining the LIB-4xxx. The CLI offers a comprehensive set of management features for use during initial setup (set IPs, etc.) and troubleshooting, as well as for day-to-day management (device management, firmware upgrades, managing security features, etc.). -
Page 43: Figure 15: Cli Screen (Telnet)
LIB-4400/4424 Installation Guide The default username is “admin” (no quotes) and the default password is blank (i.e. empty). Help screens are available through the “?” or “help” commands. One important use of the CLI is to determine the IP address of a switch through the “ip configuration” command - this is the IP address the web GUI is available through. -
Page 44: Messages And Troubleshooting
LIB-4400/4424 Installation Guide 4. Messages and Troubleshooting This section provides general and specific LIB-4xxx problem solving suggestions, general error recovery steps, and specific web interface messages, meanings, examples, and possible recovery steps. LIB-4xxx Troubleshooting Check the LIB-4xxx Back Panel Connections (see page Verify the Installation. -
Page 45: For More Error Message Information
LIB-4400/4424 Installation Guide Use the Maintenance sub-menu functions (Restart the LIB-4xxx, Reset the LIB-4xxx to factory defaults, Upgrade the LIB-4xxx firmware). If the problem persists, contact TN Tech Support. US/Canada: 1-800-260-1312, International: 00-1-952- 941-7600; TN Tech Support web; fax: +1 952-941-2322; Email: techsupport@transition.com. -
Page 46: Lib-4400 And Lib-4424 Pcb Configuration
LIB-4400/4424 Installation Guide LIB-4400 and LIB-4424 PCB Configuration The PCB has configurable components that can only be altered by or at the direction of a TN Tech Support specialist. J28 (Hardware / Software Jumper) Contact TN Technical Support. See “Service” on page | MANUAL Page 46 of 65... -
Page 47: Pcb Configuration
LIB-4400/4424 Installation Guide PCB Configuration The PCB has configurable components that can only be altered by or at the direction of a TN Tech Support specialist. J5 (Factory Reset Jumper) Contact TN Technical Support. See “Service” on page Appendix A - Cables and Connectors | MANUAL Page 47 of 65... -
Page 48: Connector Types
LIB-4400/4424 Installation Guide Connector Types The SFP connector type indicates the external optical or electrical cable connector provided as the interface. The information below is from SFF-8472 Rev 11.0. For additional information see the latest SFF-8472 Specification at ftp://ftp.seagate.com/sff/SFF-8472.PDF. Table 6: Connector Descriptions Value Description of connector Unknown or unspecified... -
Page 49: Copper 10G Ethernet
LIB-4400/4424 Installation Guide Signal P4, P5 P1, P2, P7, P8 No connection Copper 10G Ethernet Copper 10G Ethernet can run over twin-ax cabling, twisted pair cabling, and backplanes. Common forms of 10GbE copper cables include: 10GBASE-CX4 was the first 10G copper standard, published as 802.3ak-2004. It uses the XAUI 4-lane PCS (Clause 48) and copper cabling similar to that used by InfiniBand technology. - Page 50 LIB-4400/4424 Installation Guide now specified to 500 MHz. To reach this frequency, Category 6A or better balanced twisted pair cables specified in ISO/IEC 11801 amendment 2 or ANSI/TIA-568-C.2 are needed to carry 10GBASE-T up to distances of 100 m. Category 6 cables can carry 10GBASE-T for shorter distances when qualified according to the guidelines in ISO TR 24750 or TIA-155-A.
-
Page 51: 10 Gb Ethernet Standards
The Net2Edge Ltd. (TN) SFP+ modules are hot-pluggable (allows plugging in or unplugging a module while the host board is powered). Note: Net2Edge Ltd.’ SFP+ modules fully comply with the Multi- Sourcing Agreement (MSA). This compliance allows our SFP+ modules to be used in all other MSA compliant SFP+ platforms. -
Page 52: Table 9: Copper Cable Descriptions
LIB-4400/4424 Installation Guide ANSI/EIA Standard 568 is one of several standards that specify "categories" (each a "CAT") of twisted pair cabling systems. Assigned by the American National Standards Institute/Electronic Industries Association, these standards categories include CAT 1 – CAT 7, as shown below. Table 9: Copper Cable Descriptions Category Max Data Rate... - Page 53 LIB-4400/4424 Installation Guide Category 6a Copper Cable (Augmented Category 6) Category 6a cable, or Augmented Category 6, is characterized to 500 MHz and has improved alien crosstalk characteristics, allowing 10GBASE-T to be run for the same distance as previous protocols. The latest standard from the TIA for enhanced performance standards for twisted pair cable systems was defined in February 2008 in ANSI/TIA/EIA-568-B.2-10.
-
Page 54: Troubleshooting Cat 6 & Cat 6A Structured Copper Cabling Systems
LIB-4400/4424 Installation Guide The figure below shows the pins on plug face; note that the socket is the reverse of the plug pinout shown below. Figure 17: Category 6 Plug Face Pins For more information, see the TIA web site or the IEEE web site. Troubleshooting Cat 6 &... -
Page 55: Smb (Sub Miniature Version B) Cables
LIB-4400/4424 Installation Guide Fibre (10GbE) Cabling The two general types of fiber optic cables are SMF (single-mode fiber) andMMF (multi-mode fiber). SMF has an optical core of approximately 9 μm (microns), and has lower modal dispersion than MMF, and can support distances of at least 10 Km and as high as 80-100 Km (Kilometers) or more, depending on transmission speed, transceivers, etc.. -
Page 56: Appendix B: Service, Warranty & Compliance Information
This warranty is your only remedy. No other warranties, such as fitness for a particular purpose, are expressed or implied. Net2Edge Ltd. is not liable for any special, indirect, incidental or consequential damages or losses, including loss of data, arising from any cause or theory. - Page 57 ‘not repairable’, Net2Edge Ltd. will retain the $200.00 service charge and return the product to the customer not repaired. Non-warranted products that are repaired by Net2Edge Ltd. for a fee will carry a 180-day limited warranty. All warranty claims are subject to the restrictions and conventions set forth by this document.
- Page 58 Customer Pays Non- The customer must pay the non-compliant product(s) return transportation Compliant Return cost to Net2Edge Ltd. for evaluation of said product(s) for repair or Costs replacement. Net2Edge Ltd. will pay for shipping the repaired or replaced in-warranty product(s) back to the customer (any and all customs charges, tariffs, or/and taxes are the customer’s responsibility).
-
Page 59: Compliance Information
LIB-4400/4424 Installation Guide Compliance Information Standards: CISPR22/EN55022 Class A, CE Mark FCC Regulations: NOTE: This equipment has been tested and found to comply with the limits for a Class A digital device, pursuant to Part 15 of the FCC Rules. These limits are designed to provide reasonable protection against harmful interference when the equipment is operated in a commercial environment. - Page 60 In accordance with European Union Directive 2002/96/EC of the European Parliament and of the Council of 27 January 2003, Net2Edge Ltd. will accept post usage returns of this product for proper disposal. The contact information for this activity can be found in the ‘Contact Us’ portion of this document.
-
Page 61: Declaration Of Conformity
LIB-4400/4424 Installation Guide Declaration of Conformity | MANUAL Page 61 of 65... -
Page 62: Electrical Safety Warnings
LIB-4400/4424 Installation Guide Electrical Safety Warnings Electrical Safety IMPORTANT: This equipment must be installed in accordance with safety precautions. Elektrische Sicherheit WICHTIG: Für die Installation dieses Gerätes ist die Einhaltung von Sicherheitsvorkehrungen erforderlich. Elektrisk sikkerhed VIGTIGT: Dette udstyr skal 62nstallers I overensstemmelse med sikkerhedsadvarslerne. Elektrische veiligheid BELANGRIJK: Dit apparaat moet in overeenstemming met de veiligheidsvoorschriften worden geïnstalleerd. -
Page 63: Safety Instructions For Rack Mount Installations
LIB-4400/4424 Installation Guide Safety Instructions for Rack Mount Installations The instructions below (or similar) are intended for LIB-4xxx rackmount installation environments: 1. Elevated Operating Ambient: if installed in a closed or multi-unit rack assembly, the operating ambient temperature of the rack environment may exceed room ambient. Install the equipment in an environment compatible with the maximum ambient temperature (Tma) specified. -
Page 64: Index
Index SFPs 32 AC power cables 59 Standalone model 31 Caution Log out CGND 37 Menu system 50 Models 53, 54 Command Line Interface problem solving Connect AC power 34, 35, 36 Returns, product 68 Connect DC power 37, 39 safety 74, 75 Safety 4, 23, 25 CONSOLE port... - Page 65 Document Title Net2Edge Kulite House Stroudley Road Basingstoke Hampshire RG24 8UG United Kingdom Tel: +44 345 0130030 Copyright© 2012- 2017 Net2Edge Limited. All rights reserved. DOCTYPE...
Need help?
Do you have a question about the Liberator 44 Series and is the answer not in the manual?
Questions and answers