Advertisement
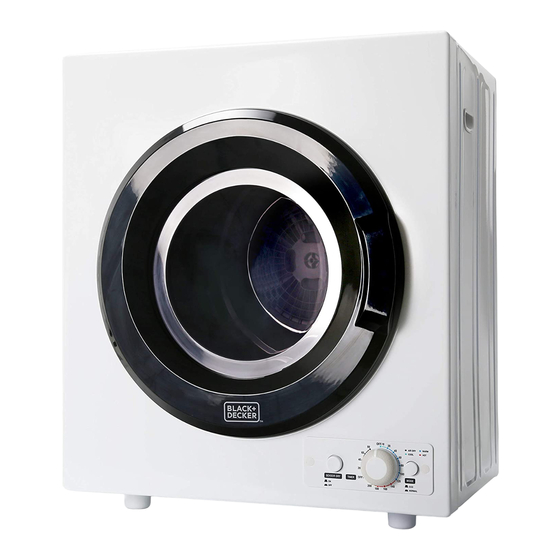
2.6 CU. FT. COMPACT DRYER
3.5 CU. FT. COMPACT DRYER
INSTRUCTION MANUAL
CATALOG NUMBER
BCED26
BCED37
Thank you for choosing BLACK+DECKER!
PLEASE READ BEFORE RETURNING THIS PRODUCT FOR
ANY REASON.
If you have a question or experience a problem with your BLACK+DECKER
purchase, go to www.blackanddecker.com/instantanswers
If you can't find the answer or do not have access to the Internet, call
844-299-0879 from 10:30 a.m. to 6:30 p.m. EST Mon. - Fri. to speak with an
agent. Please have the catalog number available when you call.
SAVE THIS MANUAL FOR FUTURE REFERENCE.
Page 1
Advertisement
Table of Contents
Troubleshooting

Related Manuals for Black+Decker BCED26

Summary of Contents for Black+Decker BCED26
- Page 1 PLEASE READ BEFORE RETURNING THIS PRODUCT FOR ANY REASON. If you have a question or experience a problem with your BLACK+DECKER purchase, go to www.blackanddecker.com/instantanswers If you can’t find the answer or do not have access to the Internet, call 844-299-0879 from 10:30 a.m.
-
Page 3: Table Of Contents
TROUBLE SHOOTING & WARRANTY ................................. 18-20 Troubleshooting Limited Warranty .................................. 21 PRODUCT REGISTRATION Thank you for purchasing our _____________________________ BLACK+DECKER product. This Model number easy-to-use manual will guide you _____________________________ in getting the best use of your Serial number product. -
Page 4: Safety Information
WARNING pulled on by children or tripped over unintentionally. NOTE: Neither BLACK+DECKER nor the dealer can accept any liability for damage to the product or personal injury resulting from failure to observe the electrical connection procedures. -
Page 5: Important Safety Instructions
SAFETY INFORMATION WARNING This dryer cannot be used upside down. Risk of Fire Clothes dryer installation must be performed by a qualified installer. Install clothes dryer according to the manufacturers instructions and local codes. Do not install a clothes dryer with flexible plastic venting materials. If flexible metal (foil type) duct is installed, it must be of a specific type identified by the appliance manufacturer as suitable for us with clothes dryers. - Page 6 SAFETY INFORMATION 3. This appliance must be grounded. Connect only to a properly grounded outlet. See the “GROUNDING INSTRUCTIONS” section found on page 4. 4. Install or locate the appliance only in accordance with the provided installation instructions. DO NOT place the dryer in steamy rooms or where the dryer is directly exposed to rain.
- Page 7 SAFETY INFORMATION 22. This appliance is not intended for use by persons (including children) with reduced physical, sensory or mental capabilities, or lack of experience and knowledge, unless they have been given supervision or instruction concerning use of the appliance by a person responsible for their safety.
- Page 8 SAFETY INFORMATION Oil a ected items can ignite spontaneously, especially when exposed to heat sources such as in a tumbler dryer. The items become warm, causing an oxidation reaction in the oil. Oxidation creates heat. If the heat cannot escape, the items can become hot enough to catch fire. Piling, stacking or storing oil-a ected items can prevent heat from escaping and so create a fire hazard.
-
Page 9: Set Up & Use
SET UP & USE INSTALLATION GUIDE LOCATION Examine the dryer after unpacking. Check for damage such as a misaligned door, broken door or dent in the cavity. If any damage is visible, DO NOT install, and notify your dealer immediately. 2. - Page 10 SET UP & USE INSTALLING THE EXHAUST CONNECTOR Install the exhaust connector as shown in the illustration by lining it up with the connector on the back of the dryer and turning it clockwise so the tabs on the exhaust connector fit into the slots on the connector: •...
-
Page 11: Specifications
SET UP & USE SPECIFICATIONS MODEL BCED26 MODEL BCED37 Page 11... -
Page 12: Parts & Features
SET UP & USE PARTS & FEATURES FRONT The appearance of your model may slightly di er from the illustrations in this manual. Door Window Door Gasket Lint Filter Assembly Drum Air Intake Shroud Timer g h i Sensor Dry Mode Selector BACK The appearance of your model... -
Page 13: Operation
SET UP & USE OPERATION CONTROL PANEL MODE SELECTOR NORMAL: By default, the dryer operates under the 'NORMAL' mode (the mode button is pressed), in combination with the presets, 'SENSOR DRY' and 'TlMER', for optimal drying performance. The 'SENSOR DRY' function can be adjusted to your drying needs by using the dial and temperature guidelines. - Page 14 SET UP & USE • ANTI-WRINKLE: For laundry loads that are di cult to iron (e.g. cotton shirts and linen), set the 'TIMER' between 30-60 minutes, depending on the load size. Once the cycle stops, the items will still contain moisture, thereby making the ironing process easier.
- Page 15 SET UP & USE SORTING AND LOADING LAUNDRY NOTE: Do not load your dryer more than approximately half full to allow space for the clothes to tumble. For the best results, your laundry should be sorted properly. Separate the lint shedders (e.g.
-
Page 16: Care & Maintenance
CARE AND MAINTENANCE FABRIC CARE • For optimum results, load the dryer with cloths of similar fabric, weight and construction. • Check for stains that may not have been removed in washing. The dryer heat may permanently set some stains. •... - Page 17 CARE AND MAINTENANCE CARE AND MAINTENANCE NOTE: Unplug the power cord before cleaning any part of the dryer. UNIT The dryer should be cleaned regularly, including the control panel, with a soft cloth and non-abrasive household detergents. The use of harsh detergent or abrasives is not recommended.
- Page 18 CARE AND MAINTENANCE AIR INTAKE FILTER The air intake filter should be cleaned before or after each use. Refer to the chart below to clean the air intake filter. NOTE: Unplug the power cord before cleaning any part of the dryer. Page 18...
-
Page 19: Troubleshooting & Warranty
TROUBLESHOOTING & WARRANTY Troubleshoot your problem by using the chart below. If the dryer still does not not work properly, contact BLACK+DECKER customer service center or the nearest authorized service center. WARNING: Users must never troubleshoot internal components. Page 19... -
Page 20: Troubleshooting
IMPORTANT DO NOT RETURN THIS PRODUCT TO THE STORE If you have a problem with this product, please contact the BLACK+DECKER Customer Satisfaction Center at 844-299-0879 or service@equitybrands.com DATED PROOF OF PURCHASE, MODEL # AND SERIAL # REQUIRED FOR WARRANTY SERVICE... -
Page 21: Limited Warranty
3. If there is damaged due to power line BLACK+DECKER does not warrant that the appliance will work surge, user damage to the AC power properly in all environmental conditions, and makes no warranty... - Page 22 BLACK & DECKER, BLACK+DECKER, the BLACK & DECKER and BLACK+DECKER logos and product names and the orange and black color scheme are trademarks of The Black & Decker Corporation, used under license. All rights reserved. Product in this box may di er slightly from that pictured. Does not a ect function.
Need help?
Do you have a question about the BCED26 and is the answer not in the manual?
Questions and answers