Table of Contents
Advertisement
IMPORTANT! Please keep these instructions for future reference
• Read all instructions before assembling and using the product.
• Assemble product according to manufacturer's instructions for ANY use mode—bedside sleeper
as well as the bassinet mode.
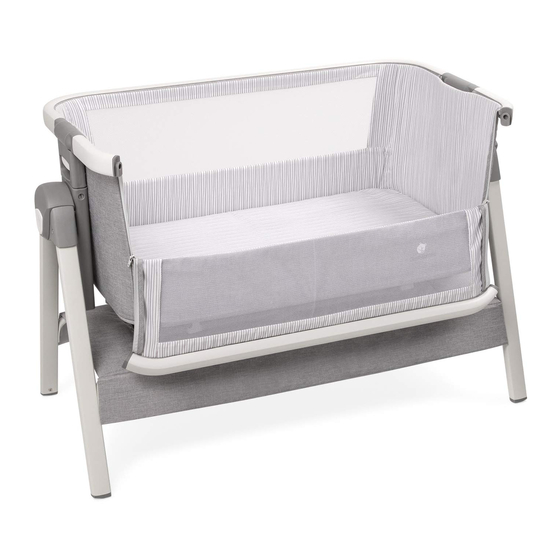
BEDSIDE CRIB
INSTRUCTIONS
Consumer Assistance
Your happiness matters to us and we want to hear from you.
Please contact us for any reason.
www.ComfyBumpy.com
info@comfybumpy.com
734 7 Ave SW #810, Calgary, AB T2P 3P8 Canada
Advertisement
Table of Contents

Related Manuals for ComfyBumpy BEDSIDE CRIB


Summary of Contents for ComfyBumpy BEDSIDE CRIB
- Page 1 • Read all instructions before assembling and using the product. • Assemble product according to manufacturer’s instructions for ANY use mode—bedside sleeper as well as the bassinet mode. BEDSIDE CRIB INSTRUCTIONS Consumer Assistance Your happiness matters to us and we want to hear from you.
- Page 2 • on soft bedding. NEVER add a mattress, pillow, comforter, or padding. Use ONLY the pad provided by ComfyBumpy™. • FALL HAZARD - To prevent falls, DO NOT use this product when the infant begins to push up on hands and knees or has reached 25 lb (11.3 kg), whichever comes first.
- Page 3 IMPORTANT! Before assembly and each use, inspect this product for damaged hardware, loose joints, missing parts or sharp edges. DO NOT use if any parts are missing or broken. Contact Comfy- Bumpy™ for replacement parts and instructions if needed. Never substitute parts.
- Page 4 Assembled Parts Mattress Leg Frame Carriage Carry Bag...
- Page 5 Crib Assembly Unfold The Legs 1. Press in outer buttons located on the top of the frame 2. Simultaneously open the legs (is easier if you have a second person to lend a hand) 3. Ensure the legs are spread as much as possible and both sides have clicked in...
- Page 6 Attach The Crib 1. Open the arms of the carriage 2. Feed the arms into the legs 3. Adjust the height by squeezing the hand-held button...
- Page 7 Stand Alone Crib Mode 1. Pull up on side bar and click in both corners 2. Zip up both corners so flap is tightly closed Study Mode - Locking The Base 1. Push in the sliding plastic clip around the base (under the crib) 2.
- Page 8 Incline Bed For Acid Reflux Setup 1. Ensure product is in ‘Stand Alone Crib’ mode 2. Ensure product is in ‘Sturdy Mode’ 3. Adjust one side of the crib up by 1 Level 4. Place baby’s head on taller side...
- Page 9 Rocking Mode – Unlocking The Base 1. Ensure product is in ‘Stand Alone Crib Mode’ and not in ‘Bed Side Crib Mode’ 2. Press in the button in on the sliding plastic clip 3. Pull the sliding plastic clip towards the middle of the crib 4.
- Page 10 Bed Side Crib Mode 1. Unzip corner flaps 2. Pull up on corner buttons to release side bar and bring down flap...
- Page 11 Bed Measurement & Crib Height Setup Measure Bed Height & Crib Height Setup 1. Measure bed height 2. Adjust crib to correct level by pulling up on the hand-held button 3. Ensure the crib side wall closest to the bed is not higher than the mattress 4.
- Page 12 Attaching Straps 1. Insert the two ‘Male Buckles’ into the two ‘Female Buckles’ 2. Feed the strap underneath the mattress 3. Tighten the strap which is located near the plastic blocker 4. Ensure the plastic blocker is flush and tight with the mattress Check To Ensure Product Is Secure 1.
- Page 13 WARNING Entrapment Hazard - To prevent death from entrapment, bedside sleeper must be properly secured to adult bed using the attachment straps. • There must be no more than 1/2 Inch (13mm) gap between bedside sleeper and adult bed • Check tightness before each use by pulling bedside sleeper in a direction away from adult bed.
- Page 14 WARNING Entrapment Hazard - To prevent death from entrapment, bedside sleeper must be properly secured to adult bed using the attachment straps. • There must be no more than 1/2 Inch (13mm) gap between bedside sleeper and adult bed • Check tightness before each use by pulling bedside sleeper in a direction away from adult bed.
- Page 15 WARNING WARNING: The 2 attachment straps must always be used in bedside sleeper mode. Removing From Bed Frame 1. Unbuckle both straps 2. Remove straps from under bed 3. Put into ‘Stand Alone Crib Mode’...
- Page 16 31.9” x 18.8” x 1.18” (81 cm x 47.8 cm x 3 cm) Replacement mattresses can be purchased by contacting ComfyBumpy: info@comfybumpy.com Never replace mattress from any company other than ComfyBumpy to ensure safety. Urine Sheet When spills or leaks are likely to happen, put down the urine sheet to avoid getting the mattress cover dirty.
- Page 17 Bedside Crib Disassembly Disassemble & Fold Crib 1. Put crib into ‘Rocking Mode’ 2. Pull up on the hand-held button to the highest level for each side 3. Find the button located in between the metal leg and the crib 4.
- Page 18 Preventing Baby’s Head from Flattening Pediatricians and child health organizations agree that healthy babies should be placed on their backs to sleep for naps and at nighttime, to reduce the risk of Sudden Infant Death Syndrome (SIDS). But babies who are always on their backs can sometimes develop flat spots on their heads (plagiocephaly).
- Page 19 Thank You! ☺ Give your baby a hug from all of us at ComfyBumpy. If there’s anything we can help with, we will. Whether you are just having a tough day or you need help with a product, we love to hear from our customers.
Need help?
Do you have a question about the BEDSIDE CRIB and is the answer not in the manual?
Questions and answers
How do I take it down
To take down the ComfyBumpy BEDSIDE CRIB:
1. Put the crib into ‘Rocking Mode’.
2. Pull up the hand-held button to the highest level on each side.
3. Locate the button between the metal leg and the crib.
4. Press the button and lift to remove the arm from the leg base on each side.
5. Pull out the frame and separate it from the mattress.
6. Press the top buttons on the outside of the legs.
7. Simultaneously close the legs.
To pack it into the carry bag:
1. Slide in the closed legs with the plastic side facing first.
2. Slide the mattress on top.
3. Slide the crib base on top.
4. Zip up the carry bag.
This answer is automatically generated