Table of Contents
Advertisement
Quick Links
Advertisement
Table of Contents

Related Manuals for Wineemotion 3 Series


Summary of Contents for Wineemotion 3 Series
- Page 1 User manual SERIES 3 VERSION...
- Page 2 • The contents of this user manual may differ from the product or sof- tware provided by the manufacturer and are subject to change without notice. For the most recent version of this manual, visit Wineemotion (www.wineemotion.com/manuals/). • The dispenser and software functionality and optional features avai- lable may vary.
- Page 3 • You can check for the availability of software updates for the di- spenser by visiting Wineemotion's website (www.wineemotion.com/ upgrades/). • This dispenser supports features that may require an active data con- nection for their operation and updating.
- Page 4 Wineemotion spa. WINEEMOTION s.p.a. Strada di Sant' Appiano 9/A - cap. 50021 Barberino Val d'Elsa (FI) P.IVA 06231920486 | tel. +39 055 39 85 422 fax. +39 055 90 29 422 email. info@wineemotion.com - website. www.wineemotion.com...
-
Page 5: Table Of Contents
Table of Contents 1. How to read this manual 2. Machine identification 2.1 Service Request 2.2 Attached Documents 3. Overview 4. Technical Information 4.1 Dispenser overview 5. Technical Data 5.1 Included accessories 6. Safety information 6.1 General safety notices 6.2 Environmental effects and safety warnings 7. - Page 6 8.8 Refrigeration system 8.9 Nitrogen or argon gas supply 8.10 Compressed air supply 8.11 Warning labels 8.11 Installation / replacement of nitrogen or argon gas cylinders bottles 8.13 Connections 8.14 Alternative gas supply combinations 9. Operation 9.1 The front door 9.2 The suction tube 9.3 Bottle-push piston components 9.4 Correct positioning of the bottle...
- Page 7 16.2 Sanitation 16.3 Load wine 17. Operations on main display 17.1 Display setting 17.2 Wine setting 17.3 Fridge setting 17.4 System setting 17.5 Clock setting 18. Cleaning and maintenance 18.1 Minimum required personnel qualifications 18.2 Daily Maintenance 18.3 Periodic Maintenance 18.4 Extraordinary Maintenance 18.5 Troubleshooting notes 18.6 PPE required for maintenance personnel...
-
Page 8: How To Read This Manual
, operation, maintenance and disposal. If you are unsure about the correct interpretation of the instructions, please contact the manufacturer, Wineemotion, for any additional clarifications needed. READ THE MANUAL BEFORE UNPACKING THE MACHINE. -
Page 9: Machine Identification
The plate should not be removed as it is useful to the service center and Wineemotion to go back to the machine specifications. The plate is present in the certificate of conformity. An example of the plate is shown below. - Page 10 110V 60Hz label for USA and Canada FRONT LABEL BACK LABEL Manual of Use...
- Page 11 220V 50Hz label FRONT LABEL BACK LABEL Manual of Use...
- Page 12 Number Function Manufacturer identification Serial number Manufacturer information Reference mark initials for compliance with national regulations Model Voltage, frequency and intensity Product line Power source rating Value fuse rating Chap. 5 ► See manual for detailed information → QR code Warning: this machine is for indoor use only.
-
Page 13: Service Request
2.1 Service Request If necessary, please contact the WINEEMOTION support team, or authorized technicians. If technical assistance is required, please always provide the identification data on the label and details of any malfunctions that have occurred. You can find an up-to-date list of authorized service centres on the www.wineemotion.com/assistance/ page. -
Page 14: Technical Information
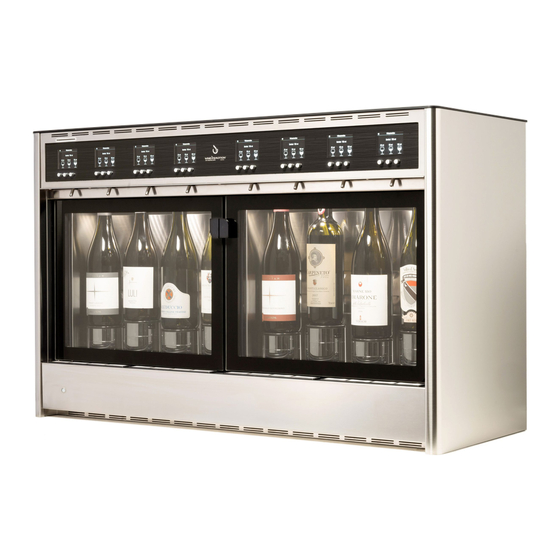
• Images and descriptions in this manual refer to WINEEMOTION Di- spenser Series 2. • The Wineemotion dispenser can be used for small, medium or large installation, for behind the bar or self service in restaurants, wine bars, casinos etc. -
Page 15: Technical Data
Technical data Model Height (H) 632mm | 22,75in 632mm | 22,75in 632mm | 22,75in Width (W) 548mm | 21,26in 548mm | 21,26in 548mm | 21,26in Depth (D) 320mm | 12,56in 320mm | 12,56in 320mm | 12,56in 45Kg | 99lbs 45Kg | 99lbs Weight (Kg) 45Kg | 99lbs Manual of Use... - Page 16 Electrical Characteristics Voltage (USA -Canada ) 110V Voltage EU 220V Frequency 50-60 Max power draw refrigerated 130 W Max power draw ambient temperature 50 W Fuses for USA and Canada F 4A Fuses for Europe F2.5A Description Nitrogen pressure with external reg. max 200 mbar Compressed air pressure 5 - 8 bar...
-
Page 17: Included Accessories
5.1 Included accessories The distributor is supplied with the following accessories: → Digital copy of the installation manual → Warranty and compliance certificate → Suction tubes Any other accessories can be supplied in special versions. Manual of Use... -
Page 18: Safety Information
Safety information 6.1 General Safety Warnings • The manufacturer, in the design and manufacture of regulators, is to foresee and avoid risks to your health. The manufacturer realizes in full compliance with the laws and materials at its disposal the know-how in the design and implementation of the distributor. - Page 19 – staff kitchen areas in shops, offices and other working environments; – farm houses and by clients in hotels, motels and other residential type environments; – bed and breakfast type environments; – catering and similar non-retail applications. • If the supply cord is damaged, it must be replaced by the manufac- turer, its service agent or similarly qualified persons in order to avoid a hazard •...
- Page 20 • The appliance is not suitable for installation in an area where a water jet could be used. • Never wash the dispenser or direct jets of water to the parts inside or outside of it, so as to prevent damage and / or damage to electronic devices.
-
Page 21: Environmental Effects And Safety Warnings
6.2 Environmental effects, safety warnings • Every organization has to apply specific procedures to estimate the effects of its activities (Goods, services, etc.) may have on the environment. • The procedure to identify the significant environmental effects, must take into account the following elements: Discharge Drainage Disposal... - Page 22 Illegal disposal of WEEE materials listed in the law will be punished by local law where the crime is committed. Manual of Use...
-
Page 23: Transport And Storage Information
If any parts are damaged or missing, do not install the dispenser and contact an authorized WINEEMOTION dealer to resolve the problem. • Important: information about the safe transfer of the dispenser can be found on the packaging. -
Page 24: Moving And Lifting
7.2 Transport and storage • The dispenser can be transported using different methods. The following diagram shows the most common solutions. • In order to protect the dispenser during transport, check the packaging is as specified in Chapter 7.1. ► Transports methods →... -
Page 25: Dispenser Integrity Check" Content Checklist
• When you receive the checklist, refer to the "package contents" to check the box numbers and ensure everything has been delivered. If any components are damaged or missing, do not install the dispenser. ► Contact an authorized WINEEMOTION dealer to resolve the problem. Manual of Use... -
Page 26: Installation
Installation 900÷1000 To not have danger or instability of the equipment you need to successfully perform the procedures in this 900÷1000 manual. WARNING: MACHINE MUST ALWAYS HORIZONTAL POSITION 8.1 Recessed installations 900÷1000 The distance shown in the diagram is the recommended distance from the floor, which must be 900 or 1000 mm. - Page 27 900÷1000 FOR DISPENSERS WITH INTERNAL CYLINDERS 900÷1000 The distance A shown in the figure is the recommended distance from the floor that may be 900 to 1000 mm. The distance B is the minimum distance for dispensing, 450mm, while the distance C is the minimum recommended distance of 400mm for the correct insertion of the gas into the dispenser.
- Page 28 900÷1000 8.2 Installation with encased positioning and 900÷1000 multiple machines 900÷1000 When installing in a recessed structure please provide 163mm of clearance on the back for the ventilation of the machine This space must be open for the free passage of air. The distance A shown in the figure is the recommended distance from the floor that may be 900 to 1000 mm.
- Page 29 'space between the panel and the radius of curvature space. It is always best to ask for updates measurements and technical specifications from the Wineemotion office as technical specifications and clearance requirements can change with model revisions. 900÷1000 CAUTION: DO NOT BLOCK THE FRONT BASE OPENING;...
-
Page 30: Power Supply
8.4 Front carter installation Use the following procedure: 1. Remove the carter from the box 2. Position the dispenser 3. Insert the carter in position and push until it stops fig. 1 fig. 2 It is strongly recommended to use silicone glue to fix the carter (fig. 2). 8.5 Power supply The operating voltage of the machine is 110 Volts-60 Hz for USA and 220Volts - 50Hz for Europe >... - Page 31 button (green), the LAN connector, and the fixing point for the WiFi antenna. The power button, with the "O" position indicating that the machine Alimentazione is switched off, and the "I" position indicating that the machine is Scarico aria calda switched on.
-
Page 32: Pneumatic System
8.6 Pneumatic system The pneumatic system provides two distinct and separate inlets: Compressed air supply. Nitrogen or argon gas supply. Recall that the two pipes must be strictly separated to prevent there being any danger of contamination of the preservation section of the dispenser. -
Page 33: Climate Class Machine
8.7 Climate class This machine belongs to the N climate control class in accordance with IEC 60335-5-24 8.8 Refrigeration system The R134 gas refrigeration system has a maximum working pressure of 10 bar. The maintenance of the refrigeration system must only be performed by a technician from an Authorized Service Center. -
Page 34: Compressed Air Supply
8.10 Compressed air supply Compressed air is used to lower the pistons for the positioning and insertion of bottles. Compressed air is supplied to the machine by connecting the supply line as shown in the figure above at position For convenience compressed air may be replaced with nitrogen pressurized at 4.5 bar. - Page 35 Caution hot surface (fig.1) During the operation of the machine the area indicated by the label may reach harmful temperatures if it comes in contact with a person, please do not touch this area for a minimum of 10 minutes after switching off the machine to allow this surface to cool within acceptable temperature ranges.
- Page 36 8.12 Installation and replacement of argon cylinders (models with external cylinder) • Before carrying out any operation, make sure that the argon cylinder is closed by the appropriate valve. Turn off the dispenser using the power switch to O (off ) position, unplug the power cord and turn off all electrical devices that may harm people.
- Page 37 4. Close the valve (C) of the cylinder (D). 5. Pull the valve ring (F) holding it in place so as to exhaust the residual pressure in the regulator (D). ). Release when the pressure gauges (E1- E2) show a value of 0 (zero). 6.
-
Page 38: Connections
8.13 Connections 1. Location of the supply lines of the gas (cylinders, generator, etc.). 2. Connect the gas lines to the gas supply and also to the pre-installed inlets on the dispenser and pressurize the system according to the ► instructions in chap. - Page 39 8.14 Altre possibili combinazioni di alimentazione Small installations (recommended) small and medium-sized installations With this configuration, the machine With this configuration, the machine is equipped with an internal gas is equipped with an internal gas pressure regulator for the separate pressure regulator for the separate alimentary and pneumatic circuits.
-
Page 40: Operation
Operation 9.1 The front door For the correct opening of the glass door, after unlocking the optional keylock in the lower right corner, perform the following steps: 1. Press in on the glass door (fig. 1). 2. Release and swing door to the desired opening (fig. 2). Avoid hygienic contamination and damage to the seals found around the door. - Page 41 This procedure must be performed by extracting the tube from the machine and washing with common cleaning products designed for food-handling equipment. Chap. Sanitation is commonly referenced for performing normal cleaning cycles but does not cover the removal of the suction tube, so please the recommendations in the sanitation section together with those in this section.
- Page 42 Number Function bottle pad spacer piston head Manual of Use...
- Page 43 9.4 Interaction and order of TAP The order of the tap from one to four / eight and from right to left, ie the rubunetto right is the No. 1 and one on the left is the N ° 4/8: The keys instead go from left to right, one on the left is the N°...
-
Page 44: Correct Positioning Of The Bottle
9.5 Correct positioning of the bottle For the insertion of a bottle into the machine it is suggested to perform the following operations: 1. Make sure the machine is properly supplied either by nitrogen or argon gas. ► 2. Insert suction tube cHap. - Page 45 UP; the piston rises; DOWN; the piston drops; 6. First press the function button "DOWN" 7. Position the bottle according to fig. 8. Then press the function button "UP" 9. Verify that the bottle has sealed correctly with the gasket as shown in fig.
- Page 46 9.5.1 Inform the machine insertion of the bottle in a certain position. It serves to inform the machine that was iserita a bottle in a certain position: 1. Press and hold the button for a few seconds at the bottom right of the center display (Figure 1).
-
Page 47: Display
Display Once the dispenser is switched on, the display first shows the manufacturer's logo, then the firmware version and the ID for the tap. After loading the firmware, the display can show one of three screens, two of which are instructions while the other is the classic view. Waiting for Bottle The system is waiting for a bottle to be inserted into the dispenser. - Page 48 Waiting for Wine ( CARDS ) The system is waiting for the bottle to be paired. BOTTLES 700gr This operation is only present in automatic mode, and then CARDS OR WINE. WAITING FOR BOTTLE. in the presence of sitemi provided with software. BOTTLES 700gr INSTALLATION WINE...
- Page 49 Volume in Dose volume INSTALLATION Under-dosage, the volume in the bottle is WINE less than the requested volume. 1.00 2.00 3.00 When Under-dosage occurs, the machine will dispense the remaining wine. ► The machine will not dispense wine if the bottle contains less than 10 gr.
-
Page 50: Manual Mode
Wine name Price. Volume. Under-dosage, the volume in the bottle is less than the requested volume. When Under-dosage occurs, the machine will dispense the remaining wine. ► The machine will not dispense wine if the bottle contains → less than 10 gr. of wine. Manual or automatic ►... - Page 51 (CARDS) BOTTLE 700gr Remember that the card is read only in manual mode that is the view of the brackets in the display, at least 3 minutes after turning on the dispenser. ► Software Mode → To access the main menu of the dispenser, in systems with software, you need to wait 3 minutes after turning the dispenser on, then, when parenthesys are shown, insert the technique card.
-
Page 52: Dispensing
Dispensing For a proper dispensing perform the following steps: 1. Insert service card ( > Chapter 13). 2. When the card is inserted, the wineglass icons are shown in negative, while the display border appears bolder. The machine is now ready to use. Press the button relative to the desired dose. - Page 53 3. Wait until the end of the wineglass animation on the display before removing the glass from beneath the dispenser tap. 4. When dispensing is completed, the phrase "PLEASE REMOVE CARD" appears on the display. Remove both the card and the filled glass. When dispensing is completed, the display will revert to that shown in step 1.
-
Page 54: Wine Cards
Warning! The dispenser is not able to determine the level of the wine in the bottle; in case the bottle is removed for manual use and reinserted into the dispenser, the preservation and correct dispensing of the wine will be compromised. ABSOLUTELY DO NOT REMOVE THE BOTTLE DURING USE Wine Cards Technical Card... - Page 55 Display the fridge status LEFT 10°C The dispenser is equipped with a particular function capable of di- splaying on the display the temperatures that are inside of the dispenser fitted with a climatic chamber. To access this feature, you must press one of the three punlsanti the first di- INSTALLATION splay...
- Page 56 On the screen you can see the activity of the refrigerator. The square appears to the left of the display indicates this activity: • SELECTED, the fridge is running up to the temperature selected from the menu Fridge Setting chap. 17.3; ►...
-
Page 57: Error States Of The System
W: (Working) The engine is running and pro- duces cold. S: (Stop) is the pause elapsing between a pro- duction cycle of the cold and the next. D: (Defrost) Normal defrost cycle. P: (Pause) Lasts 3 minutes, is made to operate the machine or Combio setting of the refri- gerator, this cycle has the aim to balance the pressures in the system and does not allow... - Page 58 The error states are coded according to the following table: Numero Tipo di Errore 1 fan 1 locked 2 fan 2 locked 3 fan 3 locked 4 fuse 4 demaged 5 fuse 3 demaged 6 fuse 2 demaged 7 eeprom fridge error 8 clock fridge error 9 fridge error stop over running status 10 internal fridge fan error...
-
Page 59: Menu Reference
Menu reference Main Menu Accessed by inserting the Engineering card. Menu index: 16. Operations on individual displays 16. 1. Calibrating • Basic • Dynamic 16. 2. Sanitation 16. 3. Load wine • Old Level Wine • Old Wine Full • Exit 17. - Page 60 • Bottle Volume • Exit & Save • Select Tap • Select Tap & Load • Exit 17.3. Fridge setting • Fridge C/F • Fridge Defrost • Fridge Evaporate • Fridge Temp Left • Fridge temp Right • Fridge Power •...
-
Page 61: How To Interact With The Display
How to interact with the display: Use the UP and DOWN arrows to scroll throu- gh the entries. Pressing OK will confirm the selection and enter the next menu. 0927 Calibrating 100 Mls Within each menu, pressing the side • •... -
Page 62: Operations On Individual Displays
Operations on individual displays The following operations appear on all the individual displays. Calibrating 16.1 Basic This function is used to calibrate the dispensing from the taps, allowing the perfect dispensing of the amount set in the "Wine Setting” menu. Calibrating Menu DOWN LOAD... - Page 63 ► Operation Insert theEngineering Cardand access theOperating Panel, then → Calibrating. pressMENU For the Calibrating operation, a 750 ml bottle of water is used. ► Action Function → Used to lower the piston, allowing the DOWN insertion of the bottle. Serves to raise the piston for the correct positioning of the bottle Chap.
- Page 64 The TASTE operation must be repeated until the dispenser dispenses the exact amount required (100 ml). ► Once the calibration is completed, it is important to SAVE, otherwise the system will revert to the previous parameters. During the LOAD and TASTE operations, always keep a →...
- Page 65 Dynamic The dispenser can be calibrated more quickly with a dynamic procedure. Operation Insert the Service Card • Dispense a dose equal to or greater than 30 gr. of wine. • CARDS BOTTLE 700gr CARDS BOTTLE 700gr If the dose is not right, proceed to the calibration: Press the center button of TAP to be calibrated.
-
Page 66: Sanitation
16.2 Sanitation This operation is used to sanitize the dispenser. The sanitization procedure must be performed approximately every 15 days, usually when replacing a bottle during the period discussed earlier. Sanitation Menu DOWN Insert the bottle disinfecting solution TASTE DOWN Sanitation working Insert the bottle with water. - Page 67 Sanitation working Insert the bottle with water. TASTE Sanitation is nished EXIT ► Operation Insert the Engineering Card and access the Operating Panel, then → Sanitation and follow the instructions shown on the selectMENU display. Sanitation Please Insert Full Bottle With Sanitation Solution Then press TASTE TASTE...
- Page 68 Action Function Used to lower the piston, allowing the DOWN insertion of the bottle with the sanitizing solution. Used to raise the piston for the correct positioning of the bottle ► Chap. 9.4 Used to begin the tap sanitizing procedure; wait until the end of the process, as shown →...
-
Page 69: Load Wine
Used to begin the tap washing procedure; wait until the end of the process, as shown TASTE on the display. Exit Exit the menu without saving. During the TASTE operation, always keep a large glass (at least 200 ml.) under the dispensing tap, as the action involves the dispensing of liquid. -
Page 70: Display Setting
Option Function Enter the Load Wine menu, select the function — for example, if you insert a new bottle of the same wine, you can simply select the function "Old Wine Full" Old Wine Full and press "OK" to load the parameters of the newly inserted bottle in the wine dispenser. - Page 71 ► Operation Insert the Engineering Card and access the Operating Panel, select → MENU Display setting. Display Setting Select tap da 1 a 8 Disp. Backlight Disp. Contrast Disp. Bottle Led Exit & Save The Display Setting operation is carried out by the main tap, from which you can select the tap you want to change ►...
- Page 72 Exit & Save Disp. Bottle Led Select tap Exit & Save da 1 a 8 Exit & Save ► If you want to load another tap's parameters, you can do Select tap Exit & Save → this by selecting Select Tap & load da 1 a 8 Exit &...
-
Page 73: Wine Setting
Used to load the parameters of a specific Select Tap & Load tap and copy them to the tap selected with the function "Select Tap" Exit Exit the menu without saving. 17.2 Wine Setting This function is used to define the parameters of the wine. Select tap Wine Setting da 1 a 8... - Page 74 Display Setting Select tap Price Volume 1 Price Volume 2 Price Volume 3 da 1 a 8 Bottle Volume da 1 a 8 Disp. Backlight Exit & Save Disp. Backlight Disp. Contrast The Wine Setting function is performed from the main tap and sets the other taps.
- Page 75 ► Operation Insert the Engineering Card and access the Operating Panel, then → select MENU Wine setting. 1.00 2.00 3.00 Option Function Used to set the price for dispensing button Glass Price 1 "1". Used to set the price for dispensing button Glass Price 2 "2".
-
Page 76: Fridge Setting
When the nozzle is set to OFF, does not deliver any more volume. When the nozzle is set to OPEN, the OPEN volume will be given until you release the button dispenser Used to define the volume of the Bottle Volume dispensing tap's bottle (default 750 ml). - Page 77 Option Function Used to define the reference scale: Celsius Fridge C/F ( C° ) or Fahrenheit ( F° ). Used to set the defrosting frequency: 1 - Light defrosting (2 times a day) Fridge Defrost 2 - Medium defrosting (3 times a day) 3 - Maximum defrosting (5 times a day) Used to define the evaporation time.
- Page 78 After making any modifications, remember to select Exit & Save to confirm the new parameters. After sending the data, the compressor switches off and ► comes on again after 3 minutes, to allow the gas to stabilise pressure prior to restarting of the compressor. →...
-
Page 79: System Setting
17.4 System Setting This function is used to define the system settings. ► Operation Insert the Engineering Card and access the Operation Panel, → System setting. selectMENU Actions Function Used to load the system parameters from Load From Card "parameters" Card Used to exit the menu, saving the new Exit &... -
Page 80: Clock Setting
17.5 Clock Setting This function is used to define the parameters that determine the minute, hour, day, month and the current year. ► Operation Insert the Engineering Card and access the Operation Panel, select → MENU Clock setting. Actions Function Clock Minute Used to set the minutes Clock Hour... -
Page 81: Cleaning And Maintenance
Daily, periodic and extraordinary and cleaning maintenance is performed by an unskilled operator. Repairs must be performed by a qualified technician provided by an authorized Wineemotion service centre. 18.2 Daily Maintenance Clean the machine of wine residue with a non-abrasive sponge and mild detergents that do not affect either the steel or polycarbonate panels (front bottles display panel, front). -
Page 82: Periodic Maintenance
18.3 Periodic Maintenance Clean the dispenser and suction tubes every 10 bottles consumed, and at least every 20 days of operation per location, (typically when the wine in the bottle runs out). Clean with detergents suitable for wines - usually citric acid. It is recommended to clean before inserting a new bottle. -
Page 83: Extraordinary Maintenance
18.4 Extraordinary Maintenance Special cleaning should be done every 6 months to ensure the dispensing taps are thoroughly clean. This should be done using a disinfectant cleaner designed specifically for oenological use, and in the doses provided by the manufacturer. An optimum time for this cleaning operation is when replacing the wine bottles. -
Page 84: Troubleshooting Notes
18.5 Troubleshooting notes Fault Cause Solution The machine does not turn on. The power button is off. Switch on the power button. The power cord is not Connect the power cord. connected. Nitrogen is leaking. Gas cylinder connections are Tighten connections. loose. -
Page 85: Ppe Required For Maintenance Personnel
18.6 PPE required for maintenance personnel All technicians performing repairs must wear protective equipment for individuals, as defined under the Health & Safety At Work laws. In particular, protective gloves and eye-wear are required. 18.7 Precautions for maintenance These instructions are not intended for people including children, with reduced physical or mental capacity, or without the necessary experience and training, without supervision or instruction by a person responsible for their... -
Page 86: Disposing Of The Machine
Ordinary recycling can be used for the main metal body of the machine as it is composed of steel, copper and aluminium. Declaration of compliance Manufacturer: Wineemotion Address: Strada di Sant'Appiano, 9/a Barberino Val D'Elsa (FI) Italy Being the manufacturer, hereby declares within its own responsibility... - Page 87 CEI EN 60335-1 - “Household and similar electrical appliances modification A2, A13, and similar”. General norm file n. 4196C A14, A15, A16 -CEI EN 50081-1 “Electro-Magnetic Compatibility” general emissions standards Part 1:residential, commercial and light industry environments. File 3215 June 1997 -CEI EN 50082-1 “Electro-Magnetic Compatibility”...
-
Page 88: Machine Warranty
P.I. 06231920486 the last 2 digit of the year of production Machine warranty WE WARRANT that the Wineemotion Wine Serving Systems (the Goods), models OTTO, QUATTRO+4, CINQUE and CINQUE WHEELS, manufactured by Wineemotion S.p:A. are sold and delivered to the Purchaser free from manufacturing defects in materials and workmanship. - Page 89 LABOUR . This is the Company’s entire liability in respect of such Warranty. Wineemotion shall provide warranty services directly or through its own authorised repair centres. Materials covered by warranty must be sent to the Repair Centres free of charge for the manufacturer and shall be sent back at the customer’s expense.
- Page 90 circuit breakers; e) incorrect storage or exposure to unusual or excessive environmental, chemical, atmospheric, mechanical, electrical (including defective house wiring or by operating the Goods on incorrect voltage or cycles or fluctuations or interruptions in the power supply) or thermal stress during the course of installation or use;...
- Page 91 The above Warranty does not extend to parts, materials or equipment not manufactured by Wineemotion S.p.A. in respect of which the Purchaser will only be entitled to the benefit of any such warranty or guarantee as is given bythe supplier or service provider to the Company.
-
Page 92: Sanikleen 512 We
SaniKleen 512 SaniKleen 512 Solution liquid detergent / disinfectant Description Balanced solution of compounds based on concentrated quaternary ammonium salts, capable, after dilution with water, of producing a high-yield cleaning / sanitising solution. Formulated specifically for sanitizing and periodic cleaning of automatic systems for distributing drinks intended for human consumption. - Page 93 Warnings For the preparation of the sanitising solution, use a dedicated container to which an appropriate label has been applied. When finished, rinse with running water, stop and store for the next cleaning operation. Do not leave used solution in the container: remove the solution at the end of each cleaning operation.
- Page 94 Product Datasheet Material Safety Data Sheet 1. Identificazione del prodotto Nome commerciale SaniKleen 512 EPA reg. N° 10324-80-58300 EPA Est N° 58300-MA-1 Data revisione 05/03/2010 Rev. Tipo di prodotto Prodotto sanificante ad ampio spettro Kronotek Srl - Via Bachelet, 38 30037 Gardigiano di Scorze' (VE) Prodotto distribuito da: Tel.
- Page 95 Indicazione per i locali Freschi e ben aerati. 8. Controllo dell'esposizione individuale Non richiesta nelle normali condizioni di impiego. Evitare di Protezione respiratoria respirare aerosol Protezione delle mani Evitare il contatto con la pelle, usare i guanti protettivi. Protezione degli occhi Occhiali di sicurezza o visiera para-spruzzi.
- Page 96 13. Considerazioni sullo smaltimento Recuperare se possibile. Operare secondo le vigenti disposizioni nazionali e locali Inviare ad impianti di smaltimento autorizzati ( DLgs 22/97 e norme collegate) 14. Informazioni sul trasporto Numero ONU Non classificato pericoloso per il trasporto n UN ADR/RID Classe/Cifra ICAO/IATA...
- Page 97 MATERIAL SAFETY DATA SHEET (Prepared According to 29 CFR 1910, 1200) SaniKleen-512 PRODUCT NAME: DISINFECTANT CLEANER SECTION 1 - GENERAL INFORMATION Manufacturer/Supplier Name: Phone: 781-278-0010 ConSeal International, Inc. Emergency: ChemTel 1-800-255-3924 90 Kerry Place, Suite 2 International: 011-813-248-0585 Norwood, MA 02062 Date prepared: 3/17/10 SECTION 2 –...
- Page 98 Page 2 SECTION 9 – PHYSICAL/CHEMCIAL CHARATERISTICS BOILING POINT (ºF): 212 SPECIFIC GRAVITY (H O=1.0): 0.995±0.005 pH: 7.0 ± 0.5 VAPOR PRESSURE (mmHg): Not determined VAPOR DENSITY (Air=1): Not Determined SOLUBILITY IN WATER: Complete EVAPORATION RATE (vs. H O): About the same APPEARANCE AND ODOR: Clear yellow liquid with lemon odor.
- Page 99 Wineemotion s.p.a Strada di Sant’Appiano 9/A - cap. 50021 Barberino Val d’ Elsa (FI) P.IVA 06231920486 | tel. +39 055 3985422 fax. +39 055 9029422 email. info@wineemotion.com - website. www.wineemotion.com Conforms To Std NSF 25 IEC 60335-1 IEC 60335-2-75 IEC 60335-2-24...
Need help?
Do you have a question about the 3 Series and is the answer not in the manual?
Questions and answers