Table of Contents
Advertisement
Advertisement
Table of Contents

Subscribe to Our Youtube Channel
Related Manuals for Cadco UNOX BAKERLUX SHOP.Pro Touch


Summary of Contents for Cadco UNOX BAKERLUX SHOP.Pro Touch
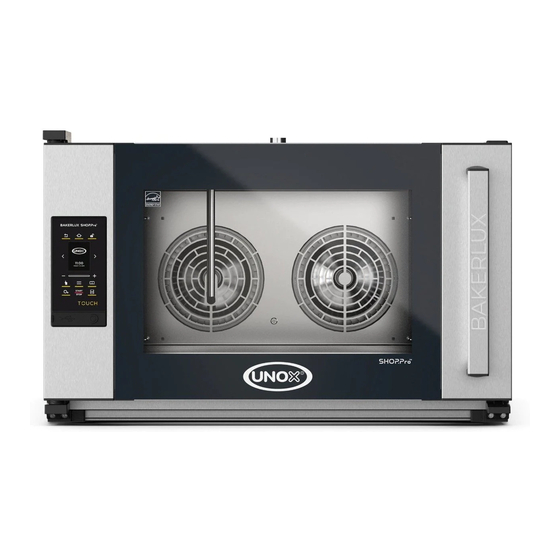
- Page 1 BAKERLUX SHOP.Pro™ Touch OPERATION MANUAL...
- Page 2 Dear Customer, Thank you for purchasing a BAKERLUX SHOP.Pro™ oven. These ovens are the result of UNOX's continuous research and development. They require a minimum amount of space but offer excellent performance and outstanding cooking management functions, in any usage conditions. The BAKERLUX SHOP.Pro™...
-
Page 3: Table Of Contents
BAKERLUX SHOP.Pro™ Touch INDEX SAFETY REGULATIONS ........................ 4 GENERAL USAGE INSTRUCTIONS ....................5 USE ..............................6 - Control Panel ...........................6 - Key Concepts ........................... 7 - Manual Cooking ........................8 - Start / Save Cooking Cycle ....................10 - Cooking in Progress ....................... 11 - View/Modify Parameters of Cooking Cycle or Preheating In Progress ....... -
Page 4: Safety Regulations
- Following any procedures other than those indicated in this manual when using or cleaning the appliances is considered inappropriate and may cause damage, injury or death, as well as invalidating the warranty* and relieving Cadco, Ltd. of all liability. -
Page 5: General Usage Instructions
BAKERLUX SHOP.Pro™ Touch General usage instructions Before using the appliance, read section "Safety regulations for use" carefully When using the appliance for the first time, be sure to clean the inside of the oven cavity and the accessories thoroughly (see page 5); let the oven run empty at maximum temperature for 1 hour to eliminate any unpleasant odors caused by protective factory grease. -
Page 6: Use
BAKERLUX SHOP.Pro™ Touch PLUS Further information: screen locking If the oven door is opened, the screen on the side warns that it is not possible to use the display for safety reasons. When the door is closed, the screen is operational again. SCREEN LOCKED PRESS 5 SEC OR CLOSE THE DOOR TO UNLOCK... -
Page 7: Key Concepts
BAKERLUX SHOP.Pro™ Use: key concepts THE SET AND PROGRAMS MENUS The oven you have purchased enables you to set cooking or leavening cycles where the parameters are set manually (SET menu). Then, you can: directly start the recipe: at the end of cooking/leavening, the parameters set will NOT be saved; save the recipe set and then start it: at the end of the cooking/leavening cycle, the parameters set are saved and the recipe can be used again in the future, by accessing the PROGRAMS menu, without having to reset the parameters. -
Page 8: Manual Cooking
OVEN Oven Set Menu During manual cooking, the user, based on experience, must set the following cooking parameters for one or more cooking steps (up to a maximum of nine): cooking duration (in hours and minutes) steam input oven cavity temperature (°F) fan speed After setting the cooking parameters (duration, temperature, etc.), you can start cooking directly or save the set recipe: this will allow you to reuse it in the future, without having to reset the parameters every time. - Page 9 SETTING PREHEATING (OPTIONAL) To set the preheating step: ap the symbol STEP 1/1 PREHEATING PREHEATING 01:30 186°C Set the desired temperature for preheating. 30°C 200°C Tap the symbol to return to the parameter setting screen. An acoustic signal (if active*) indicates the end of preheating, i.e.
-
Page 10: Start / Save Cooking Cycle
OVEN START/SAVE COOKING After having set the cooking parameters (duration, time, etc.), you can: directly start the recipe: at the end of the cooking cycle, the parameters set will NOT be saved; save the recipe set and then start it: at the end of the cooking cycle, the parameters set are saved and the recipe can be used again in the future, without having to set the parameters each time. -
Page 11: Cooking In Progress
PROG PICTURE Tap the “ ” icon Choose the photo to go with the recipe. CROISSANT CROISSANT Press the "SAVE" key to save the recipe. PROG PICTURE PROG PICTURE The recently saved program is automatically SAVE SAVE stored in the last position, after the other programs already in the memory The screen shows the "CROISSANT"... -
Page 12: View/Modify Parameters Of Cooking Cycle Or Preheating In Progress
View/modify the parameters of a cooking cycle or preheating in progress SOLUTION A Tap the "MODIFY" icon Tap the "VIEW MODIFY" icon. CROISSANT SKIP PREHEATING STEP 1/1 PREHEATING 10’:20” 180°C W /M D IFY Setting Modify parameters as usual (see " 186°C cooking parameters"... -
Page 13: Oven Programs Menu
Oven Programs Menu Using this menu, you can view and use the recipes stored previously by the user, after setting them manually (SET menu). The oven can store up to 99 recipes (from P1 to P99). CALLING UP A SAVED RECIPE 11:00 FRIDAY 11-11-2016 PROGRAMS... -
Page 14: Modify Parameters/Duplicate / Delete Saved Cooking Cycle
MODIFY THE PARAMETERS OF A SAVED COOKING CYCLE DUPLICATE A SAVED COOKING CYCLE DELETE A SAVED COOKING CYCLE Tap the ”PROGRAMS” icon The list of cooking cycles saved previously will appear PROGRAMS CROISSANT PAGE 1/25 PROG 6/6 using the ”SET MENU” (in the example the "croissant" CAKE CREAM recipe was selected). -
Page 16: Proofer (Optional Accessory)
PROOFER Proofer Set Menu Your BAKERLUX SHOP.Pro™ appliance can control a proofer from the same series, which is connected to it. The user must set the following parameters during manual leavening, depending on experience: leavening duration (in hours and minutes); temperature in the oven cavity (°F) After setting the parameters, you can start leavening directly or save the set recipe: this will allow you to reuse it in the future, without having to reset the parameters every time. -
Page 17: Leavening In Progress
SETTING LEAVENING PARAMETERS This parameter can be modified only when it is highlighted in red; if it is not already highlighted, tap the icon. leavening duration in hours and minutes (setting it to below 0 by pressing the "- (minus)" button, the time is set to infinity and the prover operates continuously). - Page 18 START/SAVE THE LEAVENING PROCESS After having set the leavening parameters, you can: directly start the recipe: at the end of leavening the parameters set will NOT be saved; save the recipe set and then start it: at the end of the leavening cycle, the parameters set are saved and the recipe can be used again in the future, without having to set the parameters each time.
- Page 19 Tap the icon " " PROG PICTURE Choose the photo to go with the recipe. Press the " " key to save the recipe. SAVE PROG PICTURE The recently saved program is automatically stored in the last position, after the other programs already in the memory The screen shows the "CROISSANT"...
- Page 20 View/modify the parameters of leavening or preheating in progress SOLUTION A Tap the " MODIFY " icon Touch the " " icon VIEW MODIFY "Setting Modify parameters as usual (see section on page 17) leavening parameters" Tap the " MODIFY icon to save the changes made.
-
Page 21: Proofer Programs Menu
Proofer Programs Menu Using this menu, you can view and use the recipes stored previously by the user, after setting them manually (SET menu). The oven can store up to 99 recipes (from P1 to P99). CALLING UP A SAVED RECIPE Select the "... -
Page 22: Modify Parameters/Duplicate / Delete Saved Leavening Cycle
MODIFY THE PARAMETERS OF A LEAVENING CYCLE SAVED IN THE MEMORY DUPLICATE A SAVED LEAVENING CYCLE DELETE A SAVED LEAVENING CYCLE Select the "PROOFER" button: the control panel is now enabled to use this appliance. Tap the "PROGRAMS" icon The list of cooking cycles saved previously will appear using the “SET MENU”... - Page 23 LEAVENING COMPLETE Leavening ends when the set time has elapsed; if you want to stop cooking before the end of the set time, hold down the "START/STOP" button. At the end of the leavening cycle, the prover beeps. At the end of leavening, you can: Stop the beep and stop leavening;...
-
Page 24: Settings
Settings his menu enables the user to set the oven parameters. 4456 The SERVICE MENU is for specialist operators only, 4456 whereas the "USER SETTINGS" can be accessed by any USER SETTINGS operator by entering the password “4456” and 11:00 confirming with "OK". -
Page 25: Date And Time
DATE AND TIME The following values must be set: the time zone: - click on geographical area (it will be highlighted in yellow) and confirm your choice using - select your country by scrolling through the list using the symbols whether to use the automatic time feature (only where the oven is connected to a network): - “YES”: the time is detected via the network and is... -
Page 27: Locking
LOCK COOKING LOCK COOKBOOK PAGE 1/1 PAGE 1/1 LOCKING PAGE 1/2 LOCK COOKBOOK LOCK COOKING DISABLE ADD TIME FORCE PREHEAT FORCE PREHEAT DISABLE ADD TIME PAGE 1/1 PAGE 1/1 LOCKING LOCKING LOCKING PAGE 1/2 PAGE 2/2 PAGE 1/1 SAFE.LOCK LOCK COOKBOOK SAFE.LOCK LOCK COOKING SAFE.LOCK PIN... -
Page 28: Password Protection
DEFAULT PROGRAM If enabled, a default program can be run simply by pressing the " START/STOP ” icon, without entering any cooking parameters before. Default program specifications: - duration: continuous - temperature: it is set in this same menu once, then it does not need to be set again. -
Page 29: Import/Export Programs
The images must be converted before they can be used. Follow the This process is in process of revision. Contact Cadco for further instructions. 1-877-603-7393 procedure shown in the drawing, points ZDATA open the UNOXDIR folder IMAGECONVERTER.EXE... -
Page 30: Haccp Data
HACCP DATA HACCP data can be used by the user to monitor the processing of foods for which there a risk of biological, chemical or physical contamination. More specifically, every 30 seconds the following readings are taken: oven cavity temperature; temperature measured by the core probe;... -
Page 31: Alarms
Description Effect Solution AF01 Motor thermal alarm The oven stops any operating cycle AF02 Safety thermostat alarm Contact Cadco Customer Service and blocks any screen display AF03 Oven cavity alarm configuration AF04 Hood (?) Communications failure alarm WF - OVEN WARNING... -
Page 32: Maintenance
BAKERLUX SHOP.Pro™ Touch Ordinary and after-sales maintenance Any routine maintenance procedure must be performed: - after disconnecting the appliance from the power and water supplies - after having put on the proper personal protective equipment (gloves, etc.). Clean the oven cavity daily to maintain proper levels of hygiene and to keep the stainless steel inside the oven cavity from becoming damaged or corroding. -
Page 33: After-Sales Assistance
AFTER-SALES ASSISTANCE In case of any malfunctions, disconnect the appliance from its power and water supply. Consult the solutions proposed in the table. If the solution is not listed in the table, contact Cadco, Ltd. Customer Service. Provide the following information: XEFT-04EU-xx the date of purchase;... -
Page 34: Inactivity
• NOTE: Using a Cadco oven without a gasket or with one in disrepair may cause the hinges to seize, as well as limit the oven’s ability to maintain the proper temperature. Doing so will void the warranty on the hinges. Please inspect and clean the door gaskets daily.
Need help?
Do you have a question about the UNOX BAKERLUX SHOP.Pro Touch and is the answer not in the manual?
Questions and answers