Table of Contents
Advertisement
Quick Links
Advertisement
Table of Contents

Subscribe to Our Youtube Channel
Related Manuals for B&G Zeus3S


Summary of Contents for B&G Zeus3S
- Page 1 Zeus Installation Manual ENGLISH www.bandg.com...
- Page 3 Preface Disclaimer As Navico is continuously improving this product, we retain the right to make changes to the product at any time which may not be reflected in this version of the manual. Please contact your nearest distributor if you require any further assistance. It is the owner’s sole responsibility to install and use the equipment in a manner that will not cause accidents, personal injury or property damage.
- Page 4 occur in a particular installation. If this equipment does cause harmful interference to radio or television reception, which can be determined by turning the equipment off and on, the user is encouraged to try to correct the interference by one or more of the following measures: •...
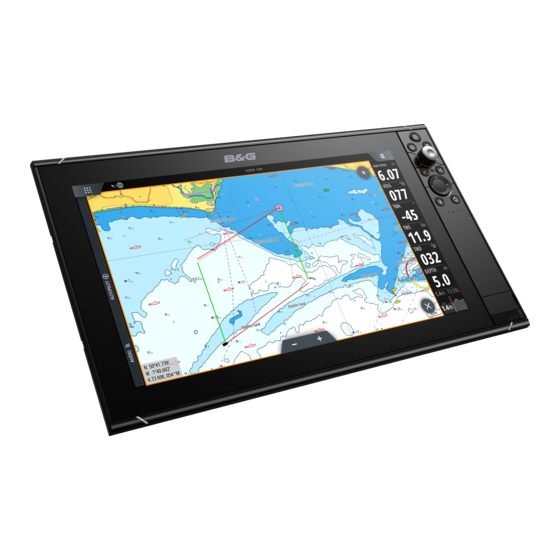
- Page 5 About this manual Images used in this manual might not exactly match the screen on your unit. Important text conventions Important text that requires special attention from the reader is emphasized as follows: Ú Note: Used to draw the reader’s attention to a comment or some important information. Warning: Used when it is necessary to warn personnel that they should proceed carefully to prevent risk of injury and/or damage to equipment/...
-
Page 6: Table Of Contents
Contents Introduction Parts included Front controls Card reader Connectors 11 Installation General mounting guidelines U-bracket mounting Panel mounting Bezel fitment and removal 15 Wiring Connectors Wiring guidelines Power NMEA 2000 Video IN and NMEA 0183 Ethernet Sonar CH1 - blue connector Sonar CH2 - black connector HDMI out USB port... -
Page 7: Introduction
Introduction Parts included Display unit Bezel trim Documentation pack Sun cover Power cable kit • Power cable • Fuse • Fuse holder U-bracket kit - 9" units • Plastic U-bracket • Bracket knobs • Mounting screws - 4x #10x3/4" self-tapping pan head U-bracket kit - 12"... -
Page 8: Front Controls
Front controls Touch screen Pages/Home • Press to open the Home page for page selection and setup options. WheelKey - user configurable key. Refer to "Configure WheelKey" on page 26. Default without an autopilot connected to the system: • Short press: toggles between panels on split screen. •... -
Page 9: Card Reader
Power key • Press and hold to turn the unit ON/OFF. • Press once to display the System Controls dialog. Repeat short presses to toggle through the default dimming levels. Card reader door Card reader A memory card can be used for: •... -
Page 10: Connectors
Connectors Connectors 9" units 12" units ETHERNET ETHERNET HDMI VIDEO NMEA2000 POWER SONAR 1 SONAR 2 NMEA2000 VIDEO ETHERNET POWER SONAR 1 SONAR 2 16" units ETHERNET ETHERNET HDMI VIDEO NMEA2000 POWER SONAR 1 SONAR 2 Ethernet - Ethernet network Power - power, power control, and external alarm Video- composite video and NMEA0183 NMEA 2000 - NMEA 2000 data... -
Page 11: Installation
Installation General mounting guidelines Warning: Do not install the unit in a hazardous/flammable atmosphere. Ú Note: Choose a mounting location that will not expose the unit to conditions that exceed the technical specifications. Mounting location Ensure that the selected area allows for: •... - Page 12 Compass safe distance The unit outputs electromagnetic interference that can cause inaccurate readings on a nearby compass. To prevent compass inaccuracy the unit must be mounted far enough away so the interference does not affect compass readings. For minimum compass safe distance, refer to "Technical specifications"...
-
Page 13: Bracket Mounting
U-bracket mounting Place the bracket in the desired mounting location. Ensure that the chosen location has enough height to accommodate the unit fitted in the bracket, and allows tilting of the unit. Also adequate space is required on both sides to allow tightening and loosening of the knobs. -
Page 14: Panel Mounting
Panel mounting Refer to the separate mounting template for panel mounting instructions. Bezel fitment and removal Ú Note: The unit in the illustration is an example only. Installation | Zeus³S Installation Manual... -
Page 15: Wiring
Wiring Connectors Different models have different connectors. For available connectors and connector layout refer to "Connectors" on page 10. Wiring guidelines Don't: • Make sharp bends in the cables. • Run cables in a way that allows water to flow down into the connectors. •... - Page 16 It is protected against reverse polarity, under voltage, and over voltage (for a limited duration). A fuse or circuit breaker should be fitted to the positive supply. For recommended fuse rating refer to "Technical specifications" on page 42. Purpose Color +12/24 V DC DC negative Black...
- Page 17 Purpose Color Power control wire Yellow Ignition switch Power controlled by power bus The yellow power control wire can either be an input that will turn on the unit when power is applied, or an output that turns on other devices when the unit is powered on. It can be configured at the installation stage to control the power state of displays and compatible devices.
-
Page 18: Nmea 2000
External alarm For sirens that draw more than 1 A, use a relay. Purpose Color External alarm output Blue Siren and relay Buzzer NMEA 2000 The NMEA 2000 data port allows receiving and sharing of a multitude of data from various sources. -
Page 19: Video In And Nmea 0183
• A terminator must be installed at each end of the backbone. The terminator can be a terminator plug or a unit with built-in terminator. NMEA 2000 device Drop-cable Terminator Power supply Backbone Powering the NMEA 2000 network The network requires its own 12 V DC power supply, protected by a 3 amp fuse. For smaller systems: connect power at any location in the backbone. - Page 20 Connector details Unit socket (male) Purpose Video 1 Ground Video 1 (+) Video 2 Ground Video 2 (+) NMEA 0183 TX_B NMEA 0183 TX_A NMEA 0183 RX_A NMEA 0183 RX_B VIDEO IN/NMEA 0183 cable Ú Note: This cable (part number 000-00129-001) is not included with the unit. Color Purpose Video in/data cable connector to unit...
-
Page 21: Ethernet
Ú Note: The video images will not be shared with another unit via the network. It is only possible to view video on the unit connected to the video source. Ú Note: Both NTSC and PAL formats are supported. Video input configuration Configurations to video input are made in the video panel. -
Page 22: Sonar Ch1 - Blue Connector
Sonar CH1 - blue connector Supports: • Sonar / CHIRP Sonar Ú Note: A 7-pin transducer cable can be connected to a 9-pin port using a 7-pin to 9-pin adaptor cable. However, if the transducer has a paddle wheel speed sensor, the water- speed data will not be displayed on the unit. -
Page 23: Hdmi Out
Purpose Drain/Ground Starboard + Starboard - Transducer - Transducer + Port + Port - Temp Transducer ID HDMI out The unit can be connected to an external monitor to replicate video at a remote location. The image is shown on the external monitor at the units own native resolution, so the external monitor should support the same resolution or be able to scale. - Page 24 USB connector details Unit socket (female) The unit is equipped with standard USB type-A connector(s). Wiring | Zeus³S Installation Manual...
-
Page 25: System Setup
System setup Turning the system on and off The system is turned on by pressing the Power key. Press and hold the Power key to turn the unit off. If the key is released before the shut-down is completed, the power off process is cancelled. You can also turn the unit off from the System Controls dialog. - Page 26 Boat settings Used to specify the physical attributes of the boat. Time Configure time settings to suit vessel location, along with time and date formats. Configure WheelKey Configures the action of the WheelKey on the front of the unit. PIN code Sets a PIN code to prevent unauthorized access to your system's settings.
-
Page 27: Activating/Deactivating Features And Applications
Ú Note: If using H5000 with a rotating mast, use mast rotation for wind needs to be disabled as the H5000 CPU will automatically correct the wind information relative to the vessel. SOG as boat speed and COG as heading Use SOG as boat speed If boat speed is not available from a paddle wheel sensor, it is possible to use speed over ground from a GPS. -
Page 28: Alarms
Manage features and applications You can manage and install/uninstall the features and apps. When a feature/app is uninstalled, the icon is removed from the home page. The feature/application can be installed again. Feature unlock Some additional features can be sold separately. These features can be unlocked by entering an unlock code. - Page 29 Radar source In a system with more than one radar sensor, the device to configure is selected from this menu. Ú Note: Radars that support dual radar mode are represented twice in the source list, with an A and B suffix. Radar status Displays scanner information and scanner features, primarily used for information and to assist with fault finding.
- Page 30 Point the vessel towards a stationary isolated object, or towards a far range AIS target where the AIS icon matches the radar echo. Adjust the coarse and fine bearing alignment so that the heading line touches the end of the selected object, or the radar target matches the AIS target. Ú...
-
Page 31: Echosounder Settings
Adjust local interference reject Interference from some onboard sources can interfere with the Broadband radar. One symptom of this could be a large target on the screen that remains in the same relative bearing even if the vessel changes direction. Halo light Controls the levels of the Halo Radar blue accent lighting. - Page 32 network. Multi-source mode should be selected if no legacy echosounder is connected to the network. Ú Note: When changing the mode to multi-source you must wait 30 seconds and then power down all sources for. Wait 1 minute, then restart all connected sources. Structure depth offset All transducers measure water depth from the transducer to the bottom.
- Page 33 Search depth Noise may cause the echosounder to search for unrealistic depths. By setting the search depth manually the system displays echoes received from objects within the set depth range. Depth offset All transducers measure water depth from the transducer to the bottom. As a result, water depth readings do not account for the distance from the transducer to the lowest point of the boat in the water or from the transducer to the water surface.
-
Page 34: Autopilot Settings
Transducer type Ú Note: The transducer type is automatically set for transducers that support Transducer ID (XID) and is not user selectable. Transducer type is used for selecting the transducer model connected to the sonar module. The transducer selected will determine what frequencies the user can select during sonar operation. - Page 35 Vessel setup The Vessel setup dialog must be used to select the number of engines, the number of tanks and vessel’s total fuel capacity across all tanks. Fuel remaining measurement The Fuel remaining measurement can be determined from fuel used by engine(s), or fuel level from tank sensors.
-
Page 36: Wireless Settings
After at least several liters (a few gallons) have been used, the tank should be fully refilled, and the Set to full option selected. Select the Calibrate option. Set the actual amount used based on amount of fuel added to the tank. Select OK to save settings. - Page 37 Auto Select The Auto Select option looks for all sources connected to the device. If more than one source is available for each data type, selection is made from an internal priority list. This option is suitable for the majority of installations. Manual source selection Manual selection is generally only required where there is more than one source for the same data, and the automatically selected source is not the one desired.
- Page 38 Ú Note: The following information might not always indicate an issue that can be simply resolved with minor adjustment to network layout or connected devices and their activity on the network. However, Rx and Tx errors are most likely indicating issues with the physical network, which can be resolved by correcting termination, reducing backbone or drop lengths, or reducing the number of network nodes (devices).
- Page 39 Serial output Selection determines whether the data is output via Tx lines, and will enable editing of the output sentences list. Serial output sentences This list allows control over which sentences that are transmitted to other devices from the NMEA 0183 port. Due to the limited bandwidth of NMEA 0183 it is desirable to only enable the data that is required.
-
Page 40: 3Rd Party Support
3rd party support CZone CZone connection to NMEA 2000 When interfacing to CZone network it is recommended to use a BEP Network interface bridge to join the two network backbones together. The CZone / NMEA 2000 Network interface bridge isolates the power of the two networks, but allows data to be freely shared between both sides. -
Page 41: Naviop
Naviop If this device is on the same NMEA 2000 network as a Naviop Loop system, this device can be used to operate the Naviop Loop system. For details, refer to the documentation following the Naviop system. FLIR camera setup Compatible FLIR cameras are plug and play when used in conjunction with a device acting as a DHCP host. -
Page 42: Appendix
Appendix Technical specifications Technical specifications Display Resolution 9" unit 1280 x 720 12" unit 1280 x 800 16" unit 1920 x 1080 Type High Visibility SolarMax HD® IPS optically bonded TFT Brightness 1200 nits Touch screen Full touch screen (multi-touch) Viewing angles in degrees (typical value @ 80°... - Page 43 Video output 9" unit Not applicable 12" and 16" units 1 port (HDMI 1.4 sink and HDCP) Data card reader 2 slots (microSD, max 32 GB, FAT32) Wireless 802.11b/g/n Bluetooth Bluetooth 4.0 with support for Bluetooth Classic 9" and 12" units Not applicable 16"...
-
Page 44: Dimensional Drawings
Dimensional drawings 9" unit 131.0 mm (5.15”) 310.9 mm (12.24”) 18.5 mm (0.73”) 287.0 mm (11.30”) 69.6 mm (2.74”) 296.2 mm (11.66”) 66.6 mm (2.62”) 12" unit 170.3 mm (6.70”) 377.1 mm (14.85”) 18.5 mm (0.73”) 351.5 mm (13.84”) 78.1 mm (3.07”) 106.7 mm (4.20”) 349.0 mm (13.74”) -
Page 45: Supported Data
Supported data NMEA 2000 compliant PGN List NMEA 2000 PGN (receive) 59392 ISO Acknowledgement 59904 ISO Request 60160 ISO Transport Protocol, Data Transfer 60416 ISO Transport Protocol, Connection M. 65240 ISO Commanded Address 60928 ISO Address Claim 126208 ISO Command Group Function 126992 System Time 126996... - Page 46 129283 Cross Track Error 129284 Navigation Data 129539 GNSS DOPs 129540 AIS Class B Extended Position Report 129545 GNSS RAIM Output 129549 DGNSS Corrections 129551 GNSS Differential Correction Receiver Signal 129793 AIS UTC and Date Report 129794 AIS aids to Navigation 129798 AIS SAR Aircraft Position Report 129801...
- Page 47 130585 Entertainment - Bluetooth Source Status NMEA 2000 PGN (transmit) 60160 ISO Transport Protocol, Data Transfer 60416 ISO Transport Protocol, Connection M. 126208 ISO Command Group Function 126992 System Time 126993 Heartbeat 126996 Product Info 127237 Heading/Track Control 127250 Vessel Heading 127258 Magnetic Variation 127502...
- Page 48 NMEA 0183 supported sentences TX / RX - GPS Name Description Datum reference Global positioning system (GPS) fix data Geographic position - Loran-C Geograpic position - Latitude/longitude GNSS DOP and active satellites GNSS fix data GNSS satellites in view Course over ground and ground speed Time and date TX / RX - Navigation Name...
- Page 49 TX / RX - Wind Name Description Wind direction and speed Wind speed and angle TX / RX - AIS / DSC Name Description Digital selective calling information Expanded digital selective calling AIS VHF data-link message AIS VHF data-link own-vessel report Ú...
Need help?
Do you have a question about the Zeus3S and is the answer not in the manual?
Questions and answers