Table of Contents
Advertisement
Quick Links
Advertisement
Table of Contents

Summary of Contents for Cleanfix E-Box 3.0
- Page 1 212336 (2019/03) EN E-BOX 3.0 Installation instructions Hägele GmbH Service: Cleanfix North America Inc. Phone: 519-275-2808 Am Niederfeld 13 +49 (0)7181-96988-36 250 Wright Blvd Toll free number: 1-855-REV-FANS D-73614 Schorndorf service@cleanfix.org Stratford ON, N4Z 1H3 www.cleanfix.org...
-
Page 2: Table Of Contents
Intended use..................12 Other regulations ................12 Warning messages ................13 Required tools .................. 16 ® Mounting the Cleanfix E-Box 3.0 ........... 17 Setting the timer ................23 Setting the Multi-Timer ..............24 5.1.1 Multi-Timer default setting ........... 24 5.1.2 Setting the Multi-Timer interval .......... - Page 3 CONTENTS Decommissioning ................30 10 Troubleshooting ................31...
-
Page 4: General Information
Hägele GmbH Am Niederfeld 13 73614 Schorndorf Germany Tel.: +49 7181 96988–0 Fax: +49 7181 96988–80 E-mail: info@cleanfix.org Website: http://www.cleanfix.org Service: Tel.: +49 7181 96988-31 E-mail: technik@cleanfix.org For additional information, feel free to contact our customer service team and our worldwide representatives at any time. -
Page 5: Introduction
GENERAL INFORMATION INTRODUCTION Introduction ® Before installing or commissioning the Cleanfix E-Box 3.0, familiarize yourself with the contents of these operating instructions. This will help you achieve optimal results and work safely. The operating instructions are a component of the product and must always be close at hand. By doing so, you will: ... -
Page 6: Liability And Damages
GENERAL INFORMATION INTRODUCTION 1.2.2 Liability and damages Since we are not included in technical service updates from the manufacturer, you may be required to make adjustments when installing this product. Hägele GmbH does not assume responsibility for installation and modification costs. On account of the information provided in these operating instructions, the manufacturer accepts no liability for direct damages or indirect losses arising from improper operation or maintenance. -
Page 7: Product Identification
GENERAL INFORMATION INTRODUCTION 1.2.4 Product identification Inquiries addressed to the manufacturer must include the article number and the E-Box 3.0 serial number. You can find these numbers at the following locations: (1) Article number (2) Serial number... -
Page 8: Typographical Conventions
GENERAL INFORMATION INTRODUCTION 1.2.5 Typographical conventions The following symbols and terms are used in these operating instructions: A dot is used for bulleted lists. ► A triangle is used for actions to be performed. An arrowhead is used for measures to avoid risks. A plus sign indicates an optional accessory that is not included in the standard accessories. -
Page 9: Safety Information In The Text
GENERAL INFORMATION INTRODUCTION 1.2.6 Safety information in the text The safety information warns users about risks and informs them how to avoid the risks. General safety information is provided at the beginning of these instructions in chapter 2. Specific warning information appears before a dangerous step. Safety and warning information that must be followed is highlighted as follows: Danger to property... -
Page 10: Product Description
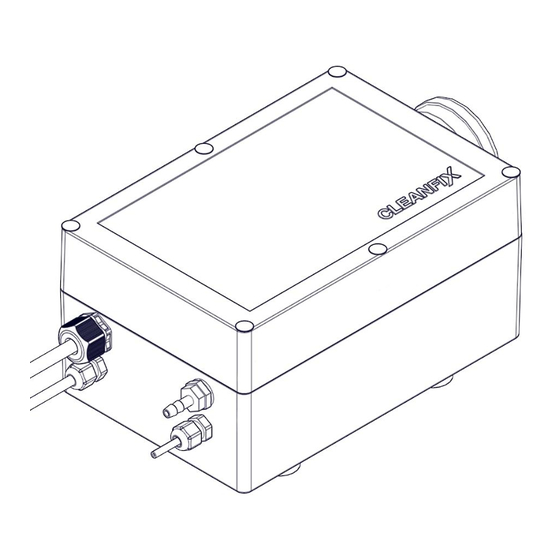
PRODUCT DESCRIPTION Product description The E-Box 3.0 is used to control a Cleanfix reversible fan in vehicles without a compressed air system. When the E-Box 3.0 is used to control the fan, the fan blades rotate around their own axis and effectively clean the radiator and intake grille. -
Page 11: Specifications
GENERAL INFORMATION PRODUCT DESCRIPTION 1.3.2 Specifications Dimensions: Weight: 3.2 kg Electrical connection: 12 V version: voltage: 12 V / current: 12 A 24 V version: voltage: 24 V / current: 7 A Working pressure of compressed air: Max. 8.5 bar / 130 psi... -
Page 12: Safety
Intended use The product may be used only for the following purposes: Controlling a Cleanfix reversible fan Only persons authorized by the manufacturer may make modifications, alterations, and repairs. Unauthorized modifications, alterations, or improper use fundamentally exempt the manufacturer from liability for resulting damages. -
Page 13: Warning Messages
SAFETY WARNING MESSAGES Warning messages WARNING! Rolling of the vehicle may result in serious injury or death! An unsecured vehicle can run over or crush you. This can result in serious injury or death. Turn off the vehicle. Remove the ignition key. - Page 14 SAFETY WARNING MESSAGES CAUTION! Failure to resolve malfunctions can result in accidents or damage! Operation of a defective E-Box can lead to accidents or damage. Immediately stop the machine. Shut down the machine. Secure the machine. Resolve the fault promptly or engage a workshop.
- Page 15 SAFETY WARNING MESSAGES NOTE Switching while the vehicle is in the red temperature range may cause property damage! The cooling effect is interrupted during the switching function. Switching while the vehicle is in the red temperature range causes the engine to overheat.
-
Page 16: Required Tools
REQUIRED TOOLS WARNING MESSAGES Required tools Standard power and hand tools... -
Page 17: Mounting The Cleanfix
NOTE An incorrect power supply may cause property damage! ® The Cleanfix E-Box 3.0 is available for vehicles with 12 V and 24 V power supplies. Make sure that the unit is suitable for the existing voltage source. High temperatures may cause property damage! ®... - Page 18 (4) Radiator (5) Shroud (6) Cleanfix® reversible fan (pneumatic) (7) Flange (8) Cleanfix® E-Box 3.0 with Multi-Timer (9) Switch (push button) (10) Fuse (12 V : 20 A / 24 V : 15 A) (11) Keyed power (terminal 15) [red cable]...
- Page 19 E-Box 3.0 mounting location ® The Cleanfix E-Box 3.0 may be mounted in the vehicle cab, on the vehicle chassis, near the hydraulic system, or in the engine compartment. One consideration in choosing the mounting location is the fact that the ®...
- Page 20 Cut the pressure hose to a suitable length. ► Slide the hose clamp over the pressure hose. ► ® Slide the pressure hose over the hose fitting of the Cleanfix E-Box. ► Secure the pressure hose by pinching the ears of the hose clamp with pincers.
- Page 21 MOUNTING THE CLEANFIX® E-BOX 3.0 WARNING MESSAGES NOTE Drilling into cables may cause property damage! Cables and electrical components run under the consoles and other components in the vehicle cab. These cables and components can be damaged during drilling. ...
- Page 22 MOUNTING THE CLEANFIX® E-BOX 3.0 WARNING MESSAGES E-Box 3.0 and push button to the vehicle’s ® Connecting the Cleanfix power supply ► ® Determine the power supply to which the Cleanfix E-Box 3.0 and the push button can be connected.
-
Page 23: Setting The Timer
WARNING MESSAGES Setting the timer The E-Box 3.0 Multi-Timer control initiates a single cleaning cycle of the compressor and valve as soon as the operator activates the push button. In addition, the Multi-Timer control allows automatic control of the cleaning cycles at set intervals. -
Page 24: Setting The Multi-Timer
SETTING THE TIMER SETTING THE MULTI-TIMER Setting the Multi-Timer The Multi-Timer automatically initiates a cleaning cycle at set intervals. 5.1.1 Multi-Timer default setting As delivered, the following times are pre-set: Compressor (mz) The compressor switches off when the pressure reaches 8 bar or after a maximum time of 30 s. Valve (t1+mz+t2) 23 s Cleaning interval... - Page 25 SETTING THE TIMER SETTING THE MULTI-TIMER Time Pause Dip switch NOTE Forcing the DIP switches may cause property damage! Forcing of the DIP switches causes permanent damage.
-
Page 26: Activating The Multi-Timer Intermediate Cleaning Cycle
SETTING THE TIMER SETTING THE MULTI-TIMER If all DIP switches numbered 1-4 are in the "Off" position, the electronics carry out a self-test. In this case, the compressor and valve are switched on simultaneously for 1 second, then off for 1 second. This continues until the voltage supply is interrupted or a DIP switch is switched to "On”. -
Page 27: Operation
OPERATION SETTING THE MULTI-TIMER Operation Switching from cooling to cleaning and back is time-controlled, for example, every 30 minutes. This interval can be changed as desired. Intermediate cleaning can be performed at any time by pressing the push button. -
Page 28: Maintenance
MAINTENANCE SETTING THE MULTI-TIMER Maintenance For pneumatic Cleanfix® electrical components with a compressor, the filter must be replaced at each machine maintenance interval. Air filter spare parts kit Order number: 100858... -
Page 29: Storage
STORAGE SETTING THE MULTI-TIMER Storage ► ® Store the Cleanfix E-Box 3.0 in a cool, dry location. - Page 30 DECOMMISSIONING SETTING THE MULTI-TIMER Decommissioning After the effective service life of the device has elapsed, the individual components must be disposed of properly and in an environmentally sound manner. Please observe the national disposal regulations currently in force. Plastic parts ►...
- Page 31 TROUBLESHOOTING SETTING THE MULTI-TIMER Troubleshooting The control unit monitors the electrical circuit for electronic faults. In the case of a short circuit, the internal fuse switches the control unit off. After the fuse cools, the control unit is switched on again. Temperatures over 60°C can also cause the control unit to switch off.
Need help?
Do you have a question about the E-Box 3.0 and is the answer not in the manual?
Questions and answers