Table of Contents
Advertisement
Available languages
Available languages
Quick Links
- 1 Table of Contents
- 2 Specifications
- 3 How to Clean · · · · · · · · · · · · · · · · · · · · · · · · · · · · · · · · · · · · · · · · · · · · · · · · · · · · · · · · · · · · · · · 11~13
- 4 Function Operating Part
- 5 How to Cook · · · · · · · · · · · · · · · · · · · · · · · · · · · · · · · · · · · · · · · · · · · · · · · · · · · · · · · · · · · · · · · · · 18~19
- 6 How to Use "Customized Cooking Function
- 7 How to Use 'Multi Cook
- 8 Cooking Guide · · · · · · · · · · · · · · · · · · · · · · · · · · · · · · · · · · · · · · · · · · · · · · · · · · · · · · · · · · · · · 62~65
- Download this manual
Advertisement
Table of Contents

Subscribe to Our Youtube Channel
Related Manuals for Cuckoo CRP-R06 TOOL Fuzzy Series

Summary of Contents for Cuckoo CRP-R06 TOOL Fuzzy Series
- Page 1 Penanak Nasi Elektrik Multi- fungsi Tipe Bertekanan Petunjuk Penggunaan CRP-R06 TOOL Fuzzy Series 1.08L(Porsi 1-6 orang)
-
Page 2: Table Of Contents
Menanak Nasi · · · · · · · · · · · · · · · · · · · · · · · · · · · · · · · · · · · · · · · · · · · · · · · · · · · · · · · · · · · · · · · · · 46~47 Penggunaan Fitur “Penyesuaian Rasa Cuckoo” · · · · · · · · · · 48 HOW TO USE “CUSTOMIZED COOKING FUNCTION”... -
Page 3: Important Safeguards
IMPORTANT SAFEGUARDS 1. Read all instructions before using this appliance. 2 Do not touch hot surfaces. Use handles or knobs. 3. To protect against fire, electric shock and / or injury to persons do not immerse cord, plugs, or Pressure 4. -
Page 4: Petunjuk Perlindungan Penting
PETUNJUK PERLINDUNGAN PENTING 1. Baca semua petunjuk sebelum penggunaan. 2. Dilarang menyentuh permukaan yang panas, gunakan pegangan atau kenop. 3. Dilarang merendam kabel, steker atau kenop tekanan dalam air atau segala cairan lainnya, untuk menghindari kebakaran, sengatan listrik dan/atau kecederaan. 4. -
Page 5: Specifications
PENGGUNAAN KABEL SAMBUNGAN Catatan: A. Kabel pendek (tersedia dalam satu set kabel pendek) digunakan untuk mengurangi risiko terbelit, sebagaimana mungkin dengan kabel yang lebih panjang. B. Kabel panjang dan sambungan juga tersedia, dan harus digunakan selayaknya. C. Penggunaan kabel sambungan untuk penanak nasi: i. -
Page 6: Safety Precautions · · · · · · · · · · · · · · · · · · · · · · · · · · · · · · · · · · · · · · · · · · · · · · · · · · · · · · 6~9
SAFETY PRECAUTIONS ● Read the following product safety guide carefully to prevent any accidents and/or serious danger. ● ‘Warning’ and ‘Caution’ are different as follows. • This sign is intended to remind and alert that something Warning may cause problems under the certain situation. This means that the action it describes may result in •... - Page 7 SAFETY PRECAUTIONS Warning Do not Do not cover the automatic Don’t spray or put any insecticide and chemicals. steam outlet or pressure weight with a duster, •It can cause an electric shock or fire. •If cockroaches or any insects get a towel, or apron, etc.
- Page 8 SAFETY PRECAUTIONS Warning Remember Do not use on a rice container Clean any dust or external or a shelf. substances off the temperature sensor and •Do not place the power cord between furnitures. It can cause an inner pot. electric shock resulting in fire. •It can cause a system malfunction or fire.
- Page 9 SAFETY PRECAUTIONS Caution Do not Don't use the inner pot for various purposes. After cooking, do not try to open And do not heat up the inner pot on the gas stove. the lid until the steam is fully released. •It can cause deformation of the inner pot.
-
Page 10: Name Of Each Part
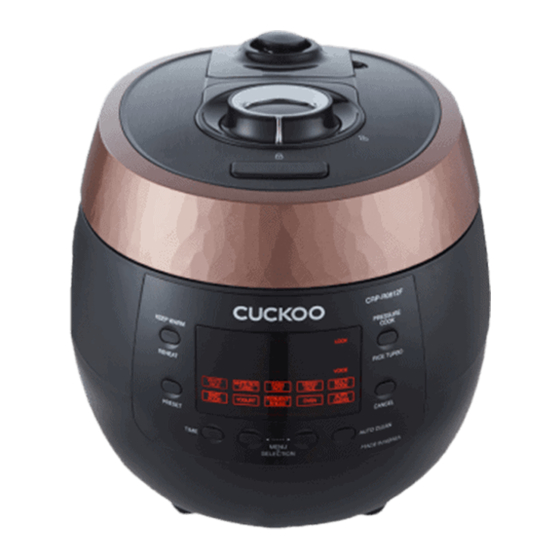
NAME OF EACH PART Name of each part Accessories Pressure Weight Soft Steam Cap Always keep it horizontal. It stabilizes steam inside of the oven. Pressure weight is twisted, it releases steam. Automatic Steam Exhaust Outlet (Solenoid valve) Manual&Cooking Guide When finished cooking or during warming, steam is automatically released. -
Page 11: How To Clean · · · · · · · · · · · · · · · · · · · · · · · · · · · · · · · · · · · · · · · · · · · · · · · · · · · · · · · · · · · · · · · 11~13
HOW TO CLEAN Detachable cover & Pressure packing After cleaning detachable cover, put it back on the lid Unless detachable cover is mounted, preset cooking cannot be done. (Alarm may sound while keeping warm.) - Clean the detachable cover to prevent odor. - Clean the body and cover with a dry towel. - Page 12 HOW TO CLEAN - To prevent foul odor clean the lid after the rice cooker has cooled and the rice cooker is unplugged. - Body and cover should be cleaned with a dry towel. Do not use betel while using rice cooker, starch can remain. No effect on health.
- Page 13 HOW TO CLEAN ※ Do not touch the surface of the soft steam cap right after cooking. You can get burned. ❶ ❷ ❸ ❹ Peel off the soft steam Disassemble the hook on the front by pressing in To reassemble the Soft Steam Cap, fit the cap When fitting the rubber cap as shown in the the direction of the arrow and wash it with a sponge...
-
Page 14: Function Operating Part
Use to set ‘VOICE GUIDE’ Multi Cook, Baby Food, Yogurt, Ferment Bread, Oven, Auto Clean. mode Use to set CUCKOO Customized Taste function ※ When power plug is just connected, display like image on the right side will be shown. It means the rice cooker is at ‘Standby’... -
Page 15: How To Set Or Cancel Voice Guide Function
HOW TO SET OR CANCEL VOICE GUIDE FUNCTION Voice Setting You may select your preferred voice among, ‘English and Chinese.’ The default is English. Example) When set to English voice Example) When set to Chinese voice 1. Press ‘AUTO CLEAN’ button once. ‘AUTO CLEAN’ button needs to be pressed for over 2 second at the first time. -
Page 16: Before Cooking Rice
BEFORE COOKING RICE Clean the inner pot and remove any moisture. ▶ Clean the inner pot with a dishcloth. ▶ Using a rough sponge may cause damage to the inner pot. Measure the rice with a measuring cup. ▶ A full cup of rice of measuring cup is equal to one person serving. (Example: 3 persons for 3 cups, 6 persons for 6 cups) Wash the rice with another container until the water becomes clear. -
Page 17: For The Best Taste Of Rice
FOR THE BEST TASTE OF RICE Cook tasty rice with CUCKOO pressure rice cooker For the best taste of rice, check the following points carefully. Use the measuring If amount of water and amount of •Use the measuring cup to measure amount of rice. -
Page 18: How To Cook · · · · · · · · · · · · · · · · · · · · · · · · · · · · · · · · · · · · · · · · · · · · · · · · · · · · · · · · · · · · · · · · · 18~19
HOW TO COOK Press the “MENU” button and select the Start cooking by pressing “PRESSURE desired menu. COOK/ Rice Turbo” button. · Pressing the “MENU” button, the function changes in · You must turn lid handle to ‘Locked’ before cooking. ·... - Page 19 HOW TO COOK Choose cook menu White rice For cooking white rice with pressure. Mixed rice For cooking mixed rice with pressure. For cooking brown rice or germinated GABA rice Baby food For cooking baby food with pressure. brown rice. Ferment bread Used to cook either ferment of back the Yogurt...
-
Page 20: How To Use "Customized Cooking Function
7 seconds, setting will be cancelled and you will go back to the standby mode.) 1. “CUCKOO Customized Taste” function is applied to the following options: WHITE RICE, WHITE RICE TURBO, GABA RICE, MIXED RICE. 2. Set up the step of customized cooking function to taste. The scorch can occur when cooking in high level mode. -
Page 21: How To Use "Gaba Rice (Germinated Brown Rice )" · · 21~22
HOW TO USE “GABA Rice (Germinated Brown Rice)” What is GABA Rice? Brown rice has richer nutrients than polished rice. However, brown rice is rather tough and harder to be ▶ digested. By germination, the enzymes in the brown rice are activated, generating nutrients and become more digestible. - Page 22 HOW TO USE “GABA Rice (Germinated Brown Rice)” Using ‘Brown GABA’ Menu In order to promote germination, soak brown rice for 16 hours in water. Method of Pre-germination ▶ Put washed brown rice in an appropriate container, pour sufficient amount of water to soak the rice. ▶...
-
Page 23: How To Use 'Multi Cook
HOW TO USE ‘MULTI COOK’ HOW TO USE ‘MULTI COOK’ Turn the top handle to ‘Locked’, press menu to select the ‘MULTI COOK’. ▶ When selecting ‘MULTI COOK’ function, the display indicates cooking time to be 20 minutes. Press “TIME” button to set up the time. Available setting time is 10 ~ 90 minutes. -
Page 24: How To Use 'Baby Food
HOW TO USE ‘Baby Food’ HOW TO USE ‘Baby Food’ Turn the top handle to ‘Locked’, press menu to select the ‘Baby Food’. ▶ When selecting ‘Baby Food’ function, the display indicates cook- ing time to be 10 minutes. Press “TIME” button to set up the time. Available setting time is 10 ~ 50 minutes. -
Page 25: How To Use 'Yogurt
HOW TO USE ‘Yogurt’ HOW TO USE ‘Yogurt’ Turn the top handle to ‘Locked’, press menu to select the ‘Yogurt’. ▶ When selecting ‘Yogurt’ function, the display indicates cooking time to be 6 hours. Press “TIME” button to set up the time. Available setting time is 30 minutes ~ 12 hours. -
Page 26: How To Use The "Ferment Bread" And "Oven" · · · · · · · · · 26~27
HOW TO USE THE “Ferment Bread” AND “Oven” HOW TO USE ‘Ferment Bread’ Turn the top handle to ‘Locked’, press menu to select the ‘Ferment Bread’. ▶ When selecting ‘Ferment Bread’ function, the display indicates cooking time to 40 minutes. Press “TIME”... - Page 27 HOW TO USE THE “Ferment Bread” AND “Oven” ▼ If there is a problem of FERMENT BREAD/BREAD BAKING, check the following details. Case Check point Do the following When dough is not inflated •Is capacity of the material •Check the volumes of the ingredients accurate? and knead the dough well.
-
Page 28: How To Preset Timer For Cooking
HOW TO PRESET TIMER FOR COOKING How to Preset Timer for Cooking Turn Locked/Open handle to ‘Locked’ and a lock icon will be displayed on the screen. Then press “PRESET” button ▶ Set the preset time in 7 seconds after pressing the “PRESET” button. -
Page 29: To Keep Cooked Rice Warm And Tasty · · · · · · · · · · · · · · 29~30
TO KEEP COOKED RICE WARM AND TASTY Having a meal ▶ If you want to have warm rice, press the “KEEP WARM/REHEAT” button. Then “Reheat” function will be started and you can eat fresh rice in 9 minutes. ▶ To use reheating in standby mode after power is applied, turn the Lock/Unlock handle to ‘Locked’. Press “KEEP WARM/REHEAT”... - Page 30 2. When the rice has a yellowish color or is too dry: The Keep Warm temp is too high. In this case decrease the “Keep Warm” temperature by 2-3℃. How to Operate Under CUCKOO Customized Taste Function. Use it while opening the lid when there is too much water or rice becomes too soft.
-
Page 31: Check Before Asking For Service · · · · · · · · · · · · · · · · · · · · · 31~33
CHECK BEFORE ASKING FOR SERVICE ▼ If there is a problem with your cooker, check the following details before requesting service to your dealer. Sometimes the cooker may not operate as desired if used incorrectly. Case Check points Do the following When the rice is not cooked. - Page 32 CHECK BEFORE ASKING FOR SERVICE ▼ If there is a problem with your cooker, check the following details before requesting service to your dealer. Sometimes the cooker may not operate as desired if used incorrectly. Case Check points Do the following •...
- Page 33 CHECK BEFORE ASKING FOR SERVICE ▼ If there is a problem with your cooker, check the following details before requesting service to your dealer. Sometimes the cooker may not operate as desired if used incorrectly. Case Check points Do the following •...
-
Page 34: Peringatan Keamanan · · · · · · · · · · · · · · · · · · · · · · · · · · · · · · · · · · · · · · · · · · · · · · · 34
PERINGATAN KEAMANAN Baca dan amati panduan keamanan ini dengan seksama, untuk menghindari kecederaan atau marabahaya lainnya. Peringatan (Warning) dan Perhatian (Caution) telah dibedakan seperti berikut. Terhadap tindakan yang berpotensi • Tanda ini mengingatkan terhadap tindakan yang berpotensi Peringatan atas terjadinya kematian atau kecede- atas terjadinya masalah di dalam situasi tertentu. - Page 35 PERINGATAN KEAMANAN PERINGATAN DILARANG Dilarang menutup saluran uap Dilarang menyemprotkan obat dan katup tekanan dengan serangga, insektisida atau cairan kemoceng, handuk, celemek, kimia lainnya. dan lain-lain. • Kelalaian berpotensi atas terjadinya • Kelalaian berpotensi untuk mengubah sengatan listrik atau kebakaran. bentuk atau merusak alat.
- Page 36 PERINGATAN KEAMANAN PERINGATAN UNTUK DITERAPKAN Bersihkan debu atau zat-zat asing lainnya dari sensor suhu dan panci. • Kelalaian berpotensi atas terjadinya kerusakan alat atau kebakaran. Dilarang memasang steker atau menarik kabel den- gan tangan yang basah. • Kelalaian berpotensi atas terjadinya sengatan listrik. Dilarang membebani kabel dengan meletakkan ba- Dilarang menarik kabel, dengan maksud memin- rang berat di atasnya.
- Page 37 PERINGATAN KEAMANAN PERINGATAN DILARANG Dilarang memanaskan panci di atas kompor gas, atau Setelah penggunaan, dilarang membuka alat sampai menggunakannya untuk tujuan lain selain tujuan aslinya. uap keluar sepenuhnya. • • Kelalaian berpotensi untuk mengubah bentuk. Uap atau muatan panas dari dalam alat berpotensi atas •...
-
Page 38: Identifikasi Bagian Alat
IDENTIFIKASI BAGIAN ALAT Nama setiap bagian alat Aksesoris Kenop Tekanan Tutup Uap Lunak Pastikan tombol tekanan berada di posisi horisontal, untuk menjaga kestabilan uap dalam oven. Saat tombol kenop diputar, saluran akan melepas uap. Saluran Uap Otomatis (Katup Solenoid) Setelah selesai memasak, uap akan keluar secara otomatis. -
Page 39: Cara Membersihkan · · · · · · · · · · · · · · · · · · · · · · · · · · · · · · · · · · · · · · · · · · · · · · · · · · · · 39~41
CARA MEMBERSIHKAN Penutup lepas-pasang dan Fitur Tekanan Setelah membersihkan penutup lepas-pasang, pasang lagi tutup ke alat dengan layak. Apabila penutup telah dipasang dengan layak, mode masak preset tidak bisa dioperasikan (weker akan berbunyi saat penghangatan). Bersihkan penutup untuk menghindari bau-bauan. Bersihkan badan dan penutup dengan handuk kering. - Page 40 CARA MEMBERSIHKAN - Untuk mencegah bau-bauan, bersihkan tutup setelah penanak nasi mendingin sepenuhnya dan steker dicabut. - Badan dan penutup harus dibersihkan dengan lap dapur kering. Hindari memasak menggunakan betel, karena sisa pati mungkin tertinggal, walaupun tidak ada efek kesehatan. Kerap periksa penutup depan dan belakang. - Dilarang memasukkan alat seperti obeng ke dalam lubang penutup lepas-pasang.
- Page 41 CARA MEMBERSIHKAN ※ Dilarang menyentuh permukaan penutup uap setelah memasak, kelalaian berpotensi atas timbulnya luka bakar. ❶ ❷ ❸ ❹ Setelah memasang kembali penutup uap, kaitkan Pasang penyumbat karet Lepaskan penutup uap Lepaskan kait dengan menekan ke arah yang ke arah yang diilustrasikan di atas ke piringan lagi, dan pas- dengan cara yang diilustrasikan di atas, dan bersihkan dengan spons...
-
Page 42: Identifikasi Kegunaan Setiap Bagian
Gunakan untuk mengatur fungsi), Baby Food (Makanan Bayi), Yogurt, Bread Fermentation (Fermentasi Roti), Oven, Auto Clean fungsi Penyesuaian Selera CUCKOO. (Pembersihan Otomatis). ※ Setelah steker dipasang, tampilan seperti yang ditunjukkan di ilustrasi sebelah akan muncul. ※ Artinya, penanak nasi ini berada dalam mode Standby (Siaga). -
Page 43: Pengoperasian Fitur Panduan Suara
PENGOPERASIAN FITUR PANDUAN SUARA Pengaturan Panduan Suara Bahasa panduan suara tersedia dalam dua pilihan, Bahasa Inggris dan Mandarin. Pengaturan awal adalah Ba- hasa Inggris. Contoh) Mengatur ke Bahasa Inggris Contoh) Mengatur ke Bahasa Mandarin 1. Tekan tombol AUTO CLEAN sekali. Tombol ini harus ditekan dan tahan lebih dari dua (2) detik di penggunaan pertama. 2. -
Page 44: Sebelum Menanak Nasi
SEBELUM MENANAK NASI Bersihkan panci dari segala cairan atau kelembaban. ▶ Bersihkan panci dengan lap dapur. ▶ Menggunakan spons kasar dapat merusak lapisan panci. Timbang beras dengan gelas penakar. ▶ Satu gelas penakar penuh setara dengan satu porsi untuk satu orang. (Contoh 3 gelas penakar untuk 3 porsi, dan 6 gelas penakar untuk 6 porsi). -
Page 45: Meningkatkan Kelezatan Dan Kualitas Hasil Nasi
Meningkatkan Kelezatan dan Kualitas Hasil Nasi Tanak nasi berkualitas terbaik dengan Pressure Cooker CUCKOO Ikuti petunjuk seperti berikut untuk menanak nasi berkualitas terbaik. ·Gunakan gelas penakar untuk menakar Dengan gelas pena- Apabila jumlah air dan beras tidak kar tuang air sampai sesuai dengan saran, hasil beras. -
Page 46: Menanak Nasi · · · · · · · · · · · · · · · · · · · · · · · · · · · · · · · · · · · · · · · · · · · · · · · · · · · · · · · · · · · · · · · · · 46~47
MENANAK NASI Tekan tombol Menu, dan pilih fitur yang Mulai fitur memasak dengan Pressure Cook diinginkan. (Masak Bertekanan Uap) atau Turbo White Rice (Nasi Putih Turbo). ·Menekan tombol Menu mengubah fitur seperti berikut; Pressured White Rice (Nasi Putih Bertekanan), Turbo ·Pegangan harus berada di posisi Locked (Kunci) White Rice (Nasi Putih Turbo), GABA Rice/Germinated sebelum memasak. - Page 47 MENANAK NASI Jenis Menu White Rice Mixed Rice Menanak beras campuran dengan tekanan Menanak nasi putih dengan tekanan uap. (Beras Campuran) (Nasi Putih) uap. GABA Rice/ Germinated Brown Menanak beras Cokelat atau beras merah Baby Food Memasak makanan bayi dengan tekanan Rice bertunas dengan tekanan uap.
-
Page 48: Penggunaan Fitur "Penyesuaian Rasa Cuckoo
[7] detik, akan membatalkan pengaturan dan kembali ke mode siaga). 1. Fitur Penyesuaian Rasa CUCKOO diterapkan untuk menu sebagai berikut: White Rice (Nasi Putih), Turbo White Rice (Nasi Putih Turbo), GABA Rice/Germinated Brown Rice (Nasi Cokelat Bertunas) dan Mixed Rice (Campuran Beras). - Page 49 PENGGUNAAN FITUR GABA/GERMINATED BROWN RICE (BERAS COKELAT BERTUNAS) Apa itu GABA/Germinated Brown Rice (Beras Cokelat Bertunas)? Nutrisi beras Cokelat bertunas lebih kaya, berfiber lebih tinggi dan bertekstur lebih keras daripada beras biasa. Karena beras tersebut dibiarkan bertunas, enzim di dalamnya mulai aktif, dan hasil nutrisinya menjadikan GABA Rice/Beras Cokelat Bertunas lebih mudah untuk dicerna.
-
Page 50: Penggunaan Fitur "Gaba/Germinated Brown Rice (Beras Cokelat Bertunas)" · · 49~50
PENGGUNAAN FITUR GABA/GERMINATED BROWN RICE (BERAS COKELAT BERTUNAS) Penggunaan Fitur GABA/Germinated Brown Rice (Beras Cokelat Bertunas) Rendam beras Cokelat di dalam air selama enam belas (16) jam untuk proses pertunasan. Langkah-langkah sebelum pertunasan. ▶ Masukkan beras Cokelat ke wadah, dan tuang air untuk merendam. ▶... -
Page 51: Penggunaan Fitur " Multi Cook (Memasak Multifungsi)
PENGGUNAAN FITUR MULTI COOK (FITUR MEMASAK MULTIFUNGSIONAL) Penggunaan Fitur Multi Cook (Fitur Memasak Multifungsional) Putar pegangan posisi Locked (Kunci), lalu tekan menu untuk memilih fitur Multi Cook (Memasak Multifungsional) ▶ Waktu memasak selama dua puluh (20) menit akan ditampilkan. 2. Tekan tombol Time (Waktu) untuk menentukan waktu memasak. Pengaturan waktu memasak terbentang dari sepuluh (10) sampai sembilan puluh (90... -
Page 52: Penggunaan Fitur Baby Food (Makanan Bayi)
PENGGUNAAN FITUR “MULTI COOK (MEMASAK MULTIFUNGSI)” Penggunaan Fitur Baby Food (Makanan Bayi) Putar pegangan ke Locked (Kunci), dan tekan tombol Menu untuk memilih fitur Baby Food (Makanan Bayi). ▶ Waktu memasak selama sepuluh (10) menit akan ditampilkan. Tekan tombol Time (Waktu) untuk menentukan waktu memasak. Pengaturan waktu memasak terbentang dari sepuluh (10) sampai lima puluh (50 menit). -
Page 53: Penggunaan Fitur Yogurt
PENGGUNAAN FITUR YOGURT Penggunaan Fitur Yogurt Putar pegangan ke Locked (Kunci), dan tekan tombol Menu untuk memilih fitur Yogurt. ▶ Waktu memasak selama enam (6) jam akan ditampilkan. Tekan tombol Time (Waktu) untuk menentukan waktu memasak. Pengaturan waktu memasak terbentang dari tiga puluh (30) menit sampai dua belas (12) jam. -
Page 54: Penggunaan Fitur "Bread Fermentation/Oven (Fermentasi Roti/Oven)" · · · 54~55
PENGGUNAAN FITUR “BREAD FERMENTATION/OVEN (FERMENTASI ROTI/OVEN)” Penggunaan Fitur Ferment Bread (Fermentasi Roti) Putar pegangan ke Locked (Kunci), dan tekan tombol Menu untuk memilih fitur Ferment Bread (Fermentasi Roti). ▶ Waktu memasak selama empat puluh (40) menit akan ditampilkan. Tekan tombol Time (Waktu) untuk menentukan waktu memasak. Pengaturan waktu memasak terbentang dari lima (5) sampai... - Page 55 PENGGUNAAN FITUR “BREAD FERMENTATION/OVEN (FERMENTASI ROTI/OVEN)” ▼ Sekiranya fitur Ferment Bread/Oven (Fermentasi Roti/Oven) bermasalah, amati langkah-langkah seperti berikut dengan seksama. Masalah Langkah Pemeriksaan Solusi Adonan tidak mengembang •Apa kuantitas bahan akurat? •Periksa kuantitas bahan, dan uli adonan lagi. •Apa waktu fermentasi terlalu lama atau singkat? Roti kecil dan kaku •Berdasarkan kuantitas bahan, apa...
-
Page 56: Penggunaan Fitur Preset Dan Timer (Pengatur Waktu)
PENGGUNAAN FITUR PRESET DAN TIMER (PENGATUR WAKTU) Penggunaan Fitur “Preset dan Timer (Pengatur Waktu)” Putar pegangan Locked/Open (Kunci/Buka) ke posisi Locked (Kunci), dan tanda terkunci akan tampil di layar. Lalu, tekan tombol Preset. ▶ Tekan tombol Preset, dan atur waktu memasak menjadi (tujuh) 7 detik. -
Page 57: Menjaga Kualitas Kelezatan Dan Kehangatan Nasi · · · · · · · · · · · 57~58
MENJAGA KUALITAS KELEZATAN DAN KEHANGATAN NASI Penghidangan ▶ IHangatkan atau panaskan ulang nasi matang dengan menekan tombol Keep Warm/Reheat (Penghangatan/Pemanasan). Nasi akan siap dihidangkan dalam waktu sembilan (9) menit. ▶ Dalam mode siaga, putar pegangan Lock/Unlock (Kunci/Buka Kunci) ke posisi Locked (Kunci) untuk mengaktifkan fitur penghangatan. - Page 58 2. Suhu terlalu tinggi apabila warna nasi berubah kekuningan. Atasi keadaan ini dengan merendahkan suhu fitur Keep Warm (Penghangatan), sebanyak dua (2) atau tiga (3) derajat Celcius. Mengoperasikan Suhu Penyesuaian Rasa CUCKOO Gunakan fitur ini untuk mengatasi nasi yang terlalu berair atau lunak.
-
Page 59: Periksa Sebelum Menghubungi Pusat Layanan Kami · · · · · · · · 59~61
PERIKSA SEBELUM MENGHUBUNGI PUSAT LAYANAN KAMI Periksa Sebelum Menghubungi Pusat Layanan Kami Apabila alat bermasalah, baca rincian berikut dengan seksama sebelum menghubungi pusat layanan kami. Harap diingat bahwa alat tidak akan beroperasi di bawah penggunaan yang tidak layak. Masalah Pemeriksaan Solusi Nasi tidak matang sama sekali ·... - Page 60 PERIKSA SEBELUM MENGHUBUNGI PUSAT LAYANAN KAMI Periksa Sebelum Menghubungi Pusat Layanan Kami Apabila alat bermasalah, baca rincian berikut dengan seksama sebelum menghubungi pusat layanan kami. Harap diingat bahwa alat tidak akan beroperasi di bawah penggunaan yang tidak layak. Masalah Pemeriksaan Solusi ·...
- Page 61 PERIKSA SEBELUM MENGHUBUNGI PUSAT LAYANAN KAMI Periksa Sebelum Menghubungi Pusat Layanan Kami Apabila alat bermasalah, baca rincian berikut dengan seksama sebelum menghubungi pusat layanan kami. Harap diingat bahwa alat tidak akan beroperasi di bawah penggunaan yang tidak layak. Masalah Pemeriksaan Solusi Kesulitan memutar pegangan ·...
-
Page 62: Cooking Guide · · · · · · · · · · · · · · · · · · · · · · · · · · · · · · · · · · · · · · · · · · · · · · · · · · · · · · · · · · · · · 62~65
COOKING GUIDE Menu Recipe Set Time Ingredients Directions Mode Rice 4 cups *The “cup” in ingredients means a Boiled Rice measuring cup in the rice cooker. 1 cup 1. Put clean-washed rice in the inner pot and pour water up to (180cc) is for one person. - Page 63 COOKING GUIDE Menu Recipe Ingredients Directions Time Mode [Fermentation] [1st Fermentation] 1. Strain strong flour through a sieve 2. Keep butter soft in room temperature 3. First, put the strong flour into the bowl and add powdered First skimmed milk, sugar, and yeast in order. (Careful to avoid (40min) contacting yeast when you add salt) 4.
- Page 64 COOKING GUIDE Menu Recipe Set Time Ingredients Directions Mode 2.5 cups of nonglutinous rice, 2 cups of adzuki Steamed Rice 45Minutes beans, 1/2 tablespoonful of salt, 2.5tablespoonful Cake of sugar and 1.5 tablespoonful of water Beef rib (port rib) 700g, sake 2 tablespoons, nicely aged soy sauce 3tablespoons, crushed garlic 1/2 tablespoon, sesame oil 1/2 teaspoon, onion juice 1 tablespoons, pear juice 1 tablespoons, sugar...
- Page 65 COOKING GUIDE Menu Recipe Set Time Ingredients Directions Mode 50g of rice cake for tteokguk, 1 boiled egg, 1 sweet potato, 40g of mozzarella cheese, 1 slice of cheddar cheese, some olive oil, 1/2 cup of white sauce, some parsley powder Rice cake gratin 20Minutes White sauce : 10g of flour, 10g of butter, 100g of milk, pinch of salt and white pepper...
-
Page 66: Panduan Memasak
PANDUAN MEMASAK Fitur Menu Waktu Mema- Bahan-bahan Resep Menanak Nasi 4 gelas beras White 1. Masukkan beras (yang telah dicuci tuntas) ke dalam panci, dan Rice tuang air sampai ke level Glutinous (Ketan) (Nasi 3 gelas beras a. Nasi Putih: level 4 Putih) 0.5 gelas kacang bolong b. - Page 67 PANDUAN MEMASAK Fitur Menu Waktu Mema- Bahan-bahan Resep Proses Fermentasi Fermentasi Pertama 1. Ayak tepung. Pertama: 2. Biarkan mentega dalam suhu ruang untuk melunak. Empat 3. Campur tepung dengan susu bubuk, gula dan ragi, mengikuti puluh (40) urutan yang baru disebutkan. (Berhati-hati agar garam menit tidak menyentuh ragi).
- Page 68 PANDUAN MEMASAK Fitur Menu Waktu Mema- Bahan-bahan Resep 2.5 beras Empat 2 gelas kacang adzuki (kacang merah) Kue Beras puluh lima 0.5 sendok teh garam Kukus (45) menit 2.5 sendok makan gula 1.5 sendok makan air 700 gram iga sapi 2 sendok makan sake 3 sendok makan kecap 0.5 sendok makan bawang putih cacah...
- Page 69 PANDUAN MEMASAK Fitur Menu Waktu Mema- Bahan-bahan Resep 2 kerang 15 gram dading sapi, putih telur Tiga puluh 0.5 telur Kerang Kukus lima (35) 1 sendok teh bawang Welsh cacah menit 0.5 sendok teh bawang putih cacah 0.25 sendok teh garam Sejumput lada bubuk 1 pak tahu Sejumput garam...
- Page 70 PANDUAN MEMASAK Fitur Menu Waktu Mema- Bahan-bahan Resep 50 gram kue beras untuk tteokguk 1 telur rebus 1 ubi manis 40 gram keju mozzarella 1 keju cheddar, minyak zaitun 0.5 gelas saus putih Bubuk peterseli. Saus putih: 10 gram tepung Gratin Kue Dua puluh 10 gram mentega...
- Page 71 PANDUAN MEMASAK Fitur Menu Waktu Mema- Bahan-bahan Resep 2 terong Saus bumbu 1 sendok makan kecap manis 0.5 buah paprika merah 0.5 paprika hijau Terong Kukus 0.25 sendok teh bubuk paprika 0.5 sendok makan cuka Sejumput bubuk wijen bubuk yang telah dicampur garam 0.25 bawang bombai Welsh 2 siung bawang putih...
- Page 72 00383-0239J0...
Need help?
Do you have a question about the CRP-R06 TOOL Fuzzy Series and is the answer not in the manual?
Questions and answers