
Summary of Contents for Hendi CookMania Professional 970546
- Page 1 P R O F E S S I O N A L VACUUM SEALER ITEM NUMBER: 970546 USE R MAN UAL BEDIEN UN GSAN LEI TUNG VERKLARING INSTRUKCJA OBSŁUGI INSTRUC TI UN E MANUALE...
-
Page 2: Important Safeguards
IMPORTANT SAFEGUARDS When using this electrical appliance, safety precautions should always be observed, including the following: READ ALL INSTRUCTIONS • Incorrect operation and improper use of the appliance can seriously dam- age the appliance and injure users. • This appliance is only suitable for private household use and it is not de- signed for commercial purposes. - Page 3 • Turn off the appliance before pulling the plug out of the socket. • Never carry the appliance by the cord. • Do not use any extra devices that are not supplied along with the appliance. • Only connect the appliance to an electrical outlet with the voltage and frequency men- tioned on the appliance label.
-
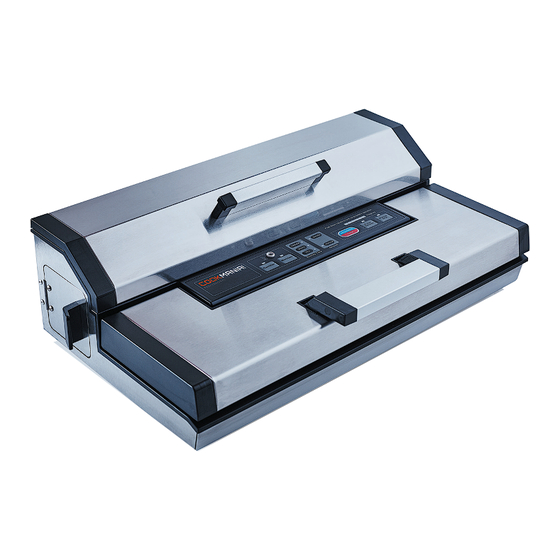
Page 4: Construction And Functions
CONSTRUCTION AND FUNCTIONS Note: There is a ON/OFF (0/I) switch at the rear of the appliance . - Press the switch to the „I” position to standby mode for operation. - Press again the switch to „0” position to turn off the appliance. 1. - Page 5 • When the automatic “Vacuum&seal” function is in operation, this button stops the motor pump and immediately starts to seal the bag so that less vacuum pressure inside the bag can be controlled by the operator to avoid crushing for delicate items. •...
- Page 6 OPERATING INSTRUCTIONS I. Sealing one side of a bag vacuum roll to make a bag Remark: 1 Embossed vacuum roll (40cm x 6m) included, embossed vacuum bags (10 pcs 20 cm x 30cm + 10 pcs 30cm x 40cm) included and containers (Both Canister & Marinate) & hose con- nectors are not included.
- Page 7 4. Put the cover down and press front handle to lock the cover. – Fig. 2 5. Check the LED status of “vacuum” and the “sealing mode” to confirm depending on the moisture status of packed items (extended/moist/dry) and desired vacuum pressure (Normal/ Gentle) according to the type of food.
- Page 8 3. Insert one end of the hose into the air intake and another end of the hose into the center hole of the canister cover. – Fig. 1 4. Check the LED status of “vacuum” and make sure if it is in “Normal” setting. 5.
-
Page 9: General Safety And Accident Prevention
V. Cord storage box 1. Put the power cord into the storage box when not use the machine which is in the back of the machine. Do not wrap the cord around the appliance. GENERAL SAFETY AND ACCIDENT PREVENTION 1. Do not touch the machine with wet hands. 2. - Page 10 Air is not removed from the bag completely: 1. To seal properly, open end of bag should be resting entirely inside vacuum chamber area. 2. Check sealing strip and the foam gasket beneath the lid for debris and position. Make sure no breaking or distortion of the foam seal gaskets on both the cover and on the base around the vacuum chamber.
-
Page 11: Disposal Of The Device
Technical Specification Operating voltage: 220-240V~ 50Hz Power consumption: 350W Protection class: class I Technical specification is subjected to change without prior notice. DISPOSAL OF THE DEVICE PROTECTION OF THE ENVIRONMENT At the end of the life of your product, it should go to a specially adapted waste-recycling centre. ENVIRONMENT PROTECTION FIRST 1. -
Page 12: Wichtige Sicherheitshinweise
WICHTIGE SICHERHEITSHINWEISE Während der Nutzung von Elektroanlagen muss man grundlegende Sicherheitshinweise einhalten, unter anderem: MAN MUSS SEHR AUFMERKSAM ALLE ANLEITUNGEN DURCHLESEN • Vor Beginn der Nutzung des Gerätes muss man alle Anleitungen genau durchlesen und für die Zukunft einhalten. • Vor dem Anschluss der Leitung an die Wandsteckdose oder ihrem Ab- trennen muss man sich überzeugen, dass die Abdeckung des Gerätes in der entblockierten Stellung ist. - Page 13 • Der Kontakt mit heißen Gasen, erhitztem Ofen, Elektrobrennern oder anderen heißen Flächen ist zu vermeiden. Verwenden Sie das Gerät weder auf nassen oder heißen Flächen noch in der Nähe einer Wärmequelle. • Die Verwendung einer Verlängerungsleitung mit diesem Gerät wird nicht empfohlen. Sollte sie jedoch verwendet werden, dann muss man eine Verlängerung verwenden, die den Nenndaten des Gerätes entspricht.
- Page 14 AUFBAU UND FUNKTIONEN DES GERÄTES 1. Taste Vacuum&seal / Cancel (Absaugen und Schweißen/Annullierung): In Abhängigkeit vom Zustand des Gerätes, hat diese Taste zwei Funktionen: • Im Bereitschaftszustand beginnt das automatische Absaugen der Luft aus dem Beutel und danach wird automatisch der Beutel nach dem Entleeren verschweißt. •...
- Page 15 7. Pulsierendes Vakuum: Taste drücken, das Gerät beginnt mit der Erzeugung des Vakuums, Taste erneut drücken, um den Prozess anzuhalten. Diese Tätigkeit kann man wiederholen. Da- nach die Taste des manuellen Schweißens drücken, wenn der Druck den vorgegebenen Wert erreicht, wird das Verschweißen gestartet. Man kann in Abhängigkeit von den verschiedenen Lebensmittelarten auch verschiedene Druckwerte auswählen.
- Page 16 BEDIENANLEITUNG I. Erstellen eines Beutels von der Rolle 1. Gerät an die Stromquelle anschließen; den Schalter auf „I” stellen. 2. Obere Abdeckung öffnen. 3. Überzeugen Sie sich, dass sich das Messer zum Abschneiden der Beutel an der Seite des Ge- rätes befindet;...
- Page 17 Abb. 1 Abb. 2 Abb. 3 5. Prüfen Sie den Zustand der LED-Dioden der Option „Vakuum” und „Schweißzeit”, um die Schweißzeit in Abhängigkeit vom Feuchtigkeitsgehalt der verpackten Produkte (verlängerte/ feuchte/trockene) und dem gewünschten Vakuumdruck (normal/delikat) und der Art des Pro- duktes zu bestätigen.
- Page 18 4. Prüfen Sie den Zustand der LED-Diode der Vakuumtaste „vacuum” und überzeugen Sie sich, dass auf „Normal” eingestellt wurde; 5. Um mit den Absaugen zu beginnen, muss man die Taste „Canister” drücken – Abb. 2. Um ein Ausweichen der Luft zwischen der Abdeckung und dem Behälter nicht zu ermöglichen, muss man nach dem Beginn des Ansaugens die Abdeckung niederdrücken.
- Page 19 V. Aufbewahrungskammer für die Leitung 1. Die Stromversorgungsleitung kann man in einer klei- nen Kammer aufbewahren, die sich im hinteren Teil des Gerätes befindet. Wickeln Sie die Leitung nicht um das Gerät. ALLGEMEINE HINWEISE BZGL. DER SICHERHEIT UND DER VORBEUGUNG VON UNFÄLLEN 1.
-
Page 20: Problemlösungen
PROBLEMLÖSUNGEN Es fehlt die Reaktion des Gerätes während einer Probe der Vakuumverpackung 1. Stromversorgungsleitung prüfen, sie muss genau an die Netzsteckdose angeschlossen sein. 2. Es ist zu prüfen, ob der Schalter sich in der Stellung „0” befindet. 3. Prüfen Sie die Stromversorgungsleitung in Bezug auf Beschädigungen. 4. -
Page 21: Entsorgung Des Gerätes
Nach dem Schweißen gelangte Luft in das Innere des Beutels 1. Die Leckstellen längs der Dichtung, die durch vorhandene Falten, Krümel, Fette oder Flüssig- keiten, die aus dem Beutel entweichen, hervorgerufen werden können. Den Beutel öffnen und vor dem erneuten Verschweißen den oberen Teil des Beutels von innen abwischen und längs der Schweißleiste glätten. - Page 22 SCHEMA DER ELEKTROANLAGE – NUR FÜR GROSSBRITANNIEN SICHERHEITSINFORMATIONEN – BETRIFFT DEMONTIERBAREN ODER ANGESPRITZTEN STECKER Die Stromversorgungsleitung kann mit dem Stecker BS 1363 13 A ausgerüstet sein. Wenn die Not- wendigkeit besteht, eine Sicherung auszuwechseln, muss man die Sicherung 13 A mit Attest von ASTA, entsprechend der Norm BS 1362, verwenden.
-
Page 24: Lees Alle Instructies
BELANGRIJKE BEVEILIGINGSMAATREGELEN Bij gebruik van dit elektrisch apparaat moet u steeds de basisvoorzorgs- maatregelen naleven waaronder de volgende: LEES ALLE INSTRUCTIES • Lees zorgvuldig alle instructies vooraleer u deze machine in gebruik neemt en bewaar ze als referentiemateriaal voor achteraf. •... - Page 25 • Het is beter geen verlengkabel te gebruiken met deze machine. Als u er toch een ge- bruikt, moet deze dezelfde of een hogere vermogensklasse hebben dan deze machine. • Voor het loskoppelen moet u om kwetsuren te vermijden de stekker vastnemen en niet aan het snoer zelf trekken om de stekker uit te trekken.
-
Page 26: Constructie En Functies
CONSTRUCTIE EN FUNCTIES 1. Vacuum&Seal / Cancel: Deze knop heeft twee functies afhankelijk van de machinestatus: • In standbytoestand start deze de automatische werking van het vacuümzuigen van de zak en dan automatisch afsluiten van de zak als het vacuümzuigen voltooid is; •... - Page 27 7. Pulse vacuum (Impuls vacuümzuigen): Druk op deze knop en de machine begint vacuüm te zuigen, drukt u nogmaal, dan stopt de bewerking. Dit proces kan worden herhaald. Druk dan op “manual seal” (manueel afsluiten) als de gewenste druk is bekomen, draai dan om af te sluiten.
- Page 28 BEDIENINGSINSTRUCTIES Een zak maken met zakkenrol 1. Steek de stekker van de machine in het stopcontact; zet schakelaar op „I”. 2. Open het bovendeksel. 3. Zorg dat het zakkensnijmes aan één kant van het snijmesrek staat en zet het snijmesrek dan naar achter.
- Page 29 5. Controleer de LED-status van “vacuum” en de “afsluittijd” om afdichtingstijd te bevestigen afhankelijk van de vochtstatus van verpakte elementen (verlengd/vochtig/droog) en gewenste vacuümdruk (Normaal/Zachtjes) volgens het type voedsel. Afb. 1 Afb. 2 Afb. 3 6. Druk dan op de Vacuum&Seal-knop, de machine begint vacuüm te zuigen en zal de zak auto- matisch afsluiten.
- Page 30 5. Druk op de blikknop om het vacuümzuigen te starten. – Afb. 2. Om zeker te zijn dat er geen luchtlek is tussen het deksel en het blik, uw hand gebruiken om het deksel naar onder te drukken aan het begin van het vacuümzuigwerk. De machine zal automatisch stoppen als voldoende vacuümdruk bereikt is.
-
Page 31: Problemen Verhelpen
V. Snoeropbergdoos 1. Berg het netsnoer in de opbergdoos aan de achterzijde als u de machine niet gebruikt. Wikkel het netsnoer niet rond de machine. ALGEMENE VEILIGHEID EN ONGEVALLENPREVENTIE 1. Hanteer de machine niet met natte handen. 2. Hanteer de machine niet terwijl u blootsvoets bent. 3. - Page 32 Als de zekering zwart is geworden, moet deze worden vervangen door een standaard 10-amp zekering. 6. Als uw machine een modusschakelaar heeft, zorg dan deze in de correcte modus staat. Zie de bovenstaande bedieningsinstructies. 7. Zorg dat de zak correct in de vacuümkamer en onder de luchtinlaat is aangebracht. Lucht wordt niet volledig verwijderd uit de zak: 1.
- Page 33 De zak smelt: 1. Als de dichtingsstrip of dichtngselement oververhit zijn en de zak doen smelten, kan het nodig zijn van het deksel omhoog te zetten en dichtingsstrip of verhittingselement te laten afkoelen gedurende enkele minuten. 2. Gebruik uitsluitend de door de fabrikant aanbevolen vacuümzakken. Het blik kan niet vacuümgezogen worden: 1.
- Page 34 ALLEEN V.K. - EEN STEKKER AANBRENGEN Belangrijk: de draden in deze kabel zijn gekleurd in overeenstemming met de volgende codes: Blauw, Neutraal, Bruin, Live (spanning) Gelieve de onderstaande instructies te lezen vooraleer het snoer op een stekker aan te sluiten. Indien u twijfels hebt, raadpleeg dan best een erkende elektri- cien.
-
Page 36: Ważne Środki Ostrożności
WAŻNE ŚRODKI OSTROŻNOŚCI Podczas eksploatacji urządzeń elektrycznych należy zachować podstawowe środki ostrożności, między innymi: NALEŻY UWAŻNIE PRZECZYTAĆ WSZYSTKIE INSTRUKCJE • Nieprawidłowa obsługa i niewłaściwe użytkowanie mogą spowodować poważne uszkodzenie urządzenia lub zranienie osób. • To urządzenie jest przeznaczone wyłącznie do prywatnego użytku do- mowego i nie jest przeznaczone do celów handlowych. - Page 37 • Przed wyjęciem wtyczki z gniazdka wyłączyć urządzenie! • Nigdy nie przenosić urządzenia, trzymając za sznur. • Nie używać żadnych akcesoriów, które nie zostały dostarczone wraz z urządzeniem. • Urządzenie należy podłączać wyłącznie do gniazdka o napięciu i częstotliwości poda- nych na tabliczce znamionowej.
- Page 38 BUDOWA I FUNKCJE URZĄDZENIA 1. Z tyłu rządzenia znajduje się włącznik ON/ OFF (0 / I) • Naciśnij przełącznik w pozycji „I” do trybu gotowości do pracy. • Naciśnij ponownie przełącznik w pozycji „0”, aby wyłączyć urządzenie. 2. Przycisk Vacuum&Seal / Cancel (odsysanie i zgrzewanie /anulowanie): W zależności od stanu urządzenia, przycisk ten ma dwie funkcje: •...
- Page 39 • Gdy używana jest automatyczna funkcja „Vacuum&Seal”, naciśnięcie tego przycisku po- woduje zatrzymanie pompy silnika i natychmiastowe rozpoczęcie zgrzewania worka, co umożliwia operatorowi sterowanie ciśnieniem próżni wewnątrz worka i ochronę delikatnej żywności przed zgnieceniem. • Po zakończeniu cyklu zgrzewania pozostawić urządzenie na 15 sekund do ostygnięcia. 8. Próżnia pulsacyjna: Nacisnąć przycisk, urządzenie zacznie wytwarzać próżnię. Nacisnąć przycisk ponownie, aby proces zatrzymać.
-
Page 40: Instrukcja Obsługi
INSTRUKCJA OBSŁUGI I. Utworzenie worka z rolki Rolka worków moletowanych (40cm x 6m) załączona. Dodatkowe worki i pojemnik z wężem do pakowania próżniowego nie są załączone 1. Podłączyć urządzenie do źródła zasilania; Obrócić przełącznik do położenia „I”. 2. Otworzyć pokrywę górną. 3. Upewnić się, że nóż do cięcia worków znajduje się z boku urządzenia, następnie odchylić ramę... - Page 41 4. Opuścić pokrywę i nacisnąć przedni uchwyt, aby zablokować pokrywę. – Rys.2 5. Sprawdzić stan diody LED opcji „próżnia” i „czas zgrzewania”, aby potwierdzić czas zgrze- wania w zależności od wilgotności pakowanych produktów (przedłużony/wilgotne/suche) i pożądane ciśnienie próżni (normalne/delikatne) w zależności od rodzaju produktu. Rys. 1 Rys.
- Page 42 3. Włożyć końcówkę przewodu do wlotu powietrza, drugi koniec zamocować w otworze w po- krywie pojemnika. – Rys. 1 4. Sprawdzić stan diody LED przycisku próżni „vacuum” i upewnić się, że ustawienie to „Normal”. 5. Aby rozpocząć odsysanie, nacisnąć przycisk „Canister” – Rys. 2. Aby uniemożliwić ucieka- nie powietrza ...
- Page 43 V. Komora na przewód 1. Przewód zasilania można przechowywać w komorze znajdującej się w tylnej części urządzenia. Nie owijać przewodu wokół urządzenia. OGÓLNE WSKAZÓWKI DOTYCZĄCE BEZPIECZEŃSTWA I ZAPOBIEGANIA WYPADKOM 1. Nie dotykać urządzenia mokrymi dłońmi. 2. Nie dotykać urządzenia będąc na boso. 3. W przypadku awarii albo nieprawidłowego działania wyłączyć urządzenie i odłączyć od zasi- lania.
-
Page 44: Rozwiązywanie Problemów
ROZWIĄZYWANIE PROBLEMÓW Brak reakcji urządzenia podczas próby pakowania próżniowego: 1. Sprawdzić przewód zasilania, powinien być dokładnie podłączony do gniazdka. 2. Sprawdzić, czy przełącznik jest w położeniu „0”. 3. Sprawdzić przewód zasilania pod kątem uszkodzeń. 4. Sprawdzić, czy gniazdko działa poprawnie podłączając inne urządzenie. 5. Odkręcić zaślepkę bezpiecznika, przez rurkę sprawdzić, czy bezpiecznik nie jest zaczerniony. Jeśli tak jest, konieczna będzie wymiana bezpiecznika na standardowy bezpiecznik 10-ampe- rowy. -
Page 45: Utylizacja Urządzenia
i wyrzucić ją. Brak odpowiedniego schłodzenia lub zmiany temperatury w chłodziarce mogą powodować psucie się żywności. Jeśli żywność nie jest zepsuta, należy ją niezwłocznie spożyć. 3. Sprawdzić worek pod kątem przebicia, przez które przedostaje się powietrze. Nie pakować próżniowo produktów z ostrymi zakończeniami (np. kości albo skorupy). Ostre zakończe- nia zabezpieczyć... - Page 46 SCHEMAT INSTALACJI ELEKTRYCZNEJ - TYLKO DLA WIELKIEJ BRYTANII INFORMACJE DOTYCZĄCE BEZPIECZEŃSTWA - DOTYCZY WTYCZKI ROZBIERALNEJ ALBO ZALEWANEJ Kabel zasilający urządzenia może być wyposażony we wtyczkę BS 1363 13 A. Jeśli konieczna jest wymiana bezpiecznika, należy zastosować bezpiecznik 13 A z atestem ASTA, zgodny z normą BS 1362. Jeśli gniazdko nie jest dostosowane do wtyczki, należy usunąć wtyczkę (jeśli to wtyczka zale- wana, należy ją...
-
Page 48: Leggere Tutte Le Istruzioni
AVVERTENZE IMPORTANTI DI SICUREZZA Podczas eksploatacji urządzeń elektrycznych należy zachować podstawowe środki ostrożności, między innymi: LEGGERE TUTTE LE ISTRUZIONI • Prima di usare questo apparecchio leggere attentamente tutte le istruzio- ni e conservarle per riferimento futuro. • Prima di collegare o scollegare il cavo dalla presa di corrente, accertarsi che il coperchio dell’apparecchio sia sbloccato. - Page 49 • Si consiglia di non utilizzare una prolunga con questa unità. Tuttavia, nel caso venga utilizzata, deve avere dei valori nominali uguali o superiori a quelli dell’apparecchio. • Durante la disconnessione, per evitare lesioni staccare la spina impugnando quest’ultima e non il cavo. •...
-
Page 50: Struttura E Funzioni
STRUTTURA E FUNZIONI 1. Vacuum&Seal / Cancel (Aspira e sigilla/Annulla): questo pulsante ha due funzioni a seconda dello stato della macchina: • in condizione di attesa avvia il funzionamento automatico della messa sotto vuoto del sac- chetto, quindi sigilla automaticamente il sacchetto al completamento dell’aspirazione; •... - Page 51 • quando è attiva la funzione automatica “Vacuum&seal” questo pulsante arresta la pompa del motore e comincia immediatamente a sigillare il sacchetto, così che l’operatore possa ottenere una minore pressione del vuoto nel sacchetto, per evitare di schiacciare gli articoli delicati;...
-
Page 52: Istruzioni Per L'uso
ISTRUZIONI PER L’USO I. Realizzazione di un sacchetto a partire dal rotolo 1. Collegare l’unità a una fonte di alimentazione; posizionare l’interruttore su “I”. 2. Aprire il coperchio superiore. 3. Accertarsi che il taglia sacchetto si trovi a unariore.“I”.limentazione; posizionare l’interruttore su “I”... - Page 53 5. Controllare lo stato dei LED “Vacuum” e “Sealing time” per confermare la durata della sigilla- tura (Prolungata/Umido/Secco), che dipende dallo stato di umidità degli articoli confezionati e della pressione di vuoto desiderata (Normale/Delicata) a seconda del tipo di alimento. Fig.
- Page 54 Fig. 1 Fig. 2 5. Premere il pulsante Canister per iniziare l’aspirazione – Fig. 2. Per assicurare che non ci siano perdite d’aria fra il coperchio e il contenitore, premere con la mano il coperchio all’inizio dell’aspirazione. Quando si raggiunge una sufficiente pressione del vuoto la macchina si ferma automaticamente.
-
Page 55: Risoluzione Dei Problemi
SICUREZZA GENERALE E PREVENZIONE DEGLI INFORTUNI 1. Non toccare la macchina con le mani bagnate. 2. Non toccare la macchina stando a piedi scalzi. 3. In caso di guasto o malfunzionamento, spegnere la macchina e staccare la spina. 4. Non lasciare la macchina esposta agli agenti atmosferici né immergerla nell’acqua. 5. - Page 56 L’aria non viene rimossa completamente dal sacchetto 1. Per una sigillatura corretta, il lato aperto del sacchetto deve poggiare interamente nell’area della camera del vuoto. 2. Controllare la striscia sigillante e la guarnizione di gomma sotto al coperchio per la presenza di residui e per la correttezza della posizione.
-
Page 57: Smaltimento Del Dispositivo
Nel contenitore non si forma il vuoto 1. Accertarsi che l’adattatore sia saldamente collegato, sia all’apparecchio sia al contenitore. 2. Controllare se la manopola del contenitore era nella posizione “seal”. 3. Premere i coperchi OPPURE l’adattatore del tubo all’inizio dell’aspirazione per evitare delle perdite dalla guarnizione del coperchio. - Page 58 DISPOZITIVE DE SECURITATE IMPORTANTE La utilizarea acestui aparat electric, trebuie să respectați întotdeauna măsurile de siguranță, printre care se numără și următoarele: CITIȚI TOATE INSTRUCȚIUNILE • Citiți cu atenție toate instrucțiunile înainte de a utiliza acest aparat și păs- trați-le pentru consultarea ulterioară. •...
- Page 59 • Se recomandă să nu utilizați un cablu de extensie pentru acest aparat. Cu toate acestea, în cazul în care este utilizat un astfel de cablu, capacitatea acestuia trebuie să fie egală sau mai mare cu cea a aparatului. • Pentru a evita rănirea, deconectați cablul prinzând ștecărul. •...
- Page 60 STRUCTURĂ ȘI FUNCȚII 1. Vidare și sigilare /Anulare: Acest buton de control are două atribuții, în funcție de starea mașinii: • În modul de așteptare, inițializează automat procesul de vidare a pungilor și de sigilarea a acestora, atunci când vidarea este completă; •...
- Page 61 8. Indicatori cu LED pentru progres: Reprezintă indicatorii de progres pentru toate procesele în desfășurare. 9. Indicatori cu LED: Indică statusul procesului de vidare sau etanșare, precum și al setărilor mașinii. 10. Port furtun: Destinat introducerii furtunului pentru recipiente și dopuri de vin, înainte de ope- rațiunile de „marinare”...
-
Page 62: Instrucțiuni De Utilizare
INSTRUCȚIUNI DE UTILIZARE I. Realizarea unei pungi dintr-o rolă de pungi 1. Conectați unitatea la sursa de alimentare; Rotiți comutatorul la “I”. 2. Deschideți capacul superior. 3. Asigurați-vă că tăietorul de pungi se află la capătul raftului, apoi puneți raftul în spate. – Fig. 1 Fig. - Page 63 Fig. 1 Fig. 2 Fig. 3 6. Apoi apăsați butonul Vidare și etanșare, unitatea începând să videze și să etanșeze automat pungile. – Fig. 3 Fig. 4 NOTĂ: Acest produs asigură o presiune de vidare foarte ri- dicată pe durata ambalării în vid într-o pungă, iar pentru a evita strivirea produselor alimentare fine ca urmare a presi- unii ridicate trebuie să...
- Page 64 Fig. 1 Fig. 2 6. Scoateți furtunul din recipient sau vas imediat ce procesul s-a finalizat. Notă: Atunci când alimentele umede sunt în vid, umezeala va fi absorbită în adaptor. Nu uitați să curățați adaptorul înainte de vidare, dacă în el este apă. Deschiderea recipientului după...
- Page 65 MĂSURI GENERALE DE SIGURANȚĂ ȘI PREVENIRE ACCIDENTELOR 1. Nu atingeți niciodată mașina cu mâinile umede. 2. Nu atingeți niciodată mașina atunci când sunteți în picioarele goale. 3. În cazul unei defecțiuni, opriți mașina și deconectați-o de la sursa de alimentare. 4.
- Page 66 Aerul nu a fost scos complet din pungă: 1. Pentru a realiza corespunzător etanșarea, capătul deschis al pungii trebuie introdus în întregi- me în zona camerei de vidare. 2. Verificați ca poziția și integritatea benzii de etanșare și a garniturii din spumă de sub capac. Asigurați-vă...
- Page 67 Recipientul poate fi vidat: 1. Asigurați-vă că adaptorul a fost bine conectat atât la parat, cât și la recipient. 2. Verificați dacă butonul recipientului se află în poziția „etanșare”. 3. Apăsați capacul SAU furtunul adaptor de la începutul procesului de vidare, pentru a evita scur- gerile prin garnitura capacului.
- Page 70 3911 TX Rhenen The Netherlands www.hendi.eu Hendi Food Service Equipment GmbH Gewerbegebiet Ehring 15 5112 Lamprechtshausen, Austria Hendi Polska sp. z o.o. ul. Magazynowa 5 62-023 Gądki, Poland Hendi Food Service Equipment Romania Srl Str. Ecaterina Teodoroiu nr. 38, Parc Industrial Ramoss...
Need help?
Do you have a question about the CookMania Professional 970546 and is the answer not in the manual?
Questions and answers