Table of Contents
Advertisement
Advertisement
Table of Contents

Related Manuals for Morgan PLUS FOUR


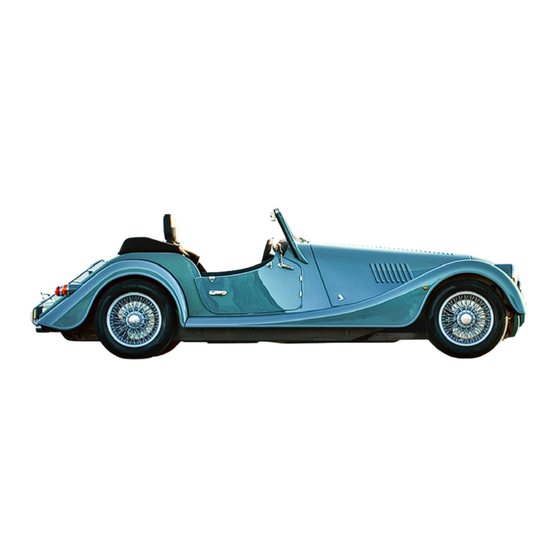
Summary of Contents for Morgan PLUS FOUR
- Page 1 MORGAN PLUS FOUR OWNER’S HANDBOOK MORGAN MOTOR COMPANY...
- Page 3 .ةرايسلا The content contained within this handbook is correct at the time of publication, however due to the nature of Morgan motor vehicle production, some details may be subject to change. Version 1.0, March 2020 - 21MY © Morgan Motor Company 2020...
-
Page 4: Table Of Contents
CONTENTS Welcome ...............2 Vehicle Identification ........3 Technical Information ........4 Safety Information ...........7 Locks, Keys and Security ......9 Seating and Safety Restraints ....9 Instruments and Switches ......12 Driver Information Panel ......16 Control Stalks .............21 Lights, Indicators and Wipers ....22 Transmission Modes ........24 Gear Modes............27 Under Dashboard Functions ....28 Foot Operated Controls ......29... -
Page 5: Welcome
This handbook has been produced in order to give the owner a good understanding of how best to use and enjoy their Morgan Plus Four. The owner/ driver should read and understand the content of this handbook before using the car, and the handbook should then be kept in the car for reference at any time. -
Page 6: Vehicle Identification
VEHICLE IDENTIFICATION Supplying Dealer Information: Morgan advises that the Vehicle Identification Number (VIN) is recorded in this section along with other records that may be useful when requesting or ordering replacement parts. The VIN (Vehicle Identification Number) plate is positioned under the left bonnet on the inner panel ahead of the A-Post. -
Page 7: Technical Information
MORGAN PLUS FOUR TECHNICAL INFORMATION Engine Information Capacities Engine ............BMW 2.0L (1998.3cc) in-line four cylinder Fuel Tank (approx.) ......43 litres (10 US Gall.) direct injection with twin scroll turbo. Windscreen washer bottle ...2.5 litres (0.7 US Gall.) Cylinders ..........4 Engine oil with new filter ....5.25 litres (1.4 US Gall.) Capacity ..........1998.3cc. - Page 8 Combined ......38.8 mpg Combined ......40.2 mpg 7.3 l/100km 7.0 l/100km Wheelbase (fully loaded) ..............2520mm (99.21 in) Track Front ....................1492mm (58.74 in) *Not all options may be available to purchase from Morgan Motor Company at launch. **All figures quoted are WLTP declared values.
-
Page 10: Safety Information
Know your own limits and skill level. Driving safely within your own limits may help you to avoid an accident. Your Morgan Plus Four is intended to be used in a safe manner, always obey the local laws and speed limits, never travelling faster than is appropriate for •... - Page 11 It is recommended that any work to be performed on a Morgan Plus Four should be undertaken by a qualified engineer or Morgan service agent.
-
Page 12: Locks, Keys And Security
WARNING Never lock the vehicle when a person or animal is inside the vehicle. Never leave the vehicle unattended and unlocked. The Morgan Plus Four may be supplied with two keys for the vehicle ignition system, and a Remote Central Locking fob. Contained within the ignition key is a chip used WARNING Do not force the lock mechanism. - Page 13 Wearing the lap section of the belt across the abdominal area must be avoided. The seat belt units fitted to the Morgan Plus Four are inertia reel seat belts. The seat belts may lock automatically when the vehicle is subjected to extreme braking, WARNING Improperly positioning the seat belts can cause serious injury or acceleration, cornering and impact forces.
- Page 14 Morgan Plus Four. Only carry people in a Morgan Plus Four who are able to use the seat belts as WARNING Not checking or maintaining seat belts can result in serious intended without any modification or seating aid.
-
Page 15: Instruments And Switches
INSTRUMENTS AND SWITCHES Central Dashboard - RHD 80 90 100 x100 Miles Speedometer Odometer & Trip meter Footwell Vent 10. Hazard Warning Analogue Clock Trip Reset Button Air Conditioning 11. Heated Windscreen Tachometer Heater Fan Control Ignition/Engine Start 12. Temperature Control 13. - Page 16 INSTRUMENTS AND SWITCHES Central Dashboard - LHD 140 160 x100 Tachometer Rev Limit Warning Light Air Conditioning 10. Heated Windscreen Analogue Clock Heater Fan Control Ignition/Engine Start 11. Temperature Control Speedometer Footwell Vent Hazard Warning 12. Trip Reset Button 13. Odometer & Trip Meter...
- Page 17 INSTRUMENTS PUSH BUTTON SWITCHES Heater Fan Control (6 RHD, 5 LHD) Speedometer (1 RHD, 3 LHD) Rotate the Heater Fan Control knob clockwise to increase fan speed. Rotate The speedometer indicates the road speed of the vehicle. The display is miles per anti-clockwise to reduce fan speed.
- Page 18 Fuel Level Gauge Your Morgan Plus Four is equipped with a visual fuel gauge. The gauge will indicate that the tank is full of fuel when the needle is positioned to the far right of the gauge.
-
Page 19: Driver Information Panel
DRIVER INFORMATION PANEL Fuel Gauge Oil Level / Oil Pressure Warning Right Indicator 13. Fog Lamp LCD Screen Check Seat Belt 10. Battery Charge Warning 14. Side Lights Coolant Temperature Heated Screen 11. High Beam or Auto Lights 15. Brake Warning ABS Warning Indicator Selected Drive Mode 12. - Page 20 DRIVER INFORMATION PANEL ICON EXPLANATION Fan. Heater. Exterior Measurement Conditions Not Met. Door Open. Temperature. Warning. Started. No Measurements Available. Secure Powertrain Gearbox Engine Overseer Overseer Oil Level Oil Level. Vehicle Breakdown. Overheat. Overheat. Off. Fault. Below Min. Against Stop At Once! Stop Carefully.
- Page 21 DRIVER INFORMATION PANEL WARNING Operating the driver information panel menus during driving can cause distraction, resulting in loss of control of the vehicle, accident, serious injury or death to the occupants of the vehicle and others. Only operate the driver information menu if permissible in the traffic situation. Stop if necessary and operate the system with the vehicle at a standstill.
- Page 22 DRIVER INFORMATION PANEL - OIL LEVEL It is recommended that an oil level check is carried out periodically. To activate an oil level measurement, the vehicle should be: 1. Parked on a level surface. 2. Park or Neutral gears selected. 3. The engine should be running at normal operating temperature. WARNING Do not scroll through Driver Information menus while driving the vehicle.
- Page 23 DRIVER INFORMATION PANEL - CONTINUED Continue to press the right stalk button to select the following information: WARNING Do not scroll through Driver Information menus while driving the vehicle. Outside Temperature Amber Warning Symbols Check Message Warning Symbol PRESS the right stalk button to cycle through When any red or amber warning symbol is Amber Warning messages may be present while the menu to display the outside temperature...
-
Page 24: Control Stalks
CONTROL STALKS Driver Info Panel Wiper Stalk Indicator Stalk PUSH UP for PUSH DOWN to indicate LEFT Windscreen Wipers PUSH UP to indicate RIGHT Intermittent Speed 1 Speed 2 PUSH DOWN for Button Single Wipe PRESS to toggle Button Auto Lights ON/OFF PRESS to toggle Outer Ring Driver Information display... -
Page 25: Lights, Indicators And Wipers
LIGHTS, INDICATORS AND WIPERS Intermittent Wipe With the main switch in the second position, the windscreen will be cleared after Lights and Indicators a pre-set delay. The lights and indicators are operated from the left hand stalk behind the Single Wipe steering wheel. - Page 26 Ignition Switch/Steering Lock Headlights - Low-beam/High-beam The ignition switch is located on the steering column and has 3 positions. Rotate the indicator stalk outer ring to position . Select between high and low-beam by pulling the Indicator stalk towards the steering wheel. Position: Steering wheel lock in operation and ignition off, key can be Auto Driving Lights extracted in this position.
-
Page 27: Transmission Modes
TRANSMISSION MODES (AUTOMATIC GEARBOX) D DRIVE Selector lever position for all normal driving. All gears for forward driving are selected automatically. WARNING An unsecured vehicle can start moving and rolling away. Danger R REVERSE of accidents. Before leaving the vehicle, secure it to prevent rolling away. Engage this position only when the vehicle is stationary. - Page 28 ENGAGING DRIVE MODES (AUTOMATIC GEARBOX) General Apply the foot brake until ready to drive off; this will prevent the vehicle from moving when a gear is selected. • It is possible to move from selector lever position P with the engine running and the brake pressed.
- Page 29 DRIVE MODES (AUTOMATIC GEARBOX) Comfort, Sport & Sport+ By default the vehicle will start in Comfort, which delivers the most efficient shift programme. It is possible to also use the shift paddles to select higher or lower gears in Comfort Mode (see Shift Paddle section). Activating Sport When in the drive position (D) the selector lever may be moved (left) into the Sport position.
-
Page 30: Gear Modes
Selecting gears in Sport Mode using the Shift Paddles General (Automatic Gearbox): The Drive and Shift programmes will avoid gear shifts that may cause mechanical harm. For example, a manual down shift would not be allowed if the engine Shift paddles on the steering column enable fast gear shifting without taking speed is deemed too high. -
Page 31: Under Dashboard Functions
Diagnostic Socket WARNING The Overseer system is not a driver aid, stability, or traction Diagnostic socket for connecting to and interfacing with the Morgan Plus control system. Four’s electronic systems. It is recommended that this is only performed by an The overseer is a safety feature that detects locking of the rear wheels. -
Page 32: Foot Operated Controls
® Instrument Dimmer Switch Morgan vehicle will appear in the list of available devices as “MusicStream” or This switch controls the brightness of the instrument lighting. Rotate the knurled “Morgan”. The pairing process only needs to be performed once per device. Play knob anti-clockwise to increase brightness. -
Page 33: Hand Operated Controls
It is important to have the steering controls in the correct position for the driver. The steering column in the Morgan Plus Four can be adjusted up or down and Accelerator forwards or backwards. -
Page 34: Heating Ventilation And Ac
AC switched on. To start the Morgan Plus Four, turn the key to the second position and press the Conditioned air is supplied to the cabin via the outlets in the heater unit. -
Page 35: Hood Operation
HOOD DOWN PROCEDURE WARNING The hood mechanism has several moving parts that can cause WARNING To prevent damage to the hood, ensure it is clean before folding. injury. Avoid trapping hands, fingers or loose clothing in the mechanism Pay particular attention to the rear window panel which should be while operating the roof. - Page 36 HOOD DOWN PROCEDURE (CONT.) FOLD 1 FOLD 2 Begin lifting the hood from the front rail. Carefully Continue to tilt the hood backwards while making a WARNING Failure to release the press studs make a neat fold through the rear window panel. second fold between the window and roof section.
- Page 37 HOOD COVER FITTING PROCEDURE To avoid potential damage to the vehicle, it is recommended that two people perform the following procedure: Slide the hood cover under the rail, passing the rear INSIDE: Ensure the hood is folded down. Pull the rear Have a helper lift and support the rear hood rail.
- Page 38 HOOD UP PROCEDURE - To avoid potential damage to the vehicle, it is recommended that two people perform the following procedure: Remove hood cover if fitted (see Hood cover fitting). INSIDE: Locate the rear hood rail release lever next Carefully unfold the hood, positioning the front rail to the drivers seat.
- Page 39 HOOD UP PROCEDURE - CONT. INSIDE: Attach the press studs to the side rails. Secure the lower sides of the hood by pushing in Push down on the rear hood rail over the clamping the press studs either side of the vehicle. points to secure from the rear and provide the required tension through the hood.
-
Page 40: Fuel Filling
FUEL FILLING The Morgan Plus Four must be fuelled with unleaded gasoline fuel. The Morgan Plus WARNING Care must be taken not to damage the paint work of the Plus Four will run satisfactorily on gasoline of a minimum octane rating of 95 RON. Using Four. -
Page 41: Bonnets
OPENING AND CLOSING THE BONNETS To open the bonnets on your Morgan Plus Four first slide the retaining round handle on the rear bonnet latch down and pull outwards. Repeat the operation on the front retaining latch and then lift the bonnet upwards. To close the bonnet push down and inwards on the bonnet latches. -
Page 42: Tyres
Cold Tyre Inflation Pressure WARNING Tyres must be inflated to the correct pressures. Over or Morgan recommend that the tyres should be inflated to 28psi/193kPa. This under inflated tyres can cause blowouts resulting in accidents causing information can also be found on the vehicles Tyre Placard Label under the left serious injury or even death. - Page 43 Traction tyre pressures are adjusted only when the Tyres are cold (when the car has been standing for a minimum of 3 hours, or driven less than 1 mile). Always replace The traction grades, from highest to lowest, are AA, A, B, and C. Those grades the tyre valve dust cap to prevent dirt and moisture getting into the valve, which represent the tyre’s ability to stop on a wet pavement as measured under could cause leakage.
- Page 44 Tyre Identification Number (TIN) Tyre Size Markings Marked on the sidewall of the tyre is the TIN; this is made up of 5 sections. Starting On the sidewall of the tyre will be marked the tyre size, for example: with DOT, then a 2-digit manufacturers code, then a 2-digit tyre size code, then a 3-digit construction code finishing with a 4-digit month and year code.
-
Page 45: Fuse Box
The battery will discharge gradually if the vehicle is not used. If the vehicle is left In the event of sustaining a flat tyre, contact your nearest Morgan dealer or a standing for more than 2 weeks then it is advised that a battery conditioner is vehicle recovery company. - Page 46 BATTERY REMOVAL If the battery is required to be removed from the vehicle this should normally be performed by a Morgan dealer. To remove the battery, locate the negative terminal on the top of the battery (2). It has a minus (-) symbol stamped into the rubber cover. Pull back the cover to reveal the terminal post and clamp.
- Page 47 (marked with a red arrow) on the left side Towing Trailers of the vehicle. The Morgan Plus Four is not designed for use as a towing vehicle for either towing trailers or other vehicles. NOTICE: If your vehicle does not have a square hole cut in the undertray...
- Page 48 It is recommended that the vehicle is only lifted using a professional workshop post lift or hydraulic ramp. Wheels should be changed at a Morgan dealership where the vehicle can be raised using specialist equipment. In an emergency, a jack may be used to raise the vehicle sufficiently to clear a trapped obstacle from underneath.
-
Page 49: Maintenance
Only top up a quantity of 1 litre (approximately 2 pints) of engine oil when the along with services from a Morgan distributor or dealer, will help to prolong the message on the driver information display is shown or the engine oil level has life and enjoyment of the car. - Page 50 It is recommended that only genuine BMW specification engine oils are used in The Morgan Plus Four uses a replaceable oil filter element located in the middle a Morgan Plus Four. Engine oils with the following oil specification can be used...
- Page 51 As the temperature rises in traffic, the fans will then cut in and cut out. NOTICE: Do not use engine coolant antifreeze, only specially prepared solutions If there is any doubt about the operation of the fan system, consult a Morgan Dealer. for washer systems. Follow manufacturer’s instructions carefully.
- Page 52 Trained personnel must carry out changes. It is recommended that a leakage must be rectified immediately. qualified engineer or Morgan service agent should carry out all repairs and brake services. The brake fluid in the system must be drained and replaced every 2 years.
-
Page 53: Cleaning
It is recommended that the paintwork should not be treated with a heavy wax Your Morgan Plus Four is fitted with two door mounted and one windscreen for a period of three months after the car has been painted. This will allow the mounted rear view mirror. -
Page 55: Warranty
We check vehicles carefully at the factory to assure quality. Upon delivery, check the vehicle over carefully and if there is any damage or problems, notify your When the vehicle needs warranty repairs it should be taken to any MORGAN supplying dealer immediately. - Page 56 Vehicle Limited Warranty are described below. When making warranty repairs • Stone chips, scratches (some examples are on paint and glass) on your vehicle, the authorised service point will use genuine Morgan new or • Dents and other panel damage re-manufactured parts, or other parts that are authorised by Morgan.
- Page 57 • Minor wind noise or water ingress or normal vehicle noises or vibrations. completed at the designated intervals. Engine parts other than Morgan new or • Non-Morgan engine parts; for example, parts installed by modifiers, or...
- Page 58 Owner Checks and Services For specific recommendations contact the Morgan Customer Assistance Centre: • Extensive idling and/or driving at low speeds for long distances (Refer to Mileage Intervals for Additional Checks and Services) • Driving in dusty conditions The owner or a service technician should perform certain basic maintenance NORMAL SCHEDULE checks and inspections at the intervals indicated.
- Page 59 NOTES / AMENDMENTS...
-
Page 60: Service History
MORGAN PLUS FOUR 3 MONTHS COURTESY CHECK (OPTIONAL) 3 months after delivery Checked by: ....................... Dealer Stamp Name: ..............................Address: ........................................................................................................................Date: ..............................Mileage: ..............................Signature: .............................. - Page 61 MORGAN PLUS FOUR 1 SERVICE 10,000 miles (16,000km) or 12 months after delivery (whichever comes first.) RENEW OIL OIL FILTER AIR FILTER SPARK PLUG Serviced by: Dealer Stamp Name: ..........................Address: ........................................................................................................ Date: ..........................Mileage: ..........................Signature:...
- Page 62 MORGAN PLUS FOUR 2 SERVICE 20,000 miles (32,000km) or 24 months after delivery (whichever comes first.) RENEW OIL OIL FILTER AIR FILTER SPARK PLUG Serviced by: Dealer Stamp Name: ..........................Address: ........................................................................................................ Date: ..........................Mileage: ..........................Signature:...
- Page 63 MORGAN PLUS FOUR 4 SERVICE 30,000 miles (48,000km) or 36 months after delivery (whichever comes first.) RENEW OIL OIL FILTER AIR FILTER SPARK PLUG Serviced by: Dealer Stamp Name: ..........................Address: ........................................................................................................ Date: ..........................Mileage: ..........................Signature:...
- Page 64 MORGAN PLUS FOUR 5 SERVICE 40,000 miles (64,000km) or 48 months after delivery (whichever comes first.) RENEW OIL OIL FILTER AIR FILTER SPARK PLUG Serviced by: Dealer Stamp Name: ..........................Address: ........................................................................................................ Date: ..........................Mileage: ..........................Signature:...
- Page 65 MORGAN PLUS FOUR 6 SERVICE 50,000 miles (80,000km) or 60 months after delivery (whichever comes first.) RENEW OIL OIL FILTER AIR FILTER SPARK PLUG Serviced by: Dealer Stamp Name: ..........................Address: ........................................................................................................ Date: ..........................Mileage: ..........................Signature:...
- Page 66 MORGAN PLUS FOUR 7 SERVICE 60,000 miles (96,000km) or 72 months after delivery (whichever comes first.) RENEW OIL OIL FILTER AIR FILTER SPARK PLUG Serviced by: Dealer Stamp Name: ..........................Address: ........................................................................................................ Date: ..........................Mileage: ..........................Signature:...
- Page 67 MORGAN PLUS FOUR 8 SERVICE 70,000 miles (112,000km) or 84 months after delivery (whichever comes first.) RENEW OIL OIL FILTER AIR FILTER SPARK PLUG Serviced by: Dealer Stamp Name: ..........................Address: ........................................................................................................ Date: ..........................Mileage: ..........................Signature:...
- Page 68 MORGAN PLUS FOUR 9 SERVICE 80,000 miles (128,000km) or 96 months after delivery (whichever comes first.) RENEW OIL OIL FILTER AIR FILTER SPARK PLUG Serviced by: Dealer Stamp Name: ..........................Address: ........................................................................................................ Date: ..........................Mileage: ..........................Signature:...
- Page 69 MORGAN PLUS FOUR 10 SERVICE 90,000 miles (145,000km) or 108 months after delivery (whichever comes first.) RENEW OIL OIL FILTER AIR FILTER SPARK PLUG Serviced by: Dealer Stamp Name: ..........................Address: ........................................................................................................ Date: ..........................Mileage: ..........................Signature:...
- Page 71 INDEX 3 Months Courtesy Check ....... 57 Comfort Mode ..........26 Engine Oil Change ......... 47 Heated Windscreen ........15 Contents ..............1 Engine Oil Grade..........47 Heater Fan Contro ........14 Accelerator Pedal .......... 30 Control Stalks ............ 21 Engine Oil Level ..........
- Page 72 Manual Gear Lever ........27 Seat Belts ............8, 10 Tyre Placard/Label .......... 42 Seats ..............9 Tyres ............... 39 Mirrors ............... 50 Selector Lever Lock ........25 Tyre Size Markings ......... 41 Moving the Vehicle When the Engine Cannot Start ......44 Selector Lever Positions .....24, 25 MPG or L/Km ............
- Page 74 MORGAN MOTOR COMPANY Pickersleigh Road, Malvern Link, Worcestershire, England, WR14 2LL. www.morgan-motor.com Part No. GP011003...
Need help?
Do you have a question about the PLUS FOUR and is the answer not in the manual?
Questions and answers