Table of Contents
Advertisement
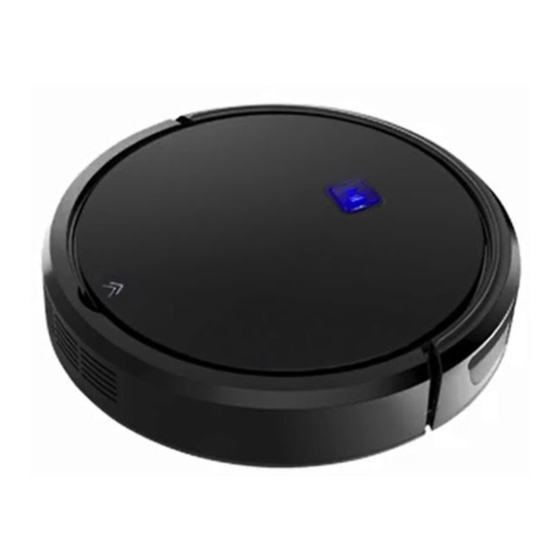
Model No.: HEGSMRV
Rev 1
Note: The specifications and/or components of this appliance are subject to change without prior notice.
If any Accessories should fail during use, please call 1300 105 888 (Australia) or 09 8870 447 (New Zealand)
for an immediate replacement. This will save you from returning the product to the store.
If we can assist you in any other way, please feel free to contact us.
Instruction Manual
For Household Use Only
Advertisement
Table of Contents
Troubleshooting

Summary of Contents for iGenie HEGSMRV
- Page 1 Instruction Manual For Household Use Only Model No.: HEGSMRV Rev 1 Note: The specifications and/or components of this appliance are subject to change without prior notice. If any Accessories should fail during use, please call 1300 105 888 (Australia) or 09 8870 447 (New Zealand) for an immediate replacement.
- Page 2 Page 2 of 52...
-
Page 3: Table Of Contents
Warnings ............................4 Safety Direction ..........................4 Please observe the following points ..................8 Components ............................9 4.1 Components Continued ......................10 4.2 Components Continued ......................11 4.3 Components Continued ......................12 4.4 Components Continued ......................13 Transporting the Robot .......................14 Robot Top Control Button ......................15 Remote Control..........................16 7.1 Time and Date Settings ......................17 7.2 Scheduling a Routine Clean ....................18 7.3 Battery Installation / Replacement..................19... -
Page 4: Warnings
Warnings Before using this appliance, read and follow all warnings and instructions in this manual, even if you are familiar with this product. This appliance is not intended for use by persons (including children) with reduced physical, sensory or mental capabilities, or lack of experience and knowledge, unless they have been given supervision or instruction concerning use of the appliance by a person responsible for their safety. - Page 5 For electrical safety, any repairs to the product must be performed by a qualified electrical person only, or the product must be disposed of. DO NOT misuse the Charger Cable. Never pull the appliance by the cable or pull to disconnect it from the outlet. Instead, grasp the charger body and pull to disconnect.
- Page 6 DO use only on indoor surfaces. Not for Outdoor Use. DO use only as described in this manual. Use only manufacturer's recommended attachments. DO Keep Charger Cable away from heated surfaces. DO Keep all openings free of dust, lint. hair, and anything that may reduce airflow. DO keep your work area well lit.
- Page 7 The Battery Pack must be removed from the Robot cleaner before disposal. Contact your local waste management authority for more information on Battery Recycling and disposal regulations in your area. This symbol on the product or its packaging indicates: Do not dispose of electrical appliances or batteries as unsorted municipal waste, use separate collection facilities.
-
Page 8: Please Observe The Following Points
Please observe the following points Electrical devices are not for children Never allow children to use electrical devices unsupervised. If used, Batteries / rechargeable batteries can be extremely dangerous if swallowed, therefore: keep the device and batteries out of reach of small children. If a battery is swallowed, seek medical help immediately. -
Page 9: Components
Components I.M.’s Bumper / Sensor Window Power Supply Start / Pause Button Magnetic Barrier Strip Dust Canister / Water Compartment Cover Spare Side Brushes. Exhaust Air Vents Cleaning Brush Instruction Manual x 2 Spare Filter Charging Dock Remote Control Note: The specifications and/or components of this appliance are subject to change without prior notice Page 9 of 52... -
Page 10: Components Continued
Components Continued Trailing Bar Water Tank Mop Pad x 1 Small Dust Canister Large Dry Dust Canister Page 10 of 52... -
Page 11: Components Continued
Components Continued Robot Bottom View – Without Trailing Bar and Mop Fitted Side Brushes Front Castor Wheel Charging Contacts Roller Brush Cliff Sensors Battery Compartment Left Drive Wheel Right Drive Wheel Page 11 of 52... -
Page 12: Components Continued
Components Continued Robot Bottom View – With Trailing Bar and Mop Pad Fitted Note: Robot comes with one of the mop pads and the trailing bar already installed. The trailing bar's main function is to attach the mop pad to the robot and is located underneath the mop pad. -
Page 13: Components Continued
Components Continued Charging Dock Power Indicator Light (behind window) Negative Charging Terminal Power Supply Jack IR Sensor Window Positive Charging Terminal Page 13 of 52... -
Page 14: Transporting The Robot
Transporting the Robot When picking up the Robot, first ensure the On / Off Switch located on the side of the Robot is in the “0” Off Position. IMPORTANT: Never grab or lift the Robot by the Bumper (which is shown in front of the lines in the diagram below). -
Page 15: Robot Top Control Button
Robot Top Control Button This Button is used to Start and to Pause the Robot. • Press this button while in standby mode and the robot will begin to clean in Normal Mode. The button will be lit Blue colour when in standby mode •... -
Page 16: Remote Control
Remote Control Schedule - Press this button and the robot will enter schedule mode. Return Home - Press for the robot to stop cleaning and return to the charging dock. Forward - Press while cleaning and the robot will move a short distance in a forward direction with each press. -
Page 17: Time And Date Settings
Time and Date Settings a. Settings the current week day: Note: The Days of the week are represented by Number 1 to 7. 1 = Monday, 2 = Tuesday, 3 = Wednesday, 4 = Thursday, 5 = Friday, 6 = Saturday and 7 = Sunday Note: you will only have 15 seconds to adjust the settings before it returns to standby. -
Page 18: Scheduling A Routine Clean
Scheduling a Routine Clean Please note: From the time you schedule the Robot to start, there will be up to a 1 minute delay to when the Robot will actually start to clean. e.g. If you program the start time to be at 10.30am, the Robot will start at a time between 10.30 and 10.31am. -
Page 19: Battery Installation / Replacement
After setting the required week day number, enter the setting for required hour / minute. Press the " " or " " button to switch between hour / • minute. Press the button to increase the required time, and press the •... -
Page 20: Before Use
Note: If you try to use the remote control when the Robot is cleaning near the charging dock, the Robot may not recognise the command as the charging dock signals have priority to ensure the Robot does not hit the charging dock. -
Page 21: Charging Dock Setup
Charging Dock Setup • Place the charging dock in a position flat on the ground with the back pushed up against a wall. There should be no other objects or obstructions two meters in front of • and one meter to the left, right and above the charging dock. IR Window Do Not Block NOTE: If the IR signal emission window is blocked, the robot will be unable to... -
Page 22: Charging The Robot
• Tidy the excess cord from the power supply by wrapping it around the tabs on the back side of the charging dock. The cord must not be on the ground or obstructing the charging dock as • it will result in the robot being unable to find the charging dock. The charging dock should always be plugged in to ensure charging when •... - Page 23 • Turn On the Robot’s power by flipping the power switch on the side of the robot to “I”. When charging, the light inside the top Control Button will blink slowly. • When fully charged, the light will turn off. •...
-
Page 24: Environment
Note: The Robot can also be charged by connecting the power supply plug directly into to the DC recharging port on the side of the robot. The average charging time between cleanings is approximately 5 hours. • The battery will not be at its full potential until after 2 to 3 cleanings and •... -
Page 25: Product Features
Product Features The Robot has two distinct cleaning methods: dry and wet cleaning. The dry-cleaning method involves a vacuum sweep cleaning, perfect for both hard flooring and low-pile carpet. The Robot's strong suction and filtration system will trap debris, hair and allergens. -
Page 26: Large Dust Canister
11.1 Large Dust Canister Note: The Robot initially comes with the Large dust canister installed. 1. Swing open the Robot’s top cover by placing your finger under the back of the cover then swing upward. The Large Dust canister will now be exposed. 3. -
Page 27: To Set Up For Dry Vacuum Cleaning
11.2 To set up for Dry Vacuum Cleaning: Note: The Robot is supplied with the Trailing Bar and Mop Pad fitted underneath. If you are going to clean carpet which is longer than 0.5cm, it is advisable to remove the Trailing Bar and Mop Pad prior to starting the vacuum function as this will cause dragging on the carpet. -
Page 28: Vacuum / Mopping Clean
12 Vacuum / Mopping Clean Vacuum / Mop Cleaning uses a vacuum sweep and a wet mop cleaning method. The Robot collects dirt and debris seconds before wet mopping. The Robot has a programmable water tank to vary the amount of water applied to the mop pad so as to protect floors. - Page 29 • Grasp and Lift the handle on top of the large dust canister and lift the whole container out. Take the small dust canister and the water tank and assemble them • together as shown. Connect the small dust canister to the tank by sliding the tabs on the left and right side of the small dust canister into the slots on each side of the water tank.
- Page 30 • Fill the tank with clean cold water or any desired cleaning solution by removing the orange rubber stopper located on the top of the tank and filling until full. Reinsert the rubber stopper. • IMPORTANT: Dry off the tank and small dust canister before inserting into the robot.
-
Page 31: Setting The Intelligent Tank
12.2 Setting the Intelligent Tank • By default, the water seeping rate is set to low which is suitable for wooden floors, as too much water may ruin the wooden floor. On the remote control, press and hold the button for 4 seconds, •... -
Page 32: Removal / Installation Of The Trailing Bar And Mop Pad
14 Removal / Installation of the Trailing Bar and Mop Pad IMPORTANT: If using the Trailing Bar and Mop Pad for Wet Mopping, the Trailing Bar with Mop Pad MUST be installed before the water tank is installed. Note: The Robot initially comes with trailing bar and mop pad installed. To remove the Tailing Bar and Mop Pad, first turn off the power to the •... -
Page 33: Using The Robot Cleaner
• Firmly press down on the mop pad to secure the mop pad to the grip strips on the trailing bar. Flip the mop pad and trailing bar so that the mop pad is facing up. • To refit the Trailing Bar and Mop Pad to the Robot, insert the front two tabs •... -
Page 34: Manually Finishing A Cleaning Session
Note: If the Robot is in Sleep Mode, you will need to press the button a second time. The first press will wake the Robot, the second press will start the Robot. Pause To Pause while cleaning, Press the button on the control panel on •... - Page 35 Four Cleaning Modes are provided to meet all your cleaning needs. Refer to section “Using the Robot Cleaner” for instructions of use. Cleaning Function How to Select Diagram Method Robot will increase suction. Suitable for a very dirty floor or a Press the thicker carpet.
-
Page 36: User Maintenance
17 User Maintenance 17.1 Dry Cleaning of the Large and Small Dust Canister The Dust canister will need emptying and cleaning when it is full or after every use. Depending how much debris, pet hair, etc. that needs to be cleaned up, you may need to empty the dust canister more often during a cleaning session. - Page 37 • Take the dust canister to the rubbish bin, the pull out the mesh filter. Note: The small dust canister attached to the water tank does not have a mesh filter, so just the canister needs to be emptied and brushed out. Tip the dirt and debris in to the rubbish bin.
-
Page 38: Cleaning / Replacing Filters
Note: Refer to Section “Cleaning / Replacing Filters” if the Dust Canister and mesh filter requires washing. To refit the Dust Canister in to the Robot, first replace the white filter into • the Mesh Filter frame, then place the mesh filter into the dust canister and push it all the way down. -
Page 39: Exhaust (White) Filter
17.2.2 Exhaust (White) Filter Note: The Exhaust (White) filter cannot be washed. Remove this filter as described previously. • Do Not Wash the White Filter. Tap the filter on the side of the rubbish • bin to dislodge the dirt and dust and give it a brush to remove the small particles, or use a normal vacuum cleaner with a hose attachment to suck the dirt and dust out. -
Page 40: Cleaning / Replacing The Robot Spinning Brushes
After cleaning, wipe any moisture off the Robot, components and accessories with a dry cloth. Do Not place accessories and components in a dishwasher. 17.5 Cleaning / Replacing the Robot Spinning Brushes. Before each use, check the brushes for damage, wear and tear, or whether they have foreign objects stuck in them. - Page 41 • Remove the Dust Canister or Water Tank Combination Gently turn the Robot upside down to access the Roller Brush. • Unclip the two front tabs on the side of the bracket and swing open the • bracket, then pull out. Remove the roller brush from robot by grasping the right side of the •...
-
Page 42: Cleaning The Robot Sensors
• Lower the other side of the roller brush by inserting the rubber piece of the roller brush into the semi-circle slot on the right side of the brush recess. 17.7 Cleaning the Robot Sensors The Robot has four “Cliff” sensors located on the underneath as shown. Keep these sensors clean by wiping with a dry cloth or brush them •... -
Page 43: Cleaning The Wheels
17.8 Cleaning the Wheels Should the drive wheels or front castor wheel become tangled with debris, hair etc., clean away before continuing use. 17.9 Cleaning the Charging Contacts Robot / Charging Stand The electrical charging contacts on the Robot and the Charging Stand must be kept clean to ensure proper charging. - Page 44 Using a small Philips Head screwdriver, unscrew (anticlockwise) the four screws as shown by the arrows: Remove the battery cover to expose the Battery. Pull up the lithium battery and its connector containing red, yellow and black wires from its recess by pulling on the clear “Pull” tabs located on both sides of the battery.
-
Page 45: Storage
19 Storage When finished using the Robot cleaner, either place back on the charging stand to recharge the battery, or, store away in in a dry cool place. If Storing away for a long period, ensure the battery in the Robot is fully charged first, switch the Robot off by selecting the “O”... - Page 46 Wi-Fi Robot has connected Connected to your Wi-Fi network Please Add Water Tank has run Fill / re-fill water tank Water out of water Side Sweeping brush Please Check or brushes are if Side Brushes Remove all debris, hair, etc. Refer to Maintenance section jammed with debris, are Jammed hair, etc.
-
Page 47: Faq
20.2 FAQ 1. How can I keep robot off unwanted areas? Use the supplied Virtual wall barrier strip, create sturdy barriers using household items or close doors to section off areas. 2. Can I have the trailing bar and mop attachment on robot while dry cleaning? Yes. -
Page 48: Operation Troubleshooting
20.3 Operation Troubleshooting Check that the Battery is fully charged. Ensure the Switch on the side of the Robot is in the “I” On Robot will not turn On Position Robot may have gone to sleep. Press the “Clean” button to wake Robot up. - Page 49 The power to the Charging Dock has been switched off or unplugged. Ensure there is power to the charging dock at all times Contacts on the charging dock and / or underneath the robot Robot battery wont charge may be dirty. Refer to Cleaning section on how to clean these parts.
-
Page 50: Specifications
21 Specifications 21.1 Technical Specification for the Robot Item Parameter Rated voltage DC 14.8V Rated power (30W) Operating temperature range -10°C 45°C Input voltage/current 26V 0.5A Infrared remote control 38KHZ Dimension Ø350mm x 86.5mm* Weight 2.9Kg Battery Lithium-ion 2200 Large Dust canister capacity Small Dust canister... -
Page 51: Warranty Against Defect
22 Warranty Against Defect 12 Month Warranty Thank you for your purchase from Kmart. Kmart Australia Ltd warrants your new product to be free from defects in materials and workmanship for the period stated above, from the date of purchase, provided that the product is used in accordance with accompanying recommendations or instructions where... - Page 52 Page 52 of 52...
Need help?
Do you have a question about the HEGSMRV and is the answer not in the manual?
Questions and answers
What is the battery
The remote control for the iGenie HEGSMRV uses 2 x AAA batteries.
This answer is automatically generated