Table of Contents
Advertisement
Quick Links
Advertisement
Table of Contents

Related Manuals for Omni-ID Sense IoT

Summary of Contents for Omni-ID Sense IoT
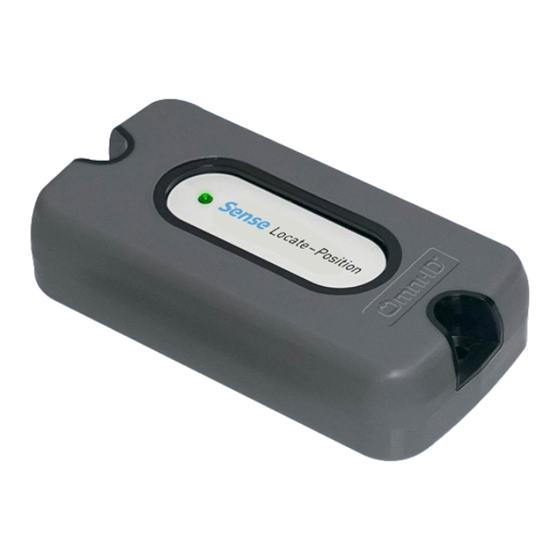
- Page 1 KIT USER GUIDE LOCATE - POSITION...
- Page 2 • A Multitech reader with power cable, plug adapters, network cable, USB cable and Antenna. • Memory Stick containing Omni-ID Sense Config PC software, electronic version of this user guide and user guides for the Multitech reader. • A magnet that can be used to activate the devices and put them back to sleep.
-
Page 3: Table Of Contents
CONTENTS FOR THIS USER GUIDE Tag Operation DBR (Default Beacon Rate) ABR (Alarm Beacon Rate) MAB (Motion Alarm Beacon) GNSS Firmware basic algorithm Operation Flow Chart Sense Locate Position, LoRaWAN packets Device Gateway beacon 2.1.1 LoRa Network Join Request 2.1.2 Sense Locate Position Data Payload Device’s configurable settings Configuring Sense Locate Position with Sense Config PC App... -
Page 4: Tag Operation
GNSS module from having to be switched on to provide an updated position. This device will not provide position while moving, if this is required please contact Omni-ID to discuss this requirement. Sense Locate Position is designed for tracking and monitoring applications over LoRaWAN with following built in sensors: •... -
Page 5: Dbr (Default Beacon Rate)
All beacons regardless of DBR, ABR or MAB contain the following payload data: • GNSS Coordinates in the form of Longitude and Latitude, current updated location or previous location depending on event triggering the beacon. • GNSS Lock, indicating if position lock is achieved within configurable thresholds (DOP, Min and Max lock times), if last known location is being sent the lock flag is not set. -
Page 6: Mab (Motion Alarm Beacon)
The device carries on sensing the temperature at the ABR and will transmit an ABR beacon when the temperature returns to within the acceptable threshold. This beacon resets the Temperature Alarm Flag. The alarm beacon rate can be set as a value of 0-254 minutes Setting the value to zero disables the ABR. -
Page 7: Gnss Firmware Basic Algorithm
1.4 GNSS Firmware basic algorithm Following flow diagram simplifies GNSS algorithm based on Tag’s motion state sensed by Accelerometer Sensor. Figure 1: MAB basic operation showing GNSS activation process V21220SLP... -
Page 8: Operation Flow Chart
1.5 Operation Flow Chart Figure 2: Above flow chart documents the device’ s operation V21220SLP... -
Page 9: Sense Locate Position, Lorawan Packets
Sense Locate Position, LoRaWAN payload Packets sent over the air from the device to the gateway: • LoRaWAN Network Join Request • Device Payload (Either DBR, ABR or MAB beacons) Packets sent from device to gateway • Message Acknowledgments used for initiating Network Join Request •... - Page 10 An App key needs to be preconfigured in the Network Server and is used to validate that the device has permission to communicate with the network. These values are user configurable and devices can be supplied pre- configured with alternative values as part of Service Bureau customisation service.
- Page 11 If more than one Gateway is in communication range with the device, the network server sends join acceptance message via the gateway which is closest to end device based on received RSSI vale of a gateway. Once accepted the tag will stay joined for a period of up to 6months before reinitiating a Join Request, so long as network service is not interrupted.
-
Page 12: Sense Locate Position Data Payload
2.1.2 Sense Locate Position Data Payload The Sense Locate Position payload consists of 11 Bytes (88 bites). The packet construction is detailed in this section. Following example demonstrates how the raw payload is parsed into the various data device variables: Device to gateway Beacon (Pay Load): D4EB0D033A69F4FF2D1D41 Decimal Value/10=Battery Voltage... -
Page 13: Device's Configurable Settings
Device’ s configurable settings The device settings can be configured via NFC. Omni-ID provides both a PC software that works with ST Microelectronics M24LR Discovery NFC PCB tool or alternately an android application. The following are the configurable parameters: •... - Page 14 • GNSS Min. Lock Time: 0-10 Minutes (Default 0min) o Minimum time GNSS chip will remain active to achive GNSS Fix/ lock o Recommended setting is 0min, non 0 value is beneficial in situation where assets are moving frequently (multiple time in 2h period) as this will allow full Almanac and Ephemeris data to be received increasing initial cold lock time but reducing subsequent hot lock times and optimizing...
-
Page 15: Configuring Sense Locate Position With Sense Config Pc App
3.1 Configuring Sense Locate Position with Sense Config PC App Supplied Hardware: ST M24LR-NFC Board (USB device for PC) Supplied Software: Sense Config PC APP NFC Programming Board Tag Placement on Board Figure 4: Configuration of Sense Locate Position using NFC board V21220SLP... - Page 16 • Place the Sense Locate Position above the NFC PCB as shown in Figure 4, once in place press “Connect” . • Press “Sense Asset GPS” Figure 5: Screenshot of Sense Locate Position PC configuration tool Configured Settings Choose settings to configure Press “Read MAC Address”...
-
Page 17: Sleep Tag
3.1.1 Sleep Tag This function can be used to put Tag to sleep and to awaken Tag from sleep • Select Asleep in Tag status field and hit Write Data at the bottom of App page to put Tag to sleep when Tag is not in use to conserve battery. -
Page 18: Configuring Sense Locate Position With Android App
3.2 Configuring Sense Locate Position with Android App The Sense Locate Position device can be configured with and Android device equipped with NFC by downloading the Android application “Sense LoRa” by following link, http://35.160.220.150/wdc/default.aspx The app provides the user with 4 menu options: •... -
Page 19: Settings And Default Values
3.2.1 Settings/Default Values The APP EUI, APP Key and data rate setting can be set via the settings/ Default Values tab in the application. Please enter values as below, EUI 16 Hex Value: 5370656374726531 Key 32 HEX Value: 44434C20476174657761792030303031 Toggle “Save provision Settings” switch to right Save Settings V21220SLP... -
Page 20: Fast Lock
3.2.2 Fast Lock For a quick lock that is accurate between 5-10m use the Fast Lock option. This is ideal for large assets that are easily recognisable, like plant and farm equipment. Note: GNSS DOP Value is automatically configured to 5.0 V21220SLP... -
Page 21: High Accuracy
3.2.3 High Accuracy For a lock with an accuracy of between 1-5m use this option, the lock time will be slower than fast lock. Note: GNSS DOP Value is automatically configured to 3.0 V21220SLP... -
Page 22: Advanced
3.2.4 Advanced For a lock with an accuracy of between 1-5m use this option, the lock time will be slower than fast lock. V21220SLP... -
Page 23: Sense Locate Position Demo Kit
Sense Locate Position Demo Kit To facilitate product evaluation, demonstrations and POC’s Omni-ID can provide a demo kit that is optimised for rapid deployment in simple environment. The Demo Kit contains a MultiTech Conduit LoRa gateway pre-configured with onboard network server which will run node red to process tag’s payload. -
Page 24: Omnisphere User Guide
4.1 OmniSphere User Guide LOGIN SCREEN Enter Username and password provided *URL and login details will be provided by Omni-ID V21220SLP... - Page 25 HOMEPAGE This Page shows all Devices in system with their most recent status indicators. • Status Indicators Device Types • Hover over Icon to see value • All Devices: List of all devices with their names/IDs, status indicator icons and device types are displayed at Home Page •...
- Page 26 TO SEE DATA FROM A SPECIFIC TAG • Select Device from List • Click on View Click on View Item Readings to see data from multiple beacons as shown on next page Shows most recent Changes/Beacon V21220SLP...
- Page 27 Data can be filtered Historical Data of Device can be downloaded as CSV file V21220SLP...
- Page 28 MAP VIEWS Select a map to view devices location Bread Crumb view of device Interval time can be selected to view history of devices for set time interval V21220SLP...
- Page 29 Selecting “Max no. of values” = 1 shows Devices Last/most recent location Device History can be filtered by number of values(beacons) V21220SLP...
- Page 30 CREATING NEW DEVICE Devices shipped with Demo kit are preconfigured on OmniSphere and will work out of box, more devices can be added to OmniSphere if you wish by following below instructions. Select to create new device • Select to choose Item Type •...
- Page 31 • Enter Unique Logical ID • Enter Name (This will be displayed in all events and reports) • Choose Customer Organization • Add Status Indicators (Only if already not been selected under Item Types) • • • • • • •...
-
Page 32: Miultitech Gateway Configuration
4.2 Multitech Gateway Configuration Connecting to the gateway Please note that Multitech Conduit gateways supplied with the demo kit are pre-configured with Nodered for operation with the Demo Application. Please Review Multitech user guides for further information on setup and configuration if required. -
Page 33: Configuring Ip Address
4.2.1 Configuring IP Address In order to configure the IP Address the user should first connect a PC/ Laptop to the gateway via a Ethernet patch cable and power on the gateway. The default IP address on the Multitech gateway is 192.168.2.1, to connect to the gateway the user must first configure their computers Ip address to be within the same subnet range for example 192.168.2.10. - Page 34 On connection to the gateway the following screen will be displayed The username is: admin The password is: Password123# V21220SLP...
- Page 35 Setting up the gateway The first step is to configure the IP settings of the gateway to those of the host network, click the setup tab. Select Network Interfaces Click the pencil icon under Options V21220SLP...
- Page 36 Fill in the IP settings for the local network below Click ‘Finish’ Save and restart. V21220SLP...
- Page 37 Configuring the firewall In order for the Gateway to communicate to the back office the following inbound ports must be opened in the firewall of the local router. Port 443, Port 1882 These should be set to forward to the address that you have configured for the gateway.
-
Page 38: Data Sheet
Sense Locate – Position The Sense Locate – Position IoT device is hugely powerful and flexible thanks to the combination of GPS and LoRa technology. As a result, the device will deliver high levels of outdoor accuracy and performance over a long range. The ultra-rugged construction of the device makes it suitable for a huge range of IoT and IIoT projects. - Page 39 Our engineers and technical teams like nothing more than to solve specific tracking and communication challenges (it’s what gets them out of bed in the morning) and we would be happy to consider a bespoke version of ‘Sense’ tailored to your particular scenario. Contact us at sales@omni-id.com to find out more. Omni-ID office locations: US...
Need help?
Do you have a question about the Sense IoT and is the answer not in the manual?
Questions and answers