Table of Contents
Advertisement
Installation Instructions and User Guide
for the Frostex Pipe Freeze Protection System
Using the 9800 FlexFit Plug Kit
Directives d'installation et Guide de l'Utilisateur
du Système Frostex de Protection Anti-gel des
Tuyaux Utilisé avec le Kit Frostex 9800 FlexFit
Keep pipes from freezing
Protection anti-gel des tuyaux
F M
R
APPROVED
LISTED
60J9 Residential
and Mobile Home
Pipe Heating Cable
®
Advertisement
Table of Contents

Summary of Contents for Tyco Frostex 9800
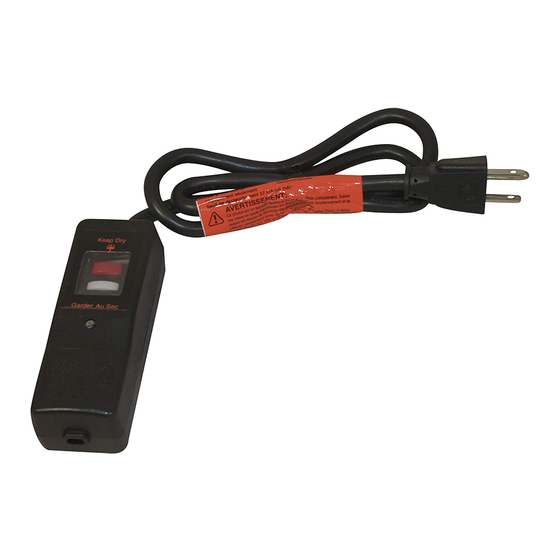
- Page 1 Frostex Pipe Freeze Protection System Using the 9800 FlexFit Plug Kit Directives d’installation et Guide de l’Utilisateur du Système Frostex de Protection Anti-gel des Tuyaux Utilisé avec le Kit Frostex 9800 FlexFit Keep pipes from freezing Protection anti-gel des tuyaux APPROVED...
-
Page 2: Table Of Contents
être utilisés pour fixer le disjoncteur différentiel à l’isolant de tuyaux. Si vous avez des questions après la lecture du présent guide, contactez le numéro sans frais de Tyco Thermal Controls au : (800) 545-6258. Conservez ces directives d’installation ainsi que le guide de l’utilisateur. -
Page 3: Five Important Safety Warnings
Five Important Safety Warnings Follow all five of these instructions to prevent fire or shock: 1. Use the correct heating cable. • Use only braided versions of Frostex heating cable. • Earlier versions of Frostex heating cable with no braid are not compatible. -
Page 4: General Instructions
• If you have any difficulty installing the system, please contact Tyco Thermal Controls for information at (800) 545-6258, or call a professional service person for help. • Remove the clear label that covers the test and reset buttons after installation. - Page 5 (15 meters), you will need additional 9800 FlexFit plugs and outlets. Longer circuit lengths will blow the nonreplaceable fuse in the 9800 FlexFit plug. If you require more than 50 feet per length (15 meters), call Tyco Thermal Controls for informa- tion on other products.
- Page 6 Step 2. Install the end seal. Note: The end seal can only be used once, so do not install it until step 2D. Heating Cable Construction Clear plastic wrap Braid Prepare the heating cable. Cleanly cut off one end of the heating cable. Remove the plastic wrap.
- Page 7 Step 3. Install the 9800 FlexFit plug. Reset button Test button Ground-fault unit Indicator light 3A. Prepare the cable. 3/4" (2 cm) Cleanly cut off the end of the cable. Push back the braid 3/4" (2 cm) and then twist the end of the braid around the cable to ensure the braid strands are not sticking up.
- Page 8 Step 4. Attach the heating cable to the pipe. Prepare to install the heating cable. Begin the installation at the electrical outlet. Leave at least 1 foot (30 cm) of extra heating cable so the ground-fault unit can be secured to the outside of the thermal insulation, as shown in Figures 1 and 2.
-
Page 9: Step 6. Start Up The System
5C. Install the warning label. Install the orange warning labels on the insulation with one near the electrical outlet, as shown in Figure 7. Additional labels and installation tape are available from Tyco Thermal Controls in the Frostex 9610 kit. Step 6. -
Page 10: Periodic Inspections
Periodic Inspections Each month • Test the 9800 FlexFit plug as described in Step 6B. Periodically Each time you plug in the system, and at least once a year, do the following: • Check the entire Frostex system for signs of damage. Inspect any exposed portion of the heating cable for evidence of cuts, nicks, abrasions, gnawing by animals, and any other physical damage. -
Page 11: Limited Warranty
Tyco Thermal Controls, within a rea- proper and normal use and were not sonable time, repair such goods or supply...

Need help?
Do you have a question about the Frostex 9800 and is the answer not in the manual?
Questions and answers