Table of Contents

Summary of Contents for Olide DSW-120N
- Page 1 INSTALLATION MANUAL Olide DSW-120N AUTOMATIC DOOR SPECIALISTS Please note:Programming of the open and close stop points will occur after installation. An uninstalled unit will result in constant motor rotation. For any questions,feel free to contact us.
-
Page 2: Table Of Contents
Contents 1. Technical Parameters..........................1 2. Components........................... 2 3. Installations........................... 3 3.1 Installation example........................3 3.2 Installation of base plate........................4 3.3 Installation of pull arm........................5 3.4 Installation of push arm........................6 3.5 Installation of operation system...................... 8 3.6 Installation of cover.........................8 3.7 Connection the operation system with the pull arm.............. -
Page 3: Technical Parameters
1 Technical Parameters Voltage: 110-220 VAC +/-10% Power Consumption: Opening Time: 3-7 sec. @ 90 degrees Hold Open Time: 1-30 sec. Adjustable 450mm / 17.7" Max. Door Frame Depth: Min. 660mm / 26" Door Width: Max. 1200mm / 47.2" 120 degrees Max. -
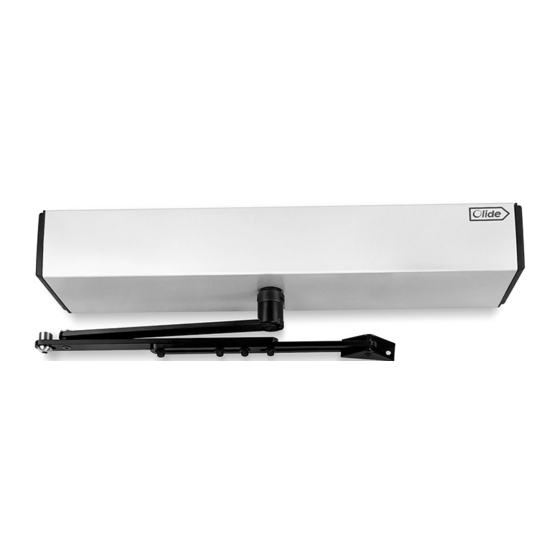
Page 4: Components
2 Component Base Plate: Sensor cable hole Power cable hole Motor Assembly: Control block Gear box Motor Off/On Switch Motor output Cover Plate: Pull Arm(Option for interior opening) Push Arm(Option for exterior opening) -
Page 5: Installations
3 Installation Installation example Pull Arm The door opens to the inside toward the unit using the pull arm assembly. Push Arm The door opens to the outside away from the unit using the push arm assembly. -
Page 6: Installation Of Base Plate
3 Installation Installation of base plate hole 0.88"(22.5mm) 1.2"(30.5mm) 5.90"(150mm) 5.90"(150mm) 6.49"(165mm) 2.0"(52mm) 18.2"(464.5mm) 1.18"(30mm) 1.5"(38.5mm) 0.59"(15mm) As the picture shows, the base plate should be mounted to the frame with eight wood screws or eight M6-15 countersunk screws. Please note that 20mm sensor cable hole is always to the right side and that the power cable access is always to the left. -
Page 7: Installation Of Pull Arm
3 Installation 3.3 Installation of Pull arm 29(1.44") 240(9.44") 240(9.44") 160(6.3") ( 0.78" Fix the slide rail of pull arm on the door panel as shown using three round head wood Screws (if the door panel is steel, please use M6*15 cross recessed head screws.) Attach the slide rail of the pull arm on the door panel as shown... -
Page 8: Installation Of Push Arm
3 Installation 3.4 Installation of Push arm 35(1.29") 50(1.96") 290(11.42") Fix the support holder of push arm on the door panel as shown using two round head wood screws (if the door panel is steel, please use M6*15 cross recessed head screws.) 12.40"(315mm) Loosen this 3 bolts and adjust the push arm length according to the door depth(L) until the angle between... - Page 9 3 Installation 3.4 Installation of Push arm Stop screw Adjust the stop screw position slotted hole to allow full opening of the door. Do not exceed 90°.
-
Page 10: Installation Of Operation System
3 Installation 3.5 operation system Hook the component assembly onto the base plate as shown. Attach it with 8 allen head screws 3.6 Cover Opening the cover... -
Page 11: Connection The Operation System With The Pull Arm
3 Installation 3.7 Connect pull arm to the operation system 3.8 Connect the push arm to the operation system. Motor output shaft... -
Page 12: Electrical Connections
Electrical Connections Control panel details Power input located on the left side of the component assembly. 4.1 Connections with a keypad... -
Page 13: Connections With A Microwave Sensor
Electrical Connections 4.2 connections with a microwave sensor 4.3 connections with PIR sensors 4.4 Connections for a safety motion top scan... -
Page 14: C Onnections For Push Buttons
Electrical Connections 4.5 Connections for plastic push buttons 4.6 Connections for wiring disabled push buttons 4.7 Connections for wireless handicapped push buttons... -
Page 15: Connections For Magnetic Locks
Electrical Connections 4.8 Connections for magnetic locks (Need to press the lock button on remote control for the first close, then it will auto lock when close) 4.9 Connections for electric locks 4.10 Connections for hand sensor touchless switch... -
Page 16: Double Door Synchronous Settings
Electrical Connections 4.11 Double door synchronous connections double door synchronous : Controller “A” Controller “B” 3 pin connector. sync in sync in sync out sync out Interlock: Controller “B” Controller”A” 6 Pin Connector safety sesnsor close safety sensor close safety sensor open safety sensor open interlock input interlock input... -
Page 17: Wireless Push Buttons Settings
Electrical Connections 4.12 Wireless push buttons settings The wireless push buttons are encoded with the opener component assembly. Code Learning Description: 1. Delete:Long press "encode"button,until you can not hear the buzzer sound,release the "encode"button. 2. Code:Press "encode"button once,buzzer is sounding ,now press the PRESS button ,the buzzer stops sounding,that indicate the code is successfully learned.When using the remote control,the buzzer will sound for 2 seconds. -
Page 18: Remote Control Settings
Electrical Connections 4.13 Remote control settings Hold-open Lock Automatic Reset Encoding the remote with the component assembly: 1. Delete all: Hold the “Encode” button on the component assembly until the buzzer is silent. 2. Encoding: Hold the “Encode” button until the buzzer sounds. Then press any button on the remote control. -
Page 19: Parameters Adjustment
Parameters Adjustment 5.1 Hand programmer instruction Display screen Increase Decrease Function Selection Test Display Screen guide and function display F – 1 work parameters F – 2 door parameters os = opening speed n1 single/double door od = opening low speed angle n2 master/slave cs = closing speed n3 synchronize settings... -
Page 20: Adjustment Steps
Parameters Adjustment 5.2 adjustment steps... -
Page 21: Trouble Shooting
6 Trouble shooting Symptoms Remedies The door opens in wrong power off, manually open the door in direction and the machine half open. then power on, the door doesn’t work. goes to closing direction, if not,change the open direction. rebound when closing the door, 1.
Need help?
Do you have a question about the DSW-120N and is the answer not in the manual?
Questions and answers