Advertisement
DXi4800 QUICK START
Using variable-length deduplication, the DXi4800 provides scalable, backup storage. The DXi4800 provides
easy to configure disaster recovery protection when it is paired with one or more DXi system as a replication
target. For complete documentation, including pre-installation requirements, see the DXi4800
Documentation Center: www.quantum.com/DXi4800docs.
Activate your warranty and register your product with Quantum:
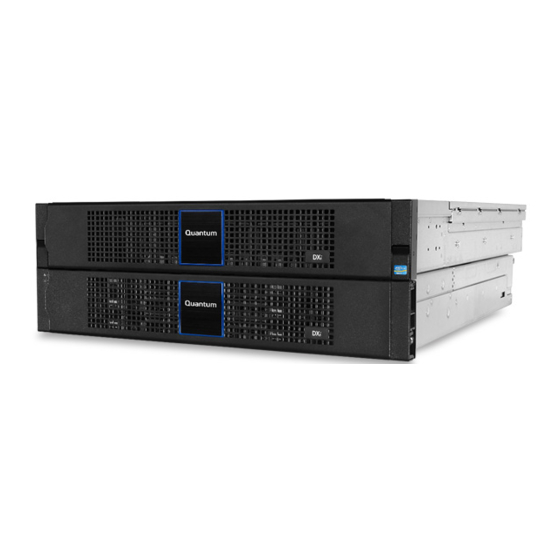
Your system includes a Node, or a Node and up to two Expansion Modules (EMs).
Front (bezels removed)
HDD slots
Node (top)
EM (bottom)
Installing the DXi4800
Important
Install the Node and EMs in the rack and connect all cables before following the power-up sequence.
For safety information, see
Step 1
Unpack the Node, and ensure it is configured as ordered. Then, unpack the Expansion Module.
See
Install > DXi4800 System Installation > Unpack the
Step 2
Determine the order of components in the rack, then locate the mounting position. See
DXi4800 System Installation Install the DXi4800 System in the
Install > DXi4800 System Installation > Choosing a Location > Rack Space
Step 3
Install any Expansion Modules; then
install the Node above the Expansion
Modules. See
Installation > Install the DXi4800 System
in the
Rack.
Step 4
Cable the DXi4800. See
DXi4800 System Installation > Install the
DXi4800 System in the Rack > Cable the
DXi4800.
Pull-out tab containing the
DXi4800 serial number
Power button
Resources > Safety
Install > DXi4800 System
Install >
www.quantum.com/startup
H840 RAID
Controller Slot
Information.
DXi4800.
Page 1
Optional
Fibre Channel
or Ethernet
network cards
em4 port
Power switches
Rack. For specifications, see
Requirements.
SAS ports for cabling
Back
480 GB
SSD
Node (top)
EM (bottom)
Install >
Advertisement
Table of Contents

Related Manuals for Quantum DXi4800


Summary of Contents for Quantum DXi4800
- Page 1 DXi4800 QUICK START Using variable-length deduplication, the DXi4800 provides scalable, backup storage. The DXi4800 provides easy to configure disaster recovery protection when it is paired with one or more DXi system as a replication target. For complete documentation, including pre-installation requirements, see the DXi4800 Documentation Center: www.quantum.com/DXi4800docs.
- Page 2 Configure email reports and other functions using the configuration wizards. Operating the DXi4800 Now that the DXi4800 is up and running, you can monitor the health of system components, replication and data reduction statistics, and activities. See Operate > DXi4800 User Guide > DXi4800 Status.
Need help?
Do you have a question about the DXi4800 and is the answer not in the manual?
Questions and answers