Advertisement
Stretchers
Corner anchors
BUILDING ASSEMBLY
STEP BY STEP CONSTRUCTION OF YOUR PRESSURE TREATED EZE BASE
STEP 1: MEASURING YOUR SHED PRIOR TO ASSEMBLY OF 'EZE BASE'
Measure the length of the building which is to be mounted on the Eze Base and transfer these dimensions to the
two outers supplied. Mark accordingly and trial fit with the floor of the building.
BillyOh.com – Grassthorpe Road – Sutton on Trent – Newark – Nottinghamshire – NG23 6QX – Tel. 0870 777 8891
' EZE BASE' INSTRUCTIONS
THE BILLYOH EZE BASE
'L' bracket
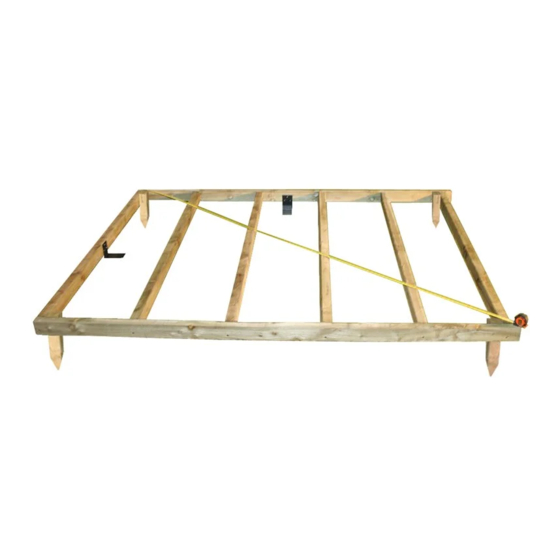
STEP 2: LAYING OUT ALL PARTS
Lay all parts of the Eze Base in their intended place as
demonstrated by the illustration (right). This is to ensure that
the stretchers can be placed equally apart as to support a
building most effectively and to check that all parts have been
received.
Outer
*Tape measure not included.
Advertisement
Table of Contents

Subscribe to Our Youtube Channel
Summary of Contents for Billyoh EZE BASE
- Page 1 STEP 1: MEASURING YOUR SHED PRIOR TO ASSEMBLY OF ‘EZE BASE’ Measure the length of the building which is to be mounted on the Eze Base and transfer these dimensions to the two outers supplied. Mark accordingly and trial fit with the floor of the building.
- Page 2 STEP 5: SCREWING ‘L’ BRACKETS ONTO FRAME (OPTIONAL) If the ground you wish to place your Eze Base and building on is not level then it is necessary to add the ‘L’ brackets provided to level out the Eze Base. Throughout this STEP use a spirit level to assess progress.
- Page 3 PLEASE NOTE: The warranty does not extend to damage caused by post-purchase transportation, careless handling nor damage caused by misuse. PLEASE KEEP THIS MANUAL FOR FUTURE REFERENCE. BillyOh.com – Grassthorpe Road – Sutton on Trent – Newark – Nottinghamshire – NG23 6QX – Tel. 0870 777 8891...
Need help?
Do you have a question about the EZE BASE and is the answer not in the manual?
Questions and answers