Table of Contents
Advertisement
Quick Links
- 1 Atp Cleaning and Maintenance Checklist
- 2 How to Clean the Canister and Motor Base
- 3 How to Clean the Atp Device 1St Shutter
- 4 How to Clean the Utc Tray and Drawer
- 5 How to Change the Printer Ribbon and Clean the Thermal Print Head
- 6 How to Maintain the Paper Path and Change the Paper
- Download this manual
CONTENTS
MODULE ONE: OVERVIEW ............................................................................................................. 2
ATP Device Maintenance Introduction ....................................................................................... 2
Precautions for Safe Operation .............................................................................................. 3
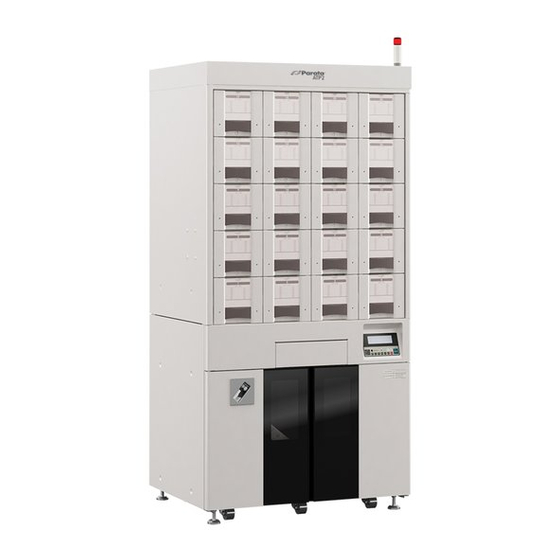
ATP Device Components ................................................................................................................. 7
ATP Cleaning and Maintenance Checklist....................................................................................... 9
How to Turn the ATP on and off ............................................................................................... 11
ATP Device Power Switch ..................................................................................................... 11
MODULE TWO: CLEANING ........................................................................................................... 13
How to Clean the Canister and Motor Base ................................................................................. 13
How to Clean the ATP Device Med Drawer .................................................................................. 15
How to Clean the ATP Device Sub Hoppers .................................................................................. 17
How to Clean the ATP Device 1st Shutter ..................................................................................... 19
How to Clean the UTC Tray and Drawer ....................................................................................... 21
How to Clean the ATP Device Main Hopper ................................................................................. 23
How to Clean the ATP Lower Packaging Unit (LPU) ...................................................................... 25
MODULE THREE: MAINTENANCE ................................................................................................. 29
How to Change the Printer Ribbon and Clean the Thermal Print Head ....................................... 29
How to Maintain the Paper Path and Change the Paper ............................................................. 35
How to Remove the Lower Packaging Unit (LPU) ......................................................................... 39
How to Replace the Cutter Blade (ADMIN) .................................................................................. 45
How to adjust or replace the Perforation Blade (ADMIN)[online video] ..................................... 51
How to Replace the TC Motor Assembly (ADMIN) ....................................................................... 59
How to Replace the Printer Head (ADMIN) [online video] .......................................................... 63
Warranty Verification ................................................................................................................... 67
Consumables FAQ ......................................................................................................................... 69
1
DEVICE MAINTENANCE AND CLEANING
TRAINING
©Parata
2014
Advertisement
Table of Contents

Summary of Contents for Parata ATP
-
Page 1: Table Of Contents
How to Clean the UTC Tray and Drawer ..................21 How to Clean the ATP Device Main Hopper ................. 23 How to Clean the ATP Lower Packaging Unit (LPU) ..............25 MODULE THREE: MAINTENANCE ....................29 How to Change the Printer Ribbon and Clean the Thermal Print Head ........29 How to Maintain the Paper Path and Change the Paper ............. -
Page 2: Module One: Overview
Updated 05/2015 INTRODUCTION Welcome to the Device Maintenance and Cleaning Unit. It is important to clean and maintain your ATP Device to ensure safe and efficient operation. Parts will last longer and you will get more out of your device when you follow the maintenance and cleaning schedule. You can find this schedule in the “resources and worksheet”... -
Page 3: Precautions For Safe Operation
Use a dedicated power source (a dedicated 20 amp circuit with a breaker) as indicated on the rating label attached to the device. A branched circuit may cause abnormal heating resulting in fire. ©Parata 2014... - Page 4 Pulling the cord may result in electric shock or fire by short circuit. Do not touch any electrical parts such as the power supply plug or any switches with a wet hand. This may cause electric shock. ©Parata 2014...
- Page 5 Doing so may be harmful to your health. Clean the device regularly. Contamination may be caused by pill dust accumulated inside the device. CAUTION: When setting up or relocating the device, contact your authorized Parata representative ©Parata 2014...
-
Page 6: Atp Device Components
Only use these buttons if instructed to do so by Parata Support. 3. Package Exit. The packets are advanced to this exit though the internal conveyor. -
Page 7: Atp Cleaning And Maintenance Checklist
DEVICE MAINTENANCE AND CLEANING TRAINING ATP Cleaning and Maintenance Checklist Clean Daily (or Every Eight Hours of Use) in this Order Step One: Med Drawers Step Two: Sub Hoppers Step Three: 1 Shutter Step Four: UTC Tray Step Five: Main Hopper... -
Page 8: How To Turn The Atp On And Off
DEVICE MAINTENANCE AND CLEANING TRAINING How to Turn the ATP on and off ATP Device Power Switch 1. Power Switch. The power switch (main switch) is located in the upper right, inside the front door. 2. Emergency Switch. The device has an emergency switch for extra safety. -
Page 9: Module Two: Cleaning
Power down the machine. Cleaning the sensors will trigger a mixed drug alarm if the ATP unit is powered on. Clean around the motor base and the pill detecting sensor using a 1”... -
Page 10: How To Clean The Atp Device Med Drawer
5. Clean all other areas by wiping with a soft, lint free cloth as necessary. 6. Replace the clean med drawer and pull out the next drawer to clean. NOTE: Parata recommends daily cleaning of the ATP Device Med Drawers. ©Parata 2014... -
Page 11: How To Clean The Atp Device Sub Hoppers
4. Set the curtain in the sub hopper and replace the sub hopper. Make sure the curtain is installed in the correct direction. 5. Close the middle panel. NOTE: Parata recommends daily cleaning of ATP Device sub hopper. ©Parata 2014... -
Page 12: How To Clean The Atp Device 1St Shutter
Proper curtain placement in the shutter is critical to ensure proper pill travel down the pill path. Mis-aligned curtains can cause a pill dam. Inspect curtains for dry or curled edges, and call Parata service is this occurs. ©Parata 2014... -
Page 13: How To Clean The Utc Tray And Drawer
4. Replace the UTC tray and lock it in place in the drawer. CAUTION: Always turn off the power switch before cleaning the UTC tray to prevent the electric component from short circuiting. NOTE: Parata recommends daily cleaning of the ATP Device UTC Drawer. ©Parata 2014... -
Page 14: How To Clean The Atp Device Main Hopper
DEVICE MAINTENANCE AND CLEANING TRAINING How to Clean the ATP Device Main Hopper Turn off the power switch before cleaning. Open the front door. The main hopper is located between the Lower Packaging Unit and the 1st shutter. Normally, the hopper is locked. Pull the 2... - Page 15 NOTE: In an extreme case, where shutters are very dirty, you may wipe with a soft cloth, moistened slightly with alcohol, and then wipe off immediately to prevent streaking of pill dust residue. NOTE: Parata recommends daily cleaning of the ATP Device main hopper. ©Parata 2014...
-
Page 16: How To Clean The Atp Lower Packaging Unit (Lpu)
DEVICE MAINTENANCE AND CLEANING TRAINING How to Clean the ATP Lower Packaging Unit (LPU) 1. Turn off the power switch and check that the heater is cool before cleaning. 2. Open the front door and slide the Lower Packaging Unit out. - Page 17 DEVICE MAINTENANCE AND CLEANING TRAINING How to Clean the ATP Lower Packaging Unit (LPU) 3. Clean the heater area with a scotch-brite pad. Clean the cutter with an alcohol pad. 4. After cleaning, move the shutter back down into the fork in it’s secure postion.
- Page 18 DEVICE MAINTENANCE AND CLEANING TRAINING How to Clean the ATP Lower Packaging Unit (LPU) 5. Replace the heater holder securely. 6. Vacuum or wipe the floor of the LPU with a soft, lint-free cloth. ©Parata 2014...
-
Page 19: Module Three: Maintenance
1. Open the ATP device’s front access doors. 2. Slide the lower packaging unit out from the ATP device. Find the release lever for the lower packaging unit and use the front handle to pull the unit out on its slide rails for access to the printer assembly. - Page 20 4. Locate the printer assembly and pull the plastic handle towards you to release the assembly. 4. Open the printer assembly cover, by pulling up on the black knob. You will see that the left-hand ribbon spool is empty. ©Parata 2014...
- Page 21 5. Remove both the empty and used ribbon spools simultaneously. Save the empty ribbon spool and discard the used ribbon spool. 6. Always clean the Print Head when you change the ribbon. Locate the ATP thermal print head as shown below.
- Page 22 Ensure that the adhesive side is facing upward. 9. Using the empty spool that you set aside, place and align the empty spool on the adhesive of the new ribbon. It is important that the ribbon is lined up closely on the empty spool. ©Parata 2014...
- Page 23 It is important that the ribbon is fed through the unit correctly and both spools are pressed all the way down. 12. By hand, roll the empty spool clockwise until the black ribbon has reached the empty spool. ©Parata 2014...
- Page 24 Make sure the printer assembly latches closed. You may hear the ribbon tighten. 14. Slide the lower packaging unit back into the ATP device until the release lever locks the unit into place. 15. Close the left and right doors.
-
Page 25: How To Maintain The Paper Path And Change The Paper
2. Unlock the lower packaging unit (LPU) by lifting the lever located on the bottom right of the unit to an upward position, while at the same time pull the black handle towards you. 3. Remove the empty spool from the paper spool disk. ©Parata 2014... - Page 26 ID badge to give support while taping, to be sure the ends are aligned. Using 2 small pieces of scotch tape, tape the topside and underside of the overlapped paper together. TIP: Make sure the tape is not placed over the open edge of the paper. It is important that this edge stay open. ©Parata 2014...
- Page 27 Tighten the roll counterclockwise until there is no slack in the paper. 8. Push the LPU unit back into place and close the lower unit doors. 9. Select Resume on the ATP application. WARNING: The Lower Packaging Unit will not operate when the front door is open, but the heater in the seal mechanism is energized and may be hot.
-
Page 28: How To Remove The Lower Packaging Unit (Lpu)
CAUTION: Do not stand on the LPU cart! The LPU cart is only designed to safely support the LPU. 1. Power off the ATP by pressing the red knob on the front of the device. 2. Open the lower front doors on the ATP device. - Page 29 DEVICE MAINTENANCE AND CLEANING TRAINING How to Remove the Lower Packaging Unit (LPU) 3. Place the LPU cart in front of the ATP. NOTE: The front casters on the LPU cart can be locked for additional stability. ©Parata 2014...
- Page 30 DEVICE MAINTENANCE AND CLEANING TRAINING How to Remove the Lower Packaging Unit (LPU) 4. Extend the positioning arm on the LPU cart and attach it to the slide tray to stabilize the cart. ©Parata 2014...
- Page 31 6. Lean forward across the cart, and with your right hand, push and hold the steel push latch on the LPU while simultaneously pulling the black handle on the front of the LPU toward you. ©Parata 2014...
- Page 32 DEVICE MAINTENANCE AND CLEANING TRAINING How to Remove the Lower Packaging Unit (LPU) 7. Pull the LPU all the way out of the ATP and onto the cart. ©Parata 2014...
- Page 33 LPU cart. 9. Transport the removed LPU to a desired location. 10. After replacing the LPU, power on the ATP by turning the red knob on the front of the device a quarter turn to the right.
-
Page 34: How To Replace The Cutter Blade (Admin)
Note: The blade starts out in the “Cut Position.” This is the home position of the cutter blade assembly, and you will see that the red arrows line up in this position. Cutter blade home position show. (Red arrows line up) Loosen the blade locking knob ©Parata 2014... - Page 35 Step Two: Remove the Cutter Blade Knife Assembly 1. Remove the metal guard from the blade assembly by lifting it off to the left. Set aside. Note: The metal guard is held in place by a metal pin inserted into the white plastic guide. ©Parata 2014...
- Page 36 Lift the blade holder to the left to remove. The blade holder rear attachment is in a cut-out channel on the housing. Note: Home position marks. Black holder pin and black grommet ©Parata 2014...
- Page 37 How to Replace the Cutter Blade (continued) 3. With the blade holder pointing up, slide the attachment forward (towards the rear of the machine) until the blade holder comes out of the cut-out hole. Blade holder and cut out hole ©Parata 2014...
- Page 38 Insert the new cutter blade into the blade holder. Be sure to lock the new blade in the “Safe position.” Tighten the blade locking knob before reassembling the blade holder into the cutter assembly. Blade holder with new blade in “safe position” ©Parata 2014...
- Page 39 - Check that the blade is locked forward in the Cut position (towards the rear of the machine, and extended all the way forward in the blade holder) - Check that the blade locking knob is tightened down securely. ©Parata 2014...
-
Page 40: How To Adjust Or Replace The Perforation Blade (Admin)[Online Video]
This document also includes inspection and adjustment procedures for the anvil assembly . Required Materials 3 mm Allen Wrench 1.5 mm Allen Key Anvil Assembly ©Parata 2014... - Page 41 2. Pull the anvil assembly off the guide pin up and to the left. it may be necessary to wiggle the assembly forward and back while lifting the anvil assembly off. ©Parata 2014...
- Page 42 NOTE: To make your adjustments easier on narrow packing units, make a mark on the edge of the anvil assembly block to help orient the new blade during installation. Narrow perforation blades utilize two of the three set screws. This may also be done on wide packing units to help with blade alignment. ©Parata 2014...
- Page 43 Blade Installation 1. Install the new heater rubber over the guide pins and under the angle of the wrinkle preventer. Verify it is flat against the anvil assembly and does not bubble up. ©Parata 2014...
- Page 44 It may be necessary to tilt the anvil assembly forward and back while sliding the anvil assembly all the way to the bottom of the guide pin. Verify the paper adjustment screw is against the arm. ©Parata 2014...
- Page 45 NOTE: Adjusting the blade toward the edge of the anvil assembly will reduce the length of your precut . NOTE: Adjusting the blade toward the corner of the anvil assembly will increase the length of your precut – if you go too far the precut will not meet the edge of the paper. ©Parata 2014...
- Page 46 Tightening the adjustment screw will result in a deeper cut, and loosening the adjustment screw will lessen the depth of the cut. When you are finished, tighten the 3mm Allen screw when your adjustment is complete. ©Parata 2014...
-
Page 47: How To Replace The Tc Motor Assembly (Admin)
1 Phillips Head Screwdriver 1 TC Motor Assembly 1. Power off the ATP Manually unlock ATP drawers by pulling the silver release knob. 2. O pen the TC Drawer that contains the canister and the TC Motor Base Assembly that needs to be replaced. - Page 48 6. Note the orientation of the TC motor base assembly. Take hold of the motor clutch and gently wiggle from left to right until the TC motor base assembly comes loose from the motor base. The motor base assembly will be attached to a wiring harness coming from the TC drawer. ©Parata 2014...
- Page 49 DEVICE MAINTENANCE AND CLEANING TRAINING How to Replace the TC Motor Assembly 6. D isconnect the TC Motor Assembly connector from the wire harness. 7. L ocate the new TC Motor Assembly and reverse the previous steps for install. ©Parata 2014...
- Page 50 DEVICE MAINTENANCE AND CLEANING TRAINING Run test bags from the location to verify TC Motor Assembly is operating correctly. Best practices is to run a test repack order for this motor base/ canister drug. ©Parata 2014...
-
Page 51: How To Replace The Printer Head (Admin) [Online Video]
TRAINING How to Replace the Printer Head (ADMIN) [online video] 1. Power off the ATP machine. 2. Follow steps 1-4 of the Thermal Printer Cleaning to gain access to the thermal print head. 3. Remove the mounting screw on the print head bracket. - Page 52 6. Pull the connecting cable away from the back of the print head. 7. Flip the bracket over, and remove the mounting screws holding the print head in place. Remove the print head. The dimples in the bracket help to align the new print head (indicated by arrow) . ©Parata 2014...
- Page 53 8. Push the black connector back into place. 9. There are four guide pins for the print head bracket. The bracket should slide on all pins at the same time. Replace the mounting screw removed in step 3. ©Parata 2014...
- Page 54 2. How do I know when to replace the print head? Replace the print head af t er trouble s hoot ing pr int q ual it y w i t h a Parata support technician. ©Parata...
-
Page 55: Warranty Verification
ATP by following the procedure below. Without the shot counter reading, warranty claims cannot be verified. 1. Verify on the ATP LCD display that the there are no machine or printer errors, and that the phrase 'SYSTEM IS WAITING' is visible on the small ATP LCD screen located on the front of the ATP device. - Page 56 DEVICE MAINTENANCE AND CLEANING TRAINING 8. Release, press and hold the ‘MODE’ button a last time in order to return to the normal ‘SYSTEM IS WAITING’ screen. 9. Please report the shot count number to Parata Service at 888-989-7822or EMAIL service@Parata.com. ©Parata 2014...
-
Page 57: Consumables Faq
Make sure to follow inspection procedures. ©Parata 2014...
Need help?
Do you have a question about the ATP and is the answer not in the manual?
Questions and answers
how to insert LPU by steps
To insert the Lower Packaging Unit (LPU) in the Parata ATP:
1. Transport the LPU to the ATP using the LPU cart.
2. Position the cart in front of the ATP, ensuring stability by locking the front casters if needed.
3. Align the LPU with the ATP and slide it into place.
4. Secure the LPU by lowering the steel lock shaft at the front of the LPU cart.
5. Lock the left and right lock levers on the front corners of the LPU.
6. Close the lower front doors of the ATP.
7. Power on the ATP by turning the red knob on the front of the device a quarter turn to the right.
This answer is automatically generated
When using the PARATA ATP to repack medication, what is the latest expiration date that the medications can be other than the manufacturer expiration date? Is it 6 months or 1 year?