Advertisement
Quick Links
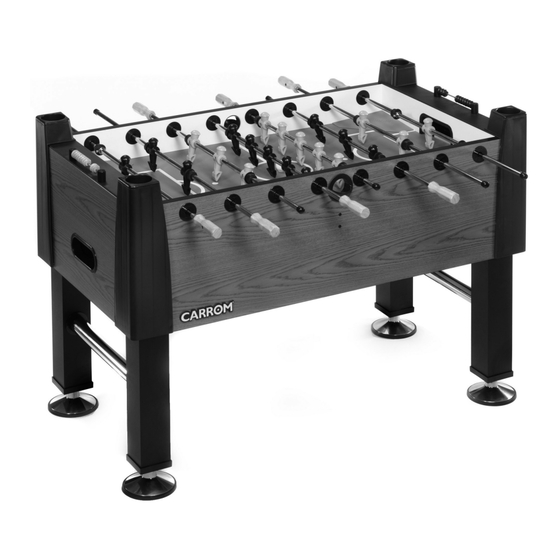
Quality Family Games
Foosball Instructions
Signature Model 521, 525, 530
Visit carrom.com/youtube for assembly instruction video
Product Registration
Visit www.carrom.com to register your product to receive the latest product
updates, special offers, and other product related information.
Advertisement

Related Manuals for Carrom 521

Summary of Contents for Carrom 521
- Page 1 Quality Family Games Foosball Instructions Signature Model 521, 525, 530 Visit carrom.com/youtube for assembly instruction video Product Registration Visit www.carrom.com to register your product to receive the latest product updates, special offers, and other product related information.
- Page 2 Part List for Foosball Cabinet Side 2 Pieces Leg Leveler Insert Ball Return 4 Pieces 2 Pieces Cabinet End 2 Pieces Leg - 25 1/2” Mounting Flange 4 Pieces 4 Pieces #12 Double Headed Screw 8 Pieces Chrome Tube Leg Leveler 2 Pieces 4 Pieces Goalie End Board...
- Page 3 Part List Continued Drink Holder Assembly Rubber Bumper #6 x 1” Pan Head Screw 4 Pieces 16 Pieces 8 Pieces #10-32 x 3/4” Pan Head Support Strip Bead Scoring Assembly Bolt 1 Piece 2 Sets 8 Pieces 3-Man Rod Players Stop Rings, Bolt, Nut 4 Pieces 26 Pieces...
- Page 4 Visit carrom.com/youtube for assembly instruction video TOOLS REQUIRED: 9/16” Wrench, Phillips Screwdriver and a Level. CLEANING: Clean with mild soap & water using a damp cloth. Step 1 the bottom and facing inward. Attach (2) Open the carton of your new Foosball GOALIE END BOARDS (item #4) with the Game near where you will play.
- Page 5 Center the PLAYFIELD (item #6) with graphics facing down into the groove of the side and lay on goalie end boards. Now attach the other SIDE (item #1) the same as before. See Fig. 2 Fig. 2 Step 2 Align BALL RETURN (item #8) with pre-drilled holes over the opening on the CABINET END (item #2) on the white side.
- Page 6 Step 3 Attach the END (item #2) with a ball return facing inward. Outside ball return hole should be high on end. Use (6) #8 X 3” SCREWS (item #33) to attach. Do the other end the same as above. DO NOT TIGHTEN YET. See Fig. 3 Step 4 Position the SUPPORT STRIP (item #35) in the center of playfield upright with marked edges towards playfield (down).
- Page 7 Step 5 (4) SCREWS - #8 x ½ PAN HEAD (item #11). Repeat for the other end of the table. Install (4) LEGS (item #15) by using (4) 3/8 Put a LEG LEVELER INSERT (item #14) – 16 X 2” HEX HEAD BOLTS (item #12), on the bottom of each leg and then screw with (4) 3/8”...
- Page 8 It takes at least TWO STRONG ADULTS to lift the table assembly from the floor and turn it over without putting weight on the legs. Set table in the location where you will play. Check to make sure all leg bolts are tight. CAUTION! SAFETY COMES FIRST! TABLE IS VERY HEAVY.
- Page 9 Step 7 corners have slots that will slide over these screws.) Attach (4) DRINK HOLDER Attach the GOALIE COVER PLATE (item CORNERS (item #20) to each corner of #5) to both ends of the cabinet. Use (2) #6 cabinet by sliding them down over the x 5/8”...
- Page 10 THE HEXAGON OPENING IS THE “BACK” OF THE PLAYER. MAKE CERTAIN THAT ALL PLAYERS FACE THE OPPOSING GOAL. SEE FIG. 6 You may set up your goalies in one of two ways. Follow appropriate instructions for your preference: 3 Man Goalie Setup Insert one 3 MAN ROD (item #22) into the PLASTIC BEARING (items #18 &...
- Page 11 FRONT BACK Fig. 6 Please note: On single goalie setup the outer goalie players are replaced by stop rings. Fig. 7...
- Page 12 Single Goalie Setup...
- Page 13 3 Man Goalie Setup...
- Page 16 07.525.10 02/23/15...
Need help?
Do you have a question about the 521 and is the answer not in the manual?
Questions and answers