Table of Contents
Advertisement
MAKE OF AUTOMOBILE:
Renault
TYPE:
Clio 3
PISTON DISPLACEMENT:
1200cc
NUMBER OF VALVES:
16v
ENGINE NUMBER:
D4F (TCe100)
TRANSMISSION TYPE ( MT / AT )
MT
VEHICLE CATEGORIES M or N
M
TYPE VSI INJECTOR ( COLOUR )
Blue, KN8
VERSION ( LPG / CNG )
LPG
INJECTION SYSTEM:
CONTINENTAL SIM32
MODEL YEAR:
2011
SYSTEM APPROVAL NUMBER ( R115 )
E13#R115-000027 VSI-LPG24
LOCATION SYSTEM STICKER
If applicable : right side, centre door post
ENGINE SET NUMBER
359/030001
NUMBER :
076/1906100
DATE :
2014-08-12
Copyright © Prins Autogassystemen B.V. 2011
VERSION NR :
2010-07-29 C
Advertisement
Table of Contents

Summary of Contents for Prins VSI
- Page 1 1200cc NUMBER OF VALVES: ENGINE NUMBER: D4F (TCe100) TRANSMISSION TYPE ( MT / AT ) VEHICLE CATEGORIES M or N TYPE VSI INJECTOR ( COLOUR ) Blue, KN8 VERSION ( LPG / CNG ) INJECTION SYSTEM: CONTINENTAL SIM32 MODEL YEAR:...
-
Page 2: Table Of Contents
Overpressure connection ........................9 Mounting the inlet manifold couplings ....................10 Mounting the ValveCare manifold couplings ..................11 Mounting the VSI injector rail ......................12 Mounting the Prins filter unit ....................... 13 Mounting ValveCare 1 ........................14 Mounting ValveCare 2 ........................15 LPG hoses ............................ -
Page 3: General Instructions
Be aware of central door locking, radio / telephone memory code, alarm system. Do not place the main fuse into the fuse holder before having completed the installation of the VSI system. The VSI computer has to be activated by means of the diagnosis software. -
Page 4: Required Equipment / Tools / Materials For Installing A Complete System
: 256 colours, advise colours 16 bits or more Com port : 1 free COM port 1 or COM port 2 with a 9 or 25 pins connector Vehicle fuel system scan tool or OBD scan tool Prins ( part nr. 099/99928 ) Exhaust gas analyser Multimeter... -
Page 5: Base Diagram
PAGE 4 076/19060100 Copyright © Prins Autogassystemen B.V. 2011 Renault Clio 1.2 16v TCe100 2011 VERSION NR : C Base diagram... -
Page 6: Vsi Approval Numbers
Injector rail Prins : LPG E4-67R-010093 Lock-off valve OMB : E8-67R-014327 CNG E4-110R-000021 Lock-off valve Valtek : E4-67R-010041 Filter unit T1 / T2 Prins : LPG E4-67R-010096 Injector Keihin :LPG E4-67R-010092 CNG E4-110R-000028 CNG E4-110R-000020 Filter unit Keihin : LPG E4-67R-010177... -
Page 7: Mounting And Connection Points
PAGE 6 076/19060100 Copyright © Prins Autogassystemen B.V. 2011 Renault Clio 1.2 16v TCe100 2011 VERSION NR : C Mounting and connection points : Reducer : Lambda signal ( 19 + 20 ) : “-“ interruption petrol injector : Filter unit... -
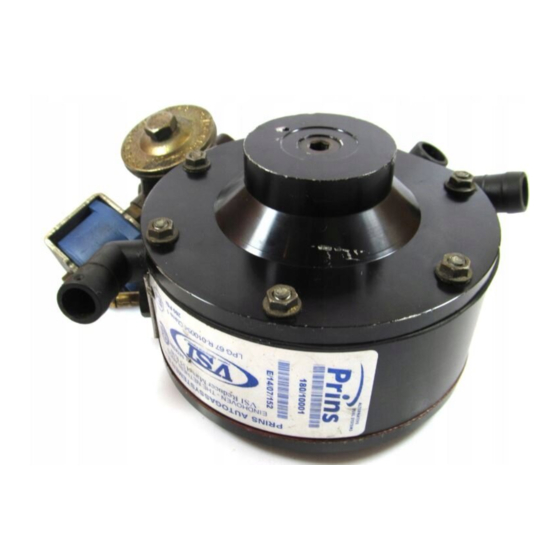
Page 8: Mounting The Reducer
PAGE 7 076/19060100 Copyright © Prins Autogassystemen B.V. 2011 Renault Clio 1.2 16v TCe100 2011 VERSION NR : C Mounting the reducer Filter replacement must be recorded in the service book supplied Remove battery, battery holder and air filter housing. -
Page 9: Water Connections
PAGE 8 076/19060100 Copyright © Prins Autogassystemen B.V. 2011 Renault Clio 1.2 16v TCe100 2011 VERSION NR : C Water connections Cut hoses. Mount T-pieces 20x16x20mm with clamps. Routing water hoses. -
Page 10: Overpressure Connection
Clio 1.2 16v TCe100 2011 VERSION NR : C Overpressure connection Drill a hole of Ø5mm and cut thread M6 in this hole. Place a VSI coupling with a lock compound to the inlet manifold. Connect overpressure / MAP hose from reducer. -
Page 11: Mounting The Inlet Manifold Couplings
Remove the inlet manifold. Drill 4x holes of Ø5 mm in the inlet manifold. Cut M6 thread in these holes. Place the VSI couplings with a lock compound in the inlet manifold. Watch out that the lock compound doesn’t come inside the VSI couplings. -
Page 12: Mounting The Valvecare Manifold Couplings
PAGE 11 076/19060100 Copyright © Prins Autogassystemen B.V. 2011 Renault Clio 1.2 16v TCe100 2011 VERSION NR : C Mounting the ValveCare manifold couplings Drill 4 holes Ø8,8mm at the upside of the inlet manifold and cut thread G 1/8-28. -
Page 13: Mounting The Vsi Injector Rail
PAGE 12 076/19060100 Copyright © Prins Autogassystemen B.V. 2011 Renault Clio 1.2 16v TCe100 2011 VERSION NR : C Mounting the VSI injector rail Mount injector rail bracket at underside of the inlet manifold with M6 bolt, nut and washers. -
Page 14: Mounting The Prins Filter Unit
PAGE 13 076/19060100 Copyright © Prins Autogassystemen B.V. 2011 Renault Clio 1.2 16v TCe100 2011 VERSION NR : C Mounting the Prins filter unit Mount the filter on the left side of the engine on top of the throttle body. -
Page 15: Mounting Valvecare 1
PAGE 14 076/19060100 Copyright © Prins Autogassystemen B.V. 2011 Renault Clio 1.2 16v TCe100 2011 VERSION NR : C Mounting ValveCare 1 Mount ValveCare pump on bracket. Cut wires (except white wire) from diagnostic plug and extend 50cm. Mount ValveCare hose and mount protection around hose and wiring. -
Page 16: Mounting Valvecare 2
PAGE 15 076/19060100 Copyright © Prins Autogassystemen B.V. 2011 Renault Clio 1.2 16v TCe100 2011 VERSION NR : C Mounting ValveCare 2 Mount ValveCare pump behind left front plastic wheel arch at the front end of the chassis beam. Mount ValveCare distributor to bracket. Mount ValveCare hose to distributor. -
Page 17: Lpg Hoses
PAGE 16 076/19060100 Copyright © Prins Autogassystemen B.V. 2011 Renault Clio 1.2 16v TCe100 2011 VERSION NR : C LPG hoses Hose From component To component Hose (Ø..mm) length (cm) Reducer Prins filter unit Prins filter unit VSI injector rail... -
Page 18: Mounting The Vsi Computer Bracket
PAGE 17 076/19060100 Copyright © Prins Autogassystemen B.V. 2011 Renault Clio 1.2 16v TCe100 2011 VERSION NR : C Mounting the VSI computer bracket Mark holes for drilling on the left in the battery box. Drill holes Ø8,5mm and mount computer bracket with supplied plugs. -
Page 19: Mounting The Fuel Selection Switch
PAGE 18 076/19060100 Copyright © Prins Autogassystemen B.V. 2011 Renault Clio 1.2 16v TCe100 2011 VERSION NR : C Mounting the fuel selection switch When mounting the switch, only push on its sides. Pushing the switch in the centre may result in damage to the switch. -
Page 20: Electrical Connections
Connection Connect to the ‘–‘ of the battery; use a ring terminal for this ground battery brown purpose. Connect to the ‘–‘ of the battery together with VSI wire 1 32 ground battery sense brown ground battery. +12V battery Connect to the '+' of the battery; use a ring terminal for this purpose or solder. -
Page 21: Electrical Connections
PAGE 20 076/19060100 Copyright © Prins Autogassystemen B.V. 2011 Renault Clio 1.2 16v TCe100 2011 VERSION NR : C Electrical connections Check and measure the wiring in case of changes in the cars wiring colours. Insulate all not used wires. -
Page 22: Electrical Connections
For measuring the petrol injectors : Interrupt each petrol injector control wire (injector min) Each VSI wire has a petrol injector / cylinder number printed on the wire, connect this wire to the corresponding petrol injector / cylinder. Connect the bicoloured VSI measuring wire to the ecu side, ( wire code: ecu side inj ). -
Page 23: Checklist After Installation
To activate the VSI computer, select function F11 (activate ECM). Check whether the program in the VSI computer matches with the car ( dedicated engine set ): Refer with F2 to the box number and car description in the diagnosis software and compare these with the set number. -
Page 24: Trouble Code Chart
Activate the LPG computer with the diagnostic program, using the F11 function key. T-Board >= 90°C LPG computer circuit board to hot, replace the VSI computer in a cooler area. Battery voltage to high Check board voltage / alternator output and condition of the battery.
Need help?
Do you have a question about the VSI and is the answer not in the manual?
Questions and answers