Table of Contents
Advertisement
Quick Links
Advertisement
Table of Contents

Subscribe to Our Youtube Channel
Summary of Contents for Purkeys TAPS
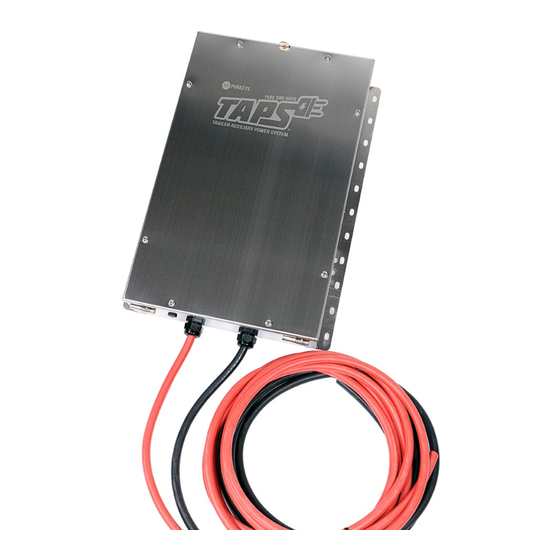
- Page 1 Trailer Auxiliary Power System (TAPS)™ INSTALLATION GUIDE 300-22 Doc 2.00...
-
Page 3: Table Of Contents
System Diagram for Straight Truck Application ..........4 Dual Pole Configuration..................5 Straight Truck Configuration ................5 Recommended Practices for Installation of TAPS Under the Trailer ..6 Mounting the TAPS Enclosure .................7 120 VAC Harness Installation ................8 Input Cable Routing for Dual Pole Application ...........12 Input Cable Routing for Straight Truck Application ........14... -
Page 4: General Information
If mounted on a straight truck, it receives DC power from the tractor batteries. TAPS converts DC power to 120 volt AC power and is managed by a smart inverter that will not turn on until it sees a DC input of 13.2 volts. -
Page 5: System Diagram For Dual Pole Application
20' Dual pole negative cable Dual pole positive cable .25" Be sure to press F7 to complete a spell check before you submit fo AC connections at the 4-terminal junction strip P: 479.419.4800 | F: 479.419.4801 | www.purkeys.net... -
Page 6: System Diagram For Straight Truck Application
SYSTEM DIAGRAM FOR STRAIGHT TRUCK APPLICATION Components: • 150 amp fuse cube and • Liquid tight conduit with 110 bracket VAC harness • Dual pole positive (+) • 110 V receptacle with power indication • Dual pole negative (-) • Inverter Fuse 150 amp Fuse Cube... -
Page 7: Dual Pole Configuration
THE INFORMATION CONTAINED IN THIS DRAWING IS THE SOLE • Drawn By shows correct name an PROPERTY OF PURKEYS. ANY REPRODUCTION IN PART OR AS A WHOLE WITHOUT THE WRITTEN PERMISSION OF PURKEYS IS PROHIBITED. • Appropriate notes are included... -
Page 8: Recommended Practices For Installation Of Taps Under The Trailer
We do NOT recommend high-strength thread locker (Loctite Red) as the enclosure may need to be removed. 8. Mount the TAPS enclosure as close to the power source as possible for best performance. 9. Route 2/0 red and black cables in a manner that mitigates chaffing (avoid sharp/rough surfaces). -
Page 9: Mounting The Taps Enclosure
TAPS INSTALLATION GUIDE MOUNTING THE TAPS ENCLOSURE R.17" .25" 2.00" Step 1: Mount the TAPS enclosure 22.50" in a suitable location, either inside or outside of the trailer, using the universal mounting brackets. 15.20" 16.00" TAPS enclosure mounting complete. ### Be sure to press F7 to complete a spell ch... -
Page 10: 120 Vac Harness Installation
VAC harness that contains the three wires with the #10 eyelets through the hole at the top of the TAPS enclosure. Secure the harness to the enclosure using the supplied liquid-tight fitting. Important! To reduce the risk of electrical shock, make sure the inverter does not have power before making the following connections. - Page 11 TAPS INSTALLATION GUIDE Step 4: Route the AC harness. (If the TAPS is inside the trailer, route the harness to the corner where the side wall and the ceiling meet. Route along this edge all the way to the back of the trailer. Use the supplied cable clamps to secure the harness to the trailer wall.)
- Page 12 Step 6: Route the three AC wires into the AC receptacle box and secure the harness to the box using the supplied liquid-tight connector. Step 7: Ensure the AC wires will reach the location on the AC receptacle where they will be secured and cut off the excess wire.
- Page 13 AC receptacle. Insert the AC receptacle into the AC receptacle box and tighten the mounting screws. Step 11: Install the AC receptacle cover. 110 VAC harness installation complete. P: 479.419.4800 | F: 479.419.4801 | www.purkeys.net...
-
Page 14: Input Cable Routing For Dual Pole Application
INPUT CABLE ROUTING FOR DUAL POLE APPLICATION (ROUTING INSIDE TRAILER) Step 1: Route the 1/0 red and black input cables down the trailer wall. Secure the cables separately to the trailer wall using the supplied plastic clamps. Important: Ensure that the positive and negative cables are routed so they cannot touch. - Page 15 Step 6: Install the 1/0 cables, attaching the black cable to the negative cable stud and the red cable to the positive cable stud. Step 7: Replace the side cover. Input cable routing for dual pole application complete. P: 479.419.4800 | F: 479.419.4801 | www.purkeys.net...
-
Page 16: Input Cable Routing For Straight Truck Application
INPUT CABLE ROUTING FOR STRAIGHT TRUCK APPLICATION (ROUTING INSIDE TRAILER) Step 1: Route the 1/0 red and black input cables down the trailer wall. Secure the cables separately to the trailer wall using the supplied plastic clamps. Important! Ensure that the positive and negative cables are routed so they cannot touch. - Page 17 Important: Make sure that the AC harness installation is complete before making connections at the vehicle batteries. Input cable routing for straight truck application complete. P: 479.419.4800 | F: 479.419.4801 | www.purkeys.net...
-
Page 18: Led Indication And Operation
LED INDICATION AND OPERATION STATUS Green Solid TAPS unit is functioning. AC Power LED Orange Solid TAPS unit is off. Orange Solid Under voltage. Orange Blink Over voltage. Yellow Solid Over power. Fault LED Yellow Blink Over temperature. Contact Purkeys at... -
Page 19: Limited Commercial Warranty Policy
Product or failure of a part not manufactured by Purkeys. This warranty shall not apply if any Purkeys product is used for a purpose for which it is not designed or is in any way altered without the specific prior written consent of Purkeys. ANY...

Need help?
Do you have a question about the TAPS and is the answer not in the manual?
Questions and answers