Table of Contents
Advertisement
Available languages
Available languages
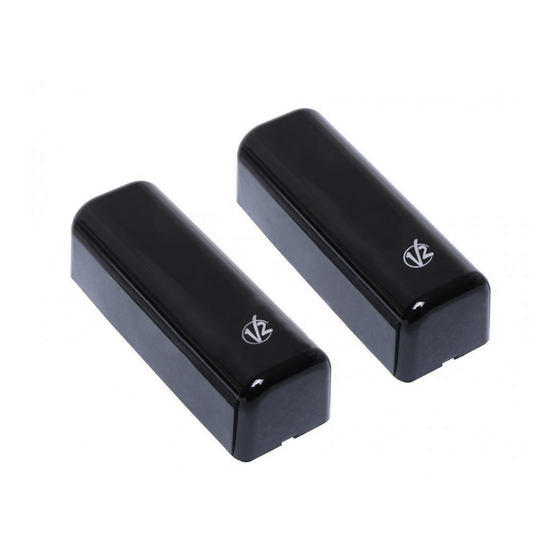
SENSIVA-XS
FOTOCELLULE DA PARETE E DA COLONNA
I
SINCRONIZZATE AUTOALLINEANTI
WALL-MOUNTED AND PILLAR-MOUNTED PHOTOCELLS,
GB
SYNCHRONISED AND SELF-ALIGNING
PHOTOCELLULES MURALES ET POUR POTELETS,
F
AUTOALIGNANTES ET SYNCHONISÉES
FOTOCÉLULAS DE SUPERFICIE Y PARA COLUMNAS
E
AUTOALINEABLES Y SINCRONIZADAS
FOTOCÉLULAS DE PAREDE E PARA COLUNAS
P
AUTO-ALINHADAS E SINCRONIZADAS
FOTOZELLEN FÜ R WANDMONTAGE UND SÄULEN,
D
SELBSTAUSRICHTEND UND SYNCHRONISIERT
GESYNCHRONISEERDE FOTOCELLEN MET AUTOMATISCHE
NL
UITLIJNING VOOR WANDMONTAGE EN PIJLERMONTAGE
V2 S.p.A.
Corso Principi di Piemonte, 65/67
12035 RACCONIGI (CN) ITALY
tel. +39 01 72 81 24 11 - fax +39 01 72 84 050
info@v2home.com - www.v2home.com
IL n.374
EDIZ. 10/02/2015
Advertisement
Table of Contents

Subscribe to Our Youtube Channel
Summary of Contents for V2 SENSIVA-XS
- Page 1 V2 S.p.A. Corso Principi di Piemonte, 65/67 12035 RACCONIGI (CN) ITALY IL n.374 tel. +39 01 72 81 24 11 - fax +39 01 72 84 050 EDIZ. 10/02/2015 info@v2home.com - www.v2home.com SENSIVA-XS FOTOCELLULE DA PARETE E DA COLONNA SINCRONIZZATE AUTOALLINEANTI...
- Page 2 Fig. 1 Fig. 2 Fig. 3...
- Page 3 SYNCHRO Fig. 4...
- Page 4 NO-SYNCHRO Fig. 5...
-
Page 5: Collegamenti Elettrici
INSTALLAZIONE A MURO (Fig.1) DIP-SWITCHES E JUMPER (Fig. 3) Per un corretto funzionamento del sistema è necessario verificare Il dip-switch e i jumper presenti sui circuiti elettronici delle la planarità e la linearità della superficie nei punti previsti per fotocellule servono per impostare il funzionamento del sistema. l’installazione, quindi FISSARE IL PROIETTORE DI FRONTE AL DIP-SWITCH 1 (RX) RICEVITORE LUNGO LO STESSO ASSE GEOMETRICO ED ALLA... -
Page 6: Electrical Connections
WALL INSTALLATION (Fig. 1) DIP-SWITCHES AND JUMPERS (Fig. 3) For the system to function correctly, it is essential that the The dip-switches and jumpers on the electronic circuits of the flatness and linearity of the surfaces intended for installation be photocells are used to set the operation of the system. -
Page 7: Mise Au Point
INSTALLATION AU MUR (Fig.1) COMMUTATEURS DIP ET CAVALIERS (Fig. 3) Pour un fonctionnement correct du système il est nécessaire de Les commutateurs dip et les cavaliers présents sur les circuits vérifier la planéité et la linéarité de la surface dans les points électroniques des photocellules servent à... -
Page 8: Conexiones Eléctricas
INSTALACIÓN EN MURO (Fig.1) DIP-SWITCHES Y JUMPER (Fig. 3) Para un correcto funcionamiento del sistema es necesario El dip-switch y los jumpers presentes en los circuitos electrónicos verificar la planeidad y linealidad de la superficie en los puntos de las células fotoeléctricas sirven para ajustar el funcionamiento previstos para la instalación, por lo que DEBE FIJAR EL del sistema. -
Page 9: Ligações Eléctricas
INSTALAÇÃO NA PAREDE (Fig.1) INTERRUPTORES DIP E JUMPER (Fig. 3) Par obter um funcionamento correcto do sistema é necessário O interruptor dip e os jumpers presentes nos circuitos electrónicos verificar o plano e a linearidade da superfície nos pontos das fotocélulas servem para configurar o funcionamento do sistema. previstos para a instalação, e depois FIXAR O PROJECTOR EM INTERRUPTOR DIP 1 (RX) FRENTE AO RECEPTOR, AO LONGO DO MESMO EIXO... -
Page 10: Elektrische Anschlüsse
WANDMONTAGE (Abb.1) DIP-SCHALTER UND BRÜCKEN (Abb. 3) Zur korrekten Funktion des Systems ist es notwendig, die Die Dip-Schalter und Brücken auf den elektronischen Platinen der Ebenheit und Linearität der Oberfläche an den für die Installation Fotozellen dienen zur Einstellung der Funktionsweise des Systems. vorgesehenen Punkten zu prüfen und dann den STRAHLER VOR DIP-SCHALTER 1 (RX) DEM EMPFÄNGER ENTLANG DER GLEICHEN GEOMETRISCHEN... -
Page 11: Elektrische Aansluitingen
INSTALLATIE OP DE MUUR (Afb. 1) DIP-SWITCHES EN JUMPERS (Afb. 3) Voor een correcte werking van het systeem moet de vlakheid en De dip-switch en de jumpers die zich op de elektronische circuits de rechtlijnigheid van het oppervlak gecontroleerd worden in de bevinden van de fotocellen dienen tot het instellen van de punten die voor de installatie aangeduid worden. -
Page 12: Dichiarazione Di Conformità
Cosimo De Falco DECLARATION OF CONFORMITY KONFORMITÄTSERKLÄRUNG V2 S.p.A. hereby declare that SENSIVA-XS equipment conforms V2 S.p.A. erklärt, dass die Geräte SENSIVA-XS konform mit den to the essential requirements established in directives: wesentlichen Bestimmungen der Richtlinie: • 2004/108/EC electromagnetic compatibility directive •...
Need help?
Do you have a question about the SENSIVA-XS and is the answer not in the manual?
Questions and answers