
Summary of Contents for OptiPro Systems eSX 300 CTS
- Page 1 User Manual – eSX OptiPro Systems, LLC User Manual – eSX OptiPro Systems, LLC. Page 1 of 111 Last Modified: 8/27/2014...
-
Page 2: Table Of Contents
Coolant Tank ........................21 5.5.2 Centrifuge..........................22 5.5.3 Spindle Chiller ........................23 Electrical Cabinet A/C unit ......................23 Pneumatic Automatic Greaser ....................24 Tool Spindle & Tool Holder Precautions ..................25 OptiPro Systems, LLC. Page 2 of 111 Last Modified: 8/27/2014... - Page 3 Ring Tools ..........................38 7.5.4 Ball Tools ..........................39 7.5.5 Edge Tools ........................... 40 7.5.6 End Mill Tools ........................41 7.5.7 Toroid Tools ........................42 7.5.8 RFID Tools ..........................43 OptiPro Systems, LLC. Page 3 of 111 Last Modified: 8/27/2014...
- Page 4 Replacing Existing Safety Windows..................... 92 Cleaning the Tool-holder and Spindle ..................97 9.10 Lubrication of Tool Spindle Locking Mechanism ................ 98 10 Appendices ............................99 10.1 Tram Procedure .......................... 99 OptiPro Systems, LLC. Page 4 of 111 Last Modified: 8/27/2014...
- Page 5 Tramming Tips ....................... 107 10.2 Manual Commands ........................108 10.2.1 M Code List........................108 10.2.2 Manual Axis positioning ....................110 10.2.3 Spindle Command ......................110 10.3 Spare Parts and Consumables ....................111 OptiPro Systems, LLC. Page 5 of 111 Last Modified: 8/27/2014...
-
Page 6: Contacting Optipro
For Service and Parts Contact: Service Coordinator Email: Service@OptiPro.com For Sales Contact: Sales Coordinator Email: Sales@OptiPro.com For Process and Technical Support Contact: Advanced Processes Development (APD) Lab Email: APD_Web@optipro.com OptiPro Systems, LLC. Page 6 of 111 Last Modified: 8/27/2014... -
Page 7: Document Revisions
User Manual – eSX 3 Document Revisions The following is a summary of changes to this document. Table 3-1: Document Revision Summary Release Dated Changes 2014, August Initial Release OptiPro Systems, LLC. Page 7 of 111 Last Modified: 8/27/2014... -
Page 8: Safety
Always wear closed-toe footwear with a good quality tread. Avoid walking through or standing in water, coolant, or other spills. Clean up any spills immediately following precautions outlined in the relevant MSDS. OptiPro Systems, LLC. Page 8 of 111 Last Modified: 8/27/2014... -
Page 9: Electrical Safety
Personal injury or equipment damage can be avoided when operating the machine as designed. Always turn the chiller off before service or maintenance. OptiPro Systems, LLC. Page 9 of 111 Last Modified: 8/27/2014... -
Page 10: In An Emergency
Follow your company’s procedures and policies for emergency reporting, response, resolution, and documentation. Once the cause of the emergency has been resolved the procedure for restarting the machine can be found in Section 6 of this manual. OptiPro Systems, LLC. Page 10 of 111 Last Modified: 8/27/2014... -
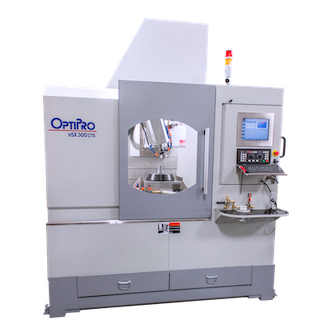
Page 11: Machine Overview And User Controls
This section provides a brief description of the components, controls, and features this machine is available with. Some of the features shown in this manual are options and may not be included in your machine. Work Operator Area Panel Coolant Tank Main Door OptiPro Systems, LLC. Page 11 of 111 Last Modified: 8/27/2014... - Page 12 Vacuum Pump Figure 5-2: Left-Rear Machine View Right Side Electrical Cabinet A/C Side Access Door Pinch Valve Assembly Centrifuge Grease Coolant Through Pump Spindle Filters Figure 5-3: Right-Rear Machine View OptiPro Systems, LLC. Page 12 of 111 Last Modified: 8/27/2014...
-
Page 13: Work Area And Machine Axes
NOTE: If the machine is a twin spindle grinding machine, then the left spindle is referred to as S1 and the right spindle is referred to as S3. A single spindle grinding machine refers to the spindle as the left spindle or S1. OptiPro Systems, LLC. Page 13 of 111 Last Modified: 8/27/2014... -
Page 14: Operator Panel Interface
5.2 Operator Panel Interface The machine is equipped with a touch screen interface. Touch Screen Jog Panel Figure 5-5: Operator Panel 5.2.1 Jog Panel Not used on OptiPro equipment Figure 5-6: Jog Panel OptiPro Systems, LLC. Page 14 of 111 Last Modified: 8/27/2014... - Page 15 Resets a part program or error condition. Cycle Start Starts the currently loaded program. Motion Stop Stops motion on all axes. DOES NOT STOP SPINDLE ROTATION. CYCLE START can be pressed to continue program. OptiPro Systems, LLC. Page 15 of 111 Last Modified: 8/27/2014...
-
Page 16: Jog Pendant
See Section 6.3 for more information. + / - Movement Press to move the selected axis in the + or – direction. See Fagor manual for additional information OptiPro Systems, LLC. Page 16 of 111 Last Modified: 8/27/2014... -
Page 17: Door Interlock
Twist in the direction of the arrows to release the E-STOP button. Pressing RESET then SERVOS on the jog panel is also required to return the machine to a fully operational state. See Section 6.3 for more information. OptiPro Systems, LLC. Page 17 of 111 Last Modified: 8/27/2014... -
Page 18: Coolant Recirculation Control
Caution: Never run processing programs directly from a USB drive; always copy programs to the internal storage before running. OptiPro Systems, LLC. Page 18 of 111 Last Modified: 8/27/2014... -
Page 19: Utility Control Panel
The pneumatic panel houses all of the air regulators and switches machine. They are set when your machine is first installed by OptiPro in your facility, and should not require further adjustment. OptiPro Systems, LLC. Page 19 of 111 Last Modified: 8/27/2014... -
Page 20: Vacuum Work Holding
Vacuum Gage Vacuum Lever Valve Vacuum Safety Figure 5-12: Vacuum Work Holding Controls OptiPro Systems, LLC. Page 20 of 111 Last Modified: 8/27/2014... -
Page 21: Coolant System
OptiPro requires that Deionized (DI) Water be used in the coolant. Tank capacity is approximately 35 gallons. Caution: Verify that all motion on pump motors have stopped before attempting to service. Coolant- Through-Spindle Pump Work Area Coolant Pump Coolant Recirculation Pump Figure 5-13: Coolant Tank OptiPro Systems, LLC. Page 21 of 111 Last Modified: 8/27/2014... -
Page 22: Centrifuge
This filter will run coolant through a 10 micron then 5 micron filter to collect any grinding particulate left in the coolant. This ensures no particulate will be pushed through the spindle. OptiPro Systems, LLC. Page 22 of 111... -
Page 23: Spindle Chiller
The A/C has a removable air filter that must be cleaned periodically, per Section 9.3. Electrical Cabinet A/C Unit Air Filter Figure 5-16: Electrical Cabinet Temperature Control OptiPro Systems, LLC. Page 23 of 111 Last Modified: 8/27/2014... -
Page 24: Pneumatic Automatic Greaser
The outer plastic cover is attached by a partial-turn twist lock. The grease cartridge must be unscrewed and the new one screwed in. See Section 9 for maintenance schedule. Figure 5-17: Pneumatic Automatic Greaser and Replacement Grease Cartridge OptiPro Systems, LLC. Page 24 of 111 Last Modified: 8/27/2014... -
Page 25: Tool Spindle & Tool Holder Precautions
For machines NOT EQUIPPED with Coolant-Through-Spindle (CTS), only use tool holders WITHOUT through-holes or those with plugs. Thread-in plugs can typically be purchased from the tool holder manufacturer. Figure 5-19: HSK 63F Tool Holder back end with threaded plug installed. OptiPro Systems, LLC. Page 25 of 111 Last Modified: 8/27/2014... - Page 26 I is the tool inertia in kg/m2, is the programmed angular velocity of the tool in rad/s (never to exceed 30m/s linear edge velocity). See Section 9.9 for cleaning instructions. OptiPro Systems, LLC. Page 26 of 111 Last Modified: 8/27/2014...
-
Page 27: Work Holding Chucks
Never actuate the chuck without a properly manufactured shank in the chuck. Only use steel, aluminum, or similar metals and alloys. Reducing collets are available. Contact OptiPro Systems for details. All shanks inserted into the chuck must be within the following tolerance: ... -
Page 28: Work And Tool Probing
C-axis and the work probe is typically located on the right side of the spindle. Tool Probe Figure 5-22: Tool Probe mounting location Work Probe Figure 5-23: Work Probe mounting location Use of the probes is described further in the Software Interface section 7. OptiPro Systems, LLC. Page 28 of 111 Last Modified: 8/27/2014... -
Page 29: Integrated Spherometer
The integrated handheld spherometer is located on the utility tray on the front of the machine. The spherometer can be used in correcting a radius. Spherometer bells are interchangeable. See Section 7.6.3.2.3 for additional information on using the spherometer. Contact OptiPro Systems to purchase additional spherometer bells. OptiPro Systems, LLC. Page 29 of 111... -
Page 30: Start Up, Shut Down, And Emergency Recovery Procedure
Walk around the machine and complete the start of shift maintenance (Section 9.1.1). Release the E-STOP button and press the RESET button, found on the control panel. Press the SERVOS button. Your machine is now ready for normal use. OptiPro Systems, LLC. Page 30 of 111 Last Modified: 8/27/2014... -
Page 31: Shutdown
If the machine needs to be referenced, all fixtures and tools should be removed from inside the machine. Press the button labeled ZERO and then the green CYCLE START button to begin the referencing routine. OptiPro Systems, LLC. Page 31 of 111 Last Modified: 8/27/2014... -
Page 32: Software Interface
Job is running or while the machine is in motion. Navigation / Function These buttons provide additional screen navigation and function options and Buttons change based on the current screen. OptiPro Systems, LLC. Page 32 of 111 Last Modified: 8/27/2014... -
Page 33: G-Series Submenu
Will minimize the G-Series software to the operating system. Close Exits the G-Series software to the operating system. About Displays the current software version number. Close Menu Closes the menu and returns to the previous screen. OptiPro Systems, LLC. Page 33 of 111 Last Modified: 8/27/2014... -
Page 34: Manual Jog Mode
Note: Some machines are equipped with Constant Torque Technology (CTT) to improve surface finish. With CTT, the Spindle Load Meters will start in the 60%-70% range and will have only slight variation during operation. OptiPro Systems, LLC. Page 34 of 111 Last Modified: 8/27/2014... -
Page 35: Automatic Mode, For Jobs And External Programs
Press E-STOP on the Jog Panel (Figure 5-9) to stop all axes, spindles, and coolant flow; work holding vacuum will remain active. See Section 6.3 for more information regarding E-Stop. b. Continue the cycle by pressing the CYCLE START button on the Jog Panel (Figure 5-6). OptiPro Systems, LLC. Page 35 of 111 Last Modified: 8/27/2014... -
Page 36: G-Code Viewer
In Emergencies: Press the E-STOP button on the Jog Panel (Figure 5-9) in any situation in which the operator feels it is warranted to immediately halt axis motion. See Section 6.3 for more information regarding E-Stop. OptiPro Systems, LLC. Page 36 of 111 Last Modified: 8/27/2014... -
Page 37: Tools And The Tool Library
Scoop (Section 7.5.9) Scooping tools are thin walled hemispherical shaped ring tools used to scoop out lens blanks from a boule. OptiPro Systems, LLC. Page 37 of 111 Last Modified: 8/27/2014... -
Page 38: Add, Delete, And Update Library Tools
Overall height of the ring tool, not including the shank, typically measured from the bottom of the cutting band to the top of the “bell”. Diamond Height Height of the abrasive material as measured from the bottom of the cutting band to the OptiPro Systems, LLC. Page 38 of 111 Last Modified: 8/27/2014... -
Page 39: Ball Tools
Additional information that can be used to describe the tool. Ball Diameter Measured outside diameter of the tool. Grit Grit rating of the abrasive material of the tool. Shank Diameter Measured diameter of the shank of the tool. OptiPro Systems, LLC. Page 39 of 111 Last Modified: 8/27/2014... -
Page 40: Edge Tools
Measured diameter of the shank of the tool. Diamond Height Height of the abrasive material as measured from the bottom of the cutting band to the top of the cutting band. OptiPro Systems, LLC. Page 40 of 111 Last Modified: 8/27/2014... -
Page 41: End Mill Tools
Description Name A descriptive name that differentiates one tool from another. Description Additional information that can be used to describe the tool. Tool Diameter Measured outside diameter of the tool. OptiPro Systems, LLC. Page 41 of 111 Last Modified: 8/27/2014... -
Page 42: Toroid Tools
Wheel Width Width of the wheel bond in the axial direction. Grit Grit rating of the abrasive material of the tool. Shank Diameter Measured diameter of the shank of the tool. OptiPro Systems, LLC. Page 42 of 111 Last Modified: 8/27/2014... -
Page 43: Rfid Tools
A serial number that is used to identify a particular tool. Read ID Reads the current ID number that is associated with a particular tool. Write ID Writes the ID number to the RFID chip in the tool. OptiPro Systems, LLC. Page 43 of 111 Last Modified: 8/27/2014... -
Page 44: Scoop Tools
Measured outside diameter of the tool. Inside Diameter Measured inside diameter of the tool. Grit Grit rating of the abrasive material of the tool. Shank Diameter Measured diameter of the shank of the tool. OptiPro Systems, LLC. Page 44 of 111 Last Modified: 8/27/2014... -
Page 45: Creating And Running Jobs
After loading an existing job it is advised to re-probe tool lengths and part reception height before processing. Once they have been setup and checked by a qualified operator, the job is ready to run. OptiPro Systems, LLC. Page 45 of 111... -
Page 46: Deleting An Existing Job
Note: Remember to save your job regularly during set-up. The [SAVE JOB] button only works when you are at the HOME screen. This is done to safeguard against saving an incomplete process. When the [SAVE JOB] button is inactive, the text color will be red. OptiPro Systems, LLC. Page 46 of 111 Last Modified: 8/27/2014... - Page 47 (Optional) Sets the air pressure that can be used to lift an optic off its vacuum fixture after processing, typically set below 1 bar, activated by the Footswitch (Section 5.2.1). OptiPro Systems, LLC. Page 47 of 111 Last Modified: 8/27/2014...
- Page 48 7. Tap [OK] to accept the values entered in the Lens Blank Parameter fields and enter the job HOME screen to begin adding processes to the job, detailed in the sections below. OptiPro Systems, LLC. Page 48 of 111 Last Modified: 8/27/2014...
- Page 49 Imported from Lens Blank parameters or the previous process if one exists. Shape Choose from Convex or Concave. Finished Radius Final spherical radius for this process. 4. Tap [>>] to continue to the Tool screen. OptiPro Systems, LLC. Page 49 of 111 Last Modified: 8/27/2014...
- Page 50 Probed tool length, automatically filled after probing. Description (Imported from Library) Additional information used to describe the tool. RFID Active Activates the use of RFID checking if so equipped. Tool Dressing See Section 7.6.3.8 OptiPro Systems, LLC. Page 50 of 111 Last Modified: 8/27/2014...
- Page 51 XZ: Feed direction is in the X and Z axes simultaneously to follow the path dictated by the head angle. Lens RPM Rotational speed of the work spindle. Tool RPM Rotational speed of the tool spindle. OptiPro Systems, LLC. Page 51 of 111 Last Modified: 8/27/2014...
- Page 52 To clear any active corrections tap [CLEAR], then select the correction type to clear and tap [OKAY] to return to the main corrections screen. Figure 7-19: Spherical Process – Main Corrections Screen OptiPro Systems, LLC. Page 52 of 111 Last Modified: 8/27/2014...
- Page 53 [SAVE JOB]. When correcting a nib, the part should ALWAYS be cut again before doing any other corrections as the nib correction can affect CT and radius correction. OptiPro Systems, LLC. Page 53 of 111 Last Modified: 8/27/2014...
- Page 54 18. Tap [APPLY] to accept the changes and return to the main Spherical Process Corrections screen. 19. Tap [OK] to accept the new or modified process and return to the HOME screen. Save the changes to the job by tapping [SAVE JOB]. OptiPro Systems, LLC. Page 54 of 111 Last Modified: 8/27/2014...
- Page 55 Measure the lens radius offline with a profilometer or spherometer (or other device). iii. Enter the value into the “Measured Radius” field. iv. Tap [APPLY] to accept the correction value. OptiPro Systems, LLC. Page 55 of 111 Last Modified: 8/27/2014...
- Page 56 Place the integrated spherometer on the work piece and press the trigger button ONCE again to capture the Measured Radius, or tap [STORE]. v. Tap [APPLY] to accept the correction value. OptiPro Systems, LLC. Page 56 of 111 Last Modified: 8/27/2014...
- Page 57 22. Tap [APPLY] to accept the changes and return to the main Spherical Process Corrections screen. 23. Tap [OK] to accept the new or modified process and return to the HOME screen. Save the changes to the job by tapping [SAVE JOB]. OptiPro Systems, LLC. Page 57 of 111 Last Modified: 8/27/2014...
- Page 58 [ACCEPT] to store the value. The amount of adjustment should not exceed 20μm under normal conditions. If excessive adjustment is required, then the machines tram should be checked (see Section 11). OptiPro Systems, LLC. Page 58 of 111 Last Modified: 8/27/2014...
- Page 59 (Calculated) Best fit spherical radius of the asphere, material safe. Max Departure (Calculated) Maximum departure of the asphere from the Best Fit Sphere. Center Departure (Calculated) Departure in the center of the asphere from the Best Fit Sphere. OptiPro Systems, LLC. Page 59 of 111 Last Modified: 8/27/2014...
- Page 60 5. Display the Sag table calculated by G-Series by tapping [SAG TABLE] and compare to a known table as an additional verification that the parameters have been entered correctly. Figure 7-27: Aspheric Process – Sag Table OptiPro Systems, LLC. Page 60 of 111 Last Modified: 8/27/2014...
- Page 61 Secure the tool in the correct spindle. b. Tap [PROBE TOOL] to begin the automated probing routine. Always use caution when using the automated probing sequences. 8. Tap [>>] to proceed to the Asphere Cut screen. OptiPro Systems, LLC. Page 61 of 111 Last Modified: 8/27/2014...
- Page 62 Safety Height). Coolant Through (Optional) If active, will activate coolant center-feed through the spindle. Vacuum Monitoring (Optional) If active, will monitor for vacuum loss during a processing cycle. OptiPro Systems, LLC. Page 62 of 111 Last Modified: 8/27/2014...
- Page 63 Nib Corrections: Enter the measured nib, can be positive or negative b. Center Thickness: Enter the measured CT, or tap [PROBE CT] to initiate the automated probing sequence. Always use caution when using the automated probing sequences. OptiPro Systems, LLC. Page 63 of 111 Last Modified: 8/27/2014...
- Page 64 Definition Initial Diameter Imported from Lens Blank parameters or the previous process if one exists. Diameter Final diameter for this process. 4. Tap [>>] to continue to the Tool screen. OptiPro Systems, LLC. Page 64 of 111 Last Modified: 8/27/2014...
- Page 65 8. Define the Cut Parameters. The available Cut and Feed options depend on the tool selected (edge or ring tool) on the previous screen. See Table 7-21 for additional details. OptiPro Systems, LLC. Page 65 of 111 Last Modified: 8/27/2014...
- Page 66 It is recommended to use a Head Angle between 1° and 5° for better results. Lens RPM Rotational speed of the work spindle. Tool RPM Rotational speed of the tool spindle. OptiPro Systems, LLC. Page 66 of 111 Last Modified: 8/27/2014...
- Page 67 (Optional) If active, will activate coolant center-feed through the spindle. Vacuum Monitoring (Optional) If active, will monitor for vacuum loss during a processing cycle. 9. Tap [>>] to proceed to the Edge Corrections screen. OptiPro Systems, LLC. Page 67 of 111 Last Modified: 8/27/2014...
- Page 68 12. To clear all active corrections for this process tap [CLEAR ALL]. 13. Tap [OK] to accept the new or modified process and return to the HOME screen. Save the changes to the job by tapping [SAVE JOB]. OptiPro Systems, LLC. Page 68 of 111 Last Modified: 8/27/2014...
- Page 69 Imported from Lens Blank parameters or the previous process if one exists. Bevel Width Face width of the bevel to be created. Bevel Angle Angle of the bevel. 4. Tap [>>] to continue to the Tool screen. OptiPro Systems, LLC. Page 69 of 111 Last Modified: 8/27/2014...
- Page 70 Secure the tool in the correct spindle. b. Tap [PROBE TOOL] to begin the automated probing routine. Always use caution when using the automated probing sequences. 7. Tap [>>] to proceed to the Bevel Cut screen. OptiPro Systems, LLC. Page 70 of 111 Last Modified: 8/27/2014...
- Page 71 (Optional) If active, will activate coolant center-feed through the spindle. Vacuum Monitoring (Optional) If active, will monitor for vacuum loss during a processing cycle. 9. Advance to the Bevel Corrections screen by tapping [>>]. OptiPro Systems, LLC. Page 71 of 111 Last Modified: 8/27/2014...
- Page 72 16. To clear all active corrections for this process tap [CLEAR ALL]. 17. Tap [OK] to accept the new or modified process and return to the HOME screen. Save the changes to the job by tapping [SAVE JOB]. OptiPro Systems, LLC. Page 72 of 111 Last Modified: 8/27/2014...
- Page 73 Lower Sag Dia Lower sag diameter of lens to be held in fixture. CT of lens to be held in fixture. 4. Tap [>>] to continue to the Tool screen. OptiPro Systems, LLC. Page 73 of 111 Last Modified: 8/27/2014...
- Page 74 Secure the tool in the correct spindle. b. Tap [PROBE TOOL] to begin the automated probing routine. Always use caution when using the automated probing sequences. 7. Tap [>>] to proceed to the Fixture Cut screen. OptiPro Systems, LLC. Page 74 of 111 Last Modified: 8/27/2014...
- Page 75 Rate at which the tool will feed into the part during cutting. Dwell Time to dwell during cut at final depth before retracting. 9. Advance to the Fixture Corrections screen by tapping [>>]. OptiPro Systems, LLC. Page 75 of 111 Last Modified: 8/27/2014...
- Page 76 12. To clear all active corrections for this process tap [CLEAR ALL]. 13. Tap [OK] to accept the new or modified process and return to the HOME screen. Save the changes to the job by tapping [SAVE JOB]. OptiPro Systems, LLC. Page 76 of 111 Last Modified: 8/27/2014...
- Page 77 Diameter Imported from Lens Blank parameters or the previous process if one exists. Finished Radius Final spherical radius for this process. 17. Tap [>>] to continue to the Tool screen. OptiPro Systems, LLC. Page 77 of 111 Last Modified: 8/27/2014...
- Page 78 Tap [PROBE TOOL] to begin the automated probing routine. Always use caution when using the automated probing sequences. 20. Tap [>>] to proceed to the Scoop Cut screen. 21. Fill in the Cut and Feed Parameters. OptiPro Systems, LLC. Page 78 of 111 Last Modified: 8/27/2014...
- Page 79 (Optional) If active, will monitor for vacuum loss during a processing cycle. CCW Work Spindle (Optional) If active, will allow work spindle to rotate counter-clockwise. 22. Advance to the Scoop Corrections screen by tapping [>>]. OptiPro Systems, LLC. Page 79 of 111 Last Modified: 8/27/2014...
- Page 80 25. To clear all active corrections for this process tap [CLEAR ALL]. 26. Tap [OK] to accept the new or modified process and return to the HOME screen. Save the changes to the job by tapping [SAVE JOB]. OptiPro Systems, LLC. Page 80 of 111 Last Modified: 8/27/2014...
- Page 81 Tap [Probe] to begin automated probing routine to determine dressing stick reception height. NOTE: Always use caution when probing dressing stick, collision issues my occur. Tap [Dress] to begin the dressing program. OptiPro Systems, LLC. Page 81 of 111 Last Modified: 8/27/2014...
-
Page 82: Executing A Process In A Job
In Emergencies: Press the E-STOP button on the Jog Panel (Figure 5-9) in any situation in which the operator feels it is warranted to immediately halt axis motion. See Section 6.3 for more information regarding E-Stop. OptiPro Systems, LLC. Page 82 of 111 Last Modified: 8/27/2014... -
Page 83: Settings
Parameters used for machine alignment and tram. These parameters should only be modified by trained personnel or OptiPro Technicians. Machine Parameters Displays the alignment information of the tool spindle centerline in relation to the B-axis centerline. OptiPro Systems, LLC. Page 83 of 111 Last Modified: 8/27/2014... -
Page 84: Settings
Factory set hardware configuration for the specific machine. Tool Load Meter Threshold Factory set hardware configuration for the specific machine. Tram Probing Factory set hardware configuration for the specific machine. OptiPro Systems, LLC. Page 84 of 111 Last Modified: 8/27/2014... -
Page 85: Error Recovery And Troubleshooting
Use the pushbuttons to move the switch point to the desired location. After about 2 seconds of no activity then the switch should resume normal operation. OptiPro Systems, LLC. Page 85 of 111 Last Modified: 8/27/2014... -
Page 86: Cleaning If Necessary
SERVOS on, then ZERO and then CYCLE START. This will reference the axes and your machine will be ready for production. Contact OptiPro Service if additional support is needed. OptiPro Systems, LLC. Page 86 of 111 Last Modified: 8/27/2014... - Page 87 RIGHT DRAWBAR EXTEND (UNCLAMP TOOL) SLOW FAULT RIGHT DRAWBAR SWITCH FAULT M102 RF PROBE FAULT M107 S1 LEFT TOOL SPINDLE NOT OK TO RUN FAULT M108 S1 LEFT TOOL SPINDLE SPEED TIMEOUT FAULT OptiPro Systems, LLC. Page 87 of 111 Last Modified: 8/27/2014...
- Page 88 WAITING FOR GRINDER RIGHT TOOL SPINDLE AT SPEED M210 MOTION STOP ACTIVE M220 C-AXIS BRAKE DISABLED WHILE HAND WHEEL C-AXIS SELECTED M223 CTS FLOW NOT MONITORED M225 SINGLE BLOCK MODE ENABLED OptiPro Systems, LLC. Page 88 of 111 Last Modified: 8/27/2014...
-
Page 89: Machine Maintenance
Check the fluid level in the chiller and top-off if it is low with 30% Ethylene Glycol and 70% Distilled Water; OptiPro recommends DOWTHERM SR-1. Wipe down the machine’s exterior. OptiPro Systems, LLC. Page 89 of 111 Last Modified: 8/27/2014... -
Page 90: Monthly Maintenance
Safety windows provided are polycarbonate which can deteriorate over time, and must be replaced every 3-years to provide a reasonable level of safety. See Section 9.8 for more information. OptiPro Systems, LLC. Page 90 of 111 Last Modified: 8/27/2014... -
Page 91: Cleaning The Centrifuge
Bolt the top back on the catch basin, making sure to line up the dowel pin. 6. Put the lid back on the centrifuge, making sure that the safety switch is in the correct orientation, and tighten the 4 wing nuts. OptiPro Systems, LLC. Page 91 of 111 Last Modified: 8/27/2014... -
Page 92: Replacing Existing Safety Windows
User Manual – eSX 9.8 Replacing Existing Safety Windows OptiPro Systems recommends that machine enclosure windows made of polycarbonate be replaced every three (3) years with Makrolon AR2 brand polycarbonate 6mm thick. A longer term upgrade option is to replace existing polycarbonate panels with laminated glass complying with ISO 23125-B1 standard. - Page 93 Use care when tightening screws. Install the other three window brackets in the same method. Laminated Safety Glass Bottom Window Bracket 4. Repeat steps 1 through 3 for the opposite window. OptiPro Systems, LLC. Page 93 of 111 Last Modified: 8/27/2014...
- Page 94 Bracket Screws Rail Clips Table cover 2. Remove the plate on the left inside face of the machine with the rubber window wiper attached. Wiper Bracket Screws Window Wiper Plate OptiPro Systems, LLC. Page 94 of 111 Last Modified: 8/27/2014...
- Page 95 Place another bead of silicone along the inside of the window frame before installing the new window. Window Brackets OptiPro Systems, LLC. Page 95 of 111 Last Modified: 8/27/2014...
- Page 96 3. Top door rail (View from top of machine) Bottom door rail (View from front machine door) OptiPro Systems, LLC. Page 96 of 111 Last Modified: 8/27/2014...
-
Page 97: Cleaning The Tool-Holder And Spindle
Do not direct jets of compressed air into the spindle shaft when the tool-holder is absent. OptiPro Systems, LLC. Page 97 of 111 Last Modified: 8/27/2014... -
Page 98: Lubrication Of Tool Spindle Locking Mechanism
3. Remove the HSK tool holder, and wipe away any visible lumps of grease with a clean dry cloth. Figure 9-4: Lubricating the Spindle Drawbar Fingers. OptiPro Systems, LLC. Page 98 of 111 Last Modified: 8/27/2014... -
Page 99: Appendices
Before starting the tram procedure, make sure that your work holding chuck does not have excessive run out. If it does, loosen the bolts, tap it in, and retighten the bolts. OptiPro Systems, LLC. Page 99 of 111 Last Modified: 8/27/2014... -
Page 100: Check Hydraulic Chuck Run Out
5. Repeat steps 2, 3 and 4 until the indicator reads between 0-2 µm. 6. Make sure all bolts are tightened completely and the chuck is still within the 2 µm. OptiPro Systems, LLC. Page 100 of 111 Last Modified: 8/27/2014... -
Page 101: Accessing The Tram Screens
Now that the spindle centerlines are parallel to each other, the next step is to make them coaxial. This is performed by using an indicator mounted in the tool spindle to sweep around a pin placed in the work OptiPro Systems, LLC. Page 101 of 111... - Page 102 This is an important step that will ensure you are using the correct B-axis zero position for each tool spindle that was found in the previous tram page. Figure 10-3: Tram - Spindles Aligned screen to make the tool and work spindle centerlines coaxial OptiPro Systems, LLC. Page 102 of 111 Last Modified: 8/27/2014...
-
Page 103: Tram - Center Of B
Figure 10-4: Tram - Center of B. This page walks the user through locating the center of the B-axis to the center of a tool ball OptiPro Systems, LLC. Page 103 of 111 Last Modified: 8/27/2014... -
Page 104: Tram - Pinch Test
Do not forget to tap [SET OFFSET] before continuing to the next screen. Figure 10-5: Tram - Pinch Test screen. This screen establishes the heights between the tool and the work piece in relation to the center of B OptiPro Systems, LLC. Page 104 of 111 Last Modified: 8/27/2014... -
Page 105: Tram - Tool Probe
[ALIGN L] and [ALIGN R] to make sure the values are input in the proper location for your machines configuration. Figure 10-6: Tool Probe Screen. This screen will automatically find the alignment of the tool probe OptiPro Systems, LLC. Page 105 of 111 Last Modified: 8/27/2014... -
Page 106: Tram - Lens Probe
After the Lens Probe operation is complete, tap [OK]. This will bring you back to the main SETTING page. Tap [VALIDATE] to accept the new tram values. From here you can tap [HOME] to return to the previously loaded job, and use your OptiPro grinding machine normally. OptiPro Systems, LLC. Page 106 of 111 Last Modified: 8/27/2014... -
Page 107: Tramming Tips
Remember, the right side of zero on the indicator is plus and the left side is minus. If there are issues with tramming don’t hesitate to call OptiPro Systems. OptiPro Systems, LLC. Page 107 of 111 Last Modified: 8/27/2014... -
Page 108: Manual Commands
End program, Stop Spindles Reference Program Complete Enable Tool RFID Cycle Trip Tool RFID Cycle Orient Tool Spindle Disable Orient Tool Spindle Enable Laser Probe Enable Laser Probe Disable CTS Flow Monitoring Enable OptiPro Systems, LLC. Page 108 of 111 Last Modified: 8/27/2014... - Page 109 TC Arm Home Position Synchronous 2-Arm ATC TC Arm Pick Position Synchronous 2-Arm ATC TC Arm Place Position Synchronous 2-Arm ATC Ultrasonic Tool Check Open File to Write to Write Line to File Close File OptiPro Systems, LLC. Page 109 of 111 Last Modified: 8/27/2014...
-
Page 110: Manual Axis Positioning
(3=Clockwise, 4=Counter Clockwise). For the tool spindle this is used to specify Left or Right spindle (3=Left, 4=Right). EXAMPLE: S1=2000M3 (spin Left tool spindle at 2000rpm) S2=200M4 (spin work spindle at 200rpm) See Fagor CNC 8070 Quick Reference for additional information. OptiPro Systems, LLC. Page 110 of 111 Last Modified: 8/27/2014... -
Page 111: Spare Parts And Consumables
OptiPro: 60635A | BIESSE: 2422A0135 5 Micron CTS Filter OptiPro: 60634A | BIESSE: 2422A0136 Pneumatic Automatic Greaser OptiPro: 60593A | LUBE USA: 249126 Grease Cartridge MetaFlux Spray OptiPro: 63977A | MetaFlux: 70-82 OptiPro Systems, LLC. Page 111 of 111 Last Modified: 8/27/2014...
Need help?
Do you have a question about the eSX 300 CTS and is the answer not in the manual?
Questions and answers