Advertisement
Quick Links
Advertisement

Summary of Contents for BlueTinum BT-H1506A
- Page 1 Internet/DAB/FM Radio BT-H1506A Internet /DAB/FM Radio Manual - 1 -...
-
Page 2: Important Safety Instructions
C A U T I O N TO PREVENT FIRE OR SHOCK HAZARD, DO NOT USE THIS PLUG WITH AN EXTENSION CORD, RECEPTACLE OR OTHER OUTLET UNLESS THE BLADES CAN BE FULLY INSERTED TO PREVENT BLADE EXPOSURE. TO PREVENT FIRE OR SHOCK HAZARD, DO NOT EXPOSE THIS APPLIANCE TO RAIN OR MOISTURE. - Page 3 Welcome Thank you for purchasing BlueTinum® BT-H1506A. Your BT-H1506A is designed to provide you with hours of music enjoyment with simple, convenient access to thousands of Internet radio stations worldwide and furthermore with DAB/FM and music streaming options. No matter whether you are in Alaska and wants to listen to Hawaiian music, or whether you want to listen to classical music, hard rock or jazz the BT-H1506A brings you home the radio station of your choice.
- Page 4 16. Troubleshooting – connecting to an internet station ···························· Page 37 1. Content of package Please make sure that the following content are included in the package: 1. BT-H1506A Digital Media Player Main unit 2. Power supply 3. BT-H1506A User Manual...
- Page 5 2. Before you start Before you can use your internet radio, you need the following: 1. A broadband internet connection. 2. A wireless access point connected to your broadband internet. Via a router is recommended. 3. If your wireless network is configured to use WEP (Wired Equivalent Privacy) or WPA (Wi-Fi Protected Access) data encryption, it is important that you know your WEP or WPA code to connect to your network.
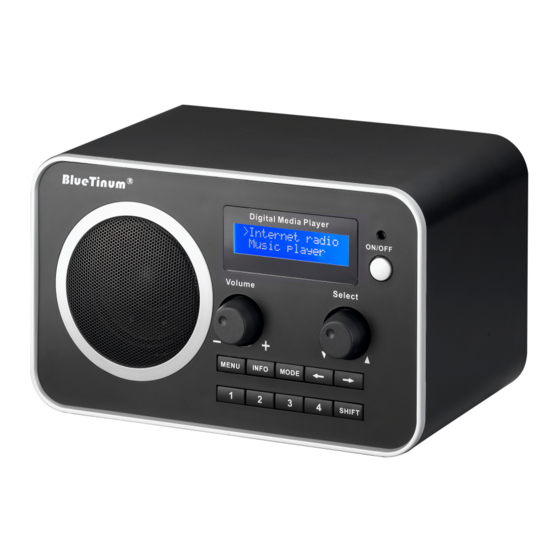
- Page 6 Please refer to your wireless access point manual to get this part working. 3. Overview of your BT-H1506A After taking your BT-H1506A out of the package, please spend some time to familiarize yourself with its features. 3.1 Front Panel VOL = By Turning VOL knob Volume level is set.
- Page 7 Preparing BT-H1506A for operation: 1. Place BT-H1506A on a flat surface. 2. If you are accessing the internet via wired Ethernet LAN, place BT-H1506A near Ethernet LAN access and proceed to 6. Setting up the BT-H1506A (Wired access is optional and may not be available in your BT-H1506A) 3.
- Page 8 ARROW button and the Menu is showing on display. Turn the TUNE knob until MAIN MENU is selected. Press TUNE knob to select MAIN MENU. Pressing MENU on front panel will take you to the Context Menu of the present mode of BT-H1506A (Internet, DAB etc.) Menu Structure - 8 -...
- Page 9 ■ ■ ■ ■ ■ Power on screen BT-H1506A has numerous features which require a small degree of setup before users are able to fully use all the functionalities of the radio. The Main Menu System Setup menu has a series of options that allow system-wide settings to be altered.
- Page 10 Connecting”, “Please wait Acquiring address” and “Connected” The Internet Radio menu will be displayed. 5. If the network has a security feature enabled the BT-H1506A will prompt you to enter the key or pass phrase. The security details must match the security information configured in the wireless access point.
- Page 11 IP Settings (Displays current IP Address, Subnet Mask, Gateway Address, Primary DNS or Secondary DNS) 6.4 Using the BT-H1506A On power up the BT-H1506A accesses the last mode or service selected. To access another mode: 1. Press Menu button on front panel to display Context menu of the mode you are in.
- Page 12 Hour. When selected press TUNE knob to confirm setting. 7.6 Set Sleep: Select Sleep. Turn TUNE knob to choose between No Sleep, 15, 30, 45 or 60 minutes. Press TUNE knob to confirm. The BT-H1506A will turn off automatically after the desired amount of minutes. - 12 -...
- Page 13 7.7 Set Alarms: Select Alarms. Turn TUNE knob to choose from Alarm 1 or 2. Press TUNE knob to confirm. Press TUNE knob to choose between Time, Off, Mode, Last listened, Volume and Save. Select Time by pressing TUNE knob. Turn TUNE knob to set Hour.
- Page 14 7.7.4 Save: When all settings are as desired. Select SAVE and press TUNE knob to confirm. ALARM will activate even if BT-H1506A is playing. However if playing mode and alarm mode are the same there will only be a short break when alarm enters mode.
- Page 15 2. From this screen left click the ‘Add …’, and enter the new user name and the Domain/Workgroup setting noted above. Select the type of user (restricted) and then select finish. 3. Select the user just created, select ‘Reset Password …’ and enter a password for this user.
- Page 16 Shared media (UPnP) Media sharing uses Windows Media Player (WMP) 11 and above as media server. This mode does not require any setting in the radio, but the PC needs to be configured to allow the radio access to the media. You will only have to do it once, following the next steps.
- Page 17 WMP media sharing window. The radio is shown as Unknown Device The Internet radio is presented as an “Unknown Device”. Make sure that the device has access to the shared media by selecting it and clicking <Allow>. Then click <OK>. The PC is now ready to stream the music to the radio.
- Page 18 Main menu Internet radio Shared media Music player Shared folders Music player context menu Browse System setup Main menu Info The connection process is different depending on the Music Player mode selected. Shared folders The startup flow when entering Music Player Shared folders mode is shown below: - 18 -...
- Page 19 Music Player startup flow 1. Ensure that the user name and password have been configured as described on page 15-16. 2. Enter the music player menu 3. Radio searches for all available domains and shows all found domains 4. Once the user selects a domain, a list of PCs on the domain is displayed: - 19 -...
- Page 20 5. Once a Domain and PC have been chosen, a list of all of the shared folders in the system is displayed. 6. select a folder and a file to play within the folder. 7. Pressing Menu invokes the Music player mode menu, which allows to return to the Main menu;...
- Page 21 Connection flow sequence in Shared media mode - 21 -...
- Page 22 9. The MAIN menu Use navigation key LEFT to go back in the menu. Press several times until “MAIN MENU” is an option in the menu. Choose “MAIN MENU” by pressing “ENTER” on remote or “TUNE” knob on front panel. Display will show: Internet radio Music player System setup...
- Page 23 >Internet radio Music player Up / Down System Setup Internet Wizard Info Main menu >Internet setup Time setup >Wizard >Username Up / Language Password PC settings Down Up / Factory reset View settings Up / PC settings screen Down Down Software upgrade Wlan region Manual settings...
- Page 24 10.3.1 Active adapter Choose this to view the active adapter (WLAN or WIRED). 10.3.2 MAC address Choose this to view the MAC address of the BT-H1506A. 10.3.3 DHCP Choose this to view the DHCP setting. (Enabled or disabled). 10.3.4 PC settings Choose this to view User name or Password set for Music player.
- Page 25 10.5 Manual settings Choose this to manually setup your network. Display will show: >Wired Wireless Note! Wired is an optional feature and may not be available for your BT-H1506A. Choose wireless. Display will show: >DHCP enable DHCP disable - 25 -...
- Page 26 Choose your desired setting. 10.5.1 DHCP enable Display will show: SSID 0123456789< Enter “SSID” by using “TUNE” knob on front panel. Use navigation keys “UP/DOWN” on remote or turn “TUNE” knob to choose between numbers, letters, capital letters or special characters. Enter SSID using >>| <<| buttons on front panel to choose correct number/letter and press “TUNE”...
- Page 27 IP address 0.0.0.0 Enter desired IP address by using”TUNE” knob on front panel. Press “TUNE” knob to go to next number. When fully entered display will show: Subnet mask 255.255.255.0 Enter desired Subnet mask by using ”TUNE” knob on front panel. Press “TUNE” knob to go to next number.
- Page 28 Choose your Security. If Open is chosen (No security) radio will connect. However having No security is not recommended. If any other security (WEP, WPA, WPA2) is chosen, display will show: If WEP is chosen: If WPA is chosen: If WPA2 is chosen: >Open >TKIP >TKIP...
- Page 29 10.9 Info Choose “Info”. Display will show: >SW version Radio ID Choose “SW version” to see the software version. Choose “Radio ID” to see the unique ID of your radio. 10.9.1 Adding favourites and stations Log onto the Frontier Silicon internet radio portal to configure your radio (for example to add favourites or add stations).
- Page 30 6. You should now be on a page used for configuring the favourites and added stations for your specific BT-H1506A. To add stations to the "Favourites" group for your specific Wi-Fi radio, simply browser through the list of stations genres until you find something you want to add, then click on the heart symbol to the left of the station name.
- Page 31 The Internet Radio Stations list menu provides the following functions: Name Description Create an account on http://www.wifiradio-frontier.com/ My favourites When you have created an account you can now add favourites directly to your radio. You can also add your own stations if needed.
-
Page 32: Radio Services
Radio services Status Playing Signal strength ■ ■ ■ ■ ■ Time / date 11:46am 23-03-07 Format Format: 128 kbps / MP3 Reliability Reliability: Excellent Info Description Description: <a description string> Genre Genre: Dance Location Location: Internet Only Pressing the Info Button changes the Example screen Display state... - Page 33 The DAB context menu provides the following functionalities: Name Description Service list Shows a list of all available DAB stations. Local scan Performs a scan of the local DAB ensemble range(for example, a product designed for the UK will scan ensemble 11B to 12D).
-
Page 34: Using Fm Radio
Scroll up / down, menu pressed or No services in list Station Selecting screen Station list menu Service could not be selected Select / Select / DAB Playing >Station List >1Xtra 1Xtra forward Forward screen Local Scan 6 Music Connecting Full Scan Enter Up /... - Page 35 The FM context menu allows you to set up the following: Name Description The Scan settings menu allows the user to set how an FM Scan setting search (started by a long-hold press of the Up/Down keys in the FM Playing screen) behaves. Stop on strong signals only' will only stop under strong signal strengths if other objectives are also meant.
- Page 36 Pressing SHIFT and numeric key 1-4 to store a station to preset (5-8), when station is playing press and hold will show PRESET STORED and the current station will be stored) (stored 5-8) Playing a preset station (5-8) Press SHIFT and numeric key 1-4 with a station already preset. The preset station will play - 36 -...
- Page 37 15. Info and Error Messages The following is a description of the info and error messages that the Wi-Fi radio could possibly display. Message Type Description Failed to Error Seen when a Wi-Fi network related error occurs. Some connect examples of circumstances which will trigger a ‘failed to connect’...
-
Page 38: Troubleshooting - Connecting To An Internet Station
16. Troubleshooting – connecting to an internet station...
Need help?
Do you have a question about the BT-H1506A and is the answer not in the manual?
Questions and answers