Table of Contents
Advertisement
Available languages
Available languages
MODEL / MODÈLE:
715005061
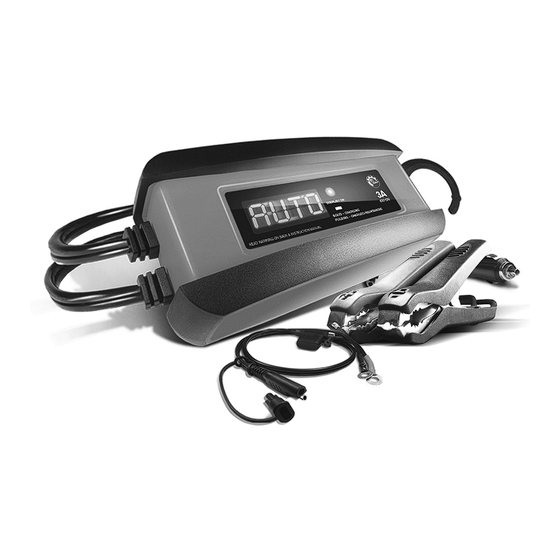
Automatic Battery Charger
Chargeur de batterie automatique
OWNERS MANUAL
MANUEL D'UTILISATION
NOTICE
This product is for usage on Can-Am off-road, Can-Am Spyder and Ski-Doo
only. This product must not be used on Sea-Doo or other watercraft.
Ce produit est pour utilisation sur véhicules Can-Am hors-route,
Can-Am Spyder et Ski-Doo seulement. Ce produit ne doit jamais être utilisé
sur un Sea-Doo ou autre embarcation nautique.
0099001920-02
Advertisement
Table of Contents

Summary of Contents for BRP Schumacher 715005061
- Page 1 MODEL / MODÈLE: 715005061 Automatic Battery Charger Chargeur de batterie automatique OWNERS MANUAL MANUEL D’UTILISATION NOTICE This product is for usage on Can-Am off-road, Can-Am Spyder and Ski-Doo only. This product must not be used on Sea-Doo or other watercraft. Ce produit est pour utilisation sur véhicules Can-Am hors-route, Can-Am Spyder et Ski-Doo seulement.
-
Page 2: Table Of Contents
PLEASE SAVE THIS OWNERS MANUAL AND READ BEFORE EACH USE. This manual will explain how to use the charger safely and effectively. Please read and follow these instructions and precautions carefully. CONTENTS IMPORTANT SAFETY INSTRUCTIONS ..................4 PERSONAL SAFETY PRECAUTIONS ..................5 PREPARING TO CHARGE ......................5 CHARGER LOCATION .........................6 DC CONNECTION PRECAUTIONS....................6... - Page 3 VEUILLEZ CONSERVER LE MANUEL D’INSTRUCTIONS ET LE LIRE AVANT CHAQUE UTILISATION. Ce manuel explique comment utiliser l’unité d’une façon sûre et efficace. Veuillez lire et suivre attentivement ces instructions et précautions. TABLE DES MATIÈRES CONSIGNES DE SÉCURITÉ IMPORTANTES .................17 MESURES DE SÉCURITÉ PERSONNELLE ................18 PRÉPARATION POUR LA CHARGE ..................19 EMPLACEMENT DU CHARGEUR ....................19 PRÉCAUTIONS SUR LA CONNEXION C.C.
-
Page 4: Important Safety Instructions
IMPORTANT SAFETY INSTRUCTIONS SAVE THESE INSTRUCTIONS. 1.1 SAVE THESE INSTRUCTIONS – This manual contains important safety and operating instructions. 1.2 This charger is not intended for use by children. 1.3 Do not expose the charger to rain or snow. 1.4 Use of an attachment not recommended or sold by the battery charger manufacturer may result in a risk of fire, electric shock or injury to persons. -
Page 5: Personal Safety Precautions
PERSONAL SAFETY PRECAUTIONS 2.1 Consider having someone close enough by to come to your aid when you work near a lead-acid battery. 2.2 Have plenty of fresh water and soap nearby in case battery acid contacts skin, clothing, or eyes. 2.3 Wear complete eye protection and clothing protection. -
Page 6: Charger Location
3.6 Determine voltage of battery by referring to car owner’s manual and make sure that output voltage selector switch is set at correct voltage. If charger has adjustable charge rate, charge battery initially at lowest rate. CHARGER LOCATION 4.1 Locate charger as far away from battery as DC cables permit. 4.2 Never place charger directly above battery being charged;... -
Page 7: Follow These Steps When Battery Is Outside Vehicle
to carburetor, fuel lines, or sheet-metal body parts. Connect to a heavy gauge metal part of the frame or engine block. 6.7 When disconnecting charger, turn switches to off, disconnect AC cord, remove clip from vehicle chassis, and then remove clip from battery terminal. 6.8 See Operating Instructions for length of charge information. -
Page 8: Assembly Instructions
• Ensure that the extension cord is properly wired and in good electrical condition. • Wire size must be large enough for the AC ampere rating of charger, as specified below: Length of cord (feet) AWG* size of cord *AWG-American Wire Gauge ASSEMBLY INSTRUCTIONS 9.1 Remove all cord wraps and uncoil the cables prior to using the battery charger. -
Page 9: Operating Instructions
12. OPERATING INSTRUCTIONS IMPORTANT: Do not start the vehicle with the charger connected to the AC outlet, or it may damage the charger and your vehicle. NOTE: This charger is equipped with an auto-start feature. Current will not be supplied to the battery clamps until a battery is properly connected. The clamps will not spark if touched together. - Page 10 USING THE QUICK-CONNECT CABLE CONNECTORS Connect any of the three output cable assemblies to the charger in a matter of seconds. IMPORTANT: Never connect the clamp and ring terminal connectors together for use in other applications, such as external battery or other power source charging, or to extend the output cable length, as reverse polarity and/or overcharge conditions will occur.
- Page 11 BATTERY CHARGING TIMES CCA = Cold Cranking Amps RC = Reserve Capacity Ah = Amp Hour NR = Not Recommended BATTERY SIZE/RATING CHARGE TIME (3A) 6-12 Ah 1½-2½ h SMALL BATTERIES Motorcycle, garden tractor, etc. 12-32 Ah 2½-7 h 200-315 CCA 40-60 RC 7½-9½...
-
Page 12: Display Messages
MAINTAINING A BATTERY The 715005061 maintains both 6 and 12 volt batteries, keeping them at full charge. It can charge small batteries and maintain both small and large batteries. If you are maintaining a fully charged large battery, you are properly utilizing the battery charger. However, if you use this battery charger to charge a large battery, such as a marine deep-cycle battery that was not fully charged, you may not get the battery’s full capacity. -
Page 13: Maintenance And Care
CHARGE ABORTED-BAD BATTERY (Green LED flashing) – Circumstances that could cause an Abort situation during charging: • The battery is severely sulfated or has a shorted cell and can’t reach a full charge. • The battery is too large or there is a bank of batteries and it doesn’t reach full charge within a set time period. -
Page 14: Specifications
PROBLEM POSSIBLE CAUSE REASON/SOLUTION I cannot select a 6V The charger is equipped No problem; this is normal. or 12V setting. with Auto Voltage Detection, which automatically detects the voltage and charges the battery. Green LED is solid The charger needs to check The Green LED will be solid and the display the condition of the battery. -
Page 15: Replacement Parts
17. REPLACEMENT PARTS Battery clamps (quick-connect) ............. 3899002636Z Ring connectors (quick-connect) ..........2299002042Z 12V accessory plug (quick-connect) ..........3899001401Z 18. BEFORE RETURNING For information about troubleshooting, contact customer service for assistance: services@schumacherelectric.com www.batterychargers.com or call 1-800-621-5485, Monday-Friday 7:00am to 5:00pm CST 19. - Page 16 ASSUME OR MAKE ANY OTHER OBLIGATION TOWARDS THE PRODUCT OTHER THAN THIS WARRANTY. Schumacher and the Schumacher logo are registered ® trademarks of Schumacher Electric Corporation. Bombardier Recreational Products Inc. 726 St. Joseph, Valcourt (QC), Canada JOE 2L0 www.brp.com • 16 • 487802781...
-
Page 17: Consignes De Sécurité Importantes
CONSIGNES DE SÉCURITÉ IMPORTANTES CONSERVER CES INSTRUCTIONS. 1.1 CONSERVER CES INSTRUCTIONS – Ce manuel contient des instructions importantes concernant la sécurité et le fonctionnement. 1.2 Ne pas laisser à la portée des enfants. 1.3 Ne pas exposer le chargeur à la pluie ou la neige. 1.4 N’utilisez que les accessoires recommandés. -
Page 18: Mesures De Sécurité Personnelle
MESURES DE SÉCURITÉ PERSONNELLE 2.1 Envisagez qu’une personne soit près de vous lorsque vous travaillez près d’un accumulateur au plomb afin qu’elle puisse vous venir en aide en cas d’urgence. 2.2 Ayez assez d’eau fraîche et du savon à proximité au cas ou votre peau, vos yeux ou vos vêtements viendraient en contact avec l’acide de la batterie. -
Page 19: Préparation Pour La Charge
PRÉPARATION POUR LA CHARGE 3.1 S’il est nécessaire de retirer la batterie du véhicule pour la charger, toujours débrancher la borne de mise à la masse en premier. S’assurer que le courant aux accessoires du véhicule est coupé afin d’éviter la formation d’un arc. 3.2 Assurez-vous que la zone autour de la batterie est bien ventilée lorsque la batterie est en charge. -
Page 20: Étapes À Suivre Lorsque La Batterie Est Installée Dans Un Véhicule
ÉTAPES À SUIVRE LORSQUE LA BATTERIE EST INSTALLÉE DANS UN VÉHICULE AVERTISSEMENT : UNE ÉTINCELLE PRÈS DE LA BATTERIE POURRAIT LA FAIRE EXPLOSER. POUR RÉDUIRE LES RISQUES D’ÉTINCELLE PRÈS DE LA BATTERIE : 6.1 Placer les cordons C.A. et C.C. de manière à éviter qu’ils soient endommagés par le capot, une portière ou les pièces en mouvement du moteur. -
Page 21: Mise À La Terre Et Cordon D'alimentation Ca
7.4 Se placer et tenir l’extrémité libre du câble aussi loin que possible de la batterie, puis raccorder la pince NÉGATIVE (NOIRE) du chargeur à l’extrémité libre du câble. 7.5 Ne pas se placer face à la batterie pour effectuer le dernier raccordement. 7.6 Pour interrompre l’alimentation du chargeur, mettre les interrupteurs hors circuit, retirer le cordon C.A. -
Page 22: Caractéristiques
10. CARACTÉRISTIQUES 1. Cordon d’alimentation CA 2. Affichage numérique 3. Bouton / Affichage et Marche 4. Indicateur DEL 5. Crochet de support 6. Prise accessoire 12 V à connexion rapide 7. Pince de câble à batterie à connexion rapide 8. Cosses à anneaux à connexion rapide 11. - Page 23 CHARGE D’UNE BATTERIE DANS LE VÉHICULE 1. Éteignez tous les accessoires du véhicule. 2. Gardez le capot ouvert. 3. Nettoyez les bornes de la batterie. 4. Placez le chargeur sur une surface sèche, non-inflammable, ou utiliser la fixation du crochet pratique pour accrocher l’appareil en toute sécurité hors de la zone de travail.
- Page 24 source d’alimentation, ou pour prolonger la longueur de câble de sortie, puisqu’uneinversion de polarité et / ou des conditions de surcharge se produiront. CONNEXION RAPIDE AVEC PINCES DE BATTERIE 1. Branchez l’extrémité du câble de sortie du chargeur à l’extrémité du câble de pinces de batterie.
- Page 25 TEMPS DE CHARGE CCA = Intensité du courant électrique au démarrage à froid (ICEDF) RC = Coefficient de capacité de réserve (CR) Ah = Ampère-heure NR = N’est pas recommandé TEMPS DE TAILLE DE LA BATTERIE / CARACTÉRISTIQUES CHARGEMENT (3A) 6-12 Ah 1½-2½...
-
Page 26: Affichage Des Messages
une grande batterie entièrement chargée, vous utiliser correctement le chargeur. Nous ne recommandons pas de charger une grosse batterie avec cet appareil. NOTE : La technologie du mode de maintien vous permet de recharger en toute sécurité et de maintenir une batterie en bon état pendant des périodes de temps prolongées. -
Page 27: Soins Et Entretien
CHARGE ABORTED-BAD BATTERY (DEL verte clignotant rapidement) – Circonstances qui pourraient entraîner une situation d’interruption pendant la charge : • La batterie est fortement sulfatée ou a une cellule en court-circuit et ne peut pas atteindre une charge complète. • La batterie est trop grande ou s’il y a une rangée de batteries qui n’atteint pas la pleine charge dans une période de temps définie. -
Page 28: Caractéristiques
PROBLÈME CAUSE POSSIBLE RAISON / SOLUTION Le chargeur ne s’allume La prise de courant CA est Vérifiez si un fusible est coupé pas lorsqu’il est à plat. ou vérifier le disjoncteur pour correctement branché. cette prise de courant. La batterie est défectueuse. Faire vérifier la batterie. -
Page 29: Pièces De Rechange
17. PIÈCES DE RECHANGE Pince de câble de la batterie à connexion rapide ......3899002636Z Cosses à anneau à connexion rapide .......... 2299002042Z Prise accessoire 12 V à connexion rapide ........3899001401Z 18. AVANT DE RETOURNER Si ces solutions ne permettent pas d’éliminer le problème, ou pour plus d’informations sur le dépannage, contacter le service technique au : services@schumacherelectric.com... - Page 30 ASSUMER TOUTE AUTRE OBLIGATION SE RAPPORTANT À CE PRODUIT QUE CELLES DE CETTE GARANTIE. Schumacher et le logo Schumacher sont des marques ® déposées de Schumacher Electric Corporation. Bombardier Produits Récréatifs Inc. 726 rue St. Joseph, Valcourt (QC), Canada JOE 2L0 www.brp.com • 30 • 487802781...
-
Page 31: Warranty Card
WARRANTY CARD SAVE ON POSTAGE! ACTIVATE YOUR WARRANTY ONLINE – THE QUICK AND EASY WAY! Go to www.batterychargers.com to register your product online. (No internet access? Send in the completed warranty card.) • 31 • 487802781... -
Page 32: Carte De Garantie
CARTE DE GARANTIE PAS BESOIN DE VOIE POSTAL ! ACTIVEZ VOTRE GARANTIE SUR INTERNET – LA VOIE PLUS RAPIDE ET FACILE! Aller sur www.batterychargers.com pour enregistrer votre produit en ligne. (Pas d’accès internet? Envoyer la carte de garantie par poste.) •...
Need help?
Do you have a question about the Schumacher 715005061 and is the answer not in the manual?
Questions and answers