
Summary of Contents for Der Koch OWEN
- Page 1 Model: OWEN Installation and use manual for Der Koch Ovens 60 cm Multifunction oven in stainless steel...
-
Page 2: Table Of Contents
Content 1…………………………………..…………………Important safety information 2…………………………………..…………………Installation 3…………………………………..…………………Prior to start up of the appliance 4…………………………………..…………………Your new oven 5…………………………………..…………………Program and function instruction 6…………………………………..…………………Before using the oven for the first time 7…………………………………..…………………How to operate the oven 8…………………………………..…………………Troubleshooting 9…………………………………..…………………Baking and grilling tips 10…………………………………..………………Maintenance and cleaning 11…………………………………..………………Environmental note 12…………………………………..………………Test dishes... -
Page 3: Important Safety Information
Important safety information This User Instruction Manual contains important information, including safety & installation points, which will enable you to get the most out of your appliance. Please keep it in a safe place so that it is easily available for future reference; for you or any person not familiar with the operation of the appliance. - Page 4 unless necessary for cooking or ● ertain types of vinyl or laminate cleaning purposes. kitchen furniture are particularly prone ● nly use utensils that are suitable for to heat damage or discolouration at use with ovens. temperatures below the guidelines given above.
- Page 5 In case of malfunction, repairs are to be General Safety conducted by qualified personnel only. ● ● o avoid damaging the cord, do not o not place heavy objects on the oven squeeze, bend or chafe it on sharp door or lean them on the oven door edges.
- Page 6 ● ● herefore, it should handle the product onnect the incoming positive, neutral with the greatest care to avoid shocks and earth cables to the terminals of the and twists, especially during installation. switched fused connection unit. Ensure connections are tight. ●...
-
Page 7: Installation
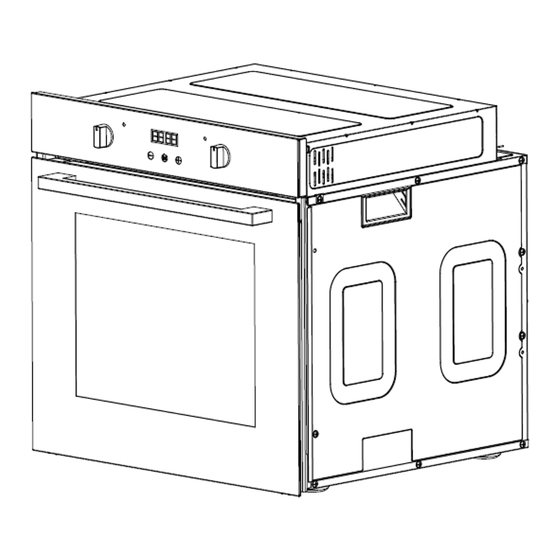
Installation Before installation The appliance should be installed built in the cabinet . It should be keep safety distance with appliance and the kitchen walls. Detail pls check below picture . (values in mm). Surfaces, synthetic laminates and adhesives used must be heat resistant(100℃ minimum), and neighboring unit fronts up to 70℃. - Page 8 Installation and connection ▲ Material damage! The door and/or handle must not be used for lifting or moving the appliance. For installation the appliance must be connected in accordance with all local gas and/or electrical regulations. Carry the appliance with at least two persons. ...
-
Page 9: Prior To Start Up Of The Appliance
Prior to start up of the appliance ➢ Once this simple operation has been carried out the oven is ready to use for cooking. ➢ This appliance is exclusively for domestic use. ➢ Use the oven to cook food only. ➢... - Page 10 B. Technical specifications Voltage/frequency 220V~/60Hz Total power consumption 2790W Cable type/section H05VV-F 3*1.5mm Cable length 1.2m External dimensions(height/width/depth) 595/595/593(mm) Installation dimensions(height/width/depth) 600/600/ min 595(mm) Main oven Multifunction oven Energy efficiency class Oven lamp 25W/300°C Grill power consumption 2790W C. Your accessories •...
- Page 11 Oven pan For moist cakes, pastries, frozen meals and large roasts. It can also be used to catch dripping fat when you are grilling directly on the wire rack. Oven deep pan (Only for some models) Used for pastries, large roasts, juicy dishes, and for collecting the fat while grilling. Wire rack Used for roasting and for placing the food to be baked, roasted or cooked in casserole dishes to the desired rack.
- Page 12 D. Control panel Here, you will see an overview of the control panel. Depending on the appliance model, individual details may differ. Function selector Use the function selector to set the type of heating. This appliance have 10 grill functions available. OVEN LIGHT: This mode switches on the oven light and other electric devices do not work.
- Page 13 hamburgers, some vegetables etc. FAN OVEN: This method of cooking uses the circular element whilst the heat is distributed by the fan. This results in a faster and more economical cooking process. The fan oven allows food to be cooked simultaneously on different shelves, preventing the transmission of smells and tastes from one dish onto another.
- Page 14 Display section diagram 2. Timer working status Switching the timer status The timer has 3 status, they are standby, function to be selected and working status. Stand-by status: After connected to the power supply, the display screen displays the system time, the decimal point symbol flashes, it is the status before entering cooking function;...
- Page 15 Timer function mode switching diagram 4. Operation instructions 4.1 Power on For the first time, the buzzer “beep” for one time to show that the timer enters into the standby state. The clock shows the time of the system and starts the timing. Power-on displays as “0·00”, the display screen displays the system time, the decimal point symbol “...
- Page 16 Press button“ ” again for 3 seconds, oven is turned off and returns to standby status. The display of pic 6 is flashing. Pic 8 System time well set diagram Note 1:System time setting range is 0:00-23:59. Note 2:When setting the time for each function of the timer, you can set the time by short press or long press “...
- Page 17 Pic 11 Alarm clock working status diagram Pic 12 Alarm clock time over diagram (alarm clock icon always bright) (alarm clock icon flickering) For example, set the clock 10 minutes. After10 minutes, display screen shows system time, oven in use symbol“ ”...
- Page 18 done, the display will change back to system time, decimal point symbol “ ” and system time keep bright. See Pic 16. Pic 16 Cooking time working status Pic 17 Cooking time over diagram (All the icons always bright) (All the icons flickering) Pic 18 Cancel “Auto”...
- Page 19 Pic 19 Cooking end time setting initial state Pic 20 Cooking end time well set state After choosing the time , lift the finger off the buttons and wait for 5 seconds, then the icon “AUTO” and oven in use symbol “ ”stop twinkling and change to always bright.
- Page 20 First, press button “ ” 3 times, then the icon “AUTO” and oven in use symbol icon“ ”twinkle. The screen shows the cooking time ( First set default display “0·00”).When the icon “AUTO” and oven in use symbol “ ”twinkle, user can set the cooking time by pressing“...
-
Page 21: Before Using The Oven For The First Time
Pic 30 Cancel “Auto” function symbol display diagram(After cooking finished) Note :Cooking time setting range is within 10 hours. 4.7 Selecting the audible signal The audible signal has 3 tones. To adjust the signal you should proceed as follows: Under standby mode, that is when display screen shows system time, decimal point symbol “... -
Page 22: How To Operate The Oven
Tips for saving energy The following information will help you to use your appliance in an ecological way, and to save energy: 1、Use dark coloured or enamel coated cookware in the oven since the heat transmission will be better. 2、While cooking your dishes, perform a preheating operation if it is advised in the user manual or cooking instructions. -
Page 23: Troubleshooting
Troubleshooting The oven may have some abnormal breakdown during working, you can check the fault list before calling to the after-sell service, maybe some breakdown you can repair by yourself. Normal operation: When first using the oven, it may have some situation of peculiar smell and smoking for some hours;... -
Page 24: Baking And Grilling Tips
Normal open thermostat If the air temperature from the outlet is have a problem room temperature, need change for a new normal open thermostat If the problem has not been solved: 1. Separate unit from the mains supply(deactivate or unscrew fuse). 2. Call the after-sales service of your store reseller; Do not attempt to repair the appliance yourself. -
Page 25: Maintenance And Cleaning
will allow them to brown evenly and remain succulent and juicy. Turn the food you are grilling after 2/3 of the time. Do not add salt to steaks until they have been grilled. Add in a little liquid if the meat is lean. Cover the base of the ovenware with approx.1/2 cm of liquid. - Page 26 ⚫ Any stains that may appear on the bottom of the oven will have originated from food splashes or spilt food, these splashes occur during the cooking process. These could possibly be a result of the food being cooked at an excessively high temperature or being placed in cookware that is too small.
- Page 27 ➢ Both sides of hinge rabbet must bite up each other. ➢ When open the door, spread down locking rod(picture B) If the door drop accidently or hinges shut up suddenly, do not push you hand in hinges. Please call your after-sell department. Remove and install door panel Remove ➢...
-
Page 28: Environmental Note
Carry out periodical maintenance of the cooking units of the cooker. Caution! All repairs and regulatory activities should be carried out by the appropriate service centre or by an appropriately authorized fitter. Environmental note Note: Before discarding an old appliance, switch off and disconnect it from the power supply. -
Page 29: Test Dishes
Test dishes We provide all kinds of recipes and ideal setting for choice here. It will show you which heating type and which temperature are of best suits for your dishes. You can find information about the appropriate accessories and its insertion height, as well as tips on cooking containers and methods of preparation. - Page 30 Warranty Certificate This "Warranty Certificate" is extended for a twelve month coverage on the equipment detailed below, from the date of purchase and under the conditions stipulated: • Our obligation within the terms of this guarantee is to replace, without charge to the Client, any part that, in our opinion, has manufacturing defects.
Need help?
Do you have a question about the OWEN and is the answer not in the manual?
Questions and answers