Table of Contents
Advertisement
Advertisement
Table of Contents

Summary of Contents for SC Enterprises Alpha Cam Premium 53002
- Page 1 Alpha Cam Premium Instruction Manual Model Number 53002 Lit Number 19-080801...
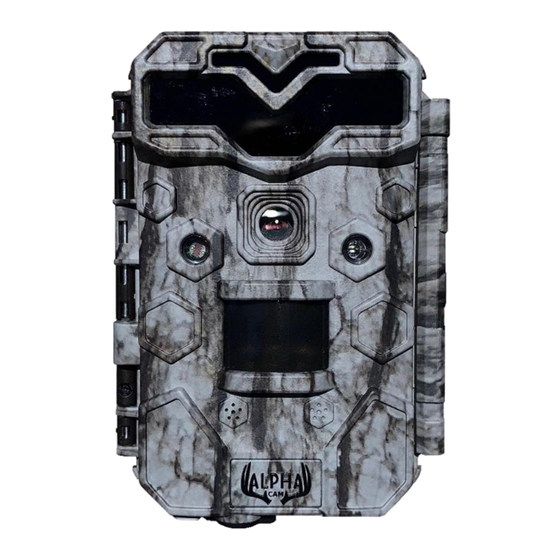
- Page 2 Alpha Cam Premium Instruction Manual Congratulations on the purchase of your Alpha Cam! The Alpha Cam Premium is one of the best scouting cameras available and is designed for long duration performance in the harshest outdoor environment. It is equipped with built-in infrared LEDs for incredible night vision images and can be triggered by movement 24 hours a day.
-
Page 3: Table Of Contents
Table of Contents Quick Start Useful Tips Camera Views Camera Overview Image Review On The LCD Hot Keys Standard Accessories Power Supply SD Card/USB Port Operational Modes Detailed Menu Settings Mounting Positioning and Sensing Specifications Warranty Card Certifications Page 2 Alpha Cam Premium Instruction Manual... -
Page 4: Quick Start
Quick Start Open the latch located on the right side of the camera Install 8 lithium AA or alkaline AA batteries (user supplied) Insert SD card—Up to 512GB Capable (user supplied) Switch to the SETUP Mode and Press MENU key Press OK button to select Set Clock and use the up/down arrow buttons to select the time in hours then use right/left arrow buttons to complete all settings including the date. -
Page 5: Useful Tips
Useful Tips • Setup Mode is the mode for adjusting the camera settings as you wish. You can either power the camera off or on from this switch position. • We always recommend when returning to your camera that you open the door and power the unit from ON to OFF directly, then select Setup from the OFF position. -
Page 6: Camera Views
Camera Views Page 5 Alpha Cam Premium Instruction Manual... -
Page 7: Camera Overview
Camera Overview Page 6 Alpha Cam Premium Instruction Manual... -
Page 8: Image Review On The Lcd
Image Review On The LCD From the SETUP menu, press the OK Replay button Press the UP/DOWN arrows to browse through the latest images/video For Images, you can zoom into those images for more detail by pressing the LEFT arrow, then using the UP/DOWN buttons to choose zoom level. Once zoomed, you can then select zoom level by pressing OK. -
Page 9: Power Supply
Power Supply After opening the latch on the right side of the camera, you will see that it has 8 battery slots. For maximum battery life, we recommend using 8 lithium AA or alkaline batteries. Please be sure to insert each battery with correct polarity (negative or “flat”... -
Page 10: Operational Modes
Operational Modes 「OFF 」Mode When cam in OFF mode, you can do the following: Replace the SD card or batteries • Connect cam with other device by USB port • 「SETUP 」Mode When cam in SETUP mode, you can do the following: Check and change the settings of the camera or review images with the help of built-in LCD. -
Page 11: Detailed Menu Settings
Detailed Menu Settings Press OK and use UP/DOWN keys (to change the setting and LEFT/RIGHT keys (to move to the next field to set the hour (24hr format only, “00” = Midnight, “12” = Noon) and minute, and then (on the lower row), the month, day, and year. Once all settings are made, press OK to save. - Page 12 Detailed Menu Settings Selects how many images are taken in sequence per trigger. Selects Image Format Ratio. 4:3 is a standard format while 16:9 is considered widescreen format. Image Format Select Camera Name Input to place a unique custom name on the image stamp of your camera’s images.
- Page 13 Detailed Menu Settings Selects the length of time that the camera will “wait” until it responds to any additional triggers from the PIR after an animal is first detected and remains within the sensor’s range. During this user setting Interval interval, the camera will ignore triggers and will not capture images/videos.
- Page 14 Detailed Menu Settings Selects the time frame that the user wants the camera to capture images. Default is 24 hours. Users who may be using the camera for security purposes may only want the camera to capture images after Work Period hours for example and avoid taking images during the busy day.
- Page 15 Detailed Menu Settings Selects a period of time where the camera can take “time lapse” images where no motion is necessary to trigger the camera. This is beneficial when a user wants to monitor a field or food plot where the Time Scan animals are further away than the detection sensor.
- Page 16 Detailed Menu Settings Selects video resolution that the camera will capture when the camera records video. 640*480 is standard VGA resolution, 1280*720 is 720p HD, and 1920*1080 is 1080p HD Video Size or Full HD. Selects video recording length. Video Length Version The version screen will indicate the software version that the...
-
Page 17: Mounting
Mounting We recommend mounting camera on a sturdy tree with a diameter of about 6 in. (15cm). To get the optimal picture quality, the tree should be about 16-17 ft (5 meters) away from the place to be monitored, with the camera placed at a height of about 5ft. -
Page 18: Specifications
Model 53002 Maximum image size 30MP Lens f=7.36mm F/NO:2.8 FOV=55°; Auto IR-Cut-Remove (at night) IR-Flash Range High Power IR Led: 6*850nm (33m) Display Screen 2.4 inch HD Color Display Memory Card SD or SDHC Card, up to 512GB Image Size 30MP (6400x4800);16MP (4736×3552);5M (2592X1944) under 4:3 mode(recommended) Video Size 1920*1080;1280*720;640*480;... -
Page 19: Warranty Card
Certifications This equipment has been tested and found to comply with the limits for a Class B digital device, pursuant to part 15 of the FCC Rules. These limits are designed to provide reasonable protection against harmful interference in a residential installation. Operation is subject to the following two conditions: (1) This device may not cause harmful interference, and (2) this device must accept any interference received, including interference that may cause undesired operation. - Page 20 Notes Page 19 Alpha Cam Premium Instruction Manual...
- Page 21 Warranty Warranty During warranty, if a hardware failure occurs caused by a faulty component Model of the product, we will provide free Serial Number maintenance service for the customer. Date of Purchase Free warranty is for the first 2 years. If Your Name there is a need for repair, you should Your Address...
- Page 22 For Questions and Support www.alphacamhunt.com support@alphacamhunt.com ©2019 SC Enterprises, LLC Alpha Cam, , Denote Trademarks of SC Enterprises, LLC...
Need help?
Do you have a question about the Alpha Cam Premium 53002 and is the answer not in the manual?
Questions and answers