Table of Contents
Advertisement
Advertisement
Table of Contents

Subscribe to Our Youtube Channel
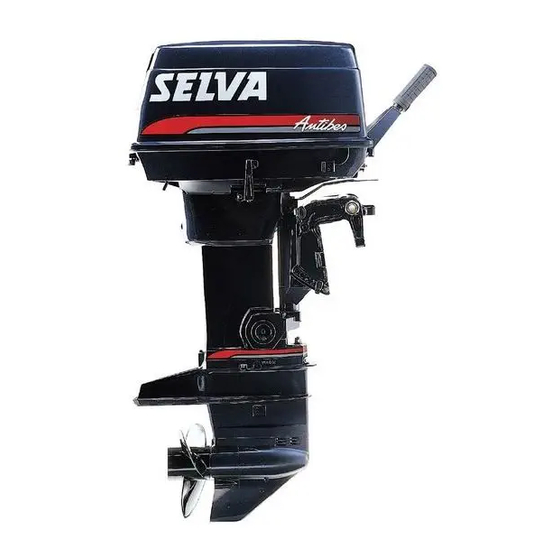
Summary of Contents for SELVA MARINE Antibes Series
- Page 1 OWNER'S MANUAL Antibes Maiorca https://www.boat-manuals.com/...
- Page 2 Your holiday, your favourite sport, your job, which has from today the name SELVA MARINE, will be a further moment of satisfaction.
- Page 3 SELVA MARINE service station or SELVA MARINE dealer...
- Page 4 OUTBOARD MOTOR IDENTIFICATION DATA SERIAL NUMBER RECORD This data is stamped on the label attached on the clamp bracket, as shown on the picture 1. When you receive your new SELVA outboard motor write down the serial Write down the identification number and the model of your outboard number, it will be useful to you in case you will have to order spare parts or for reference if your outboard motor should be stolen.
- Page 5 CONTENTS GENERAL INFORMATION............. 1 Verifications before starting the motor ......... 25 Introduction ..................2 Starting procedures..............25 Outboard identification data ............3 Verifications when the motor is on ..........25 Serial number record ..............3 Cruising..................26 Directions for use. Basic safety measures........ 5 Tilt-up the motor................
- Page 6 DIRECTIONS FOR USE BASIC SAFETY MEASURES To use the outboard motor you must have all the requisites provided by Use fuels and oils suitable for the engine, which are listed in the "greasing law (physical suitability, insurance, government duties, registration, and so chart ".
- Page 7 PAY ATTENTION TO THE PROPELLER There must be nobody within the motor steering radius. The propeller is certainly the least protected part of your motor. It is Picture No. 11. therefore forbidden to get near the propeller when this is rotating. You must leave bathers, skiers and other boats users enough space to move, in order to avoid any contact with the propeller.
- Page 8 If the motor has had an accident, you should have it fully checked, before you use it again. If necessary let the SELVA MARINE authorised skilled Prevent fires and explosions. staff have a look at it. Do not use the motor, if the damage could have compromised the sailing safety.
- Page 9 SPECIFICATIONS MODEL ANTIBES 25 - S495 ANTIBES 30 - S505 MAIORCA 35 - S525 25HP/18.4KW 32HP/23,5KW 35,3HP/26Kw POWER FULL THROTTLE RANGE 5500 5500 6000 PISTON DISPLACEMENT BORE X STROKE 72/60 72/60 72/60 NUMBER OF CYLINDER 2 in a line 2 in a line 2 in a line ENGINE TYPE Cycle eight 2 stroke...
- Page 10 MODEL ANTIBES 15XS ANTIBES 20XS ANTIBES 25XS MAIORCA 25XS MAIORCA 30XS S505XS S495XS S505XS S495XS S525XS POWER 15HP/11KW 20HP/14.7KW 25HP/18.4KW 25HP/18.4KW 30HP/22KW FULL THROTTLE RANGE 5000 5000 5500 6000 6000 PISTON DISPLACEMENT BORE X STROKE 72/60 NUMBER OF CYLINDER 2 in a line ENGINE TYPE Cycle eight 2 stroke FUEL PUMP...
- Page 11 LOCATION OF MAIN COMPONENTS See picture 16 N° DESCRIPTION Propeller Propeller fixing nut Water circulation warning Back cowling lock lever cover Tilt-up handle and air intake Gear shift lever (R= reverse gear; N= neutral gear; F= forward gear) Battery joint wires Free lock lever Fixing motor screws housing Trim-angle adjusting rod...
- Page 12 REMOTE CONTROL BOX Neutral lever fixing rod It fixes the control lever in the neutral position end has to be pulled up to (Only for electric start models) select the forward gear or the reverse gear. MAIN COMPONENTS Neutral gear accelerator control lever It allows to control the accelerator when the clutch is in the neutral position, to increase the number of r.p.m.
- Page 13 CONTROL FUNCTIONS Accelerator-grip/steering-handle. (Model with manual start) Gear-shift lever. Turn the grip to operate the accelerator, and move it sideways to adjust Starting out from the position of neutral gear ( N ), move the lever in boat the steering angle. Picture No. 25. direction and you engage the forward gear.
- Page 14 ELECTRIC WIRING SCHEME Manual start models 14- Ignition coil 15- Spark plug Legend 16- Fuse 17- Thermo switch Picture No. 32 1 - Flywheel 2 - Ignition coil 3 - Sparking plug WIRING DIAGRAM 4 - Emergency engine stop switch 5 - Switch to stop the motor Models Maiorca 25xs/35 6 - Thermo switch...
- Page 15 Remote control box Wiring colour scheme Light blue Black Grey Reference to control lever position Blue Orange Brown White Reference to the starter key position Black/light blue Ba/Az Electrochoke Emergency engine stop-switch Picture No.35 SYMBOLS Picture No. 34 Engine A serious risk is present. The machine operator must read and follow the instructions in the manual.
- Page 16 SELVA MARINE dealer. The time which is needed to check functionality. Failure to check as shown in the chart could result in your motor is very modest, but the safety, that you obtain from it is severe injury to people or damage to the boat.
- Page 17 Outboard motor mounting. Check the supply. A good position of the motor on the transom is very important to have an appropriate trim angle and therefore to obtain a good When you receive your motor check that: performance from your boat To have the optimum mounting height of the outboard motor, you must - the packing is not damaged mount it so that the anti-cavitation plate is between the bottom of the boat...
- Page 18 Trim angle adjusting - push down the free-lock lever and tilt up the motor till the first automatic stop; The trim angle is the inclination angle, that should be given to the motor in - remove the adjusting-rod and reposition it in the position order to obtain an optimal performance from your boat.
- Page 19 REMOTE CONTROL BOX INSTALLATION To install the remote control box and the cables we suggest you contact an official dealer SELVA MARINE. If the cables aren't correctly installed, they can get entangled We suggest you contact this dealer also for the control device causing the loss of control of the boat.
- Page 20 ß Fix the sheathing of the cables inserting the sheathing-retainer in its Never bind or entangle the cables of the remote control box. housing. They mustn't be bound with a bending ray inferior to 300 mm. (12 feet). ß Screw the lower cover. Picture No.
- Page 21 ß Screw the other fixation plate sheathing retainer to the basin in ß Fix the plate to the (4) handle or to the plate in correspondence correspondence of the holes which are on one side of the gears handle. Insert in the plate the sheathing retainer of the holes (using the screws which are in the kit k40).
- Page 22 STEERING CONTROL DEVICE MOUNTING Insert the control cable in the tube brackets union. Steering plate Fix one extremity of the longitudinal rod of control of the steering to the steering fixation plate, using the apposite nut, bolt and washer. Then fix Steering arm kit the other extremity of the rod to the cable of control through the nut and the washers.
- Page 23 BATTERY MOUNTING Connecting the battery Battery electrolytic fluid is dangerous; it contains dilute sulphuric acid and therefore is poisonous and highly caustic Before connecting or disconnecting the battery Always follow these preventive measures: leads turn the switch key in the anti-clockwise direction, to •...
- Page 24 FUEL Preparation of the fuel Fuel Use only petrol with a octane number higher than 95 N.O. Research and that does not contain alcohol, with the addition The fuel used for the propulsion of internal combustion engines of 2% of oil proper for mixture (see the detailed list) is highly flammable and, in certain cases can become explosive.
- Page 25 USE OF THE REMOTE CONTROL BOX Accelerating when neutral gear is selected To open the throttle when the neutral gear is selected (gear lever in N Leaving from the position N of the control lever, to position in forward gear position), you have to use the neutral gear lever and turn it up.
- Page 26 and let down the gas control lever at neutral. Picture STARTING No. 59 Controls before starting the motor When the engine is still warm, you don't need to use the choke knob. Should the engine fall to start after many attempts, refer to the section on troubleshooting.
- Page 27 If after having done all this, you start the engine and no water runs out of To tilt up the motor do as follows: the pilot hole, stop immediately the motor and contact a SELVA MARINE dealer. Switch off the engine.
- Page 28 EMERGENCY STARTING PROCEDURES Models with electric start Put the control lever on N If the motor doesn't start because of a damage at the starting system, it is possible to use the emergency starting cable. Turn the starting key on the position ON Take away the cover using the levers Models with manual start Insert the extremity off the cable positioning it with the knob in the...
- Page 29 STOPPING PROCEDURE RUNNING-IN PROCEDURE Emergency stopping procedures. A SELVA outboard motor is tested completely in our workshop and it is partially run in a tank. A second test is done by the concessionaire It is always advisable to complete the running in procedure in the following way: In an emergency you can stop your motor by pulling the engine stop switch lanyard.
- Page 30 Stopping for a long period of storage. You can carry out this cleaning operation in two different ways: 1 - Immerse the outboard motor without the propeller in a tank If you will not use the motor for several days, you should stop the engine in filled up with fresh-water, make sure that the water level is over the height the following way: of the water inlets, so that no irreparable damage could be caused to the...
- Page 31 Pay attention to the motor parts, which are still hot, so that you do not burn yourself. Some maintenance operations must be carried out by qualified staff. Contact SELVA MARINE after-sale service. The following chart lists the periodic maintenance operations to do on your motor.
- Page 32 PERIODIC INSPECTIONS AND ADJUSTMENTS GREASING CHART (Running hours) INITIAL THEREAF GREASING FREQUENCY OPERATIONS TO PERFORM GREASE GREASE THAT EVERY POINTS MUST BE USED SALT WATER 100 100 FRESH-WATER seas Check the level after the first 10 running hours. Afterwards every 50 Inspection of the conditions of the fuel API GL-5 hours.
- Page 33 Greasing and additions The oil must agree with the characteristics listed in the greasing The only part, which must be filled with oil, is the gearbox. chart, and must comply with the quantity pointed out in the technical detailed list. Selva supply the motor already with the oil, which the user will have to change completely after the first 20 cruising hours Insert and tighten the oil-level plug and the oil drain plug.
- Page 34 Replace the spark-plug cap, checking that it is correctly fitted and then replace the top cowling. Picture No. 69 For an careful choice of the propeller consult a SELVA MARINE service centre. Sacrificial anode.
- Page 35 The motor should be towed in the normal running position. Avoid towing Change the gearbox-oil. with the tilt-support lever only, but use a motor support device. Check the screws torque. Grease all the components as shown in the greasing chart. Storage Inspect the anode.
- Page 36 Fuel hose is flattened or kinked Fuel pump is malfunctioning If you still have difficulties, after investigating these, please contact your SELVA MARINE dealer. Fuel filter is clogged The engine will not start. The engine runs irregularly or staIls.
- Page 37 ,oo' Only for models with electric start. Possible cause L Possible cause Electric circuit is defective Starter-motor is defective Ignition-coil is defective Starting board is defective Clogged water passages Defective electrical connectors Faulty water-pump Battery is undercharged Thermostat faulty Cavitation is occurring Propeller is damaged Propeller proper...
- Page 38 https://www.boat-manuals.com/...
- Page 39 https://www.boat-manuals.com/...
- Page 40 https://www.boat-manuals.com/...
- Page 41 https://www.boat-manuals.com/...
- Page 42 https://www.boat-manuals.com/...
- Page 43 https://www.boat-manuals.com/...
- Page 44 https://www.boat-manuals.com/...
- Page 45 https://www.boat-manuals.com/...
- Page 46 https://www.boat-manuals.com/...
- Page 47 https://www.boat-manuals.com/...
Need help?
Do you have a question about the Antibes Series and is the answer not in the manual?
Questions and answers
Здравствуйте хотели узнать какая рабочая степень здатия для двигателя Selva30 для холодного двигателя
For a cold start, the Selva Marine Antibes Series engine should be started and run at low speed for a few minutes.
This answer is automatically generated