Table of Contents
Advertisement
Model
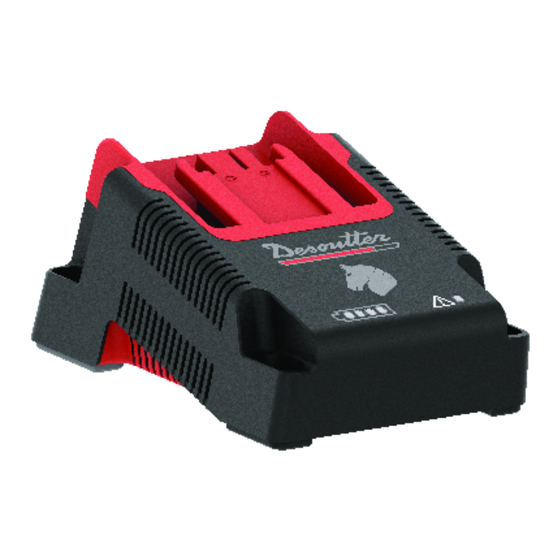
3747, battery pack charger 18-36V 6158132700
Download the latest version of this document at
http://www.desouttertools.com/info/6159925330_EN
Read all safety warnings and instructions
Failure to follow the safety warnings and instructions may result in
electric shock, fire and/or serious injury.
Save all warnings and instructions for future reference
Battery Pack Charger
Product Instructions
Part number
WARNING
Printed Matter No. 6159925330_EN
Issue No.
03
Date
06/2020
Page
1 / 12
Advertisement
Table of Contents

Subscribe to Our Youtube Channel
Summary of Contents for Desoutter 3747
- Page 1 1 / 12 Battery Pack Charger Product Instructions Model Part number 3747, battery pack charger 18-36V 6158132700 Download the latest version of this document at http://www.desouttertools.com/info/6159925330_EN WARNING Read all safety warnings and instructions Failure to follow the safety warnings and instructions may result in electric shock, fire and/or serious injury.
-
Page 2: Table Of Contents
Table of Contents Product Information .......................... 3 General Information......................... 3 Warranty.......................... 3 Website .......................... 3 Information about spare parts .................... 3 Dimensions .......................... 3 CAD files .......................... 4 Overview ............................ 4 Description ........................... 4 Technical data........................ 4 Installation.............................. 6 Installation Instructions........................ 6 Mounting instructions ...................... 6 Powering on ......................... 6 Operation.............................. 8 Operating Instructions ........................ 8 How to charge a battery pack .................... 8 Charging time........................ 8 Service.............................. 9... -
Page 3: Product Information
• The product warranty relies on the correct use, maintenance, and repair of the tool and its component parts. • Damage to parts that occurs as a result of inadequate maintenance or performed by parties other than Desoutter or their Certified Service Partners during the warranty period is not covered by the warranty. -
Page 4: Cad Files
Product Information 7.83 4.72 CAD files For information about the dimensions of a product, see the Dimensional drawings archive: https://www.desouttertools.com/resource-centre Overview Description Battery charge level Warning LED Connector Daisy-chain output Power supply plug Technical data Power supply Input voltage 100-240 V AC Frequency 50 / 60 Hz Maximum input current... - Page 5 Product Information Indoor use only 06/2020 5 / 12...
-
Page 6: Installation
Installation Installation Installation Instructions Mounting instructions Installing the charger on a wall Use the following drilling template. 6.14 4.02 Mount the battery pack charger as follows. Use M5 screws (not supplied). Daisy-chain connection Daisy-chain connection Refer to the chapter Technical data [Page 4] to know how many chargers can be daisy-chained. For example: Daisy-chain the chargers as shown above. - Page 7 Installation Area Length Part number Europe 2.5 m 6159172010 8.2 ft 2.5 m 6159172030 8.2 ft 2.5 m 6159172020 8.2 ft China 2.5 m 6159172060 8.2 ft Use only the power cord supplied. Plug for power cord Connect the power cord to the charger and plug it to the mains. The 4 white LEDs light up and then go out.
-
Page 8: Operation
Operation Operation Operating Instructions How to charge a battery pack The charger detects automatically the type of battery pack and adapts the charge conditions to the battery pack. Slide a battery pack on the connector. Battery pack charge level Description Charge level LED 1 starts blinking. -
Page 9: Service
Service Service Maintenance Instructions Maintenance instructions 1. Disconnect the charger from any AC outlet before cleaning. 2. Clean out dust and debris from charger vents and electrical contacts. Use a damp cloth. 3. Do not use liquid or spray detergent for cleaning. Do not modify or attempt to repair the charger. -
Page 10: Trouble-Shooting
Trouble-shooting Trouble-shooting Description Solution 1 blink every 5 seconds. There is no battery pack plugged on the Plug a battery pack. connector. Remove the battery pack and plug it The battery pack is not plugged in cor- again. rectly. Description Solution Yellow - 1 blink Temperature is below operating range... - Page 11 Trouble-shooting Description Solution Battery pack is strongly discharged and Try again with another charger. cannot be charged anymore for safety If the error still occurs, the battery pack reasons. must be disposed of. Red - 6 blinks For charger rev1, it can also be a communication issue or compatibil- 1 blink every 5 seconds.
- Page 12 Original instructions Founded in 1914 and headquartered in France, Desoutter Industrial Tools is a global leader in electric and pneumatic assembly tools serving a wide range of assembly and manufacturing operations, including Aerospace, Automotive, Light and Heavy Vehicles, Off-Road, General Industry.


Need help?
Do you have a question about the 3747 and is the answer not in the manual?
Questions and answers