
Related Manuals for Crosley Eclipse CR7014A


Summary of Contents for Crosley Eclipse CR7014A
- Page 1 CR7014A Eclipse Entertainment System Instruction Manual Questions, problems, missing parts? Before returning to the store, call Customer Service 8 a.m. – 6 p.m., EST, Monday – Friday 1-888-CROSLEY www.crosleyradio.com...
-
Page 2: Safety Instructions
English Safety Instructions Read and understand this entire manual before using this product. Keep these instructions for future reference. Do not use this product near water. This product should be operated only by the type of power source indicated on the marking label or in this instruction manual. Do not defeat the safety purpose of the polarized plug. -
Page 3: Specifications
Turntable Remote Speakers Please contact Crosley customer service if there is any accessory missing from the package. Retain the original packaging materials for exchange or return purposes. Specifications... -
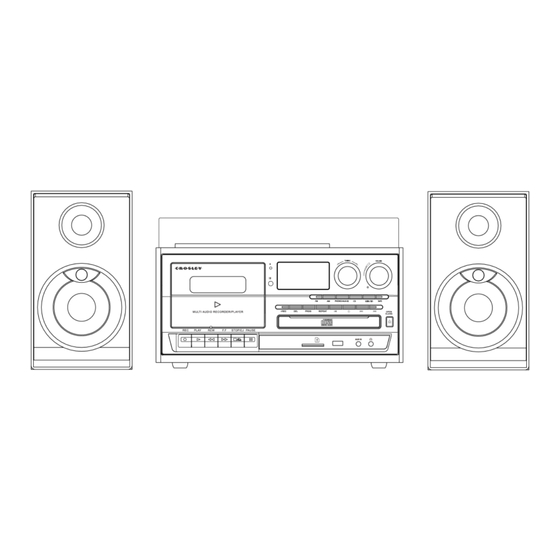
Page 4: Product Description
English Product Description 1. Dust Cover 9. Stop/Eject Button 2. LCD Screen 10. Pause Button 3. Bluetooth Indicator 11. CD Tray 4. Cassette Door 12. SD Card Slot 5. Record Button 13. USB Port 6. Play Button 14. Aux In Jack 7. - Page 5 English 17. AM Button 25. Stop Button 18. FM Button 26. CD Button 19. Record Button 27. Backward Skip Button 20. Delete Button 28. Forward Skip Button 21. Program Button 29. Tape Button 22. Repeat Button 30. USB/SD Button 23. Play/Pause Button 31.
- Page 6 English 33. Turntable Spindle 38. Hold Down Clip 34. Turntable Platter 39. Tonearm Rest 35. 45 RPM Adapter 40. Speed Switch 36. Tonearm Lever 41. Tonearm 37. Auto Stop Switch 42. RCA Jacks 44. FM Wire Antenna 43. Spring Clip Speaker Terminals 45.
-
Page 7: Remote Control
English Remote Control 46. Program Button 47. Repeat Button 48. Mode Button 49. Mute Button 50. Play Pause Button 51. Record Button 52. Stop Button 53. Backward Skip Button 54. Forward Skip Button 55. Folder Down Button 56. Folder Up Button Initial Setup Essential Setup 1. -
Page 8: Aux Input Connection
English Stereo System Connection RCA Jacks The RCA Jacks output analog line-level signals and could be connected directly with a pair of active/powered speakers or the appropriate input of your stereo system. The Red plug connects with the Right channel and the White plug connects with the Left channel. -
Page 9: Needle Replacement
English 9. When the record is finished playing or to suspend the playback, use the Tonearm Lever again to raise the tonearm and return it to the Tonearm Rest. Release the lever to lower the tonearm back to its rest. 10. -
Page 10: Radio Operation
2. Press the Phono/AUX/ button to set the unit to Bluetooth mode, you will hear an activation sound from the unit. 3. Turn on the Bluetooth feature of your audio device, search for “CROSLEY CR7014A” and pair. 4. Once your device is successfully paired with the unit, you will hear a short confirmation sound from the unit. -
Page 11: Cassette Operation
English 8. To repeat a specific track, press Repeat button once while that track is playing. To repeat all the tracks, press the Repeat button twice. To repeat random tracks, press the Repeat button three times. To cancel repeat function, press the Repeat button. 9. - Page 12 English Cassette Recording RADIO to TAPE 1. Press the AM Button or FM button to the desired band. 2. Insert a cassette tape, and press the RECORD and PLAY button to record the sounds from the radio. Note: To prevent accidental recording, break off the cassette tab from side A or B. 3.
- Page 13 Bluetooth to TAPE 1. Press the Phono/AUX/ button and set the unit to Bluetooth mode. 2. Turn on the Bluetooth feature of your audio device, search for “CROSLEY CR7014A” and pair. 3. Play and stream music from your device to the unit.
- Page 14 English 5. To pause recoding, press the Pause button. Press it again to resume playback. 6. To stop recording, press the Stop/Eject button. AUX IN to TAPE 1. Connect the 3.5mm auxiliary cable between your audio device and the Aux In Jack of this unit 2.
-
Page 15: Deleting Files
English Folder/Album Playback If your USB or SD is separated into folders, follow the steps below to access the folders. 1. While the device is stopped, press the Folder Up or the Folder Down buttons on the remote to advance forward or backwards through the folders. 2. - Page 16 English USB/SD Recording RADIO to USB/SD RECORDING 1. Press the AM or FM button to the desired band. 2. Insert a USB device or an SD memory card and press the record button. 3. Press the Backward or Forward Skip button to select USB or SD for recording, and press the record button to confirm the desired media.
-
Page 17: Troubleshooting
Bluetooth to USB/SD RECORDING 1. Press the Phono/AUX/ button and set the unit to Bluetooth mode. 2. Turn on the Bluetooth feature of your audio device, search for “CROSLEY CR7014A” and pair. 3. Insert a USB device or an SD memory card and press the record button. -
Page 18: Fcc Statements
English FCC Statements This equipment has been tested and found to comply with the limits for a Class B digital device, pursuant to Part 15 of the FCC Rules. These limits are designed to provide reasonable protection against harmful interference in a residential installation. This equipment generates, uses, and can radiate radio frequency energy and, if not installed and used in accordance with the instructions, may cause harmful interference to radio communications.
Need help?
Do you have a question about the Eclipse CR7014A and is the answer not in the manual?
Questions and answers