Advertisement
Quick Links
Advertisement

Subscribe to Our Youtube Channel
Summary of Contents for Fath Mechatronics TANlock
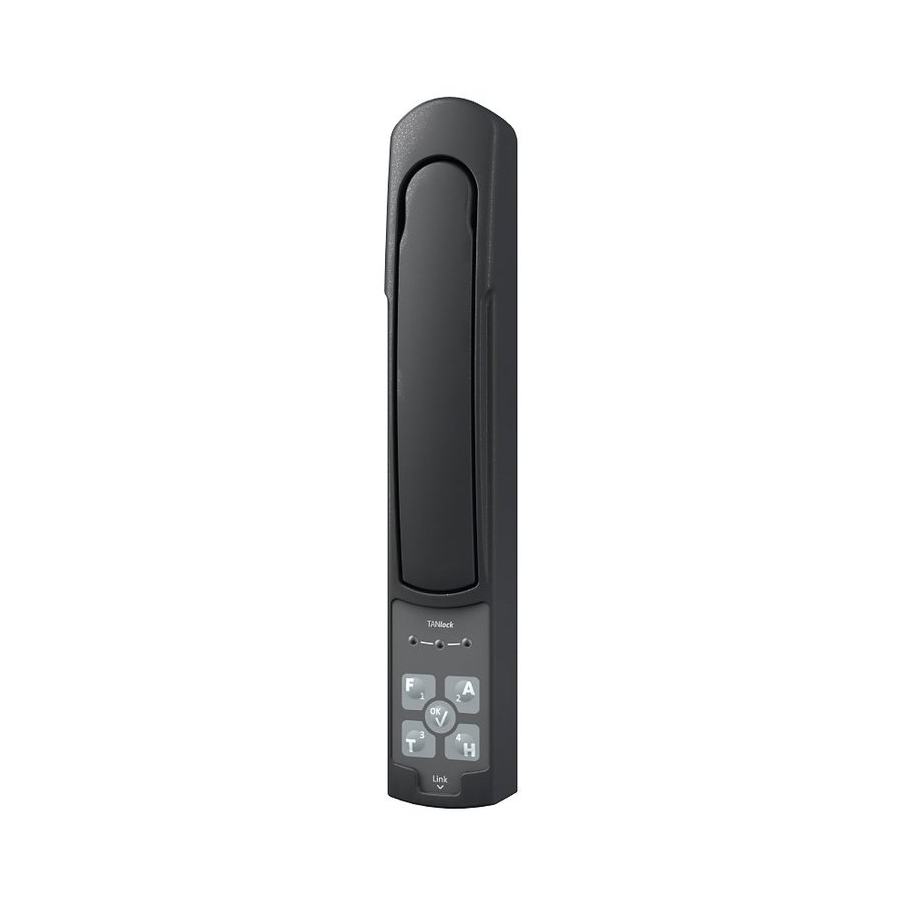
- Page 1 TANlock Assembly instructions 08.08.2018...
-
Page 2: Package Contents
Package contents ① 1 x TANlock ② 1 x Cover cap - long ③ 1 x Cover cap - short ④ 2 x Cylinder head screw DIN7985 M4x25c ① ⑤ 2 x Cylinder head screw DIN7985 M4x18 ⑥ 1 x Hexagon screw mit Verzahnung M6x8 ⑦... - Page 3 Unpacking Open the packaging, pull on the plastic tab and remove the TANlock. Pull out the inner carton and open the side door to take out the assembly kit. 08.08.2018...
- Page 4 Assembly Loosen the retaining plate slightly. Hang the TANlock into the door cut-out and press the mandrel into the existing locking mechanism. 08.08.2018...
- Page 5 Assembly Insert the enclosed cylinder head screws for your cabinet Fasten the retaining plate. through the locking mechanism into the TANlock and screw them tight. If you have a lever lock, continue. If you have a bar lock, go to point 8.
- Page 6 Assembly If you use a lever lock, place the cam lock housing on the mandrel of the TANlock and screw it down with the enclosed M4x18 cylinder head screws ⑤. 08.08.2018...
- Page 7 Assembly Fasten the fitting cover cap to your cabinet at the TANlock. Hook the cover cap at the top and click the cap at the bottom into the retaining plate. 08.08.2018...
- Page 8 Assembly Connect the TANlock via Power over Ethernet (PoE) or with the serial cable over PC/powerbank. The TANlock is now lockable and unlockable with the standard code: 123412 Serial cable 08.08.2018...
- Page 9 TANlock Installation-Guide 08.08.2018...
-
Page 10: First Steps
First Steps Download the »TANlock Explorer« at the following link: https://crm.fath-mechatronics.de/~sXd8o Connect your TANlock to your PC. You have two options: Connect via serial cable Connect via ethernet cable Pay attention to the correct Never connect pay attention to firewall release! -
Page 11: Network Settings
Network Settings in conjunction with ethernet Connect your TANlock to the ethernet cable and your PC. Open your Windows Settings. Continue to Network & Internet. Click with the mouse on the "blue" deposited "Ethernet" port. 08.08.2018... - Page 12 Network Settings in conjunction with ethernet The window "Ethernet Status" opens, see picture 1. Picture ① Picture ② Click on the button "Properties" - button, see picture 1. Click the "Internet Protocol, Version 4 (TCP/IPv4)" box and click "Properties", see picture 2. 08.08.2018...
- Page 13 Takeover the specified IP-address / Subnet mask, as shown in picture 3. Acceot the setting with the "OK" button and close all the opened windows. Now you can connect to the TANlock via TANlock-Explorer. Follow the instructions on page 15. 08.08.2018...
- Page 14 Connect via serial cable Download and install the appropriate driver at the following link: http://www.ftdichip.com/Drivers/CDM/CDM%20v2.12.28%20WHQL%20Certified.zip Connect your TANlock via serial cable to your PC. 08.08.2018...
- Page 15 TANlock – Configuration via TANlock-Explorer Open the TANlock-Explorer. Option 2: Serial cable Option 1: Ethernet cable Select one of the two options and continue with "Connect" 08.08.2018...
- Page 16 TANlock – Configuration via TANlock-Explorer . Right-click on the word TANlock and select "Launch Bild ① Cockpit", see picture 1. It opens a password window. Enter the password Bild ③ "91174" here, see picture 2. Confirm the next window with "OK".
- Page 17 TANlock Access to the TANlock via internet browser 1. Open your internet browser and enter the IP- address of your TANlock as follows: <ip-address>/lab/info The delivery status is: 192.168.0.90 Here you can see the current state of your TANlock. 08.08.2018...
- Page 18 TANlock Access to the TANlock via internet browser With the input command you are able to open your TANlock remotely. Enter the command as follows: <ip-address>/lab/input/123412 In the delivery state the code is: 123412 08.08.2018...
- Page 19 TANlock Access to the TANlock via internet browser The help command gives you an overview of all browser options. Enter the command as follows: <ip-address>/help 08.08.2018...
- Page 20 Finish! 08.08.2018...
Need help?
Do you have a question about the TANlock and is the answer not in the manual?
Questions and answers