
Related Manuals for Nortek ADT Pulse GD00Z-8-ADT

Summary of Contents for Nortek ADT Pulse GD00Z-8-ADT
- Page 1 ® GARAGE DOOR OPENER REMOTE COMMAND CONTROLLER with TILT SENSOR GD00Z-8-ADT Installation Instructions or dial...
- Page 2 Regulatory Information Regulatory Information Z-Wave ® is a registered trademark of Sigma Designs Inc. and/or its subsidiaries. • • Changes or modifications not expressly approved by the manufacturer could void the user’s authority to operate the equipment. • Les changements ou modifications non approuvés expressément par la partie responsable de la conformité...
-
Page 3: Table Of Contents
Table of Contents Product Description . . . . . . . . . . . . . . . . . . . . . . . . . . . . . . . . . . . . . . . . . . . . . . . . . . . . . . . . . 2 Overview . -
Page 4: Product Description
Product Description Overview ◊ This is a Security enabled Z-Wave product and must be used with a Security enabled Z-Wave controller in order to fully utilize this product. As such, this device will not respond to Basic CC commands. ◊ The GD00Z-8-ADT is a garage door opener remote command transceiver with built-in Z-Wave®... -
Page 5: Package Contents
Package Contents The Garage Controller System The GD00Z-8-ADT System consists of three major components: • The Controller — The Controller wires to the garage door opener’s pushbutton terminals, receives door status from the tilt sensor, and communicates with the ADT Pulse system. •... -
Page 6: Tilt Sensor Installation
Tilt Sensor Installation Mounting the Tilt Sensor The battery powered Tilt Sensor attaches to the top panel of the garage door. 1. Before installation, activate the Tilt Sensor by pulling and removing the battery protection strip. 2. If using screws to mount the Tilt Sensor, open the sensor case with a small screwdriver. 3. -
Page 7: Enrolling With The System
Enrolling with the System Enrolling the Garage Door Controller Before the system can be used, the ADT Pulse system needs to enroll the Garage Door Controller. Bring the Controller near your ADT Pulse Gateway and apply power to the Garage Door Controller. ✓... - Page 8 Enrolling with the System (Cont.) 5. At the bottom left of the Z-Wave Devices screen, click Add. The Add Z-Wave Devices screen is displayed. 6. On the Add Z-Wave Devices screen, click Continue. 7. Press and hold the Garage Door Controller’s include button for 1 second (See page 3, Figure 2 for the location of the include button).
- Page 9 Enrolling with the System (Cont.) 9. When the device is successfully recognized, the Z-Wave Device Details screen opens. Enter a name for the device, and then click Save at the upper right. 10. Click Go Back, and then Close the exit Manage Devices. 11.
-
Page 10: Resetting Or Excluding The Garage Door Controller
Enrolling with the System (Cont.) Resetting or Excluding the Garage Door Controller If you have trouble adding the Garage Door Controller you can reset the device. Resetting the device removes it from a site (Not the same as factory resetting the device). You can then try to add the device again. -
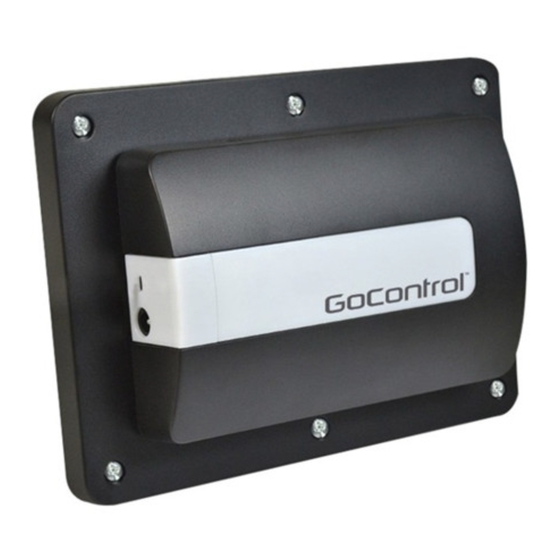
Page 11: Controller Mounting
Controller Mounting Mounting the Controller in the Garage The Garage Door Controller mounts in the garage near the garage door opener. It will need to be near a power outlet and where its warning lamp can be seen, regardless of the door position. Un-plug the garage door opener before continuing. -
Page 12: Controller Connections
Controller Connections Wiring the Controller to the Opener The Garage Door Controller wires to the garage door opener with a two wire connection. 1. Connect the GD00Z-8-ADT connection wires to the two pushbutton terminals on the garage door opener. The terminals on various models may have different names. Either wire can connect to either terminal. -
Page 13: System Operation
System Operation Opening and Closing the Garage Door After the installation is complete, the garage door opener can be activated by the ADT Pulse system and the door’s status can be viewed through the system. 1. Restore power to the garage door opener. 2. -
Page 14: Operation Notes
Operation Notes Indications and Operation Notes ◊ The warning light will flash and the warning beeper will sound for five seconds before the door opener is activated. STAY CLEAR OF THE DOOR, AND DOOR OPENER. THEY ARE ABOUT TO MOVE! ◊... -
Page 15: Troubleshooting
Troubleshooting If Something is not Working Refer to the following table for information regarding possible problems and solutions if the Garage Door Controller is not operating as expected. PROBLEM POSSIBLE CAUSE CORRECTIVE ACTION 1. Make sure the power supply is plugged in securely to a live outlet. - Page 16 ® Copyright © 2020 Nortek Security & Control 10025370 Rev-B...
Need help?
Do you have a question about the ADT Pulse GD00Z-8-ADT and is the answer not in the manual?
Questions and answers